The Dwarves

A team of four Space Dwarves employed by Deep Rock Galactic to explore the most dangerous planets in the galaxy.
- 24-Hour Armor: They'll wear their armor all the time, whether it's after waking up and while drinking before a mission, to retaining their helmet gear while otherwise dressed in naught but a hospital gown and their underwear. Downplayed with the Roughneck set, however, which looks more like casual clothes than actual armor - especially the Engineer's hawaiian shirt.
- Subverted with Yuletide and Oktoberfest events rewards which are an elf suit and lederhosen respectively.
- Ability Mixing: Some of the individual dwarves have weapon mods are designed to work with other mods or weapons in tandem, leading to this, but here are some examples across multiple different dwarves:
- Scout's flare gun can light up all the walls in a room, identifying minerals in the walls for Engineer to shoot his Platform Gun at, so that Scout has a safe spot to stand on when mining those minerals.
- When the Driller is doing a Dungeon Bypass and is beelining the drop pod with his drills, he leaves behind a narrow passageway chokepoint. Perfect for the Gunner to tear up with his minigun, or for more practically-minded dwarves, creating an opportunity for the Engineer to seal up the tunnel behind the group so that bugs can't reach them at all.
- Achilles' Heel: All four Dwarves have conspicuous drawbacks in their kits, although the Engineer's are the least glaring. This encourages players to work together during swarms, but it's not nearly as pronounced unless you have at least three Dwarves on a dig.
- Acrofatic: All four of them are rather portly, with prominent double chins underneath their beards and visible beer guts in the cases of the Scout and Engineer. This did nothing to hamper their ability to sprint indefinitely though, and their stout physique also gives them impressive physical strength.
- Amazing Technicolor Population: In addition to light and dark human tones, you can choose to make your dwarf have bright yellow or pale blue skin.
- Ambiguously Human: In what little lore the game has of yet, Dwarves seem to be sort of just there. We don't know if they're a Human Subspecies, a Human Alien, or a species entirely distinct from humans that is nonetheless still native to Earth (or whatever the Homeworld is called). We also don't yet know whether their race has any particular origin story or if they just naturally evolved like humans did.
- Badass Boast: The Dwarves dole them out almost every time they kill something hostile, as well as when selecting them.Dwarf: That all you got, you slippery shits?!
Dwarf: (killing Glyphid Menace) You're fast, bug, but I'm faster!
Dwarf: (pinging Glyphid Oppressor) Glyphid Oppressor! And what do we say to oppression, lads?!
Dwarf: (using a power attack) TASTE the pickaxe!!! - Badass Crew: Each one of the Dwarves is as much as soldier as a miner (though "exterminator" might be a better choice of words, given their enemies). Even the drilling expert is armed and armored to the teeth.
- Battle Trophy: The Glyphid Hunter skins have what appears to be Glyphid teeth and chitin attached to the guns.
- With the introduction of the Rival Company, should you enter the tunnel in the launch bay that goes under the bar, you can come across the ball part of a Patrol Bot, which has been torn off, taken back to the rig, and is being used like an association football (complete with two holographic goals).
- Beware the Silly Ones: Big time. Don't let their childish attitude fool you, these guys are very good at their job and can overcome any challenge Hoxxes throws their way.
- Bunny-Ears Lawyer: As the above trope can attest to, the dwarves are... not the most professional people around, yet they regularly invade a Death World, strip it of useful minerals and fight off the VERY murderous and aggressive wildlife on a daily basis.
- Big Ol' Eyebrows: A later update added eyebrow customization because their brows are large enough to actually be modelled instead of textured on to their heads. Even the thinnest options are pretty thick.
- Bile Fascination: In-universe. The Dwarves are fascinated by the stereotypical garden gnome bobble-toy found at the Abyss Bar... even though it's hilariously off-model. One response is a stated desire to punch whoever designed it.Dwarf: (Slapping the Gnome) "Why is this so fun!?"
- Buffy Speak: The Dwarves occasionally break into this speech pattern when dealing with more technical things, and especially when it comes to the Rival Company.Dwarf: Patrol Bot! Aim for the gun... turret... head... thing?Dwarf: It's one of those Nemi... Numa, uh...? Big things that hurt.
- Character Catchphrase: The salute action has them declare a variety of voicelines, but very frequently they'll say one that includes the phrase "Rock and stone!". The phrase has multiple meanings and usage, varying from being almost literal ("We fight for rock and stone!"), metaphorical ("Rock and stone in the heart!") or as if it's the Dwarf version of "Hooah!" ("Can I get a rock and stone!?")
- Color-Coded for Your Convenience: Each Dwarf has a color, which is usually the primary color of their outfit and the color of the grip of their pickaxe. The original four are Blue, Red, Yellow, and White. As of Update 20 they also have Blue, Orange, Yellow, and Green flares respectively.
- Companion Cube: They seem to have a tendency to nickname and latch onto their equipment. The APD-B317 All Purpose Drone becomes Bosco; the Mining Utility Lift Engine becomes Molly; the Breakpoint Explosives Transport - Combat specification - becomes, well, Betsy, although that at least is logical. Doretta in particular seems to have no official company designation, simply being referred to as "The Drilldozer;" not even the Dwarves know why she's called Doretta.Dwarf: (Petting Doretta) Anyone knows why it's called Doretta?
- Difficult, but Awesome: Generally speaking every Dwarf is easy to learn, but hard to master. They all have pros and cons that need to be taken in serious consideration, but mastering their unique equipment and learning how to make the most out of them can potentially turn a bad situation, whatever it may be, around.
- Eat Dirt, Cheap: Red Sugar, a bright, glowing red crystal found all over Hoxxes, is apparently edible and highly addictive. The Dwarves even ask Lloyd to rim their mugs with it for certain beers. They'll even imbibe Dark Morkite Ale if it's on offer.
- The Engineer: The Engineer, obviously, but every Dwarf is this regardless of class. They're often called to do engineering tasks such as building pipelines, maintaining a Drill Tank, salvaging valuable equipment, and so on. Every Dwarf is also skilled at metalworking/tinkering, as seen in The Forge at the Space Rig.
- Everyone Calls Them Barkeep: The main quartet is only referred to by their classes, with no name given for any of them.
- Everyone Has Standards: Though they spend each day of their life fighting off Glyphids and will regularly insult them, even they agree that the Rockpox is absolutely horrid and the bugs don't deserve that kind of treatment.
- Everything Sensor: Each dwarf is equipped with a laser pointer device, which in addition to performing the obvious function of shining a laser at things also comes with the ability to somehow analyze and identify whatever it's pointed at to all team members (be it an creature, mineral, piece of equipment, or fellow dwarf). Downplayed however in that there are several things it is not capable of correctly identifying; Error Cubes as well as several types of land formation (helixes in the Radioactive Exclusion Zone and energy-charged stones in the Azure Weald) will cause it to output random gibberish.
- Gasshole: One of the salute voice lines is declaring "Rock and stone!" while each word is punctuated with a burp. Drinking a Gut Wrecker beer will also quickly cause the drinker to be burping and farting constantly.
- Genius Bruiser: Brutish and boorish, but they're also brains, very far from just being brawns. Dwarves routinely deal with complex machinery and make quick on-site building and repairing of very complicated machines with ease and competence.
- Goofy Print Underwear: As of the Rival Escalation update, Dwarves who fail a mission now wake up at the medbay wearing hospital gowns. Said gowns do not cover their back, revealing that they are wearing this kind of underwear (thankfully opposed to typical hospital attire being naked beneath the gown).
- Hidden Depths: They may be beer-chugging, bug-slaying badass standard issue Dwarves, but they still have moments hinting at more of a rich inner life than you'd think to look at them.
- Despite being gruff, obstinate and therefore completely normal Dwarves, one piece of dialogue from them successfully hacking a patrol bot has them attribute their success to many hours of video games paying off.
- For all their contempt of "leaf lovers," even the Dwarves are enchanted by the beauty of the Azure Weald, both the flora and fauna. They can identify most of the plants there by name, with comments about how cool they think they are, and their affection towards the Hexawing Gniffer rivals their approval of Bosco and Lloyd.
- Despite all the wise cracking and snarking at each other, they will never hesitate to be genuinely appreciative of assistance. New Dwarves joining the team regularly get greeted with variations of "Nice to meet you!" or "I like the look of this team", and a Dwarf who gets revived will sometimes address his savior as a "brother" or a "true friend".
- High Turnover Rate: There's no explicit numbers, but much of the game makes it clear that the job of mining underground when many angry bugs are liable to burst out of the ground and try to murder you is about as lethal as it sounds. Some of the dwarves' dialogue has them express their awareness of this, the entire mission type of Salvage missions are literally about reclaiming the equipment of another team of now-dead dwarves from a failed mission, and the promotion ceremony might have Mission Control say that very few dwarves survive long enough to get promoted. When another Dwarf joins an in-progress dig, one possible welcome quote is "I thought you were dead!"
- Played for Drama in Season 3. After completing a Rockpox Research mission, Mission Control will occasionally reveal that three teams of other Dwarves were completely wiped out while your squad was on that mission, and he is clearly not happy about the losses. Further played as such in Season 4, where a meteorite hits another Space Rig, with no survivors.
- Hired Guns: They are some of the best mercenaries in the galaxy, and expert miners to boot. This unique skillset makes them virtually a necessity for Deep Rock Galactic's designs on Hoxxes IV, a Death World that is bursting at the seams with highly valuable minerals.
- Is It Something You Eat?: Their remarks about the Error Cube:"I wonder if it's edible..."
- Lantern Jaw of Justice: What your Dwarves have under their beards. Especially notable on the Driller, who has no facial hair by default and a helmet that covers the rest of his face.
- Lower-Class Lout: Played With. They're rude, crass, not afraid to be a jerk to their bosses, not afraid to be jerks to each other, and probably at least a little drunk 24/7. But their loud working-class camaraderie is charming and they have genuine moments of respect for each other, like when they get revived, salute each other, or get promoted by Mission Control.
- Mundane Object Amazement:
- All four of them are absolutely enthralled by the pair of fuzzy dice hung near the door of the Drop Pod, giving off quotes of amazement when slapping them around.
- They have a similar reaction to the bizarre gnome-like "dwarf" bobblehead on display at the Abyss Bar, but in this case it's more amusement and derision at just how Off-Model it is, like In-Universe So Bad, It's Good.
- Nerves of Steel: They do all their heavy work while under heavy attack by endless swarms of glyphids, mactera and worse. Though the Scout is usually heard having a moment of nervousness at the start of multiplayer games.
- Not the Intended Use: Their Laser Pointers can be seen from a decent distance and even without pinging anything it's easy see the laser from it which helps nearby stray dwarves find their way back to a teammate.
- Our Dwarves Are All the Same: A group of stout-bodied, surly, hardy, elf-hating miners who are proud about being, well, Dwarves. During their free time, they drink excessive amounts of beer, and the Overclock Forge allows them to partake in a sci-fi version of the "master blacksmith" archetype as well. They may occasionally talk about how they sometimes wonder if there is a life outside of killing bugs and mining before punching themselves in the nose (for even considering such an idiotic concept, apparently). On the other hand, they do each have a unique appearance and set of skill, one of them is clean-shaven and another has Perma-Stubble by default instead of some sort of massive beard, and their accents are Danish rather than Scottish.
- Pointy Ears: Ironic, since they often use "pointy-eared leaf-lover" as an insult.
- Powerful Pick: It's most useful for its intended purpose, but it can serve as an Emergency Weapon if you're out of ammo. Not using its Power Attack mod (considering it's the only option on its first tier and costs no ammunition to use, only having a Cooldown) is practically wasting a bit of your ammunition every level.
- Power-Up Food: Drink. Consuming any of the Daily Special beers will give you a temporary buff that lasts one whole mission, either normal or Deep Dive. According to their marketing blurb, these drinks don't actually confer any actual enhancement, other than giving your Dwarves one hell of a morale boost so effective that they physically hit harder, carve through terrain more efficiently, somehow get more mineral and gold out of mining, and generally take less damage, making it a case of Liquid Courage as well.
- Psychopathic Manchild: A team of elite miners with the maturity of rowdy teenagers and the firepower of an entire platoon. One voiceline upon successfully hacking a patrol bot implies they are also avid video gamers.
- Pungeon Master: When given enough of a chance they'll drop some outrageously bad puns and often laugh about them or expect a reaction. This is especially notable with the decorative ghosts from Halloween, cracking the worst possible puns they can muster.Dwarf: Hey, ghost, you look fit! You must be exorcizing every day, BAHAHAHAHA!
Dwarf: Hey Stingtail, if you need a new one maybe visit the RETAIL store, HAHAHA!! - Renaissance Man: One would think that you'd find an expert miner who's also an expert mercenary and mechanicnote about as often as the Windows error message finds a Solution To The Problem, but Deep Rock Galactic has managed to hire four of them, one of whom is also an engineer! No wonder they've got Ultimate Job Security.
- Taken even further with the Season 01: Rival Incursion update. The dwarves now have a Hacking Minigame when encountering disabled drones from the Rival Corporation. Ironically, the Engineer, who's the most tech-savvy of the bunch, doesn't get any bonus at his hacking attempts and failing a hack can have him complain that he's "a jock, not a geek" just like any other class.
- Required Secondary Powers: Each Dwarf's armor upgrade grants resistance against a certain element, and is most pronounced on the Scout (Falling Damage, given his role of zipping around) and the Gunner (Explosives, due to his frontline role and his various explosive options). More broadly speaking, a number of Mods and Overclocks require conditions that may not be available by default on the class, requiring the Dwarf to take the supplementary mods or rely on their teammates.For example...
- Screams Like a Little Girl: If they get shocked by the Caretaker's tesla coils sometimes they'll let out very undwarf-like yelps of pain.
- Snowball Fight: Can engage in this with each other during "Yuletide" winter events, when small piles of snow inexplicably appear in the Space Rig for this very purpose. During the "Great Egg Hunt" Easter events, they'll pelt each other with painted eggs from a basket near the Performance Pass terminal instead. During the Summer events, as of Season 4, they can have a water balloon fight.
- Sucks at Dancing: Mission Control apparently has this opinion, as in his own words: "Let's hope you're better miners than dancers."
- Stout Strength: All of them have the same body type - short, stout-bodied. And they're all fairly strong, able to smash in a grunt's head with a single downward strike with their pickaxes or carve through solid rock with them too. The Gunner and Driller especially, considering both are clad in heavy duty armor and lug very heavy weapons and equipment everywhere, whereas the Engineer and Scout are significantly less encumbered. The Gunner and Driller also have the deepest voices of the four.
- Talking to Themself: Their only dialogue lines specific to solo missions are the ones for issuing Bosco commands, so a solo dwarf will still do things like threaten to "beat the record" of someone who isn't there and mention it's a good thing we're dwarves to deal with the hard work of mining.
- The Nicknamer: Even though it's against company policy, the dwarves seem to have given names to the robotic equipment. APD-B317 is much more commonly known as Bosco, the M.U.L.E is affectionately called Molly by the dwarves, the Drilldozer is named Doretta, the Hacking Pod is Hacksy, etc.
- Trademark Favorite Food: While their tastes in liquor vary plenty, it appears all the dwarves mainly enjoy sandwiches, going by their comments after depositing heavy mineral loads and the occasional comment on having to sacrifice "sandwich space" to fit in more ammo for their weapons. This probably due to the dwarves' job consisting heavily of manual labor while sandwiches are a foodstuff associated with blue-collar workers.Dwarf: When we get back... it's sandwich time.
- Unexplained Recovery: Even if left behind in the depths of a Death World, downed and surrounded by dozens of very angry Glypids, they'll always somehow return to the Rig's medbay. The dwarves even lampshade this; when another Dwarf joins an in-progress dig, one possible welcome quote is "I thought you were dead!". Fan theories chalk it up to fallen Dwarves being cloned, to the Player Character dwarves being valuable enough that a rescue team is sent to extract them or to them having some kind of emergency teleport device in their armor rig that can warp them back to the Space Rig as a last resort if things go south.
- Working-Class Hero: All of them are heavily coded as being blue-collar workers. Their job involves a lot of physical labor, Mission Control is like a boss to them (and Management is the next rung up), and they enjoy simple foods like beer and sandwiches.
- Vitriolic Best Buds: The Dwarves are constantly bickering with, shouting at, and insulting each other. But when push comes to shove, they consider each other true friends. One of their mottos is "Leave No Dwarf Behind". This even extends to the equipment; you're likely to hear "Where's that damn tin can?" and "You're a good mule, Molly!" in the same mission.

The Scout is a mobile dwarf capable of reaching faraway places to search for minerals. He carries a flare gun capable of lighting up a place for some time and a grappling hook that allows him to have more mobility and reach places where the other players can't.
- Ability Mixing:
- The Bullets of Mercy overclock grants Scout a damage bonus versus enemies with a status effect, naturally synergizing with his status-applying grenades, the Trick Arrows of his crossbow, and his boomstick's fire mod.
- His boomstick and crossbow have heat damage options, which can be used with his Cryo Grenades to induce temperature shock.
- Achilles' Heel: His weakness is a total lack of crowd control. His weapons are best suited for killing enemies one at a time, and his limited-use grenades only impede enemies instead of spreading damage around. The Scout can move like nothing else in the game, but his inability to hold his ground means that he has to keep moving if he wants to stay alive. And while his grappling hook helps him reach for items in high places in the cave, retrieving them from pits or bringing them up to higher places will be extremely difficult without help.
- An Adventurer Is You: Resource Master/Backstabber. He is the undisputed master of lighting up the caverns and using the flares, which are easily the most important piece of gear in the crew's arsenal. His grenades let him inflict various status effects on his target, and his reusable grappling hook helps him reach the vulnerable, rear-mounted weakspots of larger enemies as well as difficult-to-reach veins of minerals and the occasional collectible.
- Battle Boomerang: The Voltaic Stun Sweeper, his Season 3 grenade, is a high-tech, high-voltage boomerang that tasers enemies into semi-unconsciousness one by one and returns to you. If you throw it without any enemies around it'll even return to you without losing any charge.
- Bizarre and Improbable Ballistics: The Nishanka Boltshark with the Bodkin Points Unstable Overclock can achieve these, with a single fired bolt somehow managing to pierce and ricochet its way across a scattered crowd of five different glyphids like it's no big deal.
- Boring Yet Practical:
- His default Deepcore GK2 rifle isn't exciting by any means, but carries a good blend of power, accuracy, and efficiency with no frills, no gimmicks, and no limitations. Thus, it's a welcome addition in any firefight.
- Compared to gun turrets, satchel charges, and a portable shield generator, the Scout's support tool — a flare gun that's basically an over-expensive Cherry Tap in combat — seems rather dinky compared to the other dwarves' support tools, but it's just as useful as the others'. Shooting a single one down is sufficient to make medium-sized rooms fully visible and makes it almost impossible to miss minerals in the walls. Additionally, their speed and ability to get lodged into surfaces means the flare gun can light up the ceiling when normal flares can't even get near it, making it invaluable for revealing Cave Leeches.
- Charged Attack: A feature of the M1000 Classic. Holding down the fire button will slightly zoom in the aim and fire a shot that consumes 2 bullets but that deals 125% of the normal damage.
- Cherry Tapping: His Flare Gun does 40 damage to whatever he shoots it at, which is peanuts compared to the health pool of most standard enemies which is typically in the hundreds or even thousands, but can One-Hit Kill lesser mobs or finish off already weakened foes. The largest common enemy type that can be one-shot by a flare is the Glyphid Web Spitter.
- Combat Medic: The Scout often become this since his Grappling Hook allows him to reach downed teammates quickly, especially if they fell while on tricky terrain, or are spread apart, while avoiding enemies that are in the way. If glyphids are swarming the fellow fallen Dwarf his grenades all apply some form of status or Draw Aggro which can give him a some breathing room during the rescue.
- Critical Hit Class: Both the Scout's bullet-firing primaries encourage pot-shotting enemy weakspots, something he's uniquely well suited to do with his mobility and high accuracy, helping to partially offset his low firepower.
- Difficult, but Awesome:
- The Scout's transversal tool can be deceptively difficult to use. His Grappling Hook gives him the highest, bar none, mobility of the Dwarves, but if you ever hear a Scout say he never bungled up a hookshot and downed himself, they're either lying or they never use their Grappling Hook. But once mastered the Grappling Hook allows a Scout to move nearly everywhere, explore places that would require a lot more effort and resources from any other Dwarf and become nigh untouchable in combat.
- While most of Scout's guns require decent to at least average aim the M1000 stands out— it's essentially the game's sniper rifle and is capable of dispatching problematic targets like Wardens, Sepctic Spreaders, Praetorians and Oppressors fairly quick if one has good aim with it. Given the game has enemies attacking en masse every time and that you need to focus or line up for the high damage, this can be very difficult, especially during swarms.
- Enhanced Archaic Weapon:
- His third secondary weapon, the Nishanka Boltshark_X-80, is a beefed-up crossbow that can fire various trick bolts.
- The M1000 Classic is basically a futuristic M1 Garand that even does the famous (and ever so satisfying) "ping!" upon ejecting an empty clip. According to Overclock descriptions, it also has an integrated railgun piece within, which powers its Charged Attack.
- Falling Damage: While every character is vulnerable to this, Scouts have a propensity for busting their shields (and often their legs) by mucking up a grapple to an Engineer-made platform or a place that seemed like a good idea to go to. Conversely seasoned Scouts can save themselves from it, usually caused by a Stingtail reeling them in, if they equip the Grappling Hook and fire at the ground or a wall.
- Fiery Redhead: Comes with default red hair, and is easily the loudest and most arrogant of the crew.
- Flare Gun: Although all the Dwarves carry throwable flares, his flare gun fires much brighter ones at a much greater distance that last longer. Cannot be used to light enemies on fire, sadly.
- Foil: To the Gunner. Both are equipped with Rope-based traversal tools, and a pair of more-or-less conventional bullet-firing weapons. In particular, the Scout's M1000 Classic and Akimbo Zhukov NUK17s are more or less analogous statistically to the Gunner's Bulldog Heavy Revolver and Powered Minigun respectively. However, the Scout favors the more accurate M1000 over his Zhukovs, his traversal tool is the most reusable but least team-oriented, his grenades are all focused on supportive debuffs, and he trades staying power for mobility.
- Furthered by the third primary weapon he received: instead of another precise bullet weapon or a still-conventional explosive launcher like the Gunner got, he has access to a high-tech (though built by the lowest bidder) DRAK-25 Plasma Carbine, which is extremely rapid-firing and not very accurate and can equip a bouncy projectiles mod that makes it even more chaotic to use.
- Fragile Speedster: While the Scout's health is no worse than any other class, he lacks the ability to effectively deal with large swarms the way the Gunner, Driller, or even the Engineer can, and has to stay on the move or use his valuable and limited grenades to keep from getting overwhelmed. On the other hand, he can really move. His grapple pistol is the only tool in the game (besides the Pickaxe) with unlimited uses, and has a short enough recharge period to be used liberally, both while exploring and in firefights.
- Grappling-Hook Pistol: Very useful for exploring vast cave systems, and for making quick getaways.
- Guns Akimbo: The Scout's alternative secondary weapon is a pair of machine pistols wielded in each hand. Their combined rate of fire and general DPS can match that of the Gunner's Minigun, at the cost of wide spread, a quarter the ammo, and frequent reloading.
- Harmless Freezing: His Cryo Grenades function like this by releasing some kind of super-cold gas on impact. It's far less harmless against Airborne Mooks, who drop to the ground and shatter on impact. Glyphid Swarmers also shatter instantly upon freezing.
- Hate Plague: He has access to pheromones that causes the native wildlife (and oddly, the robotic Rival Tech units) to attack coated targets. The Nishanka Boltshark X-80 fires pheremone darts that will cause the tagged sucker to be torn appart by its fellow creatures, and the Pheremone Canister can instantly start an Enemy Civil War if thrown at a large enough group.
- Hit the Ground Harder: If used toward the ground, the grappling gun will negate any fall damage.
- It's All About Me: The Scout's Grappling Hook is the only traversal tool that only benefits himself. It can get him nearly anywhere except through solid objects, and can be infinitely reused, but unlike the Driller's tunnels, Engineer's platforms, and Gunner's ziplines, he's the only one that gets there, and no one can follow him unless they find another way. This, combined with the tendency for Scouts to run off using their Grappling Hook and focus more on keeping themselves alive over helping the team fight off swarms, gives Scouts a poor reputation amongst the playerbase overall.
- Lightning Bruiser: Skillful use of the grapple pistol allows the Scout to run circles around any composition of enemies, and do devastating damage to single targets at a safe distance while keeping on the move. With good aim even Heavily Armored Mooks will die in just a few shots from his M1000 Classic.
- Lovable Coward: As shown in his unique quotes on the Drop Pod, the Scout is generally the least willing and most concerned about facing Hoxxes's dangers. Which makes sense when you note he's also the least well-equipped to face down the inevitable horde of angry bugs out of all of the Dwarves.
- Magikarp Power: Low complexity and length caves in addition to lower difficulties won't make either his mobility or his flare gun seem particularly necessary. Higher complexity and length caves as well as harder difficulties however will make it clear how much trouble his ability to just grapple over to minerals and objectives in large caves which were only seen due to his flare gun (not to mention being able to see the many lethal bugs baying for your blood heading toward you) will save a team. The accuracy of his primary weapons are also very valuable for being able to quickly handle ranged enemies, who are guaranteed to strip away a dwarf's shield and damage his health with a single hit at the highest difficulty.
- More Dakka: While not to the level of the Gunner, taking the right upgrades and overclocks (namely Gas Rerouting and Overclocked Firing Mechanism) allows the Deepcore GK 2 assault rifle to spit out lead like a hose.
- Necessary Drawback: His Grappling Hook needs to recharge after every use, preventing it from being spammed.
- Non-Action Guy: While he's quite mobile, the Scout suffers from having relatively low reserve ammo, and few ways to kill multiple bugs at once. Without a build specializing to help him shoot at the swarms more freely, in the absence of special enemies (such as ranged ones), the Scout is outright better off grappling around while letting some Grunts chase him to keep some heat off his team and preserve his ammunition (and by extension, considering the limitations of resupply pods, the entire team's).
- Not the Fall That Kills You…: His grappling hook completely prevents him from taking fall damage while reaching the hooking point. This can allow him to avoid falling to his death by firing his grappling hook... right where he was going to fall down to anyway.
- Plasma Cannon: His Drak-25 Plasma Carbine operates quite a bit like the plasma rifle from Doom, rapid-firing small balls of purple plasma directly from the ammo reserve with the only limit being the (admittedly somewhat small) overheat meter.
- Recoiled Across the Room: One of his shotgun's overclocks amps up the kickback to an absurd degree, so much so that pointing and firing at the ground will give the Scout significant air. Used skillfully, a scout doing this won't have to touch the ground until he's out of ammo entirely, and will never need to worry about fall damage as long as he can grapple well enough. Or he can kill himself with fall damage but in a different manner than expected.
- Sawed Off Shot Gun: His default secondary weapon: the Jury-Rigged Boomstick. It's quite powerful, especially up close, and can be modded to deal fire damage or fear enemies to make them run away.
- Small Name, Big Ego: He's a bit full of himself, claiming that he doesn't so much "scout" as much as "make this whole [mission] possible". To his credit, he's definitely the face of the game. Literally, as the game's icon in Windows and Steam is his face. Considering this, his line for firing his flare gun "Let there be light!" may be a Blasphemous Boast instead of him merely quoting.
- Sniper Rifle: The unlockable M1000 Classic fills this role, which rewards precision shooting and works well with his mobility, allowing him to give himself the breathing room necessary to line up those critical shots in a way no other class can.
- Shoot the Mage First: His highly accurate weapons and lack of crowd control outside greandes encourages him to employ this trope and hunt the more fragile and supportive enemies, like Tri-Jaws, Webspitters, Acidspitters, and Wardens, or stray glyphids flanking his team. His teammates can handle the hordes of regular grunts much easier without the aforementioned enemies inhibiting or sniping away at them.
- Short-Range Shotgun: Even moreso than the Engineer's. The Boomstick becomes almost completely ineffective more than 5 meters out, but it can kill Grunts in one hit and is so powerful that the muzzle blast itself does damage (useful for killing swarmers that might otherwise dodge individual pellets).
- Sole Survivor: Thanks to his premier mobility, the Scout is your guy for clutch eleventh-hour saves. If everyone else is down, the hordes are unmanageable, and the drop pod has arrived, the wisest thing any Scout can do in that situation is to immediately evacuate and take the quickest path to the drop pod, becoming this trope and ensuring that the mission wasn't All for Nothing; the other dwarves don't have the same level of maneuverability that can guarantee a solo escape when they can't get rid of all the bugs.
- Support Party Member: His weapons may be the least ammo-efficient for killing the giant swarms that hound the team and his grenades are scarcely capable of causing damage, but his guns can quickly take out high-priority targets that are a huge threat to the team's survival even while they keep the swarms at bay and his grenades do an excellent job hampering the enemy to help the team with that. The light from his flare gun is nearly irreplaceable in a large enough cave to help the team see the bugs coming or even just being able to see mission objectives or minerals. Even his grappling hook can be infinitely-reusable utility for his team by zipping away from enemies as they chase him and aren't attacking his team.
- Trash of the Titans: All four cabins are themed to one of the four classes. His cabin is absolutely filled with discarded energy drinks and empty Chinese food cartons.
- Trick Arrow: Season 2 gives the Scout the Nishanka Boltshark, a crossbow that fires normal reusable bolts as well as your choice of three special bolts that explode or inflict status effects. Overclocks allow replacing your normal bolts with even more trick arrows that split, catch fire, bounce at nearby targets, and more.
- Trick Bomb: None of his three grenades function conventionally (i.e. doing damage by exploding), and are all focused on being Status Infliction Attacks. His normal grenade, the IFG, emits an electric field that inflicts slowness and causes bugs to take additional damage. His first (and most conventional) unlockable, the Cryo Grenade, inflicts freezing, which stops bugs in place and makes them vulnerable to being shattered, while his last unlockable, the Pheromone Grenade, is a glass canister that douses bugs in a fluid that causes them to attack each other.

The Gunner is the main source of damage for the group, being able to suppress entire legions of creatures all on his own. He is equipped with a minigun and a powerful revolver to keep the swarms under control. He also provides ziplines for the other players to reach distant places, along with a deployable bubble shield.
- Achilles' Heel: His weakness is that he is extremely slow - his mobility tools, while powerful, can't be used for a quick getaway in the same way the other dwarves' tools can, and even his fearsome firepower will only get him so far against the horde as both of his primaries slow him down when fired. A lone Gunner can shred up bugs like nobody's business, but they'll rapidly begin flanking him, and without support from his team, there's no way to keep them all off of you; his lack of mobility and peeling options means that he'll go down fast unless he spends one of his valuable Shield charges.
- An Adventurer Is You: DPS/Tank. The Gunner carries the most firepower of all the Dwarves, in both terms of how much damage he can do between resupplies, and his high, reliable sustained damage, and his Shield allows him to hold back massive amounts of incoming damage or stall powerful enemies like Dreadnoughts and Detonators for the crucial few moments it takes to bring them down.
- Armor-Piercing Attack: The ArmsKore Coil Gun is capable of piercing through even the Glyphid Oppressors' invulnerable armor.
- Baritone of Strength: The depth of his voice is second only to the Driller.
- Bee Hive Barrier: His deployable shield fits the bill, being a dome-shaped forcefield with a noticeable hexigonal pattern.
- BFG: He isn't called The Gunner for nothing, you know! He claims that something isn't a real gun if it doesn't weigh at least a hundred pounds. Reloading the "Thunderhead" Heavy Autocannon reveals that the magazines are nearly the size of a dwarf. His third primary is described as essentially being a vehicle-mounted missile launcher that's been made Dwarf-portable.
- The Big Guy: His kit makes him the best option available for holding ground and defending against large swarms. His armor sets enforce this, being the most bulky and conspicuous after the Driller's. The MK 5 suit even claims to come with handrails for lesser dwarves to hold onto!
- Blood Knight: Like you wouldn't believe. Most of Gunner's quotes are him either reveling in carnage or complaining about the lack thereof. He seems to always be itching for a fight and loves his arsenal of BFGs.
- Boring, but Practical:
- The Gunner is a textbook example, although "boring" is a highly relative term when one is discussing a guy toting a powered minigun. The Gunner doesn't clear swarms better than the Engineer or Driller, and his Ziplines aren't meant for retrieving objectives or reaching inacessible areas of the caves like the Scout. What the Gunner can do is keep killing every swarm the Game throws his way with scarcely a pause for breath, and outright stonewall them when necessary with his Shield Generator.
- His guns are damn near universally effective in any situation; single large targets, swarms, and distant enemies are all susceptible, and the Gunner can dish out more hurt per ammo refill than anyone else due to just how many rounds his primaries carry. Critically, he also lacks any of the crippling drawbacks that the other two damage-dealing Dwarves suffer from. The Engineer's secondary weapons all suffer from limited ammunition, and the Driller's primary weapons all suffer from extremely short range. If the Gunner can see it, he can send it bullets, and he has a lot of bullets.
- Ziplines are usually considered boring due to their slow forward/upward speed, but ziplines need little, close no to time to arm, if set correctly provide safe way for teammates to escape the glyphids and rain down fire on them, allows Dwarves to carry heavy objects upward (very useful in Point Extractions) and may save a Dwarf's life from the harsh mistress gravity is
 .
.
- Chainsaw-Grip BFG: Just look at his character select quotes if you need an indication as to the sort of guns he prefers.
- Cigar Chomper: Well, his official artwork shows him as one, anyways; however, there's currently no such cosmetic in the game.
- Combat Medic: While he doesn't have options to directly heal his teammates, he does have ways of protecting them and saving their bacon. Specifically, his Shield Generator can hold bugs at bay, and buy him time to revive downed Dwarves instead of needing to clear out the swarm first. This doesn't stop him from his usual MO of wasting everything in his sight with lead.
- Compensating for Something: Played for Laughs by one of the character select lines. Even his fellow Dwarves poke fun at him sometimes if they ping him."So what if I like really big guns?"
Dwarf: Hey, Gunner! You sure you're not compensating for something? - Damage Reduction: Some of his weapon mods grant up to 50% Damage Resistance while it's charging or shooting at max rate of fire. Stack this with Veteran Depositor perk and the Shield Generator, and you can facetank a lot of things Hoxxes throw at you, other than Bulk Detonator death explosion.
- Death from Above: A playstyle encouraged by the Gunner's mobility tool, the Zipline Launcher. One of his biggest weaknesses is that he can get overwhelmed fast if a swarm manages to close the distance on him because he moves slower while firing and his weapons need a second to fire up, making him maximally effective at around mid-range. This can be outright negated by hooking up to a zipline and raining bullets down on the glyphids below who now have no way of reaching him. The only thing to watch out for is getting too close to the walls (because glyphids can and will climb them) and enemies who can fly or have ranged attacks like Mactera and Acid Spitters, since getting hit while on a zipline will send you plummeting to the ground.
- Deflector Shields: He carries a rechargable, dinner-plate-sized deployable force field generator that repels enemies and restores the shield meter of dwarves inside.
- Difficult, but Awesome:
- The Mole Overclock for the ArmsKore Coil Gun has extra wall penetration and gains damage based on how many separate terrains the shot passed through before hitting an enemy. It can deal a massive amount of damage in one shot, however, the player needs to tag an opponent's location and position themselves with the right amount of terrain in between for it to do so.
- The Aggressive Venting upgrade for the Lead Storm Minigun will scare off anything within 10m and has a massive Fear factor of 1000% meaning only mini-boss level enemies like Oppressors and Bulk Detonators will not be affected by it. The problem? You need to overheat the Minigun which is a fairly risky thing to do and will probably force the Gunner to become well acquainted with his secondary gun, but if used correctly this can easily save the entire team from being overran by the glyphids.
- Foil: To the Scout. Both are equipped with Rope-based traversal tools, and a pair of more-or-less conventional bullet-firing weapons. In particular, the Gunner's Powered Minigun and Bulldog Heavy Revolver are more or less analogous statistically to the Scout's Akimbo Zhukov NUK17s and M1000 Classic respectively. However, the Gunner favors the rapid firepower of his Powered Minigun over the Bulldog as his primary weapon, his traversal tool is the most team-oriented but least reusable, his grenades are all focused on direct damage, he trades mobility for staying power, and he's the mechanical main character and the character assigned to you during the tutorial.
- Furthered by the third primary weapon he received: instead of a rapid-fire Spray and Pray weapon like the Plasma Carbine, his "Hurricane" Guided Rocket System is, as the name implies, a guided rocket launcher (less like a bazooka and more like a dwarf-portable Chainsaw Grip MLRS platform) that allows him more precise control of where his damage goes at the cost of overall DPS and it requiring more attention to use.
- Friendly Fireproof: The autocannon, uniquely for a primary weapon unlike the other options in the game, is completely unable to damage allies. This is probably because a middlingly-accurate, rapid-firing, always damaging in a small area-of-effect weapon would be highly troublesome to be deal with as a user or ally the moment any bugs get close to anyone if this were not the case, compared to much slower-firing weapons or grenades with a much greater area-of-effect that can more easily be properly placed to affect many bugs but minimally affect allies.
- Gatling Good: Oh yeah. Hulks around a massive mini-gun that can lay waste to entire crowds of aliens in seconds.
- Hand Cannon: His revolver, the "Bulldog", fires bullets so incredibly large that it can only hold 4 in a cylinder. These rounds are so powerful that each shot will leave a baseball-sized crater in the terrain, and it matches the Scout's full-size battle rifle in damage. The BRT 7, his unlockable alternate, an Expy of RoboCop's Auto-9, fires bursts of high-caliber pistol rounds that allow it to kill Glyphids in a single trigger pull. It's also longer than his forearm. And finally there's the ArmsKore Coil Gun, which is not quite as long but definitely thicker, and hits like a goddamn cannonball, easily blasting through every glyphid in the path until it hits a wall, and then often going through it; Mission Control is convinced the thing can shoot a hole in the Space Rig.
- Heavy Equipment Class: Wields a BFG that puts out way more damage than any other class.
- The Hero: The Gunner is the closest thing the game has to a "main" class that is assumed to be the player, notably due to being the class given to Players to learn in the Tutorial, as well as his room being the one a player spawns in when they start up the game.
- Hot Blooded Sideburns: The Gunner sports an impressive pair of mutton-chops by default and is definitely the most boisterous and trigger-happy of the bunch.
- Kill It with Fire: Several of his weapons have upgrades centered around fire or just flat out are fire-based. His minigun has three tier 5 mods — one of them ignites his bullets when he's near overheating, and another turns him into a fiery Action Bomb when his gun actually overheats — and an overclock that causes it to overheat faster, but burn everything immediately in front of him; his rocket launcher has an upgrade that simply converts some of its damage to fire type. His revolver has an overclock for drastically increased damage against enemies that are on fire. And he has the self-explanatory incendiary grenade, which smothers an area with lingering fire.
- Macross Missile Massacre: The Hurricane Guided Rocket System can deliver these, especially with upgraded fire rates. If you stockpile them just a little in the air before guiding them into an unfortunate alien, it can be one hell of an alpha strike with over a dozen rockets at once. Not bad at all for something being hauled around by just one guy.
- Magnetic Weapons: His ArmsKore Coil Gun is a Hand Cannon of a coil gun that can fire shots so fast and powerful that they not only penetrate through rock, but also leave a damaging and temporarily-lingering trail behind.
- The Medic: in a Combat Medic fashion. He's the only one who can heal a Dwarf - in this case, the Shield bar - allowing for clutch burst of healing that can help survive a bad situation. He otherwise can't restore health, meaning he and his team still need Red Sugar to patch up injuries.
- Mighty Glacier:
- A strange example. His primary weapons slow him down while firing, with two of them have a "windup time" before they really get going and the third having Painfully Slow Projectiles that track the crosshair, which makes it difficult to use them on the move. Furthermore, his ziplines, while infinitely reusable once placed, are fairly slow barring a steep downhill slope. But he can do devastating damage to anything that passes his crosshairs, drop a shield generator for protection of himself and his allies, and his zipline covers the greatest distance in one go and can be used while carrying heavy items. While he technically has the same health and shields as any other Dwarf, his unique armor gives him the most useful damage type resistance of all the dwarves, namely Explosive, and his Shield Generator lets him stand his ground and take on overwhelming amounts of enemy attacks like no other.
- You can really exaggerate this trope with his "Lead Storm" overclock; in return for a tremendous damage boost, it makes the Gunner completely immobile when his gatling gun is spinning, effectively making him a walking deployable turret. He can obliterate anything non-bulletproof that remains in his crosshairs more than a few seconds, but he isn't going anywhere fast (though he can alleviate this by jumping repeatedly).
- More Dakka: With a name like "The Gunner", it kind of comes with the territory. His minigun is the fastest firing weapon in the game, and all of his primaries carry very generous stockpiles of ammo. His unlockable secondary, the BRT-7, is a downplayed example, being a hybrid between a high-caliber pistol and an SMG. Even his grenades have dakka; the Tactical Leadburster will embed itself into the earth and spray a hail of bullets absolutely everywhere like a lead sprinkler, cutting down basic glyphids and putting the hurt on bigger enemies.
- Multi-Directional Barrage: The Tactical Leadburster is a grenade that sticks into terrain before riddling the surrounding area with a massive hailstorm of bullets, turning terrain, enemies, and unfortunate dwarves in its radius into Swiss cheese.
- Necessary Drawback: His minigun overheats after 6-9 seconds of continuous firing, since allowing it to mow down swarms and bosses by emptying its entire ammo without stopping would make other classes' firepower redundant. This can be mitigated somewhat by equipping upgrades which give him some cooldown back after killing an enemy, allowing him to become an even more effective crowd-controller.
- Not the Fall That Kills You…: While somewhat difficult to manage while at high velocities, grabbing onto a Zipline while plunging down midair can save a dwarf from all fall damage whatsoever, as they never actually hit the ground.
- Overheating: Continuously firing the minigun for too long causes it to overheat — complete with glowing barrels — and then jam up. Otherwise, only running out of bullets stops the minigun from firing. Some of his mods allow him to weaponize this.
- Player-Guided Missile: The "Hurricane" Guided Rocket System fires a slew of missiles that can be guided by aiming the reticule.
- Powerful, but Inaccurate: Subverted by his minigun. It starts less accurate, but the longer it's fired, the more accurate it becomes. And if you buy the accuracy mod for its first tier, it can be as accurate as the Scout's M1000 Classic. Played straight with the Bulldog revolver, however, the first shot is fairly accurate, but the nasty recoil and accuracy drop makes nearly impossible to hit the same target at anything beyond mid-ranges.
- Recursive Ammo: The unlockable "Cluster" grenade releases nine bomblets when it goes off, each of which explodes with the force of a single grenade. The Gunner sometimes calls it a "grenade grenade". It's the butt of jokes in the community, which often poke fun at overzealous Gunners who bomb their team more than the bugs themselves.
- Revolvers Are Just Better: His default secondary weapon is an extremely powerful and accurate Hand Cannon. It holds four shots instead of the usual six because of the sheer size of the ammo.
- Skill Gate Characters: Played straight at first, but averted at higher levels of play. The Gunner is the most straightforward class in the game. He doesn't need to worry about placing turrets or platforms, drilling tunnels, lighting up the caves, or scouting ahead. He just points his gun at whatever he doesn't like until it goes away. That being said, the Driller and the Engineer will have a hard time eradicating swarms the way the Gunner can without using up a prohibitive number of resupplies to do it; the Gunner is also renowned for being able to pull a situation out of complete FUBAR territory with a well-placed Shield Generator. Unskilled Gunners are basically walking turrets; skilled Gunners are resilient, minigun-toting field medics who can make their team nearly invincible.
- Shoulders of Doom: His base armor would pretty much entirely prevent from him being able to look at anything to his sides past his collarbone.
- Stone Wall: In addition to his other obvious role, this is the Gunner's biggest utility to any team. His minigun can sweep up trash glyphids like nothing else, but also brings punishing suppressive firepower to bear on any major threat, be it a big bug like a Praetorian, or a swarm of dangerous grunt variants such as Slashers and Guards. His grenades are suitable for clearing entire sections of a swarm in a flash, and his deployable shield gives the team some much-needed breathing space when they're surrounded. Even his mobility tool, ziplines, are usually the slowest one to use on any given team.
- This Looks Like a Job for Aquaman: Compared to classes' mobility tools, ziplines seem painfully slow and limited by comparison. When it comes to the team needing to go across a very big chasm (especially while holding heavy objects, hello Point Extraction!) however, ziplines can be unmatched for the purpose. Ziplines are also the most useful mobility tool for an entire team during a swarm, since they can lift players high enough to be untouchable from non-ranged enemies - even if there turns out to be a bunch of ranged enemies that the team has trouble taking out before they get hit, the team can just accelerate themselves to head toward the ground and maybe even dodge the projectiles to avoid falling off the zipline.
- Too Awesome to Use: Both of the Gunner's equipment options are very limited in how many he can carry, but they are also very powerful. His Zipline Launcher has by far the least uses of any traversal tool, but can both be a game-changer in combat by allowing the Dwarves to hang well above the reach of most enemies while firing down into them, and traverse great vertical and horizontal gaps that would otherwise require much more effort, while his Shield Generator operates not only on a limited number of charges, but also on a recharge period between each use, with each usage being able to buy immediate breathing room for a team in almost any situation.
- Weaponized Exhaust: 2 of his Tier 5 minigun mods allow him to either dump all the minigun heat as a fire AoE, or starts firing hot bullets when the minigun is hot enough.
- We Will Wear Armor in the Future: He has preposterously large shoulderpads, tassets, a hanging groin protector, vambraces, greaves, kneepads, and some sort of breastplate (though he seems to still be wearing these over clothing). The only other Dwarf who gives him a run for his money is the Driller, and at least he has the excuse of having dozens of pounds of broken rock rolling over his head and shoulders on a regular basis.
The Engineer is a strong support dwarf who can use numerous gadgets to aid his allies. His primary function is to place sentries that will help with damage against incoming swarms. He is also responsible for helping other players to reach higher areas by placing platforms.
- Achilles' Heel:
- His weakness is that his equipment is very ammo-inefficient. His primary weapons output great damage really fast, but have lower max ammo counts, something that's doubly true for his secondaries, which basically must be used exclusively on crowds to for efficient damage-per-resupply. His mobility tool is also this, as it has a ton of uses like discouraging Glyphid swarm movements, forming bridges, softening a fall, or creating overhead cover, but its ammo is similarly limited. That said, he does have ways to make up for this weakness: though not usable on the move, his turret is great at long-term security and lessens the amount of ammo he needs while doing lower-intensity tasks.
- His primary and secondary have more pronounced weaknesses compared to other Dwarves, becoming more effective in some situations while becoming nigh-useless in others. Details Playing an Engineer means you need to know your weapons well and bring the right loadout to excel in the right situation; i.e., bringing the right tools for the job.
- An Adventurer Is You: Jack Of All Trades/Petmaster. He can dish out some solid damage, and his Grenade Launcher plus Shotgun combo (two seperate weapons) allows him to hold his ground even without his turret down, but his individual specialties can be done better by the other three Dwarves; the only exception are his turrets. His Platform Gun is simultaneously the most versatile mobility tool in the game by a wide margin, but also the least efficient in any given category. You can use it for climbing, safe descent, or arena construction in a way only the Driller's drills come close to matching, but where other mobility tools need only a single application, you'll have to spend a fair chunk of the Platform Gun's ammo to get the same basic result.
- Attack Drone: The Shredder Swarm grenade spawns a swarm of reprogrammed Rival Tech Shredders that deal weak but rapid damage to enemies they seek out.
- Awesome, but Impractical: The Fat Boy and Hyper Propellant overclocks are on opposite sides of the spectrum, and are hilariously fun to use. The downsides are that the former completely kills the Engineer's secondary ammo pool, and the latter limits the Engineer to his grenades for splash damage.
- BFG: Contrary to the other classes, his Secondaries are these compared to his Primaries. They all deal huge damage to a single or multiple targets, and have little ammunition.
- Chain Lightning: The "Stubby" Voltaic SMG has a high-tier upgrade that allows electrified enemies to electrify nearby enemies as well, who themselves can electrify nearby enemies, and so on. A few rounds into a horde can render the entire mass of bodies slowed to a crawl and taking rapid ticking damage. An Unstable Overclock for said SMG also allows the Engineer to create a lightning arc between his turrets, if he uses the "Gemini System" perk.
- Combo: The Plascrete Catalyst Unstable Overclock for the Shard Diffractor packs an odd one: In exchange for a slower recharge and a reduced battery, you can target your own platforms from the Platform Gun in order to blow them up and splatter every bug in their vicinity. It's unwieldy, but powerful and highly entertaining.
- Companion Cube: If another Dwarf pings him sometimes they'll ask if the Engineer names or sleeps with his turrets.
- Cute as a Bouncing Betty: One of the grenade launcher Overclock is called Fat Boy. Take a guess on what it does.
- Difficult, but Awesome: Engineers pack a lot of handy toys and have a very versatile loadout from the get go, but to excel as one you need to know what tools you have and how to use them properly given the current situation. Poorly used Engineers are as useful as a fifth leg on Molly, but skilled ones can cover for most deficiencies any given team has.
- Their guns are pretty awesome and usually does a lot of damage against single or multiple targets depending on what you pick, but as stated in Achilles' Heel they suffer from lower max ammo count. Having bad aim or being plain wasteful will hurt Engineers in the long run.
- Good Engineers also try to make sure his turret(s) is primed as often as feasibly possible and ready to take out the glyphids or at least alert him and his team of them approaching, greenbeard Engineers more often than not forget they even have a turret.
- Their Platform Gun is a bit tricky to learn and you can waste a ton of ammo building wrong platforms or do something downright detrimental to your team like clog minerals or a passage if you're sloppy, but it's also very useful and can create fast, cheaper shortcuts for the other dwarves, a safer landzone for high jumps, or at least make their lives a lot easier by covering gaps and the sticky goo in Fungus Bog. Particularly skilled Engineers are dextrous enough to create platforms as they jump forward which can save their bacon if they're about to be cornered by a swarm of angry bugs.
- In terms of weapon the LOK-1 Smart Rifle is Engineer's most complex weapon despite its lock-on feature. Poorly used it's an ammo hose that runs dry quickly, but if used properly it can quickly shred even tough glyphids with ease and efficiency. You need to be on the move and angle yourself right so the bullets will hit the weakspots of enemies, especially when it comes to things like Praetorians and Oppressors.
- Energy Weapon: Two of his unlockable secondaries are this. The Breach Cutter fires an energy wave to slice through armor and deal immense damage as it passes through, while the Shard Diffractor is a Ray Gun that fires a steady, precise beam until the Engineer either stops firing or it overheats and needs to cool down.
- The Engineer: Downplayed, as he doesn't do a whole lot of mechanical problem solving like an actual engineer would. That said, given all the tools and gadgets he can deploy, including turrets and his Platform Gun, he's clearly got expertise in using all sorts of equipment for numerous situations.
- Expy: He's a dead ringer for another Engineer: red shirt under brown leather, goggles, hardhat, equipped with a shotgun and a turret.
- Falling Damage: One of the upgrades of the Platform gun allows Engineers to cushion the fall damage from a decent height. It still won't save anyone falling from too high, but the reduction is easy to notice.
- Gameplay and Story Segregation: Story-wise, the Engineer built the LOK-1 Smart Rifle and the Shard Diffractor himself. Gameplay-wise, the player still has to complete an assignment in order to unlock said weapons.
- Grenade Launcher: The Deepcore 40mm PGL, his default secondary weapon. Deals solid damage in a small area, and later upgrades will allow it to shred armor to an impressive degree. An Unstable Overclock, Fat Boy, turns it into a mini-nuke.
- The Goggles Do Nothing: Wears a pair of goggles by default, but they have no in-game effect.
- Heel–Face Brainwashing: His Shredder Swarm Grenade is made of reprogrammed Rival Tech Shredder Drones that now fight for the Dwarves' cause.
- Jack of All Stats:
- The Engineer can comfortably deal with any kind of threat, even if they lack specialized ways of dealing with specific problems. Their primary weapons deal a lot of damage fast and are best for nailing weak spots on bigger Glyphids, the AoE on their heavy secondary weapons are ideal for thick swarms of medium-weight bugs, and the turrets will automatically track and fire on targets without input, making them great for little swarmers or annoying fliers that are difficult for players to hit.
- Even the Engineer's Platform Gun is this compared to the other classes' exploration tools. While each platform deployed only affects a small area, the things you can do with them are broadly applicable, including scaffolding for mining, padding to reduce fall damage, ladders up sheer cliffs (also useful for building pipes), and blocking off access points to limit where enemies can attack from.
- Land Mine Goes "Click!": One of the grenade options is a sticky bomb. Upon throwing it and sticking it to some location, it beeps to indicate it's armed and will make a short, but distinctive ramp up beep before it explodes. And somehow those bombs are able to explode several times before expiring.
- Magikarp Power: Engineers seem to be overkill for low complexity caves since they rarely need plaforms to dig for minerals and at lower hazards levels he can make do even solo just fine with his default weapons completely forgetting about his grenades and turrets. Higher complexity means a lot of minerals will probably be on high places where his platforms will be vital to reach them easily, and on higher hazard levels the Engineer's turrets and grenades can be godsends to ease the burden of defending the team during swarms.
- No "Arc" in "Archery": Averted as usual with his Grenade Launcher, but also averted with his Platform Gun, if you need to create a platform from very far you'll need to aim higher to compensate for the projectile drop.
- Non-Indicative Name: Downplayed. He doesn't do a lot of problem solving, beyond the ever-present formulae required to reduce the number of living bugs to zero. That being said, he uses a lot of gadgets and tech, far moreso than his squadmates do; it's also explictly stated that he built many of his own weapons like the LOK-1 and Shard Diffractor.
- Not the Intended Use: Engineers's Platform Gun can be used to create "roofs" for their team. In Escort Duties this is useful to protect over Doretta in to prevent Ommoran's rocks from hitting at certain angles and in other missions Engineers can use them as vantage points for their turrets.
- Playing with Fire: His Shard Diffractor fires an energy beam that quickly heats up enemies to set them on fire.
- Power Crystal: His Shard Diffractor is powered by a chunk of Ommonran Heartstone, allowing it to fire a laser not unlike the Heartstone's pillars in the final phase.
- Punny Name: His unlockable primary weapon introduced in the November 2021 update, the LOK-1 Smart Rifle. It's a gun that can lock on targets. Geddit?
- Red Is Heroic: Can be inferred based on his generic quotes. While the Scout is a Cowardly Lion, the Gunner is a Blood Knight who's constantly aching for a fight, and the Driller complains non-stop about the company's shoddy hardware, the Engineer is the only optimist in the quartet, and takes Deep Rock Galactic's motto of "Leave no dwarves behind!" to heart.
- Ridiculously Fast Construction: Two examples. His turrets just need a few smacks with a hammer and they unpack in seconds (Even faster if allies of him joins in). His Platform Gun fires a yellow, rubbery substance that instantly becomes a platform if it touches any surface.
- Rocket Jump: The RJ250 Compound overclock for the grenade launcher allows the Engineer to do him, reducing the damage of it but causing dwarves hit by it to be knockbacked significantly to facilitate impressive jumps.
- Shock and Awe: The Engineer's first alternate primary weapon is a submachine modified to fire electrified bullets that have a chance to shock enemies for more damage. It comes with at least one Overclock to let his turrets join in too.
- Shotguns Are Just Better: The Warthog Auto 210, his default primary weapon is a semi-automatic shotgun. Amusingly, he still "pumps" it when reloading. It somewhat averts the Scout's Short-Range Shotgun problem by having passable accuracy to nail even Macteras at a decent range. With the right overclock it can essentially become a semi-automatic assault rifle.
- Smart Gun: The LOK-1 Smart Rifle has a lock-on capability that locks onto enemies with a displayed trajectory, then fires homing bullets that follow said trajectories to hit the targeted enemies.
- Stuff Blowing Up: Second only to the Driller in bringing the boom. But he takes top spot if he uses the Grenade Launcher with the Fat Boy Overclock. Not only does it increas the blast radius to the point of mimicking the Driller's Satchel Charge, it also leaves behind a radiation field to further wear down any bugs that survived the blast!
- Super Prototype: The Shard Diffractor is of the Experimental Prototype type. Some of the Engineer's quotes when "reloading" the weapon even alludes to it.Engineer: (sounding a little surprised) Hasn't exploded yet!
- Support Party Member: His Jack of All Trades nature makes him perfect for plugging the other Dwarves' weak point. Put an instant platform for the Scout to mine mineral near the ceiling! Drop a L.U.R.E. for the Gunner to saturate with bullets! Protect the Driller from long-range enemies with turrets! And so on.
- The Turret Master: He can build a turret, two if he has the right upgrade, which is handy to conserve ammo and make sure no glyphid will get the drop on you if you aim it somewhere you're not looking at. One of his shotgun's upgrade and some overclocks from the Stubby SMG enhance turrets beyond their normal upgrades as well.
- Utility Weapon: The Platform Gun. It shoots Plastcrete that creates platform upon impact and can have more other uses like using it to reduce fall damage or repellant to make the glyphids take a longer path (but not block) when moving towards you.
- Verbal Tic: His class-exclusive lines all seem to involve the word "Mate" somewhere. Downplayed, however, since he shares 99% of his dialogue with his teammates.
- Victor Gains Loser's Powers: His Shard Diffractor is apparently powered by a 12 pound chunk of Ommoran Heartstone, and just like the Ommoran, it can fire out a beam of energy.
- You Nuke 'Em: The Fat Boy overlock takes a big bite out of his grenade launcher's ammo capacity in exchange for turning each shot into a miniature nuclear warhead with several times the blast radius and damage, plus a lingering field of deadly radiation.
- Wave-Motion Gun: The Shard Diffractor is a decent example by itself, but it gets really crazy with one Overclock. The beam it fires becomes even more powerful, at the cost of burning through much more ammo and forcing the Engineer to stay still when he fires.

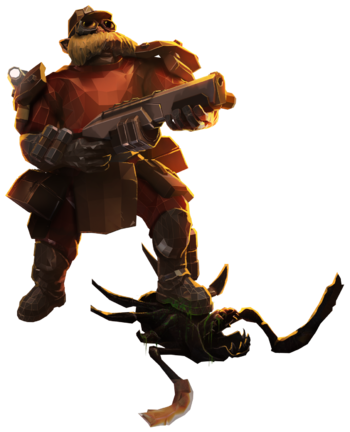
The Driller is a frontline explorer, capable of digging straight through dirt and rock to reach his goal. Equipped with twin drills, he can tunnel through rock and obstacles to clear a path for the team. The Driller also has a flamethrower to show the Bugs how HOT Dwarves can be, and also carries several satchel charges.
- Ability Mixing:
- Enemies frozen by his Cryo Cannon take more damage from melee attacks. Driller has the most consistent form of melee damage, dealing it in bursts via his throwing axes or at a rapid pace over time with his drills. Do the math.
- His Sludge Pump's goo can be ignited using heat weapons, and since it takes the spot of his Flamethrower, he'll need to ignite it using a heat-modified Wave Cooker or EPC.
- Achilles' Heel:
- His weakness is that he has virtually zero ranged capabilities. His primary weapons are all limited to close-range use, his secondaries are peashooters that are really only good for picking off low-defense enemies like Acid and Webspitters unless you really minmax them, and his mobility tool confines him to the terrain in order to move around with it. Of course, pity anything that is within his reach.
- Additionally, he lacks high single target damage, something the other 3 classes can do very well. He can easily wipe out hordes of grunts, but Praetorians, Oppressors and Bulk Detonators take a lot of ammo to kill with his weapons.
- Most of his weapons take time to deal damage, and in general he lacks a reusable, big instant damage options. He can deal with with swarms like no other Dwarves, but will have trouble taking down big single targets with brief vulnerability periods like Dreadnoughts.
- Acid Attack: One of his primary weapons is the Corrosive Sludge Pump, which fires acidic sludge balls that stick onto surfaces and enemies. It can be charged to make them burst into more acidic sludge balls. Enemies walking into these will get covered in sludge and take Damage Over Time, melting those that die to it and prior to a patch also prevented most of their death-activated effects.
- An Adventurer Is You: AoE Status Effect Guy and Nuker. His primary weapons are both based on enemy-piercing streams that let him affect entire swathes of enemies at once and either ignite and slow down enemies, or freezing them solid to leave them vulnerable to take additional damage, his Satchel Charges and two of his grenade options focus on immediate damage, while the third creates yet another large, sustained area of effect that slows and damages enemies, this time with poison.
- Anti-Armor:
- His Power Drills have some of the highest armor breaking power in the game. They can quickly destroy the armor plating of Praetorians and deshell a Q'ronar before you can blink. Although if you're using the drills for this purpose, you're either out of ammo for your primary and secondary, or are extremely coordinated with a team that can exploit these openings.
- His Corrosive Sludge Pump has an upgrade that lets him dissolve the armor of foes from a distance, softening them up without the need to get close and personal.
- The All-Solving Hammer: In contrast to his teammates, his mobility tool — his drills — are useful for combat. They can pulp rock — the puny chitin of a Glyphid is small potatoes. This essentially means that the Driller can solve every obstacle he faces with only his gauntlets, with only his fuel being the limiting factor. More generally, the overall usefulness of quickly carving away terrain combined with the sheer volume of fuel available to the drills means they can be liberally used for quick escapes, wall climbing, creating bespoke arenas for fighting, and more. The difference between a good driller and a great driller is how aggressively they can use their drills to make things easier for themselves and their team.
- Anti-Air: The Driller's Cryo Cannon is bar-none the best anti-air weapon in the game: the continuous spray it fires makes it so aiming is less an issue, as well as being able to catch multiple foes in the line of attack, but its true value comes from what happens when an organic Airborne Mook is frozen: anything from the smallest Mactera to the biggest Naedocyte Breeder will drop to the ground and smash to pieces no matter how much health it has left. However, Rival Corporation's Shredders and Patrol Bots are far more resistant to cold and are instead vulnerable to heat, making the Cryo Cannon much less useful against these but turning the flamethrower into the anti-air weapon against them. The Flamethrower tends to be equally effective against most other airborn threats, although it does lack the instant-kill potential of the Cryo Cannon.
- Armor-Piercing Attack: The flamethrower completely bypasses the Prateorian, Oppressor and Dreadnaught's armor.
- Blood Knight: Driller’s unique voice lines seem to show he treats the lethal dangers of Hoxxes with nonchalance, and seems to mostly be enjoying himself. Notably he has a series of lines on the drop pod where he mentions he’s trying to catch a nap as if it’s an airplane flight to a vacation, while the other classes are normally panicking (Scout) or trying to steel themselves (Engineer, Gunner)
- Body Horror: He is capable of causing this with the Blistering Necrosis Overclock on the Colette Wave Cooker. Enemies he hits with it have a chance to get a rather unpleasant-looking blisters on their limbs, which act as weakpoints that can be hit and burst for more damage to the enemy.
- Boring, but Practical: The Impact Axe throwable's potential for area damage is nil compared to the fear inducing Frag Grenade or flooding the area with a deadly neurotoxin, but it deals extremely high single target damage, something the Driller lacks. It also synergizes nicely with the Cryo Cannon, guaranteeing a quick kill on anything short of a mini-boss or Dreadnought. Thanks to its retrieval capacity it makes for a good lawnmower too when in the Fungus Bogs to swiftly and efficiently destroy massive amounts of poison spore fungi, or any other damageable terrain feature you want removed without wasting ammo.
- The Bully: His character-specific voicelines are a lot more impatient and mean-spirited, and quite a few of them involve him picking on the Scout for being scared. Not helping matters is the reputation Drillers have garnered in the community for throwing Satchel Charges directly at their teammates' feet and otherwise engaging in Unfriendly Fire, especially towards Scout players.
- Close-Range Combatant:
- His primaries focus on denying an area around himself with spray-area weaponry and persistent terrain effects, but lose out on range if they're not built towards it. His secondaries can pepper enemies at range, but are most powerful when mixed with the effects his primaries spread.
- The Driller is technically the best melee class in the game. He has access to the most useful "melee"-type damage... in the form of throwing axes. His drills are the only mobility tool that can do damage, but they're only just better than hitting foes with your pickaxe. They do come in handy when mixed with the Cryo Cannon, though (see Combos).
- Combos:
- Victims frozen by the cryo cannon take 3x damage from direct sources. His power drills are considered direct. Slap on the vampire perk, and you can literally bulldoze your way through frozen hordes while healing at a crazy rate. Impact axes are also considered direct, and can be used to one (or two at higher hazard levels) shot Praetorians and Oppressors.
- His Subata can be upgraded to deal bonus damage against burning targets. One of his primary weapons is a flamethrower.
- The Colette Wave Cooker has multiple upgrades that encourage this: one spreads the temperature status of your target in the area around them, another causes frozen or burning enemies to explode into extreme-temperature mist, and a third does bonus damage against enemies who are being poisoned or corroded while spreading that poison around.
- The Springloaded Ripper is made to combo with the tunnels he drills. If deployed laterally in a small tunnel, it will rapidly circle the walls and floor and absolutely shred most bugs foolish enough to enter it.
- Crippling Overspecialization: Averting this trope is the mark of a skilled Driller. Due to his incredibly short range, the Driller may find himself unable to contribute to certain fights and objectives. Forethought and positioning are required to properly employ his devastating AoE weaponry - especially if you want to do so without nuking your teammates into the bargain. Turning the otherwise-mediocre Subata into a lethal Noisy Cricket style pocket cannon is also a rite of passage for Driller mains. Failure to play him properly will generally relegate him to sweeping up trash mobs after his teammates kill everything else.
- Deadly Gas: Neurotoxin Grenades emit a distinct brown-orange cloud which drains the life of any Hoxxes native inside it. Dwarves are thankfully immune. Just be careful with your flamethrower, the Neurotoxin is extremely flammable and the ensuing explosion is something dwarves are not immune to.
- Difficult, but Awesome:
- The Driller has the potential to be an unrivaled killing machine who can reliably beat the Engineer and Gunner in a Body-Count Competition, but getting to that point requires you to understand his kit exceptionally well. The short range of his weapons and the fact that Glyphids are at their most dangerous up close mean you need to be clever about how you unleash the ridiculous destructive potential the Driller is carrying with him at all times.
- Using the EPC for mining requires very precise timing and (in the case that you're using the axes) very good aim with an arcing projectile in order to hit the flying charge projectile before it hits the wall you're trying to mine and fizzles out. But if you get it right, you can dig out an entire mineral vein in seconds by yourself, using only some secondary weapon ammo.
- The Springloaded Ripper grenade needs some setup or favorable terrain to use optimally, not to mention good aim and footwork. Use it badly, and you'll probably shred your ankle tendons with it once it leaps up and lands behind you. Throw it right, and you'll be mowing down an entire horde like so much overgrown grass using just one grenade.
- Dungeon Bypass: While all of the dwarves can dig relatively quickly with their pickaxes, his drills allow him to dig long tunnels much faster to get around obstacles. This is particularly popular at the end of the mission, since pointing the drills at the drop pod and digging your way there is often easier than navigating the full cavern (unless you fall into a cave). This also makes him incredibly useful for quickly finishing On-Site Refining missions, since the Driller can tunnel straight to the Liquid Morkite spouts instead of forcing the team to build snaking pipe complexes over difficult terrain.
- The Engineer: Of the "sapper/pioneer" variety, focused on quickly reshaping terrain (or enemies) with drills and explosives.
- Fast Tunneling: It's kind of his thing. His powered drill gauntlets allow him to burrow his way through virtually any obstacle in his path, whether it's geographical or insectoid.
- Flawed Prototype: The Experimental Plasma Charger, his unlockable alternate secondary. It has superior stopping power to the Subata 120, and a powerful Charged Attack, but its heat system, extremely low ammo capacity, and slow projectiles mark it out as a generally mediocre weapon. However, properly upgrade it and it's an effective mining tool- the Thin Containment Field upgrade allows the charged projectile explosion destroy terrain and instantly mine minerals. It can also dislodge embedded gems and objective items in the ceiling of caves without needing a Scout or Engineer.
- Freeze Ray: His alternate primary weapon is the Cryocannon. Sustained fire with this weapon will freeze enemies solid, after which it becomes easy to pull out your side arm and just blast them into a million pieces.
- Friendly Fire: The Driller is infamous for his Friendly Fire potential. His flamethrower and cryo cannon, by their very nature, make it hard to avoid hurting other players caught in a swarm, and his satchel charges are so powerful that they're very likely to catch a fellow miner in their explosion radius. And then there's the Springloaded Ripper, which for some reason has increased friendly fire damage on top of its already brutal hits; whether it's a balance tweak or just for the meme, the thing can kill your entire team if you throw it badly enough.
- Geo Effects:
- With his ability to reshape the terrain and create entirely new areas, the Driller is exceptionally well-suited to generating this, coralling the Glpyhids into predictable, bunched up mobs which he can then take full damage of with his splash-heavy primaries.
- The Sticky Fuel Unstable Overclock doubles his flamethrower's sticky flame damage and quadruples its duration up to 14 seconds, allowing him to set the ground on fire and watch all incoming Glyphids burn to death in no time.
- Gradual Grinder: Most of his weapons take time to kill, though they're often compensated with good area of effect and Overclocks can alleviate it somewhat. The Flamethrower relies on setting enemies on fire and waiting them out to burn to death, the Cryo Cannon deals no damage and takes time to freeze, and the Sludge Pump is, well, corrosive.
- Hurricane of Puns: Use of his Impact Axe will likely result in a slew of axe puns.
- Jerkass to One: The Driller tends to be the most aggressively vitriolic of the Dwarves, especially towards the Scout, often verbally attacking the latter when he acts cowardly as they're about to start a mission on the Drop Pod.
- Kill It with Fire: His primary use in combat is his flamethrower.
- Little Useless Gun: His starting secondary, the Subata 120, is generally considered one of the weakest guns in the game. While mods can make it more useful, especially once it's overclocked, it remains solidly outgunned by all the other class's secondary and primary weapon options (though it at least has some of the best accuracy in the game). It's also about half the size of the Gunner's Bulldog Revolver and BRT 7.
- Magikarp Power:
- The Driller's pistol isn't very powerful and his flamethrower isn't a very efficient choice against individual enemies. Even his drilling isn't immediately useful, as the early parts of a cavern are usually sloped and straightforward. But his flamethrower is crucial during Swarms as its Damage Over Time lets him damage many weak enemies at once, and his drills can save the game during extraction, where you might be in a position where it's easier to simply drill straight to the drop pod instead of running through a confusing labyrinth chased by hordes of angry bugs. The drills also make him all but required for On-Site Refining operations, being able to create nice, clean paths to the pumpjacks instead of having to thread pipes all over the map.
- His default Secondary, the Subata 120 is also this. At first, it deals a measly amount of damage that can barely be upgraded. But upgrade it fully and slap on the Explosive Reload Overclock, and you've turned it into a manually-detonated Bolt Pistol, capable of taking out a Grunt in just 2 shots.
- Man of Kryptonite: Having a Driller in the team can make the Glyphids' numerical advantage irrelevant. Not only can he instantly create tunnels to funnel the Glyphids into a narrow killzone and prevent getting surrounded, his weapons and grenades excel at wiping entire swarm of normal enemies.
- Min Maxers Delight: The Driller is an integral part of many strategies for Hazard Level 5. His ability to essentially dig out his own arenas make him absolutely invaluable. It doesn't hurt that he's also the second-best choice after The Gunner for dealing with swarms. In addition, an upgraded EPC allows him to mine mineral deposits in the walls quickly and without assistance, making him ideal for high-level solo play.
- No Body Left Behind: The Driller has quite a few weapons that invoke this on bugs. Any organic enemy killed while frozen by the Cryo Cannon will shatter, the Corrosive Sludge Pump will melt them into nothingness if its projectiles or Damage Over Time causes the finishing blow, and the Colette Wave Cooker will cause them to pop. Certain enemies killed by these methods will not trigger on-death abilities or will have them mitigated, such as the Praetorian's/Oppressor's toxic gas and the Exploder's explosion being nullified if shattered or if the latter is popped by the Wave Cooker, or the Bulk Detonator's explosion changed to a non-damaging knockback shockwave if it's killed while frozen.
- Noodle Incident: Upon unlocking the Colette Wave Cooker, Mission Control will be quick to remind the Driller that, even though the Colette is basically a weaponized microwave oven, it is *not* meant to be used to cook food, and mention a "flamethrower incident in the mess hall" that was most likely a result of the Driller trying to use his CRSPR flamethrower as a kitchen utensil.
- Not the Intended Use:
- The Experimental Plasma Charger, specifically with the Thin Containment Field upgrade. It's meant to be used like an Unreal Tournament shock combo, shooting the charged sphere with the primary fire to cause a massive explosion to scorch whole hordes. And to be fair, it is used more or less like this... except instead of hordes, it's to instantly excavate an entire vein of ore, due to the size of the explosion and instant terrain eradication.
- His Impact Axes are intended to be high-damage sources against single targets. However, the fact that you can pick them up if they don't hit an enemy allows you to toss them repeatedly at environmental hazards (such as Electrocrystals) to break them without using up ammunition. It's even possible to throw them into walls to use them as very small, makeshift platforms. They can also be used to crack Ebonuts open in a single strike instead of taking several seconds to gradually break their shell with the pickaxe.
- Overheating: His drills, Plasma Charger, and Wave Cooker overheat if used continuously for too long and stop working until they cool down. While technically not the case with the Cryocannon, which instead needs to repressurize if fired for too long, it acts the same mechanically.
- Painfully Slow Projectile: The Experimental Plasma Charger shoots these. The fully-charged projectiles are actually slower than the Driller's throwing axes, which is important as it allows you to use them to manually detonate the Thin Containment Field explosion.
- Poisonous Person: He has access to the bulk of poison-causing equipment in the game, between his Corrosive Sludge Pump and Neurotoxin Grenades. His Colette Wave Cooker has an upgrade that applies an additional poison DoT to enemies poisoned with Neurotoxin or covered in sludge to combo with both. His Subata also comes with an upgrade that coats the bullets in a material that's poisonous to Mactera, but that just functions as a straight damage bonus. Only the Gunner can cause this type of damage besides him, and then only with specific upgrades on his revolver and autocannon.
- "Pop!" Goes the Human: Well, alien, rather. Organic enemies killed by his Colette Wave Cooker will appear to quickly swell, then pop and leave no body behind, also denying certain on-death effects such as an Exploder's explosion. This even includes the three Dreadnaught types.
- Power Copying: The "Goo Bomber Special" overclock for his Sludge Pump causes projectiles to imitate Mactera Goo Bombers, allowing them to spill out blobs of sludge as it flies through the air.
- Power Fist: His Reinforced Power Drills, after their visual update, take the form of a pair of large gauntlets with drills on the front that happily mulch through anything in their way.
- Ranged Emergency Weapon: The Driller's first two secondary weapons, both of which have very shallow ammo pools for their damage output, relatively low damage per second, and require frequent pauses to reload or cool off. They are however, generally accurate enough to pick off weak enemies at a distance that the Driller's short-ranged primaries can't reach. The Wave Cooker, meanwhile, is more of a combo tool to capitalize on the effects of his primaries, but can also be pressed into serving as an adequate way to pick off ranged threats.
- Splash Damage: The Driller focuses on this quite heavily, with his primaries able to kill whole hordes of Glyphids and swarms of Mactera on their own. The only weapons that aren't able to do area damage are the Subata and Impact Axe.
- Stuff Blowing Up: This is arguably his specialty, other than digging. One of his default pieces of gear is the Satchel Charge, a remotely-detonated explosive that dwarfs all other forms of explosives in the game. His grenades are no slouch, either; he is the only dwarf who is able to bring standard-issue HE Grenades, and his other two choices are either an absurdly damaging throwing axe, or a canister of neurotoxin (and that blows up too if you have a flamethrower).
- Support Party Member: While a dangerous combatant in his own right, the Driller's biggest strength is his ability to just cut straight through an intervening wall. This is useful in most situations, but can be absolutely critical in On-Site Refining missions, since he can bore a hole straight through rock to lay down the pipes without needing to either take forever mining out a passage with pickaxes or assembling twisting loops to conform to the terrain. Even the least digging-intensive mission, Escort Duty, has him able to destroy the Ommoran Heartstone's laser-spewing pillars faster than anyone else, and those are the most likely thing to take out the Drilldozer. His Flamethrower is also extremely effective against airborne targets, including the Flying Rocks the Ommoran summons in Phase 2.
- With a little out-of-the-box thinking, a Driller can substantially increase the room his team can have during tense situations. He can carve looping tunnels to endlessly kite enemies through and give a chance to get some distance, open up some space around equipment if it lands right next to a wall or is in a cramped spot, bring said equipment down to a safer level if it landed way too high for everyone else to access safely, and form chokepoints to funnel bugs into so they can be dealt with more easily. He really shines when it comes to ensuring he and his team have more space to work with.
- Mining-build EPC drillers. They sacrifice nearly all ranged damage (outside of axes and the EPC's pitiful stock primary fire) in order to be able to mine minerals extremely quickly and efficiently.
- This Is a Drill: You'll usually be using them for their intended purpose, but the drills do inflict damage if you happen to hit any aliens with it. The damage isn't too stellar but it hits in a wide range, is likely to stun or cause enemies to flee in fear from the Driller, and it chews through armor like nothing else. It also qualifies as "direct" damage, meaning that kills with it will heal Drillers with the Vampirism Perk; freezing or scorching a crowd of Grunts and then finishing them off with the Drills can give as much HP as a modestly-sized Red Sugar crystal.
- This Looks Like a Job for Aquaman: The Driller is a dangerous fighter, but when it comes to objectives, the only mission type his kit excels at is On-Site Refining. The only other missions that require digging are Point Extraction and Egg Hunt, both of which will usually require a Scout-Engineer combo or a Gunner's zipline to reach the higher objectives without an impractical amount of digging. That being said, you will very rarely see a On-Site Refining dig without a Driller present to tunnel directly from the refinery to the Morkite Wells. In addition, he's the best-equipped to deal with certain suboptimal Salvage Operation locations, given his ability to quickly carve a cramped defense area into a larger one and even reposition the defense areas entirely by drilling the uplink/fuel downwards.
- This trope may also come into play at the end of a mission; did Molly just climb up a sheer wall and squeeze through a microscopic hole to get to the Drop Pod? The Driller can easily beat her back by tunneling through everything between him and it.
- Throw Down the Bomblet: While all Dwarves carry explosives, the Driller alone has access to standard HE frags. More importantly, he carries blocks of C4, which can carve out massive craters and One-Hit Kill Praetorians.
- Tunnel King: Again, this is pretty much his gimmick, on account of the power drills.
- Utility Weapon: More "utility" than "weapon, but his drills can be used for more than just coring tunnels. If trained on an enemy, his drills will grind through armor in moments and pulp swarmers en masse. In addition, his EPC is arguably more efficient as a ranged mining tool than as a weapon.
- Video Game Flamethrowers Suck: Averted. While the flamethrower does have a shorter range than the other classes' primaries, it does decent damage including afterburn, ignores armor, can pass through enemies, and can be upgraded to avert the trope even further. A fully upgraded Flamethrower can have a greater range than the Engineer's shotgun, which itself averts Short-Range Shotgun, or else compete with the Gunner for best DPS. It also leaves behind flames on the ground, which can be upgraded into very dangerous napalm-like "sticky flames" for area denial. One Overclock expands the range even more, at the expense of fire rate.
- We Will Wear Armor in the Future: Goes toward this trope much like the Gunner's base armor. He has large shoulderpads (marginally smaller than the Gunner's), tassets, a hanging groin protector, greaves, kneepads, and some sort of breastplate that he seems to still be wearing over clothing. Unlike the Gunner, he lacks vambraces and seems to have even larger leg and groin protection - the use of his power drills would prevent him from wearing sizeable armor over his forearms, and the greater leg protection is perhaps due to his closer-range weapons making him especially liable to get a bunch of Glyphids swarming his legs even if he's doing his job well.
- When All You Have Is a Hammer…: Glyphids in your face? Drill 'em. Glyphid Praetorian in your face? Drill it. Need to get up to that ledge? Drill up to it. Need to get up to the ceiling? Drill a curved tunnel. Need to get DOWN? Drill an angled tunnel. Molly just climbed up a sheer cliff and squeezed through a microscopic hole in the rock, and the Drop Pod's too far into the tunnels? Drill through everything in the way. Virtually every obstacle in a mission can be solved by drilling them hard enough, long enough, or in the right spot.
DRG Equipment and Other Employees
Who is Karl? As of yet, nobody is really sure, but he is spoken of fondly by the four playable Dwarves. Going by the context of their quotes and the way they describe him, he was a miner who met a fate that catapulted him into legend. Rumor has it that Skull Crusher Ale was involved somehow.
- The Ace: Whoever Karl was, one thing is certain: he was good at what he did— to the point any Dwarf respects his memory.
- Alcohol-Induced Idiocy: Whatever it is that happened to him, the one thing we have some certainty about is that it involved some amount of Skull Crusher Ale.
- Ambiguously Human: Fans have occasionally noted that he's never actually confirmed to have been a dwarf.
- And This Is for...: Expect to hear "This one's for Karl!" at least once during a mission after getting a kill. The Dwarves will also shout "For Karl!" while performing a pickaxe power attack.
- Death by Origin Story: Given that the Dwarves only ever speak of him in past tense, and clearly begrudge the Glyphids for his fate, it's heavily implied that whatever made him famous was fatal. One common fan theory is that he was another dwarf who was killed during an early mining mission.
- Due to the Dead: The Dwarves kill bugs in Karl's name and make toasts in his honor.
- Forgotten Fallen Friend: Inverted. The Dwarves remember Karl fondly and often mention him (either in combat, when drinking beer or when picking new cosmetics), but the player has no idea who Karl was and wouldn't even know about him if it wasn't for the Dwarves talking about him.
- The Ghost: Doesn't actually appear in game, though the Dwarves very frequently reference his name.
- Left for Dead: An unused voiceline for Dwarves being left behind by the drop pod implies Karl was left behind on a mission, though exactly why is ambiguous.
- Long-Dead Badass: If he's truly dead. But one thing is certain: Karl did something so awesome/incredible/badass that every Dwarf speaks of him with reverence and awe.
- Noodle Incident: It's very clear that something happened to Karl. It's explicitly stated that whatever it was, he came out as a legend, and it's strongly implied that it also got him killed. And finally, it may or may not have involved a crapton of Skull Crusher Ale.
- Shrouded in Myth: Karl holds a status comparable to that of Chuck Norris amongst the Dwarves employed by Deep Rock Galactic; in particular, the Dwarves compare his tolerance for booze to a Dreadnought's tolerance for bullets. The only things we unquestionably know for sure about Karl is that he disappeared doing something legendary, and that he was named Karl.Dwarf: That thing ate bullets like Karl drank beers!
- The Spook: No details about Karl has ever been revealed beyond what the Dwarves occasionally mention every now and then. Who he was, if he was a Dwarf, if he was a miner, if he was a miner what job he had... Nothing at all. It all remains in a mystery deeper than the caves of Hoxxes.
- Uncertain Doom: While it's very much implied that he died, a Dwarf on Smart Stout will claim he's figured out where Karl is before losing track of that thought, bringing up the possibility he just went missing.
- What Would X Do?: Sometimes when choosing and customizing their equipment, dwarves will ponder what Karl would have chosen, or that Karl would be proud of their choice.

The man giving orders and directions to the team on the ground.
- Ambiguously Human: Considering the hints that Deep Rock Galactic (the company, not the game) might be run by humans, it's not clear if Mission Control is a dwarf or a human. On one hand, he has a smooth British accent as opposed to the harsh Danish-sounding accents the Dwarves have and lacks beard. But on the other hand, the Driller and Gunner don't have beards and he's definitely got the right body type, and the locked door the Space Rig used to have that led to his room was dwarf height. He never refers to the player characters as Dwarves in a way that implies he isn't one, and the Dwarves never talk about his species. Of course, all this is assuming that dwarves themselves aren't a Human Subspecies to begin with. Besides, his in-game portrait has the same nose and multi-chin as the player-controlled Dwarves, further hinting that he is, indeed, a Dwarf himself (further reinforced by the introduction of the "Scary Rubber Mask" cosmetic, a mask of Mission Control's scowling green face, which is almost identical to a default Dwarf face). Upon completion of assignments or promotions, he will echo the Dwarven chant "Rock and Stone" back to the Miners in recognition and respect, lending additional credence to his Dwarven heritage.
- Anti Poop-Socking: In-universe. Playing Jetty Boot for too long will generate a unique response from him complaining about how the dwarves are addicted to the game and they need to get back to work.
- Beleaguered Boss: His working relationship with the dwarves is polite and helpful while they're on mission... but when they're off duty, he easily grows weary putting up with their raucous shenanigans. If they're not getting passed-out drunk, they're dancing (badly), or messing with company equipment, or playing with the gravity calibrator, or kicking barrels into the launch area.
- Benevolent Boss: On the other hand, during missions, he acts very professional and supportive, keeping Dwarves up to date on whatever's coming their way, as well as praising them for completing objectives. He also sends down supplies in exchange for Nitra, and in situations where he has to send down other equipment (like say, fuel cells for the Drop Pod in Salvage Operations), he'll do his best to make sure it lands close while advising Dwarves to stand clear. In general, long as the Dwarves do their job and maintain professionalism, he'll reciprocate the courtesy.
- Berserk Button:
- His biggest pet peeve is when the Dwarves start kicking barrels into the launch bay. Or into the drop pod itself.
- The Rival Company is one to him and a giant Berserk Button to upper management. Completing an Industrial Sabotage has him express large amounts of gratification and he heaps more praise upon the dwarves for destroying the Rival Company's operations than in any of the other mission types. It's clear the company higher-ups hold more animosity against this potential competitor than the rest of the planet's threats put together, which highly contrasts with their otherwise apathetic attitudes.
- Hacksy being forced into hiding from enemy attacks will have him demand the Dwarves to clear out the area in an angrier tone than unusual.
- Crowding around a gold nugget and especially xenofungus to do the usual memetic chants will set him off, one of the few times he yells at the miners with genuine anger rather than simply annoyance.Mission Control: ENOUGH about the mushroom! We all know it's a mushroom! WE GET IT!Mission Control: Yes, yes, "you're rich", time to get a move on! I got management breathing down my neck here!
- Consummate Professional: While you're on the field he's all about the job and very rarely breaks his stoic and professional demeanor. When the Dwarves are on the Space Rig he quickly gets tired of their shenanigans.
- Cynical Mentor: He has shades of this in the tutorial. When you encounter your first swarm, he fully expects you to die and then acts completely surprised when you manage to survive it.
- Deadpan Snarker: He definitely has some quips for the dwarves when they annoy him enough, especially if they cause some shenanigans on the Space Rig. In season 4's summer event, he doesn't try to hide his sarcasm when the dwarves recover the pool float toy.
- Don't Celebrate Just Yet: He may sometimes celebrate your completion of an assignment when you still have one more mission to go, realizing his mistake and sheepishly apologizing for it.
- Enraged by Idiocy: Downplayed. He does get easily upset at the Dwarves' rambunctious shenanigans around the Space Rig and chastises them, usually not unlike a stressed parent would to their hyperactive children.
- Everything Sensor: He's in charge of operating the Space Rig's sensor suite (or, alternatively, relays information from those who do, given the 'ScanCom' he references in some promotional material), which is capable of detecting all types of mineral and mission objectives and also alerting you to enemy swarms, even down to the exact species of alien making up the incoming horde in the case of rarer species-specific swarms. And it can do this despite the fact that it's mounted on an orbital station, and all of the game's missions take place thousands of meters underground!
- Hypocritical Humor: He'll scold you for playing the Jetty Boots video game instead of working, yet the high scores shows his initials (MC) appearing twice.
- I Need a Freaking Drink: It is heavily implied by the achievements that dealing with the Dwarf crew's various wacky antics drives Mission Control down to the bar on the regular, particularly the one for punting all the barrels into the Drop Pod's deployment area.Achievement unlocked: Foreign Objects In The Launch Bay. You kicked every barrel into the launch bay. You are why Mission Control drinks.
- Lame Pun Reaction: When the Engineer first unlocks the Stubby (an electric SMG), he quips that its "shockingly good" before immediately groaning at what he just said.
- Mean Boss: Zig-zagged. On the one hand, he very openly admits that he's willing to let you die to save the MULE and the drop pod, berates you if you take too long on a mission, gets livid if you kick barrels down the drop pod's launch tube, and he doesn't like it when you waste time dancing. On the other hand, if you're not actively pissing him off, he's usually polite and to-the-point, invested in your dwarf's wellbeing by providing the best mission support he can, and never lies about the company's intentions or priorities. In addition, promoting a Dwarf will earn you a message from him admitting that he was wrong to doubt your capabilities and respectfully acknowledging your dwarf's skills, showing that he still respects his employees in spite of their rockier moments.
- When the rockpox first hits Hoxxes and DRG is scrambling to research and find countermeasures to it dig teams start begin dropping left and right. Mission Control is clearly distraught that so many miners are losing their lives.Mission Control: [solemnly] You did admirably, Team. But... we... lost three more teams while you were down there. Damn it all to hell...
- When the rockpox first hits Hoxxes and DRG is scrambling to research and find countermeasures to it dig teams start begin dropping left and right. Mission Control is clearly distraught that so many miners are losing their lives.
- Mission Control: Not only does he serve as this for your mining team, he doesn't even have a proper name to address him with, he's only ever known as Mission Control.
- Mysterious Past: Not much is known about him, or what he did before getting a job as Mission Control for Deep Rock Galactic. A popular fan theory, based on some of the things he says and his attitude under certain circumstances, is that he used to be an elite miner himself (most likely a Scout), before a Career-Ending Injury forced him to accept a job that does not involve physical work.
- No Name Given: The Dwarves don't refer to him as anything other than Mission Control or "that guy in Mission Control," and even he doesn't acknowledge himself as anything else.
- Not So Above It All: He generally acts as if he's above the raucous shenanigans the Dwarves get up to, but there are a few glimpses of a far more lax side to him; for instance, when you unlock the Cryo-Cannon, he'll comment that it's also "useful for keeping drinks cold, or so I'm told.."
- He will also occasionally refer to the M.U.L.E. as "Molly", not even bothering to correct himself after doing so.
- As opposed to yelling at them to stop, he will sometimes snark at the Dwarves for their awful dancing in a peanut-gallery manner.
- He will frequently make comments about the dwarves being addicted to Jetty Boot, but he has two entries on the game's high score screen.
- He doesn't even attempt to hide his excitement for Oktoberfest, sounding outright elated when you find a Best Wurst Beer Mug or progress an Oktoberfest assignment.
- Not So Stoic:
- Occasionally when a swarm is approaching your team he'll warn you with palpable worry in his voice.
- He's admirably professional even with his occasional flashes of beleaguered annoyance, but he does emote beyond that. He expresses genuine pride when giving your promotion speeches, and when giving you the briefings for the Rockpox research missions he sounds rather affected by the news from R&D and the rest of the company. For someone who regularly calls your miners "lugs" and berates them he sounds genuinely afflicted by the losses:Mission Control: ... you did admirably, team, admirably. But... we lost three more teams while you were down there. [to himself] Damn it all to hell.
- Oh, Crap!: He sometimes expresses this when a swarm approaches and doubly so if a Dreadnought makes an appearance outside of elimination missions.Mission Control: Contact! We've got 4, wait 6, no, 12... A lot of aliens headed your way!
Mission Control: The scanner just lit up like a Christmas tree! We've got a swarm incoming!
Mission Control: We've got a blip the size of a drop pod, lock and load miners, we've got a swarm incoming! - Only Sane Employee: The Space Rig's total personnel complement seems to consist entirely of the four Dwarves and Mission Control himself. He is an objective-oriented long-suffering professional. They are four short mad bastards with a fondness for kicking barrels, random violence, and passing out drunk. When you're the single sober person trying to get four different flavors of intoxicated Bunny Ears Lawyers into action, you're the only sensible one by default.
- Retired Badass: Possibly. As mentioned above, there are many hints that Mission Control used to be a badass miner himself, and had to retire early after suffering a Career-Ending Injury. It's generally assumed that he was an elite Scout, going with the fact that he tends to praise the unlockable weapons for that class and has nothing bad to say about them (unlike the unlockable weapons for the three other classes, which will have him express concern or doubt in some way) and one of his lines for a Gunner unlocking the BRT7 secondary implies that the source of said Career-Ending Injury was a reckless Gunner crippling his leg on a mission that may or may not have been an Elite Deep Dive. If this is true, then the guy truly earned his "cushy job".
- Skewed Priorities: He will berate you for kicking barrels or dancing. However, he doesn't seem to mind DRG employees getting drunk on the job (granted, since they're Dwarves, he probably realizes it would be pointless to tell them not to do this).
- So Proud of You: He admits to this if the player promotes any of the four dwarves, complimenting them on their diligence and sense of duty.Mission Control: I'm proud of you. You've done well for yourself since you joined the Company. I recall you joining up as a scrawny greenbeard, and figured you'd join the dead down in the deeps in short order. However, consider my position changed... you've grown into your role and have more than proven yourself. It's my personal pleasure to announce that management has granted your promotion. Rock and Stone, miner! Well done.
- Voice with an Internet Connection: He never makes a physical appearance in game. There was once an off-limits room aboard the beta versions of the Space Rig titled "Mission Control," but it was removed before the release of the game, leaving it ambiguous if he'll ever appear in person.
- Berserk Button:
- The Rival Company is detested by them because of the threat they pose in retaining Hoxxes' financial viability.
- Damaging holiday decorations has harsher punishments than anything else, according to Mission Control's annoyed and slightly desperate statements on it; they go from Holiday cancellation (including for Mission Control) to outright flooding the Rig with radon gas to make you stop.
- Disproportionate Retribution: Have occassionally threatened to flood Space 17 with radon (an unbreathable, highly radioactive gas) in order to stop the employees from vandalizing the holiday decorations.
- The Ghost: Never seen in-game, only alluded to.
- Golden Mean Fallacy: Leaf Lover's Special was a requirement for them to allow the Abyss Bar to run, likely to counter how many miners would go into the mines drunk as a consequence of opening a bar on premises. Of course, nobody said the dwarves have to drink it, so they usually just malign it while looking for a different beer to order.
- Mean Boss:
- They don't give a damn about Doretta beyond using her as a tool to get Ommoran Heartstones out of the mines. You're not rewarded a penny for hauling her head back to the drop pod.
- Ping compressed gold or xenofungus enough during a mission, and Mission Control will yell at you to get on with it, with the implication that they're evaluating him based on your performance and being a Bunny-Ears Lawyer not reflecting well on him.
- Why We Can't Have Nice Things: Mission Control warns that, if you destroy the Christmas decorations, management will cancel the holidays for everyone, including him.
Mining Utility Lift-Engine "Molly"

The machine, lovingly referred to as a "minecart on legs", that collects the ore extracted from Hoxxes by the Dwarves.
- Anti-Frustration Feature: If the team gets too far away from her and she hasn't been called yet, Molly will eventually start trudging her way to the team on her own. This ensures she's always nearby instead of forcing the team to constantly call her everywhere.
- Artificial Brilliance: During extraction, Molly will follow an automatically set path towards the Drop Pod. If, however, a new, shorter route to it appears before she gets there (like a Driller mining his way towards the Drop Pod) and she can access it, she will alter her route to take the shorter path. Done right, she will very likely go the same direction the Dwarves are going, so that they don't have to waste time waiting on her to use the slower route.
- Artificial Stupidity: Molly automatically heads toward a dwarf should they all stray too far away from her - this can be a death sentence for a dwarf if she's coming toward them through a narrow tunnel they're running down while a bunch of bugs are on the other end. Occasionally, her pathfinding can get confused while trying to go back to the drop pod and cause her to repeatedly move back and forth getting nowhere, but fortunately she'll be teleported back to the drop pod when there's 15 seconds left on the clock so the Dwarves can hope to get in and succeed in the mission. The Dwarves frequently lampshade how troublesome Molly can be.Dwarf: What sort of fiendish technology makes Molly constantly get in the way?
Dwarf: Molly is on the Space Rig! Maybe R&D is finally fixing that glitch in her noggin? - Bag of Holding: Can hold exponentially more minerals than should be able to fit within her exterior. Large minerals, like Enor Pearls and Jadiz, don't even look like they should fit inside the deposit compartments Molly has. A couple of "depositing" voicelines even lampshade it:"It's like she's Bigger on the Inside!"
- Averted, however, with the Ommoran Heartstone which is tied to the MULE's exterior with straps. Since the alternative deposit sites that players would otherwise used aside from Molly are outright grinders, the Heartstone is probably wanted in one piece. Or maybe considering all the effort to get it, perhaps the dwarves wanted to show off. Similarly, the Data Racks recovered from the Facility Caretaker are also strapped to the exterior of Molly.
- Companion Cube: The Dwarves seem to hold her with a certain amount of sentimentality, even if she doesn't really have a personality. This pisses off management to no end, and they've taken steps to ban this sort of naming (not that the Dwarves listen).
- Cute Machines: Despite not having recognizable facial characteristics and being a decidedly non-humanoid machine, Molly does have a degree of adorability, mainly from her cute chirps as she wanders around.
- Fun Size: Salvage missions feature adorably-tiny Mini-M.U.L.E.s that are a fraction of Molly's size and make cute eletronic chirps. Your job is to repair them and bring them home.
- Fun with Acronyms: While her full "name" does describe her function decently, the fact it shortens to "mule" is extra apt given she's basically a robotic pack mule.
- Gameplay Ally Immortality: It cannot be damaged in way, so feel free to chuck explosives near it or leave it to be buried beneath a horde of Glyphids, Molly will still be there to collect all your minerals. If you're really lucky, she might even end up absorb an enemy's projectile that was intended for you.
- Holler Button: While she generally stays in the general vicinity of the team, you can press a button to call her directly over to your location, so she's never out of reach.
- I Call It "Vera": Her name is Molly. Even Mission Control humors the name on occasion.
- Item Caddy: Molly can hold an infinite amount of resources unlike the Dwarves, who can only collect a limited amount of resources of each type. Depositing the resources in Molly (if she's available) is key to surviving and completing many missions.
- Required Party Member: Inverted on On-Site Refining and Point Extraction, where Molly doesn't join the team for those missions, forcing them to deposit all items into the Refiner and Mine Head, respectively. Trying to call for her with her Holler Button will have the Dwarf range from lamenting her absence to calling for her anyway and then remembering she's not actually there.
- Shout-Out: Probably one to M.U.L.E.. Also, her beeping sounds are nigh-identical to BB-8.
- Stout Strength: She's about the same height as the dwarves are, and completely indestructible. Go ahead, throw a grenade at her; throw a cluster bomb at her, drop a supply pod or the drop pod on top of her — she'll crawl out of the hole with the same happy robotic chirps as always. And in terms of carrying capacity, you can go ahead and load a literal ton of gold on top of whatever else you find, she won't be impeded by it and will march as quickly as always.
- Wall Crawl: Is able to scale walls and ceilings to reach her destination from any angle. Useful if you need her and there isn't a stable footing pathway to where you are; annoying if she hangs out on walls where you can't reach; possibly mission-ending if she takes a ceiling shortcut that the team doesn't have the maneuverability to follow.
APD-B317 "Bosco"

A small combat and mining robot that accompanies dwarves in solo missions.
- Affectionate Nickname: "Bosco" is a nickname given to the APD-B317 following the lone Dwarf. Sometimes when calling for him a grouchy Dwarf can call him "flying tin can".
- All Animals Are Dogs: Well, Robot Dogs, at least. Bosco will cheerfully bark when given orders or saluted, and growl when engaging enemies, burrow for ore using his claws like a dog digging up a bone, and his collapsible antennae act like Expressive Ears, extending and retracting depending on his mood.
- Anti-Frustration Feature: Bosco's is lovely designed to make a single-player experience bearable for greenbeards and graybeards alike. He can dig nigh unreachable minerals, carry heavy items out of pits, fight alongside you, and cover for almost any basic function your current Dwarf lacks. His revive has a unique massive fear effect to tell the glyphids to buzz off so you don't get stuck in a Cycle of Hurting upon being revived and give you a chance to escape somewhere safe.
- Artificial Stupidity: Discussed. Left to its own devices Bosco does a capable job shooting at any incoming bugs, and when ordered around generally does whatever would be most helpful in context. However, the rocket upgrade's Flavor Text points out that its AI is not ready for the responsibilities involved with explosive ordnance, hence the dwarf needing to paint a target first.
- Bosco also has an annoying habit of hovering out of your reach whenever he's carrying an item for you (be it a Mini Mule leg, a chunk of compressed gold, a Gunk Seed, an Aquarq crystal, etc.), making it hard to grab it unless he decides to eventually lower his altitude a bit. You can use the "Attention!" command to have him throw the item toward you, however.
- When it comes to cleaning up the contagion spikes, Bosco is generally good with vacuuming the foam the player sprays on the infected areas. However, Bosco will immediately drop what he is doing and attack any enemies nearby before resuming his vacuum duties. Since enemies spawn quite frequently from contagion spikes, Bosco can end up in a loop where juggles between trying to vacuum the boils and attacking any enemy that pops up. It's often better to just vacuum it up yourself.
- Auto Doc: Can revive the player two to four times during a mission.
- Badass Adorable: Despite being a Cute Machine, he will kick some serious ass when the bugs show up. You can push this even further by giving him combat-focused mods, which allow him to bring along a rocket launcher and electrified bullets.
- Bottomless Magazines: Bosco never needs to reload its guns like the Dwarves, it will just keep shooting until all targets are down.
- Companion Cube: Like Molly, the Dwarves treat it as if it were a friend.
- Cute Machines: Despite his fearsome combat abilities, Bosco's rounded design (complete with antennas that look like rabbit ears) and peppy salutes make him rather endearing. A rare case of overlapping with Killer Robot.
- Determinator: Upon failing a solo mission, the post-mission screen will show Bosco dragging the player's unconscious body back to the Rig instead of having the player doing their usual victorious walk. The implication being that, no matter how dire the circumstances of your failure were, even if you were downed at the bottom of the cave's deepest chasm and surrounded by murderous bugs, the little guy still managed to reach you, fight off the glyphid swarm all by himself and drag you all the way to an extraction point. It seems even Bosco believes in the "No Dwarf left behind!" creed.
- Do-Anything Robot: Bosco can do virtually anything that a solo player needs, and perhaps better than human players at some tasks (in particular digging minerals from the ceilings). About the only things he can't do are laying down pipes, digging through non-dirt soil, repairing or building (except for pipes), depositing minerals, and aiding your movement.
- Fast Tunneling: While not used to actually tunnel, Bosco's forearms are very good at digging. With the right upgrade, it can clear a whole vein of ore even faster than two dwarves and their picks could.
- Gameplay Ally Immortality: Immune to all damage.
- I Call It "Vera": Just like Molly. Bosco's actual designation is the "All Purpose Drone B317." The Dwarves, however, have given him the nickname of "Bosco."
- Killer Robot: Packs enough firepower to turn an entire wave of bugs to paste, and will do so repeatedly, with lethal efficiency.
- Kill It with Ice: Downplayed; the "cryo" upgrade for his rockets makes them do less direct damage, but they will freeze most enemies solid... Which is basically a death sentence for any airborne enemy, because being frozen will make them fall to the ground and shatter no matter how much health they have left. This basically turns Mactera waves into a complete cakewalk, especially with the "explosion radius" perk. Being frozen will also turn Glyphid Menaces into sitting ducks, allowing the player to kill them quickly whithout having to worry about their continuous acid spits and ability to burrow into the ground to evade damage.
- More Dakka: Equipped with two SMG-like weapons for killing bugs.
- Purposely Overpowered: Bosco can do several tasks very efficiently, such as producing light, mining minerals or objective items like Aquarqs or Alien Eggs, shoot bugs for respectable amounts of damage, and revive the player if they go down, all while having the excellent mobility from flight. This is justified, however, as Bosco can only be present in a solo mission, and without extra Dwarves the player cannot be efficiently revived any other way and it becomes much harder to mine buried objective items or minerals in hard-to-reach areas.
- Roar Before Beating: Bosco will often let out a doglike robotic growl whenever he's about to open fire on an enemy. However, unlike most examples of this trope, the sound he makes combined with his design is more adorable than intimidating.
- Robot Buddy: A firm, dependable, and powerful ally in a dark place. Bosco is designed to make sure solo Dwarf miners stay safe and alive, and helps them dig out dirt, minerals, and chunks of valuable ore. It can somewhat cover for the weaknesses of each class, but not to the same extent that a human partner can.
- Skill Gate Characters: On lower hazard levels Bosco can deal reliably with enemies and give a good helping hand even during swarms, but never rely on him to kill a lot of glyphids in higher hazard levels as enemies with higher health and speed will be more than enough to endure Bosco's regular attacks.
- Stuff Blowing Up: If you're playing solo in a public game and another player joins, Bosco will spontaneously explode when they enter the mission. He can also be equipped with a Rocket Launcher, which allows him to exploit this trope himself.
- Support Party Member: Some of his more advanced upgrades can have him firing slowing, electrecuting, gunfire at the enemies and a cryo rocket as well.
- Took a Level in Badass: Update 20 (appropriately named "Bigger, Better, Bosco") made Bosco upgradable. Not only can his existing functions be improved such as a stronger gun or faster digging and mining, but he now comes equipped with remote-launched rockets.
- Video-Game Lives: Bosco has a number on his back (and on the HUD) that displays how many more revives he can do. Whenever a solo player falls, Bosco will come over to revive them and the number goes down by one. If the player goes down while it's at 0, the mission ends in failure.
- Utility Party Member: While his combat capabilities are nothing to sneeze at Bosco truly shines in how darned helpful he is when mining, carrying stuff and lighting up the caves for you.
Drilldozer "Doretta/Dotty"

- Anti-Frustration Feature: While Doretta is a rather slow escortee, she does sport a sizeable amount of health, has Multiple Life Bars, and unlike many other games' Escort Missions, the players are also capable of repairing her rather quickly.
- Artificial Stupidity: Doretta is not especially avoidant of terrain-based threats, and it sometimes gets very confused about where it's going. While not usually a problem, it's perfectly likely it'll try and run over exploding plants or an active lava spout in the Magma Core, which is extremely detrimental to the mission. It also makes no effort to avoid enemies or take cover from ranged threats (especially bad if Doretta's driving at a Bulk Detonator), though this is forgivable for what is clearly not intended as a military vehicle.
- Companion Cube: Another Deep Rock Galactic machine that's been given a name by the Dwarves who work with it. Taken a step farther by how the players can bother to lug back her head to the drop pod for extraction, for no purpose at all other than the Dwarves clearly deciding to extend their "Leave no dwarf behind!" policy to it as well.
- Cute Machines: More badass-looking than the usual, but the Dwarves adore it and eagerly pet the turret-head at the top.
- Drill Tank: One with full focus on digging, and no real offensive capability other than drilling and running over things. It will completely annihilate anything that gets in front of it, however, meaning you don't have to worry about enemies that spawn or burrow out of the rock directly in front of it while it is moving.
- Earn Your Happy Ending: Rescuing Doretta means lugging her disembodied head all the way to the Drop Pod. While a typical extraction swarm is ongoing. And the pod can drop in as early as the second room of the mission. And Doretta's head can't be deposited into the MULE, in addition to being a heavy object that slows the carrier and locks them out of shooting their guns. Solo dwarves can at least assign Bosco to carry her to leave their hands free to shoot. Getting Doretta back to the pod saves her from dying alone in the mines, and is recognized in the victory screen with her head placed on one side of it.
- Escort Mission: She needs to make it through the mission in more or less one piece, and will be repeatedly assaulted by insects, the terrain, and the Heartstone itself. Fortunately for you, it's not necessary to take it back up. If you choose to rescue Doretta's head after getting the Heartstone, you now have an escort mission to get its head back to the drop pod.
- Fast Tunneling: The thing carves a highway-sized tunnel through the caverns in a matter of minutes, even those with hardy stone that takes three pick strikes to chip.
- Friendly Fireproof: Averted, just like the Dwarves. However, the Drilldozer does have a fair amount of damage reduction and will only take about 10% damage from hits that would obliterate most anything else, so don't feel too sorry if you need to bomb her with a Satchel Charge; she'll handle it much better than your teammates would.
- I Call It "Vera": Once again, the Dwarves grow fond enough of their equipment to name it, even the more disposable pieces like this. Maybe even fonder, since they say they want a Doretta of their own.
- Mercy Invincibility: Doretta has a small period of invincibility whenever one of its segments is repaired to full, or is destroyed. This way, a Bulk Detonator won't just instantly cost you the mission by blowing all 3 segments up at once.
- Multiple Life Bars: The dozer has three, in the form of two pods on the left and right followed by the main body. The bugs will always attack the pods left-to-right before attacking the body, and if that is then destroyed, the mission instantly fails. Notably, all three life bars cannot be taken out in a single strong attack — a Bulk Detonator's explosion will only remove one.
- One-Hit Kill: See that giant drill on the front of it? NOTHING survives contact with it. Oppressors, Korloks, Bet-C, they all get turned into mush on contact. The only thing strong enough to withstand it for any amount of time is the Ommoran Heartstone's outer shell. Keep in mind that this also includes the Dwarves as well, so stay out of its way.
- In fact, Doretta can even take out a Bulk Detonator if one happens to get in its way. Though the resulting explosion will take off an entire armor segment in the process, meaning you should still try and keep the big beast away from Doretta so it doesn't blow up near the dozer.
- Video Game Caring Potential: After Update 33, the Drilldozer's head will blow off of its chassis after getting a Heartstone out of its shell. Players can elect to carry the still-active and clearly afraid head of Doretta back to the drop pod, even though it will slow them to a crawl and bring no tangible reward (since Management doesn't care about disposable assets), purely because they and the Dwarves don't want to leave it behind to eventually die in the dark. Managing to do this will cause Doretta's head to appear on the victory screen and on a hand truck in the space rig after the mission, showing that you succeeded at bringing it back home.
- Video Game Cruelty Potential: When Doretta was originally given the feature of being savable, she would scream whenever thrown as if she was still in one piece and being damaged, implying a fear of being thrown. Players with nothing better to do could elect to just repeatedly throwing a screaming Doretta around for no particular reason.

- Action Bomb: The Drone Replicator module creates these. Basically dynamite sticks with propellers attached, they home in on nearby players and detonate for relatively high damage.
- A.I. Is a Crapshoot: Unlike BET-C, there aren't any Xynarch Charge-Suckers messing with how the OMEN tower works. When active, it just kills anything indiscriminately. In addition, while they're capable of being remotely deactivated, they're not capable of being remotely decommissioned- that's where you come in. Oh, and even with physical access the only way to permanently shut one off involves turning it on and then intentionally misusing the maintainence mode to make it temporarily vulnerable to firearms so that you can blow it up, all while you're dodging weapons fire and explosive drones.
- Anti-Frustration Features: Zigzagged. The bottom module will always be the Radial Pulse Gun and its maintenance port will always be opposite of the Core Infuser, so you don't have to scramble and search for the right port to shut down. Unfortunately, this also means every variant will always have its deadliest weapon.
- Attack Its Weak Point: Like most other Deep Rock Galactic machines, its exterior is completely invulnerable. The only way to damage it is by shooting the green cooling tanks attached to it, which in turn are only exposed when a dwarf stands on one of three maintenance pads surrounding the tower.
- Beam Spam: Its bottom module is always the Radial Pulse-Gun, which shoots lots of plasma waves in every direction. The plasma is very slow, however, so the dwarves must maneuver around the plasma while simultaneously avoiding the other two modules.
- Drone Deployer: The Drone Replicator is one of its possible modules, which deploys homing, explosive drones every 5 seconds that seek out a Dwarf and attempt to blow him up.
- Gone Horribly Right: Deep Rock R&D wanted to help the employees on Pest Control duty, devising the OMEN project to kill the local wildlife effectively and efficiently. Unfortunately, they made the system so hyper-focused on killing any detected organic life that it will target employees as well; their thoroughness also made OMEN Exterminators impossible to remotely shut down and difficult to destroy.
- Meaningful Name: Omen means "an event regarded as a portent of good or evil". Beat it and you'll get a nice bonus in EXP and the chance of turning a Blank Matrix Core into a Weapon/Cosmetic Overclock. However, it's true to its "Exterminator" name as an unprepared group of Dwarves can very easily suffer a Total Party Kill from it, especially in higher hazard levels.
- More Dakka: The Heavy Burster module is equipped with twin machine guns. Get caught in the spotlight, and it'll blast you to pieces with high-caliber bullets.
- Multi-Ranged Master: It has weapons for every range. Close, medium and far. The only saving grace is that it won't actively target a Dwarf that runs away from it.
- Names to Run Away from Really Fast: With a name like that you shouldn't expect it to shoot beer and sandwiches.
- No-Sell: It posseses a hefty 70% resistance to explosive, fire and frost damage. Most Drillers tend to struggle against this thing because of that.
- Omnicidal Maniac: Originally, it was designed to help the dwarven miners by killing the local wildlife. Apparently, R&D was so tunnel visioned on maxmimizing its firepower that they either forgot to debug its IFF, or never added one in the first place, so now it attempts to kill the dwarves as well.
- Painfully Slow Projectile: The Radial Pulse Gun bottom module fires out Spread Shots of wide plasma projectiles, not unlike Engineer's Breach Cutter, that are slow enough for the dwarves to sidestep or jump over. However, they're also extremely painful if they make contact with a Dwarf.
- Ray Gun: The Twin Slicer module fires two beams at varying angles as it rotates.
- Spread Shot: The Radial Pulse Gun fires spreads in several directions.
- Stationary Boss: It doesn't move when activated, but Dwarves are forced to stand close enough to its modular pods moving as little as possible to make it vulnerable.
- Superboss: It can randomly appear in caves, and you have to go out of your way to activate it. Between its wide variety of attacks, its weakpoints which are only exposed by standing on small platforms, and how you have a limited amount of time to defeat it, it's one of if not the most difficult boss to take down. Successfully doing so rewards you with an Overclock and/or bonus experience at the end of the mission.
- Time-Limit Boss: As with the other Machine Events, you are only given a couple minutes to destroy it.

The bartender at the Abyss Bar about the Space Rig. He seems to be the same model of robot as Bosco, but with a different paint job and with drink dispensers for arms.
- The Bartender: And he's also the tap itself! The kegs of the bar are all plugged to him, and he dispenses drinks via his arms.
- Cute Machines: Occupies an unusual crossover between this trope and Sharp-Dressed Man, as seen below. He shares this trait with his brother-in-servos, Bosco.
- Dashingly Dapper Derby: Wears a dapper little bowler cap.
- Everyone Calls Him "Barkeep": Downplayed. Most of the time, the Dwarves refer to him as "Bartender," but there are a few instances where they will address him by name while ordering or tipping him; until Update 27, however, he was only named in the patch notes.
- Idle Animation: If you're near him Lloyd will do a spin (somehow never tangling his beer hoses), fix his bowtie or tip his hat to greet you.
- Loved by All: All dwarves unanimously and unironically like Lloyd having nothing bad to say to him when even Bosco gets called "flying tin can" sometimes. Being the one responsible for their beloved beer might help.
- Palette Swap: He's basically Bosco's default frame but colored red-white and a bowler cap placed on him.
- Sharp-Dressed Man: Lloyd certainly knows how to dress, considering he only has what could barely be called a torso.
- Shout-Out: To The Shining, which has a similarly dressed bartender named Lloyd.
- Video Game Caring Potential: As of the three-year anniversary update, particularly generous dwarves can tip Lloyd five credits (or more, depending on how many times you use the tip jar) for his services via a small green robot placed on the side of the bar. It's not clear if he actually can use money, but his reaction to getting tipped indicates he at least appreciates the gesture.

A tamed Glyphid Grunt that will follow you around and help you in combat, if you unlock the "Beast Master" perk.
- Collective Identity: "Steeve" is just the name Dwarves give to their Grunt everytime they tame one. By this point, there likely have been thousands if not millions of tamed Grunts named "Steeve" since the perk was introduced but he's nonetheless treated as a character in his own right.
- Creepy Cute: A Glyphid Grunt that purrs like a lootbug and happily shakes its abdomen whenever you pet it.
- Dead Guy Junior: Every Grunt that gets tamed will be named Steeve, that includes the following Grunt a player tames if their previous Steeve dies.
- Defector from Decadence: Kind of. He's only an ally because you (or a teammate) tamed him but he's the closest you'll get to a friendly Glyphid.
- Elite Mook: Becomes one after being tamed; depending on perk rank, Steeve can deal up to 300% more damage than other Grunts. And if your Steeve happens to be a Grunt Slasher or a Grunt Guard, it pretty much makes him an Elite Elite Mook. If the dig you're on happens to have the Regenerating Bugs hazard, Steeve gets this, too, which means that just about the only thing that can kill him is a mandible-to-mandible fight with a Bulk Detonator.
- Fluffy Tamer: He's the fluffy, you're the tamer. If you have the required perk, that is.
- Forgotten Fallen Friend: Played for laughs. The Dwarves express grief when Steeve dies - as an example: "Steeve died! I will never get over this!" Five minutes later.. "I think I'm gonna call you.. Steeve!"
- Friendly Fireproof: Averted. Which is unfortunate, because Steeve is very likely to get shot at by players mistaking him for an enemy before they realize he's their Glyphid Grunt. That being said, he does take less damage from your weapons than the average Grunt.
- Mook–Face Turn: A Glyphid Grunt that got tamed over to the Dwarves side to help them.
- My Nayme Is: It's "Steeve", not "Steve".
- No One Gets Left Behind: Averted; even if he follows you all the way back to the drop pod, DRG regulations prevent you from actually bringing a Glyphid back on the Rig, much to the Dwarves' chagrin.
- One Steeve Limit: Averted. Every single tamed Grunt is named "Steeve", which means you can have up to 4 Steeves following you around at the same time if every Dwarf on your team has the required perk. And if your Steeve gets killed, you can always tame a new one, that will also be named "Steeve"!
- Redemption Promotion: With Beast Master perk levels 2/3/4, Steeve will get 100%/200%/300% extra attack damage compared to the variant they spawned as. At all levels, Steeve becomes massively resistant to friendly fire, becomes resistant to freezing and thaws twice as quickly, and isn't affected by Sticky Flames or Corrosive Sludge unlike enemy Grunts.
- Stone Wall: If they're a tamed Grunt Guard, they get the heavy leg armor and higher HP to go with it, allowing them to make a good distraction. If the mission has the "Regenerative Bugs" hazard, it will also affect tamed bugs.
- Suicidal Overconfidence: He'll charge Exploders no matter how much it hurts, and gleefully go up to a Bulk Detonator and start chewing on it before getting blown to bits. Steeve just doesn't have self-preservation, not that the other Glyphids have any.
- Team Pet: Being a tamed Glyphid, Steeve is this as well as an example of Pet Monstrosity and Monster Ally.
- They Killed Kenny Again: Unlike Bosco (who's invulnerable) and the Dwarves (who will be fine as long as there's someone to get them back on their feet), Steeve will die if his health drops to zero. There is no way to heal him when he takes damage, barring the "Regenerative Bugs" mission modifier. This, combined with his species' Suicidal Overconfidence, means that you'll rarely finish a mission with the first Steeve you tamed. Unlike the Trope Namer, though, every single tamed Grunt is a different one rather than the same Grunt being brought back to life.
- Token Heroic Glyphid: So far, Steeve is the only Glyphid who won't try to kill you (after you tame him, that is) and actively fight against his brethren to protect you.
- Ugly Cute: The Dwarves certainly think so, judging from some of their voice lines when they pet him.Dwarf: Huh, for a bug, I guess you're kinda cute!
- You Are a Credit to Your Race: Even if he was chewing at you before you or a teammate tamed him (which is very likely), the Dwarves immediately get a soft spot for Steeve, eagerly petting him like they do loot bugs or Doretta, and sound genuinely upset should he die in battle.Dwarf: He was a good bug!
Hack-C Bot Unit "Hacksy"

An APD-model robot designed to hack into Rival Corporation installations from within a personal drop pod.
- Cute Machines: Comes with the territory of being a DRG drone not unlike Bosco, though this one has a blinking light on his head, a little hat on top, and a slightly different frame.
- Developer's Foresight: You can actually pet and salute the little guy when he's deployed. The former makes him lose balance and mash his face on the keys for a second, while the latter makes him halfheartedly return the salute before resuming work.
- Eating Machine: He apparently packs snacks inside his pod, as you can see cans of energy drinks and takeaway noodles fall off when it unfolds. It's especially weird considering that not only is Hacksy a robot, he doesn't even have a physical mouth.
- Everything's Better with Rainbows: The cooling fans on his back glow in rainbow colors, not unlike a typical gaming PC's.
- Gameplay Ally Immortality: He never takes any visible damage from being attacked and will never actually die, but he will hide away if he's been attacked too often, only returning after the Dwarves give the all-clear.
- Hacker Cave: Ignoring the obvious pun that he's hacking in a literal cave, Hacksy's pod is basically a hacking workstation on a rocket, which he and his screens can fold into when necessary (dropping in, launching out, and when under attack). He's even got some snacks inside, if the few pieces of trash scattered on the ground around his pod are any indication.
- Hollywood Hacking: His workstation is a set of glowing, flashing screens displaying nonsense bars and symbols, while he furiously types away on his keyboard.
- I Call It "Vera": In true Dwarven tradition, Hack-C gets the nickname "Hacksy".
- Lovable Coward: If he's attacked too often, he'll retreat into his pod and wait for the Dwarves to clear the area and reactivate him. It's hard to hold it against him though, since he's not built for combat and is incredibly endearing.
- Palette Swap: Same as Lloyd before him, he's another take on Bosco's basic model. Only this time, he's got RGB fans and a DRG hat on, and is hardwired to his hacking pod.
- Protection Mission: Bugs and Rival robots will be attracted to Hacksy's position while he hacks, so it's up to the Dwarves to defend him until he's finished his job. Like with most equipment deployed by DRG, he'll never be permanently destroyed, he'll just be temporarily disabled and need a restart once the enemies are cleared.
- Rapid-Fire Typing: It's implied that the whole reason you get mobbed by bugs while Hacksy works is because of the noise generated by his keyboard-smashing. There's plenty of precedent for loud noises attracting the locals, but it's usually reserved for the heavy machinery used in your primary objectives.
- Tinman Typist: Despite the hacking pod being a self-contained unit into which he is firmly wired, Hacksy still has a keyboard to tap frantically away at while he's working his magic.
- Visual Pun: He's a hacker working for Deep Rock Galactic, and he wears a white helmet on the job. He's a white hat hacker.
- You Have Outlived Your Usefulness: Actually Averted, compared to the treatment every other non-Molly robot gets from management. Not only does Mission Control always retrieve Hacksy, they don’t even leave it to the Dwarves, by giving him his own personal drop pod to escape in. This is just another example of their monomania when it comes to besting the Rivals.
The Glyphids
- Armor Is Useless: Grunts, Slashers, Acid Spitters and Web Spitters have light armor covering their bodies which reduces incoming projectiles' damage by 20%. However, their health pools are so small that for Grunts and Slashers, they'll at worst two extra bullets to put down, while the armor may as well not be there for both spitters.
- Artificial Brilliance: While the Glyphids as a whole will without hesitation throw themselves into the meat grinder that is the dwarves' arsenal, they do display subtle but effective tactics.
- When mobbing a single dwarf, some Glyphids will peel off to the sides to catch the dwarf in a pincer maneuver.
- They are capable of reacting to changes in terrain, meaning if a Driller shapes the terrain too much with his drills or satchel charges, the Glyphids can and will use new angles of attack created by the Driller. Supply Pods can also create new attack avenues for the Glyphids which they will exploit without an Engineer to patch up the hole with a platform.
- When hit by a Gunner's sticky grenade, the Glyphid will panic and try to run away from its allies to minimize the explosive's kill potential (though they do sometimes run right into the middle of their allies).
- Whenever possible, Glyphids will attempt to avoid ground hazards, such as fire left behind form the Driller's flamethrower or Gunner's incindeary grenade.
- Artistic License – Biology: All in all, Ghostship seems far more concerned with how a given morph will perform as a videogame enemy than what role it's meant to play in the colony's survival (which to be fair is a perfectly valid approach to game design).
- It's stated that the Praetorian family of Glyphids have exposed backsides for heat dispersal purposes. On its own this would be a great justification... except that the largest such morph, the Dreadnaught, has lesser (compared to that on the rest of its body) armor there that regrows rapidly enough to function as a regenerating shield. As the largest morph, the dreadnaught would have the biggest issue with heat dispersal of all, so if it can get away with putting armor there, then the rest should be able to as well.
- Glyphids seem to have multiple reproductive morphs. First the Dreadnought is able to vomit up eggs that hatch on impact, the offspring within being Swarmers. But there's also whatever's laying the "glyphid egg" terrain hazard, which unlike the Dreadnought's eggs apparently need to gestate, since their swarmers don't hatch until the dwarves shoot them. Then there’s the Brood Nexus, an Ambiguously Related species which gives live birth to Spawns.
- Attack Its Weak Point: Most Glyphids take critical damage in their mouths, but the Praetorian, Oppressor, and Dreadnought have large, glowing abdomens, while the Warden, Menace, and Detonator have glowing growths on their back to attack instead.
- Evil Smells Bad: Praetorians and Sepctic Spreaders often disgusts Dwarves with their smell.
- Eyeless Face: To be expected given that they live their entire lives in underground caves, which makes it weird that things like the mactera and loot bugs have eyes anyway.
- Fluffy the Terrible: With the Beastmaster perk, the dwarves can tame Grunts, Slashers and Guards. They're even more vicious than a regular Glyphid to their own kind, eagerly scattering their limbs around. And the dwarves always name them Steeve and eagerly give them pets.
- Horde of Alien Locusts: Fits the trope down to a tee.
- Insectoid Aliens: They are seemingly ant-like in how their hive structure works, and have chitinous bodies that protect them for small arms fire. They are officially described as "arachnids".
- Logical Weakness: The Glyphids' primary strength comes from their number, swarming from all directions, flanking and surrounding the team. Tactically, chokepoints can negate an enemy's numerical advantage, which is why a Driller can be vital in dealing with swarms, especially at higher difficulties.
- Monster Mouth: Type 3 Monstrous Mandibles. Most of those that attack you in melee range also do so by extending their jaws for a bite, similar to how a Goblin Shark feeds (though it might actually be the neck that's extending; since thy don't have eyes, it's kinda hard to tell where the head is supposed to end).
- Roar Before Beating: The Glyphids will unleash a collective roar whenever a swarm of them unburrows. When they quiet down, they will charge as one in an attempt to tear the dwarves apart.
- Shot in the Ass: The likely fate of many a bug, given the location of most of the more dangerous variants' weak points. Hell, Oppressors and Dreadnoughts can ONLY be wounded via a storm of lead up the rear end (or explosives).
- The Swarm: They operate in mass swarms, seeking to overwhelm Deep Rock prospector teams with sheer numbers.
- Sympathy for the Devil: During season 3, the Dwarves will occasionally express pity towards Gylphids infected by Rockpox, saying that, as much of a deadly threat and general pain in the ass they are to their operations, even they don’t deserve the endless agony the infection gives them.
- Unfriendly Fire: The Glyphids don't seem to care at all if they end up killing each other.
- Glyphid Exploders can cause more harm to their allies than the dwarves, be it being set off early by a dwarf's gunfire or manually detonating in a group of their own or other Glyphids.
- A Glyphid Praetorian's acid vomit or an Oppressor's rock spikes attack can wipe out any Glyphid that stands inside of it. This is especially noticeable whenever they attack downed dwarves.
- Acid and Web spitters' projectiles can hit their allies if they miss the dwarves or get body blocked by another Glyphid.
- Underground Monkey: Variants of existing Glyphids are being gradually added, such as the Radioactive and Ice variants found in their respective biomes.
- Wall Crawl: They can walk on walls as easy as they can walk along the the ground.
- Xenomorph Xerox: They share a few traits with the Xenomorphs, such as an Eyeless Face, a dark carapace, a hive structure, the occasional Zerg Rush tactics and walking on walls or ceilings. One Glyphid variant even spits acid.
- Zerg Rush: They're fond of this tactic and aren't too dissimilar from the Trope Namer in that regard. With their ability to Wall Crawl, terrain that isn't just a single pathway to the dwarves standing on it will quickly get filled with them as they attempt to attack them from as many directions as they can.

The most basic glyphid lifeform. Most commonly seen en masse during a Swarm.
- Death of a Thousand Cuts: Individually weak and pathetic (they can even be destroyed by a single pickaxe strike), but their primary threat is their sheer numbers and speed. Player shields stop recharging if they're damaged in any way, and Swarmer groups exist to surround a player and stop them from recovering. Once through the shields, they'll gradually take a player's health to zero.
- The Goomba: It's easy to kill and does very little damage.
- The Swarm: Occasionally, Mission Control will announce that a swarm of Swarmers is incoming. Prepare to fight at least two hundred of the buggers.
- Underground Monkey: The Radioactive Exclusion Zone will sometimes produce Swarmers that glow green in the dark.
- Zerg Rush: When the Glyphids do this, the Swarmers make up most of the numbers.

Tougher and more powerful than the Swarmers, but only just. The second most numerous after the Swarmers.
- Mooks: Pretty much one step above the Swarmers, the resident Goomba.
- Not-So-Harmless Villain: On lower hazards Grunts are to treated as pests barely above Swarmers. On the highest hazard levels every Dwarf worth their salt will tell others to treat even a single Grunt with caution as if they could kill you, because they can.
- Underground Monkey: Grunts in the Glacial Strata are grey and dark-blue and will resist cryo damage (but are vulnerable to fire). Radioactive Exclusion Zone grunts are a dark greyish-green and will resist half of all radiation damage instead.
- Zerg Rush: Swarmers may be the kings of zerg rushing, but basic Grunts can still form large mobs to overwhelm the dwarves.
Slower but tougher Glyphid Grunts.
- Achilles' Heel: Armor Piercing weapons mods will peel the armor from a Grunt Guard like dead tree bark. A Power Attack from a pickaxe is a good alternative.
- Decomposite Character: Prior to updated 23, the Veteran Glyphid was a tougher and more damaging version of the regular Glyphid Grunt, but it was given the axe. The Grunt Guard has inherited the Veteran Grunt's higher health, but the heavy front leg armor is new to it.
- Elite Mook: On lower hazards these things are a rare sight, on higher hazards they may attack in non-negligible numbers and their heightened resistence and health can bring a lot of problems if the Dwarves aren't careful.
- Heavily Armored Mook: Their forelegs have a strong armor that must be broken before you can deal damage to the Grunt Guard.
- Mighty Glacier: Compared to normal Grunts. They have triple the health of normal Grunts, and when taking damage will lead with their invulnerable armored foreclaws to deflect bullets, but move slower.
- Shield-Bearing Mook: This is essentially their role; they are much more resilient than standard Grunts, and their forelegs are bulletproof, allowing them to soak up suppressive fire for the squishier bugs behind them. Breaking their armor with explosive weaponry is the best way to make them vulnerable to bullets.
A Grunt variant with sharp claws that do extra damage.
- Blade Below the Shoulder: It has much sharper claws to gore Dwarves with.
- Decomposite Character: Prior to updated 23, the Veteran Glyphid was a tougher and more damaging version of the regular Glyphid Grunt, but it was given the axe. The Grunt Slasher has inherited the Veteran Grunt's higher damage, but the slow/stun is new to it.
- Elite Mook: Faster movement, more health, and triple damage compared to the regular Grunts. If they hit you, they will slow you down for a moment, which can easily lead to being overwhelmed by a swarm.
- Status Effect: They cause slow on strike on top of dealing more damage than a regular Grunt.


A Glyphid subtype that's easy to spot by the glowing orange pustules all over their bodies. They're easier to take down than a standard Glyphid, but killing one causes it to explode, so you'd better keep your distance or get ready to run away. If they reach you they'll just explode themselves.
- Ambiguous Situation: R&D is unsure whether the Exploder's traits are a natural part of the species or if it's a victim of a pathogen.
- Attack Its Weak Point: If you kill them with a headshot they don't explode. This is easier said than done however with how bulbous and oddly shaped their bodies are, not to mention their tendency to crab scuttle towards you sideways.
- Action Bomb: Their sole purpose is to rush forward, explode, and hope to catch an unlucky Dwarf in their blast radius. They also explode under most circumstances upon death.
- Boom, Headshot!: One way to avoid them exploding is to destroy their heads, but that's easier said than done, considering how fast they move and how they're likely to already be gearing up to blow by the time you line up your shot.
- Fragile Speedster: Fairly fast, but also fairly weak, with their main strength being running up to a Dwarf and blasting him to bits.
- From Nobody to Nightmare: The Miner's Manual theorizes that an exploder that manages to survive long enough will eventually turn into a Bulk Detonator.
- Glass Cannon: Exploders have very low health — at maximum hazard level they have less than half the HP of a Grunt on the lowest hazard level. Should an unlucky Dwarf get caught in the explosion it will remove a huge chunk of health especially on higher Hazard Levels.
- Hell Is That Noise: Or rather, the lack of sound. If you notice the music suddenly getting lower, you better check your surroundings.
- Kill It with Ice: They will not explode if they're killed when frozen.
- Magikarp Power: As mentioned above, these things can turn into one of the most dangerous threats a mining squad can face if they manage to not blow themselves up for long enough. Thankfully, this aspect of Exploders is only brought up in the Miner's Manual, meaning you don't have to worry about randomly-spawned Exploders actually turning into Bulk Detonators during a mission.
- Shout-Out: They're usually quiet until they get next to you and then hisss .. BOOM!
- Sound-Coded for Your Convenience: The ambient music gets quieter when one is sneaking up on you, and if that subtle alert doesn't warn you of an imminent explosion, the suspicious hissing/gurgling will.
- Stealthy Mook: It's fairly easy for one to get the drop on you since these things are rather silent and move pretty fast.
- Suicide Attack: Unless killed via specific methods, these guys will explode one way or another.
- Taking You with Me: Their explosive attack is triggered by their death as well, unless they're shattered while frozen, melted with acid, popped by microwave radiation, or headshot.
- Underground Monkey: The Radioactive Exclusion Zone has Radioactive Exploders that leaves a small Damage Over Time area after they detonate. While the explosion deals less damage upfront compared to regular Exploders, its radiation can deal more damage overall.


A massive, volatile Glyphid that can stomp you flat with an explosive slam attack and goes up in a massive cluster bomb explosion when killed. The Crassus Detonator is a variant whose death explosion turns everything in the radius into solid gold.
- Achilles' Heel: Their speed, or lack thereof. Make no mistake, Bulks are almost always the biggest problem in the room whenever they show up, but any sufficiently coordinated team that isn't dealing with a swarm at the same time can usually run rings around them long enough to stop them from blasting anyone into the next century before administering the final bullet (and running the hell away from the explosive aftermath in the process).
- Action Bomb: Boss-tier. Its individual attacks are large explosions that will severely damage players but don't actually harm itself, and upon death, it deletes the surrounding area in the single biggest explosion the game has to offer, with secondary explosives randomly landing around the initial detonation.
- Anti-Frustration Feature:
- The Bulk Detonator is mercifully one of the few enemies that will never directly target Doretta, unlike most other things in an Escort Duty mission. If it did target Doretta, rather than a player standing on her, then its high health and high-damage attack would cause the mission to fail the moment it starts going after her. Regardless, dwarves need to take care in where they kill a Bulk Detonator since its death explosion will severely damage Doretta if she in the blast radius.
- The Haunted Cave mutator (and by extension the Unknown Horror) will never show up in Salvage Operation or Escort Duty missions, a huge relief due to needing to stay in a small radius for a period of time in the former and having to protect a slow-moving unit in the latter.
- If a Bulk Detonator spawns at the landing zone while the party is being dropped there at the mission's start, it won't go after them for a few seconds so that they can get their bearings when they leave the drop pod.
- Attack Its Weak Point: Its pustules take extra damage, though each will eventually pop from enough damage. Although this is the best way to injure the Detonator, it's seldom enough to actually kill it.
- Bad Vibrations: Sometimes, players' first cue that a Bulk Detonator has spawned into the level is not seeing it, but instead hearing a low, persistent "-thump" of it blasting through stone and rock in order to tunnel towards the party. A good practice to employ is checking the map to see exactly *where* said tunnel is being formed in order to track the Detonator's progression.
- Body Horror: Just look at it. It's a horrible overgrown tumorous mass of a Glpyhid, likely caused by a Exploder managing to not kill itself for long enough. Especially apparent with its face, which looks extremely warped, being more an ugly mishmash of teeth and fangs growing in haphazard ways.
- Boss in Mook Clothing: They have the same amount of health as the Dreadnought but don't get a boss healthbar. Also unlike the Dreadnought, there's technically no upper limit on how many of them can exist at once. If your luck is particularly cruel you might see as many as three at once bearing down on you while the rest of the swarm charges at you. If things weren't bad enough, the Elite Threat mutation allows Elite Bulk Detonators to spawn, with even more health and damage plus a bigger death explosion to boot. It's up to you whether you want to set off spectacular Disaster Dominoes by letting the deathblast from one kill the others, but if you do, better take cover.
- Cutting the Knot: Try to hide from them in a tunnel that they can't fit in? Nice try, they'll simply do their melee explosion to create a crater, slowly but surely digging out a tunnel towards you.
- Cycle of Hurting: If you're pinned down underneath it, further attacks will make it tunnel the pair of you straight down into the earth. A few attacks like this and just killing the thing might not be enough (never mind being trapped at ground zero is a guaranteed KO) — getting out of the new mineshaft can be an ordeal.
- Damage-Sponge Boss: Has a lot of health like a Dreadnought, but doesn't have any armor while also having a few weakpoints that can be shot for extra damage.
- The Dreaded: Both for the Dwarves, and for the Players. The Bulk Detonator is just about the only thing on Hoxxes that gets the Dwarves to express actual fear when tagging it; even tagging Dreadnoughts has them shouting strategic advice to one another rather than panicking. This is completely understandable, as it is a massive threat that can wipe out the whole team instantly. Its description in the Miner's Manual shows that Deep Rock Galactic considers it one of the biggest threats on the planet.Dwarf: Aw, shite! Detonator! REPEAT, DETONATOR!
- Evil Laugh: The weird, throaty noises it makes are disturbingly reminiscent of dark chuckling, making them even more intimidating.
- Evolutionary Levels: The Miner's Manual speculates that the Bulk Detonator is the result of an Exploder surviving long enough to transform into a much more powerful and monstrous form.
- From Nobody to Nightmare: They started out as nothing but regular Exploders. Now they're one of the most dreaded sights on Hoxxes for a DRG mining team.
- Having a Blast: It's an Exploder times one hundred, and its explosive abilities are magnified to a similar degree.
- Hell Is That Noise: A telltale sign that a Bulk Detonator is nearby is its roars, which sound like a hellish and somewhat high pitched laughter.
- Instakill Mook: On higher difficulty levels, its Hellfire exploding stomp will one-shot any Dwarf in its radius. Then, there's its death explosion, which can and will One-Hit Kill any Dwarf caught within it, even on the lowest Hazard Level.
- "Instant Death" Radius: Allow one to get too close, and they will simply slam the ground and crush you in the resulting quake. Luckily, it also projects a sphere of glowing orange ashes the exact size of this attack so visually wary players have a chance at escape before it drops the hammer. When killed, it explodes in an even bigger radius which will One-Hit Kill any dwarf caught within, and also throws out a cluster of smaller bomblets for good measure.
- Invincible Boogeymen: Missions with the Haunted Caves mutator have the "Unknown Horror", a ghost version of the Bulk Detonator that chases the team slowly. It is completely invulnerable to damage, and is only slightly less damaging than the regular ones, meaning that the team (or the one who draws its aggro) has to be constantly on the run from it.
- The Juggernaut:
- Bulk Detonators cannot be stopped. At best, they can be slowed down, but there is no way to stop or even give a Bulk Detonator pause until it dies. Concentrated fire won't make it flinch even if it pops a cyst, it'll shrug off any and all stun effects, it'll easily climb any obstacle, and if you try to by sealing it away or hiding in a tunnel too narrow for it, it'll will just fire-stomp a tunnel to get to you. The only hard stop you can give them is crashing Doretta, another utterly unstoppable entity, into them by luring it into Doretta's path, which is borderline suicidal since its death explosion is a One-Hit Kill on an entire segment of the Drilldozer.
- On missions with the Haunted Caves mutator, you'll find yourself being chased by an Unknown Horror, a light blue, ghostly Bulk Detonator that is completely immune to damage and is unkillable, which will constantly be chasing and creeping up on you during missions. Shooting it will however divert its attention, so if you're playing with a team it becomes a game of juggling the Horror's aggro to keep the others safe while they do a mission. Thankfully on as high as Haz 4 the Horror's also weaker than the average Bulk Detonator, and getting caught in its stomp will only mostly kill you instead of an instant-kill.
- King Mook: They're essentially boss variants of the standard Exploders.
- Logical Weakness: Given that it's a burning monstrosity that goes up in a massive, fiery explosion, it's naturally vulnerable to being frozen which will keep said fiery explosion from happening. However since it still has the compressed gas for the explosion and it would make freezing too powerful if it didn't do anything when shattered, it instead pops with an absurd decompression that can launch dwarves clear to the other side of the map until they hit a wall.
- Mighty Glacier: They have a whopping four thousand HP and hit stupidly hard, but are thankfully very slow.
- Money Spider: Very rarely, you may find yourself faced off with a Crassus Detonator, a Bulk Detonator that's coated in gold. When killed, the Crassus' death crater will be coated in a layer of gold ore, netting you anywhere between 500-1000 gold ore total depending on if you let it make a crater in the open or lure it into a small tunnel so it coats it in a complete sphere.
- No-Sell: They're immune to any kind of stun, highly resistant to explosives of any kind, and can't be trapped in any way. The Unknown Horror variant takes this up a notch, being both completely invulnerable to damage and able to phase through obstacles.
- Notice This: If for some reason you haven't noticed a Bulk Detonator is getting really close pay attention to the sparkles on the air around you, if you see them— 'run. This is also a good way to know if the Unknown Horror is close by as green-blueish sparks will start to show close to you.
- Oh, Crap!: Causes this reaction in a dwarf that calls out its position."Aw, shite. Detonator!"
- One-Hit Kill: Upon defeat, the Bulk Detonator will explode in a massive radius around it, dealing 10000 damage at merely Hazard Level 1 to anything caught in it — even more than the health of Dreadnoughts on Hazard level 5. Naturally, any Dwarf caught in this is instantly downed, and enemies hit by it are usually blown to bits. The only things that can remotely survive a Bulk Detonator exploding are the Drilldozer and Rival Prospector (both of whom lose one of their Multiple Life Bars), the Caretaker (which loses 1/3 of its health before turning invulnerable), the Unknown Horror (which is flat-out invulnerable), and Hiveguards or Lithophage Corruptors that haven't exposed their weakpoint yet (who both No-Sell it).
- Our Ghosts Are Different: The Unknown Horror is a ghost version of the Bulk Detonator. Visually, it resembles a partially-disintegrated Detonator with blue wisps orbiting it, and the ash particles denoting its explosive range are the same color of blue. Functionally, it is completely invulnerable to any sort of damage, but shooting it will still Draw Aggro if it needs to be lured away from teammates or mission-critical objects.
- Required Secondary Powers: A Detonator is completely immune to its own explosive attacks (but not from other bulks), and it is also 50% resistant to ALL OTHER EXPLOSIVES. Using the grenade launcher against a bulk detonator is about as effective as a marshmallow gun.
- Set a Mook to Kill a Mook: It's very possible to lure an injured one over to a Dreadnaught and kill it there, causing it to blow up and take out the Dreadnaught.
- Stealthy Colossus: The only major indicator that a Detonator is present is the Evil Laugh it makes. Otherwise, it walks surprisingly quietly for something that huge and on fire, and in the chaotic caverns of Hoxxes this can lead to extremely unfortunate surprises as you find out the Bulk Detonator's nearby because you're already in the "Instant Death" Radius. And sometimes the game feels especially spiteful that match and spawns one too close for comfort right away.
- Stuff Blowing Up: They attack the Dwarves with explosives before and during their death. According to the Miner's Manual, its death explosion is on the kiloton scale, and it appropriately tears a massive hole out of the caves on its death.
- Taking You with Me: When it takes its last bullet, it explodes to create the biggest crater in the game, plus throwing out a cluster of bomblets. The explosion is enough to One-Hit Kill any Dwarf on any hazard level, and the bomblets can also one-shot a dwarf on higher hazard levels.
- There Is No Kill Like Overkill: Upon death, a Bulk Detonator explodes for 10000 damage on Hazard level 1, and around 68000 on Hazard Level 5. A Dwarf can have around 200 combined health and shields at the very maximum. This explosion is far more than enough to one-shot a Glyphid Dreadnoughtnote at the same hazard level.
- Undead Abomination: The Unknown Horror variant appears to be a ghost of a Bulk Detonator that haunts a cave system, relentlessly pursuing Dwarves until they die. The Terrain Scanner displays it as a totally black cube, and no other lifeform on Hoxxes is yet to come back from the dead like this.
- Underground Monkey: Probably because they're so dangerous, there's multiple type of Bulk Detonators to contend with. The standard Bulk, the gold-spawning Crassus detonator, and the weaker but invincible Unknown Horror that shows up in Haunted Cave mutators.
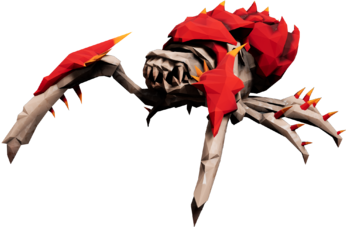
Glyphids with distinctive red shells that have a powerful projectile acid attack.
- Acid Attack: They spit gouts of corrosive liquid.
- Cowardly Mooks: Will flee if it takes too much damage.
- Damage Over Time: The Acidspitter's projectiles deal damage a few more times after the initial strike.
- Glass Cannon: Its acid attack is one of the most damaging in the game, short of exploders and dreadnoughts, but is not particularly tough once targeted.
- Highly-Visible Ninja: Acidspitters attempt to be stealthy by attacking from walls and ceilings, usually in the dark, but their vibrant candy-red shells usually give them away unless the cave is absolutely dark. Their projectiles are very visible in any light level, and slow enough that it's easy to track their origin.
- Long-Range Fighter: No melee attacks, only acid spit.
- Stealthy Mook: Both spitter types are relatively quiet when not attacking and prefer moving along the ceiling instead of the ground. Acidspitters will also sometimes retreat when damaged to attack from new angles.

Sneaky Glyphids that shoot webs which blind you and slow you down.
- Highly-Visible Ninja: Like Acidspitters, their shells can give them away, but they are slightly different since their pearlescent shells blend in with certain terrain types when well-lit but will subtly glow in the dark, giving them away in low-light environments.
- Interface Screw: Getting hit by their projectile obscures your vision with webs in addition to slowing you down.
- Long-Range Fighter: Like the Acidspitters, they don't use melee attacks and rely on projectiles.
- Projectile Webbing: They can shoot sticky webs to entangle and immobilize targets.
- Squishy Wizard: It can hit you with the most annoying status effect in the game, but dies to a couple of Cherry Taps.
- Stealthy Mook: Both spitter types are relatively quiet when not attacking and prefer moving along the ceilings instead of the ground. Webspitters also move much slower, sometimes sitting perfectly still if they haven't engaged you yet.
- Status Effect: Their projectiles cause prolonged slow and a nasty visual obstruction
- Support Party Member: On their own Web Spitters are nothing but a nuissance, but during a swarm their attacks can impair your vision and ability to run away from the glyphids which might be a death sentence if you're being targeted by a group of Grunts.
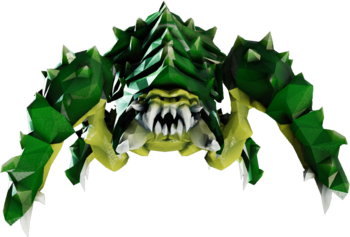


Bigger, badder, heavily armored aliens. Their corpses fill the air with toxic gas.
- Achilles' Heel: Armor Piercing ammo will peel off or penetrate its normally tough frontal shell quickly, allowing even a sole Dwarf to kill Praetorians easier, or their team to make short work of it.
- Acid Attack: The basic Praetorian vomits acid at dwarves standing in front of it, which helpfully roots it long enough for a quick flanking maneuver.
- Area of Effect: A dead Praetorian will release a large cloud of poisonous gas (or radiation) that drains the health of any dwarf within its area. The Radioactive Praetorian variant can generate a 360-degree aura that causes radiation damage to any dwarves caught in its range.
- Attack Its Weak Point: Sort of. Their abdomen is a large, glowing "SHOOT ME!" part of their otherwise heavily armored body, but it actually takes the same amount of damage (that is, it has a 1x damage multiplier) as if you just shot it in the face, underside, or unarmored section. However, the abdomen IS subject to weakspot damage bonuses, such as Hollow-Point Bullets, or the Critical Weakness anomaly.
- Elite Mooks: Tougher than the other common enemies, but they show up almost as often.
- Heavily Armored Mook: Basically impervious to any kind of damage because of their heavy chitin armor, unless attacked from behind that is.
- An Ice Person: The Frost Praetorians breath a freezing spray instead of the basic variant's acid.
- Mascot Mook: It features prominently in promotional materials.
- No Dead Body Poops: An aversion of this trope, the "death fart", is what makes this enemy reviled in and out of universe: Dwarves hate the stench the damn thing leaves upon death and players will hate it because how problematic it can become, especially if they kill one in an enclosed space.
- Taking You with Me: A much slower version than most; the Praetorians emit toxic gas that does damage over time when killed.
- Underground Monkey: The Praetorians come in three variants.
- The green Praetorians are the most common. They have poisonous breath and emit a poison cloud when they die.
- Radioactive Praetorians have a gray shell instead of a green one and emit an Area of Effect aura of radiation damage instead of poison breath. While it has less range, it has 360 degree coverage and can murder a dwarf much quicker.
- The white and blue Praetorians dwell exclusively in the Glacial Strata, which replaces the acid in its Breath Weapon and death cloud with freezing gas. While the freezing gas doesn't deal any damage, it can freeze you solid, opening you up to other aliens.
- Weaponized Stench: After dying it leaves a cloud of its corresponding damage which the Dwarves usually call "death fart" and more often than not digusts them.

Elite version of the Praetorian with truly indestructible chitinous armor. It moves slower but has more dangerous attacks.
- Achilles' Heel:
- They take massively boosted damage from melee attacks. Melee attacks are even capable of damaging them through their otherwise-invincible armor plates, though running right into their face to hit them with a pickaxe is usually a bad idea (and they still have enough health to survive multiple power attacks, let alone normal strikes). Karl help them if there's a Driller with a cryo-cannon and impact axes on your team, as their potential 3x direct damage multiplier to frozen enemies is incredibly nasty against them for however long they stay frozen.
- Similar to the Praetorian, their armour means nothing against the CRISPR Flamethrower or the ArmsKore Coil Gun, both of which can bypass the Oppressor's armour whenever they hit it. They can also take indirect (frost and fire) damage from all angles, making the Driller rather effective against them.
- Anti-Metagame Character: Their Raison d'être is to counter "Bunker" strategies, where the Dwarves simply dig a small room in a wall and funnel the bugs into an easy to kill choke point. The Oppressor, being completely immune to damage from the front, has enough HP and resistances to easily shrug off whatever the Dwarves throw at it from the front. Combined with its ability to dig its way into a bunker, it can royally screw the Dwarves over if they don't have an escape plan.
- Attack Its Weak Point: Its glowing abdomen, just like the Praetorian. Attacking it directly is one of the only ways they can take any meaningful damage, since its armor is truly impervious to damage, unlike how the Praetorian's armor will eventually break apart.
- Blown Across the Room: Can inflict this on dwarves with a concussive blast attack, sending them flying across entire caverns if they're close enough.
- Cutting the Knot: They can dig through walls to reach otherwise inaccessible dwarves, just like Dreadnoughts.
- Dishing Out Dirt: Their ground stomp attack causes a line of jagged rocks to jut out of the ground, causing Damage Over Time to Dwarves caught in it.
- Elite Mooks: Even tougher and more dangerous than the Praetorian, as it almost always requires cooperation to take down easily.
- Heavily Armored Mook: Its armor is completely and utterly bullet proof and will never break, requiring one to focus on its exposed abdomen.
- Immune to Bullets: It's completely immune to any damage that isn't indirect, armor-piercing, or aimed toward the glowing weak spot on its abdomen.
- Immune to Flinching: They cannot be stunned or electrocuted.
- Knockback: The Oppressor's special attacks don't do much damage, but they can easily launch a dwarf across a cave, potentially knocking them off a steep cliff or into other dangers. In particular, their stone-pillar-raising stomp flurry attack turns any dwarves who are entrenched in a bunker into pinballs and renders them essentially incapable of rendering an effective defense or escape.
- Kung Fu-Proof Mook: Their armor is unbreakable and makes them completely invulnerable to direct damage from anywhere except the abdomen, meaning that blindly shooting at its face or body will do absolutely nothing against them, unlike other armored mooks which still take miniscule damage. Adding to this, they're also immune to stun and electrocution while resisting cold, making them much harder to slow down.
- Obvious Rule Patch: Out of universe, it was designed to make killboxes significantly harder to pull off, as its impenetrable armor makes frontal attacks a waste of ammo at best and actively suicidal at worst.
- Shockwave Stomp: They will periodically stomp the ground using their front legs, causing rock to jut out of the ground in a wave-like fashion in front of them. This attack has surprising range and causes constant damage, but the Oppressor is immobile while performing this attack, giving you an opening to hit their weakpoint.
- Stone Wall: Aside from it's melee ram/bite, The Oppressor doesn't do much damage with its attacks, but it can shield other Glyphids from attack with its giant size and bullet-proof armor.
- Taking You with Me: Like the Praetorian, it disperses a cloud of toxic gas when killed.
- Violation of Common Sense: As detailed in Achilles' Heel they take more damage from melee attacks, but no sane Dwarf would even dream of doing that unless they've heard it from someone else.

One of the largest and most powerful creature the Glyphids have to offer. Is armored in the same way as the Praetorian, but is much tougher and has more tricks up its sleeve. The Dreadnought is the "basic" form of dreadnought, inbetween the Dreadnought Hiveguard and Dreadnought Twins in terms of durability and damage, but this balanced loadout means it's nowhere near as slow as the Hiveguard, while being much more durable than a Twin.
- Attack Its Weak Point: Like the Praetorians, their abdomen (butt) is their weak point. Unlike the Praetorians, you can't shoot them in the face.
- Area of Effect: It possesses a devastating one that can potentially down every Dwarf caught in it.
- Berserk Button: It does not like having its armor broken. It'll charge with absolute rage at any unfortunate Dwarf close by, if said Dwarf happens to be you—MOVE.
- The Berserker: The Dreadnought will relentlessly charge down its chosen target until it is in melee range, stopping occasionally only to fire out fireballs or groups of swarmers. Its response to having its armor broken? Charge faster at the target.
- Boss Battle: Of Elimination missions. Although, like the Tank, they can show up randomly too.
- Breath Weapon: They spit explosive fireballs.
- The Dreaded: Mission Control regards them as such, sounding incredibly worried and alarmed should one decide to spawn in a mission outside of Extermination.
- Heavily Armored Mook: Doubly so. They have armor that prevents damage from the front, and they have two healthbars with one representing the strength of their outer shell.
- Jack of All Trades: It's not as mobile as the Dreadnought Twins, and can't match the crazy amount of damage they output, But it is heavily armored enough to be completely invincible form the front and can still summon small amounts of backup in the form of glyphid spawn. Compared to the Hiveguard, it's not as durable and can't swarm the dwarves with Sentinels or regular grunts, but it is MUCH faster than the Hiveguard, way more agressive, and when its abdomen is exposed, it is much harder to hit.
- King Mook: The Dreadnought is similar to the lesser Praetorians- it's hard to attack from the front and packs high close-range power, but its abdomen is an important weak point.
- Large and in Charge: The largest Glyphid variant and the most powerful so far.
- Law of Chromatic Superiority: It's a giant red Praetorian with Spikes of Doom and the ability to spit exploding fireballs.
- Lightning Bruiser: It's deceptively fast for something of its size and it grows even faster whenever you peel out its armor.
- Mook Maker: In addition to launching fireballs at the dwarves it can also spit out eggs that spawn a cluster of Glyphid Swarmers on impact.
- Pupating Peril: Elimination missions have the sole objective of killing these things from their cocoons before they metamorphose into something nastier... but as of Update 33, this isn't always entirely successful: see the Dreadnought variants below.
- Shielded Core Boss: Their weakpoint is covered in an outer shell that must be shot down first to expose it. This shell regenerates either after a short time passes, or when they lose a third of their health.
- Shockwave Stomp: When it roars, you better get away from it, lest you get impaled by a bunch of burning spikes after it slams the ground.
- Turns Red: When its armor is shattered, it starts moving even faster.

A Dreadnought whose metamorphosis has been interrupted, it can be likened to the normal Dreadnought but with some additional capabilities. Instead of summoning Spawn, it calls forth Sentinels; armored Glyphid variants that assault the dwarves while it flings projectiles at them. Only when the Sentinels are taken down will its weak points be exposed.
- Attack Its Weak Point: Similar to the other Dreadnoughts, shooting it in the abdomen is the Hiveguard's weakness. Exposing it is what makes the fight difficult.
- Armor of Invincibility: A biological variation. Unless you force them to expose their weak points, their armour makes them completely invulnerable to damage. Even the kiloton-level blast from a dying Bulk Detonator won't put a dent in it.
- Artificial Brilliance: The Glyphid Sentinels, unlike any other creature in the game will make an effort to never show their weak point to you by strafing/side stepping if you attempt to circle around it. This ensures that their heavily armored front side is always facing you, and not its unarmed fleshy abdomen.
- Breath Weapon: Like the other Dreadnoughts, the Hiveguard can spit out fireballs and explosive rocks. However, its fireballs arc, allowing it to hit dwarves behind cover.
- Evil Laugh: Whenever you're fighting it, it lets out noises that distinctly sounds like it's laughing at you.
- Flunky Boss: It spawns Glyphid Sentinels which are basically Glyphid Grunt Guards with a large weakpoint on the back. These Sentinels must be killed before the Hiveguard can be damaged. Additionally, it has a separate "call for reinforcements" ability, allowing it to spawn a mini horde on the dwarves.
- Immune to Bullets: Its armor is totally bullet/explosive-proof, and the armor covers its entire body as opposed to the Oppressors. Its weakpoint needs to be exposed to bypass the armor.
- Large and in Charge: Like the standard Dreadnought, it's one of the biggest Glyphids out there. It's also one of the few shown to be an outright "commander" through its ability to spawn and control Glyphid Sentinels and mini-hordes.
- Mighty Glacier: The Hiveguard isn't exactly the most mobile Glyphid. But that sure as hell doesn't mean this thing is easy to take down. It's completely invulnerable until players force it to expose its abdomen, and even then it takes an absolute beating. While it's sluggish its attacks are absolutely devastating.
- Nigh-Invulnerable: Its armor makes it completely invulnerable to damage when its weakspot isn't exposed. Not even a Glyphid Bulk Detonator's explosion (which is a One-Hit Kill on almost anything else) will put a dent in it.
- Puzzle Boss: Downplayed. Unlike other Dreadnoughts where you simply shoot them in the rear, you have to kill the Glyphid Sentinels it summons first, then shoot specific weak points on the Hiveguard then you can shoot the rear of the Hiveguard.
- Reverse Shrapnel: Its rock burst attack fires flaming rocks in multiple directions around it.
- Shielded Core Boss: Twofold. First, the party needs to take care of the Sentinels, which causes the Hiveguard to expose three glowing protrusions. These all need to be shot down in order for it to expose its actual weakspot. Once enough time passes or if it loses a third of its health, it closes its weakspot, summons more Sentinels, and the cycle repeats.
- Stone Wall: Compared to the other Dreadnought types, the Hiveguard is a lot less aggressive. Rather than immediately attempting to charge into melee range, it prefers to sit back and launch projectiles at you while its minions do the killing. It's much more heavily armored and slower than the standard Dreadnought, being essentially invulnerable in its default state..
- Attack Its Weakpoint: Good news: the armor of the Dreadnought Twins' abdomen does not regenerate if you properly damage both twins equally. Bad news: good luck hitting it in the first place.
- Breath Weapon: The Lacerator can spew out flames from its mouth in close proximity to a dwarf. This leaves it wide open for a counter attack.
- Bullet Hell: While the other Dreadnoughts prefer to shoot high damage fireballs one at a time, the Arbalest can spit out a fan of small fireballs rapidly, quickly filling the room with plenty of hard to dodge, fast, moderately damaging projectiles. This is even more prevalent if the Lacerator is enraged.
- Combination Attack: Or rather, a Combination Heal. When both of them are alive and one has much less health than the other, they can go into an invulnerable state where they share health, healing the more damaged one and damaging the healthier one to roughly equalize their health.
- Dual Boss: As their name implies, you fight them both at the same time.
- Gemini Destruction Law: The best way to handle the Twins is to coordinate your team's fire so both their health bars go down at close to the same rate, preventing them from healing each other and ensuring that the surviving Twin won't have much health left when it flies into a rage.
- "Get Back Here!" Boss: Unlike the other two dreadnoughts that dig a tunnel that directly shapes terrain, and generally only dig to get to you, these two can burrow into the ground and teleport elsewhere to flee, forcing you to chase them down.
- Glass Cannon: Compared to the other two Dreadnoughts, both Dreadnought Twins do not have unbreakable armor over their bodies and can be damaged freely by shooting them anywhere. Additionally, their armor plates do not regenerate when broken.
- Healing Factor: The Twins frequently stop attacking to get close to each other and begin healing rapidly. They can do this an endless amount of times until one of them goes down (and it can't be interrupted), turning both of them into absurd bullet sponges. The only weakness of the Twins' healing is its effectiveness being dependent on one of them being healthy; concentrating fire on one will just let the other heal it to nearly full health, while damaging them equally will severely weaken the regeneration.
- Kill One, Others Get Stronger: Killing one of the pair will cause the survivor to power up, becoming stronger and gaining upgraded versions of its attacks.
- Nigh-Invulnerable: Averted, unlike the other Dreadnought variants, there's no need to focus on weakpoints or dealing with flunkies first. The actual main problem with this pair is that they will regularly harass you at multiple angles and also like to equalize each other's health if one of them is different from the other.
- Shockwave Stomp: The Lacerator can send three spiked rocky waves towards you, one to the right, one to the left, and one down the middle.
- Short Range Guy, Long Range Guy: The Lacerator smashes the dwarves up close, while its twin the Arbalest picks them off from a distance.
- Spread Shot: The Arbalest's Fire Fan fires a spread of five fireballs, making it tricky to avoid.
- Sticky Bomb: The Arbalest's Explosive Barrage tosses out several explosive rocks that stick to surfaces and glow for a few seconds before exploding.


The Brood Nexus is a large, lump-shaped organism with no defensive capability of its own. When dwarves are nearby, however, it creates Glyphid Spawn that seek them out and attack, which function in the same way as Swarmers.
- Ambiguously Related: It's speculated in-universe to be a separate species from the Glyphids, as its method of birthing live Spawns contrasts with the egg-laying nature of true Glyphids.
- Attack Its Weak Point: The Nexus is covered in what are apparently its eyes, which take a certain amount of damage before being destroyed. While it is possible to kill the Nexus by dealing damage anywhere, destroying these growths will make it take a lot more damage.
- Bizarre Alien Reproduction: According to the bestiary, Glyphids are usually hatched from eggs, which is no particular surprise. But Brood Nexuses birth them directly instead, which is very weird and points towards it not actually being related.
- Death of a Thousand Cuts: A single Glyphid Spawn isn't very dangerous, but they're rarely found alone.
- Kill It with Ice: If the Brood Nexus is killed while frozen, it will not explode into a swarm of minions.
- Mini Mook: Spawns are even smaller and squishier than the Swarmers, which already get one-hit killed by almost everything in the game — and Spawns have less health than them.
- Mook Maker: Brood Nexuses are the source of the Glyphid Spawn.
- Weaponized Offspring: A Justified version. According to the codex, DRG biologists theorize the Brood Nexus is an unrelated species that creates Swarmers for self defense; if this is the case, it has no reason to actually care for its Swarmers nor if they'll pass on their genes, and only uses them to prolong its own survival. That begs the question of why it produces mooks that look exactly like members of a completely separate species, although the current theory is that it can somehow replicate the DNA of other species and use it to recreate them for self-defense.
- Zerg Rush: Produces these all on its own. Woe to anyone who encounters one during a Swarm, in which case you're essentially dealing with a smaller Zerg Rush in the middle of a Zerg Rush. And when it dies while unfrozen, it bursts into its own huge swarm of its Glyphid Spawn.

A large Glyphid variant that attacks the Dwarves with an unending barrage of ranged attacks.
- Elite Mook: Essentially a bigger, meaner Acidspitter that knows to ambush its targets and how to run away if a fight is going badly.
- "Get Back Here!" Boss: The Glyphid Menace will burrow away and attack later if they take too much damage.
- Hell Is That Noise: If you hear something that oddly resembles a weird mix of yawn/burping, look up and around. A Glyphid Menace is close by.
- Kill It with Ice: The most reliable way to destroy a Menace is to use cryo weapons (such as the Driller's unlockable primary, the Scout's cryo grenades or Bosco's rockets with the appropriate perk) to freeze it solid, which will not only prevent it from attacking you but also, more importantly, deny its ability to burrow away to evade your attacks, leaving it a sitting duck ripe for shattering.
- Long-Range Fighter: Has no melee attack whatsoever. They fight exclusively by spitting acid at the dwarves from a distance, and they do it constantly.
- Meaningful Name: They certainly are menaces, given how they stay far away, rain highly damaging fire from afar, and quickly hide if it senses things going sideways before popping out elsewhere.
- More Dakka: Unlike the Acidspitters, these Glyphids fire their projectiles constantly.
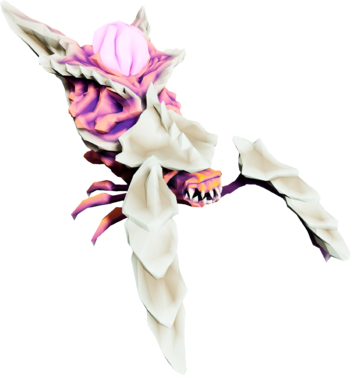
A large Glyphid that supports nearby enemies by healing them slowly and granting them a shield that reduces damage taken.
- Attack Its Weak Point: The same orb that produces the healing/shielding streams also receives the most damage.
- Mook Commander: Its presence will protect and heal nearby Glyphids.
- Mook Maker: Glyphid Grunts will spawn periodically around a Warden, which cannot attack or fight by itself.
- Support Party Member: Enemy version. Wardens never attack the Dwarves, they only heal and protect nearby enemies.
- Anti-Escape Mechanism: Running away in a straight line will only make it easy for the Stingtail to drag you right back into the mob of glyphids.
- Beware My Stinger Tail: They have a large one which they can fire at dwarves and reel them in for a deadly one-two punch with their tusks.
- Combos: On flat ground, the Stingtail can pull in a dwarf and then ram/smash them with its long horns. If the Stingtail has an elevation advantage, it may instead simply hook a dwarf and let the insane momentum of the grab catapult the dwarf into the air and downing them from the sheer fall damage
- Grappling-Hook Gun: A biological example, but instead of using it to hook into terrain and pull itself to said terrain, it instead uses it to grab a dwarf and pull the poor sap towards itself.
- Heavily Armored Mook: They have a very annoying thick armor that must be destroyed before one is able to deal damage to them reliably.
- Hoist by His Own Petard: Sometimes a Stingtail can reel you in when you're expecting it... cue a Power Attack on its face and unloading your guns on its stupid bug face. Particularly satisfying as a Scout with his Jury-Rigged Boomstick or the Engineer's Warthog.
- Ledge Bats: Its primary danger comes when it yanks you off a cliff or to high enough elevation to take fall damage. If you're unlucky this can lead to a One-Hit Kill from Falling Damage alone.
- Non-Indicative Name: The name "Stingtail" suggests that it would have some kind of poisonous stinging attack that it uses its tail for, but its real purpose is to restrain and knock down dwarves like a mobile Cave Leech rather than sting them.
- No-Sell: It won't trigger a player's Heightened Senses ability, which will easily catch them off guard when they move in to grab them.
- Sound-Coded for Your Convenience: They make a very distinctive high-pitched squeaking sound just as they're about to attack to stand out from the ambience of the rest of the Glyphid hordes and let you know to be alert.
- Support Party Member: On its own, it doesn't do too much damage, even with its "pull and smash" combo. Its strength comes from dragging dwarves out of position and into a swarm of angry Glyphids, or by getting them downed by fall damage.
- You Will Not Evade Me: If you suddenly get yanked out of position and into a swarm, that's a Stingtail's handiwork.
- Attack Its Weak Point: It has a much larger weak point than even Menaces, which takes up two-thirds of its body.
- Bloody Murder: According to the Miner's Manual, they attack with their own infected pus. Pus is made of dead white blood cells, so they're technically still throwing their own infected, corrosive blood at you.
- Body Horror: Sepsis is a condition where the body responds improperly to an infection, causing blood poisoning. This causes Septic Spreaders to be bloated with corrosive pus.
- Brain Bleach: The Dwarves may occasionally react with disgust over being pelted by the Septic Spreader's... "ammunition".Dwarf: Agh! This smells worse than it stings!!
- Damage Over Time: Standing in the sepsis puddles is a quick way to get downed, as they will rapidly deplete your health as long as you stand in them.
- Evil Counterpart: The Septic Spreader is essentially a Driller with the Corrosive Sludge Pump equipped.
- Foil: It is virtually a mirror to the Menaces, as seen in its color scheme but especially in its attack method. Menaces will barrage you with acid globs and the best protection is to hide behind cover and stay still until they stop attacking and are open to counterattack. Septic Spreaders attack less often, but their arcing projectile nature means they can hit you behind cover, and you should instead remain mobile while facing them.
- Glass Cannon: Septic Spreaders can do a lot of area damage from far away, but will go down almost instantly if focused due to their low health and huge weak point.
- Long-Range Fighter: Spreaders will take cover and launch their acid at you or hurl it at you from the ceiling. They don't have any close range attacks, but they will still chuck acid at close range if given the chance.
- Support Party Member: Own their own, the Spreader won't be able to do much, but their acid utility shines when they are grouped with other bugs; their acid can limit where the Dwarves hold out during swarms and the Spreader themselves can serve as a distraction while the other bugs rush in to overwhelm the Dwarves.
- Taking You with Me: Downplayed like the Praetorians. Upon death, the Septic Spreader's sac ruptures, spilling sepsis in a large area all over its corpse. It's not terribly difficult to dodge this puddle, but care should be taken in killing these things in close quarters.


Strange, mutated Gylphids that have been taken over by a mysterious, extremely-durable "organic silicate" known as Ebonite. They only appear during the "Ebonite Mutation" Machine Event and come in Grunt and Praetorian varieties.
- Body Horror: Given the Dwarves' statements when pinging Ebonite Glyphids, being infected with Ebonite is an intensely unpleasant experience that mutates the body into jagged, organic rock. Even the normally thick-skinned Dwarves shout about putting the things out of their misery. They also express an extreme aversion to being bitten by the infected Glyphids, implying it jumping the species gap is a concern, so it makes sense that they would want to destroy this shit and its carriers with extreme prejudice.
- Kung Fu-Proof Mook: Immune to every form of attack except melee strikes. Thankfully, the Machine Event that summons them also has an Overcharge Sprinkler to spawn capsules that let the Dwarves very rapidly perform power-attacks.
- Logical Weakness: Being made of minerals/rocks, they become nearly impervious to attacks but are now vulnerable to being mined by a pickaxe, hence gaining a weakness to melee damage.
- No-Sell: Whether bullets, burns, or blasts, absolutely no conventional attacks will work against these Glyphids. The only way to damage them is through melee.
- Optional Boss: Activating the Ebonite Mutation Machine Event by turning on an Overcharge Sprinkler found randomly in any level triggers a wave of Ebonite Glyphids, and tasks the dwarves with killing a certain amount of them before time runs out.
- Silicon-Based Life: These Glyphids' bodies have been taken over and mutated by some kind of rocky "organic silicate" (it's not known if this is some kind of creature or a type of material, since it's never seen separately from the Glyphids it controls). The mutations this infection has caused makes them immune to everything but sustained heavy impact damage- like, say, pickaxe power strikes.
Mactera
- Achilles' Heel: Mactera are especially vulnerable to the Cryo-Cannon and Grenade, because they never actually unfreeze; they just drop to the ground and shatter like glass.
- Airborne Mook: The Mactera are to the air what the Glyphids are to the land.
- Attack Its Weak Point: The Mactera have more health on average than the Glyphids, but their weak points take even more damage.
- Fragile Flyer: Compared to the terrestrial Glyphids. Given their aerial nature, they can all move around quite quickly (barring the Goo Bomber). While they have more health than the average Glyphid, they also take 3x weakpoint damage, while Fire, Corrosive, Explosive and Melee deal double damage, and electricity does one and a half times damage. Additionally, freezing kills them instantly regardless of health (Elite versions are immnune to it, though).
- Insectoid Aliens: Mactera resemble flies, in particular.
- Long-Range Fighter: Four of the five Mactera sub-types attack at long range, and the one that doesn't does no damage at all (at least, not directly).

The most common Mactera species, the Mactera Spawn float above the Dwarves and charge up damaging Sting Shots.
- Artificial Brilliance: If you attempt to aim at a Mactera Spawn that hasn't begun to charge up a shot, they will actively juke around in the air to throw off your aim. Turn around for a split second to get them to charge a shot, then turn back and unload on them to stop them from dodging your shots.
- Charged Attack: Their bellies inflate and glow for a second before they shoot.
- Fragile Speedster: Of the Mactera. They have more HP than grunts do, but take far more damage than them to their belly weakpoint, which as mentioned above also bloats up in size whenever they attack. However, they move quite quickly and are capable of making very quick juking motions whenever they're not charging an attack, making them hard to hit.
- Mooks: The basic Mactera sub-species with the least health.

- Charged Attack: Charges its attack similarly to the Spawn, but its stomach doesn't grow as much to make up for it being larger to begin with.
- Glass Cannon: Capable of very high damage with their triple-shot, but the stomach weakpoint is naturally larger than the Spawn's and they aren't capable of dodging.
- Spread Shot: They fire three acidic spikes that can also cause area-of-effect damage if they miss.
- Spikes of Doom: Their tri-part mandibles are covered in small yellow and black spikes.

- Charged Attack: Charges its attack similarly to the Spawn, but it doesn't leave itself open due to possessing armor over its stomach that needs to be broken before it can be damaged there.
- Shout-Out: It's named after Seth Brundle, the protagonist of The Fly, the joke being that it's a fly.
- Stone Wall: Has the best defense of the Mactera, but doesn't have a dodge and its damage isn't any higher than the normal Spawn- which is respectable, but Brundles don't appear often enough to use the Zerg Rush tactics that makes Spawn truly dangerous.
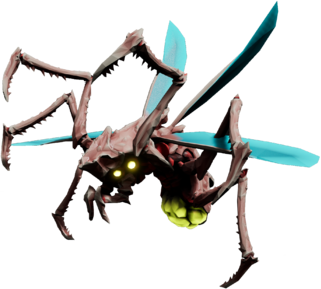
A gangly Mactera species. Grabbers will dive at Dwarves and pluck them off the ground.
- Muscles Are Meaningless: While Grabbers are larger than the Dwarves, they have a very slender frame and thin limbs. Despite their thin frame, Grabbers are more than capable of picking up a heavily armored Dwarf and can fly around with them in tow unimpeded.
- Not the Fall That Kills You…: Grabbers are at their most dangerous by far when you're close to a tall, open cave, as they'll gladly fly up to the point where you'll take massive or lethal fall damage before dropping you. And unlike Cave Leeches, Grabbers aren't nice enough to gently set you down when your teammates/Bosco/Steeve kills them, which means if you're at that point, you better hope you're a class that can mitigate falling or an engineer is on the ball with their Platform Gun. That being said, if a Grabber can't find a suitable spot to dump you for fall damage, it'll just let you go automatically.
- Hell Is That Noise: A Grabber's approach is always signalled by an ear-splitting SKREEEE!!, usually just before they snatch up an unfortunate player.
- Personal Space Invader: Their main method of attack involves swooping down onto a dwarf, seizing them in their gangling limbs to render them completely helpless, then flying high to drop them to their doom.
- Shout-Out: To the Gigafly enemies from the Contra series, being brown, flying insectoid aliens that only attack by grabbing a player character, taking them high, and dropping them to kill them.
- Spider-Sense: The Heightened Senses perk can inform the player if they're being targeted by a Grabber, though the hellish screech should be enough already. Still helps differentiate which player is going to be grabbed though.
- Super-Speed: Grabbers are (if not a close runner up to) the fastest enemy in the game. Their elite version however moves so fast, they can phase through walls. The moment an Elite Grabber emits its war cry, it'll be grabbing you before you can blink. They're THAT fast.
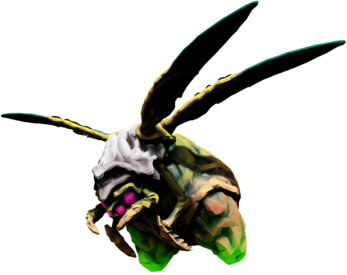

A large Mactera variant that drops orbs of goo that slow down anything that walks through it.
- Attack Its Weak Point: The two goo pouches on its underside. Even more important than usual, as the weak points not only take more damage but prevent the Bombers from dropping more goo when they die.
- An Ice Person: The Ice Bombers drop light blue goo that, in addition to a slowing effect, slowly lowers the dwarves' temperature until they freeze solid.
- Bombardier Mook: Goo Bombers not only chuck goo balls that slow targets in an area, but also can perform a carpet-bombing like maneuver to cover a large area in goo.
- Friendly Fireproof: Averted. Their goo will slow down glyphids as well as dwarves. Additionally, their goo bombs can damage anything they hit. Other mactera or glyphids included.
- Shows Damage: The Goo pouches will break after they take enough damage. This isn't only cosmetic; see Suicide Attack.
- Sticky Situation: The goo dropped by the Goo Bombers makes the Dwarves move extremely slowly.
- Suicide Attack: Downplayed. When they die, the Bombers crash, coating the floor in their goo, but this doesn't do any damage. Destroying one of the Bombers' goo pouches will shorten this effect, and destroying both will stop it from happening entirely.
Other Enemy Aliens

- Body Horror: Nearly every creature in a mission featuring them is being slowly eaten alive as you fight them, and after you kill them the parasites they were hosting will burst out and attack you. As the Miner's Manual says, "The tales we've heard from our predecessors on Hoxxes are not for children."
- The Goomba: On the other hand, the larvae themselves are not too scary. They can only move by flopping around like fish and rather than burrowing into the dwarves, their only attack is a low-damage lunge move. Their health is also so pathetically low that they die in one hit to nearly everything- even attempting to attack a dwarf with the Thorns perk will cause them to instantly die.
- Parasitic Horror: For the bugs, at least. For you, not so much.
A tentacle-like alien that sits on cave ceilings and snatches your dwarves if they get in range. Grabbed dwarves are dragged up to the ceiling and chewed on.
Not to be mistaken for its smaller, harmless cousin, the Cave Vine.
- Anti-Frustration Features:
- When a dwarf is saved from a cave leech, the leech stretches out and deposits them on the ground before dying. If they didn't, dwarves would almost certainly be downed from the Falling Damage every time... which is what used to happen before it was altered to the aforementioned mechanic.
- Cave Leeches can grab you from any distance, well out of range of being able to hear them. To compensate for this, they glow red when they've noticed a dwarf and are preparing to grab him, revealing its location.
- Expy: Bears a strong (mechanical) resemblance to two classic Valve Corporation enemies: the Barnacle and the Smoker. Unlike the barnacle, however, the Leech stays 'retracted' until it senses prey within reach, making it easier for them to surprise and grab you.
- Face Full of Alien Wing-Wong: The "face full of" part is definitely in play, as the leech grabs the dwarves head first. Hopefully ''not'' the "wing wong" part.
- Giggling Villain: Leeches emit telltale creepy giggling noises every so often. This clues you in to the fact there's a leech nearby, and helps you tell them apart from their mundane cousins.
- Sound-Coded for Your Convenience: A faint hissing sound that gets louder as the Leech's mouth gets closer. Be careful though, it sounds similarly to your flares.
- Spider-Sense: The player can develop this as a Perk specifically for dealing with Cave Leeches. When equipped, a Cave Leech targeting you will result in the screen going white, warning you of the danger and allowing you to free yourself twice per mission if grabbed, killing the leech in the process.
- Unwilling Suspension: Once it gets a hold of a dwarf, it'll hoist them up to the cave ceiling.
- Vertical Kidnapping: Their modus operandi is to hang on the ceiling, stretch down from above to grab an unlucky dwarf before hoisting them back up to chew on them.

Swarms of stinging insects that erupt from hives. They can temporarily be chased off by fire, but will only dissipate permanently if their hive is destroyed.
- Attack Its Weak Point: The bugs themselves are mostly immune to damage, meaning you have to destroy their hive to stop their threat.
- Big Creepy-Crawlies: An averted example in that they're the size of regular flying insects, which is lampshaded by the bestiary to be one of Hoxxes' few cases of such.
- Death of a Thousand Cuts: They do negligible damage, but they stick to you and can't be killed directly.
- Insectoid Aliens: Even more so than the Glyphids, as they're actually insect sized.
- Kill It with Fire: The Driller's flamethrower is capable of burning up the swarm that comes from to give you a temporary reprieve, but the swarm will respawn unless the hive is killed.
- Meaningful Name: Their name is likely a play on "Deep" which references their underground habitat, and "Diptera", the order of flies that includes biting swarm insects like horsefiles, sandflies and mosquitoes, which refereces their nature as The Swarm with weak but constant damage.

- Underground Monkey: They're basically a faster but less damaging Deeptora Swarm.
- Wicked Wasps: Swarms of stinging insects that love to ravage you with their sting.
Jellyfish-like aliens that electrify any dwarves that they float towards. They only appear in the Dense Biozone and the Glacial Strata.
- Airborne Mook: They levitate swiftly through the air.
- Cycle of Hurting: Their main threat is that they slow you while surrounding you completely in a massive group, opening you up to getting torn apart by glyphid hordes or mactera swarms and absorbing bullets until they're all removed. Their electric attacks also cause a bit of a Interface Screw considering how much blue will be on your screen when a swarm of them hit you, making it harder for you to shoot them.
- Interface Screw: Their attacks come with a very large, obnoxious spark on your screen; if they swarm you they're likely to leave you blind until you've cleared them.
- Shock and Awe: They attack the dwarves with electric attacks that also cause a slowing effect.
- Zerg Rush: They always appear in massive groups, but go down in one shot from almost any weapon.

A large, almost blimp-like Naedocyte that spawns Naedocyte Roe, which hatch into Naedocyte Hatchlings.
- Achilles' Heel: While the Breeder has a lot of health and a small weakspot, it is very vulnerable to cold damage like other Airborne Mooks as it shatters into pieces upon hitting the ground if frozen. A short spray of the Cryo Cannon or a single Cryo Grenade will thus put it out of commission, durability be damned.
- Airborne Mook: Both the Breeder and Hatchlings are capable of flight.
- Attack Its Weak Point: It's fairly resilient, but the mouth (or whatever other orifice that is on its front) functions as this. The weak spot is only functional when laying eggs, however.
- Bizarre Alien Reproduction: Naedocyte Breeders reproduce by vomiting up clusters of roe, which hatch into Naedocyte Hatchlings.
- Kill It with Ice: One of its biggest weaknesses is it will immedietly die when frozen, so a Driller with the cryo cannon or a scout with a cryo grenade handy will be able to take these out near instantly.
- Mook Maker: Constantly drops Naedocyte Roe when alive, which hatch to let loose small swarms of Hatchlings. If the roe are shot before they can hatch, the threat within is nullified.
- Shock and Awe: Subverted. Unlike the Naedocyte Shockers, Hatchlings do not have any ability to shock Dwarves.
- Underground Monkey: Hatchlings are a purple version of the Naedocyte Shocker. While their behavior is identical, the Hatchlings rely on a Breeder to summon them, and if the Breeder dies, no more Hatchlings will appear in that mission.
- Weaponized Offspring: The Breeder's sole defensive mechanism is its ability to spawn dozens of its offspring on demand per minute to attack anything that might pose a threat to it.
- Zerg Rush: Each Naedocyte Roe that hatches will spawn five Hatchlings, which are just as weak as Shockers. If the Breeder is left to its own devices, it can spawn a small army of them.

Stationary enemies that fire green blobs.
- Attack Its Weak Point: There's a bulbous green sack on its throat that takes significantly more damage, and depending on how it's facing to aim at you this can either be easy or hard to hit.
- Kill It with Fire: Surprisingly weak to fire damage. Even on high hazard levels, an ignited Spitballer won't stay up for long.
- Long-Range Fighter: Emphasis on long. While they won't fight you until provoked, they have pinpoint accuracy to a range that's essentially only limited by line of sight.
- Mighty Glacier: It doesn't move at all and its attack suffers from Painfully Slow Projectile, but on any hazard level higher than 3 it's more than enough to smash through a Dwarf's shield and eat a chunk of their health.
- Non-Indicative Name: Partially. They do indeed spit balls of goo at you, but nothing about them is infectious - it just causes damage.
- The Pig-Pen: The Interplanetary Miner's Union agrees with Management on precious few things; "Spitballers are absolutely gross" is one of them. Whatever they spit is disgusting as hell and they're also one of the enemies that leaves a massive coating of goo around the area when they die.
- Painfully Slow Projectile: Their spitballs tend to be slower than most projectiles in the game, allowing the Dwarves to shoot them down. If they do connect, however, they deal a considerable amount of damage.
- Shoot the Bullet: Unlike other projectiles, the spitballs can actually be nullified with good aim.
- Super Spit: Like its name suggests, it spits out toxic spitballs at Dwarves.


A rolling arthropod creature that can be found in almost any Biome except the Salt Pits and Sandblasted Corridors. The less armored but more gregarious and numerous juveniles are found in the Salt Pits.
- Acid Attack: The adult variants are capable of spitting gouts of acid from their Belly Mouth.
- Bizarre Alien Biology: Their mouth is a Vagina Dentata that takes up most of their belly.
- "Get Back Here!" Boss: Very mobile, the Shellback won't stay in one place for very long.
- Heavily Armored Mook: More than any other enemy in the game, its armor has the most health of any creature in the game.
- Mini Mook: Within the Salt Pits, you'll end up finding Q'ronar Younglings instead of the big ones. They're much faster, smaller, and always come in packs, but are unable to spit acid and their shells are less resistant to gunfire.
- Pushy Mooks: When the Q'ronar is rolling around, any dwarves it runs into will get knocked around like they just had a mug of Flintlock's Delight. This ranges from "annoying" to "fatal", depending on the cavern they try this in.
- Rolling Attack: It spends most of any battle bouncing around the terrain, knocking you and anything else around.
- Tactical Suicide Boss: Would be far harder to kill if they didn't stop rolling to spit acid at you and instead just kept rolling at you forever. Them stopping exposes their fleshy underbelly and makes their weak spot (the tailtip) far easier to strike.
- Vagina Dentata: Their underside mostly comprises of a large, vertical Belly Mouth.

A finned alien that swims through the sands in Sandblasted Corridors.
- Attack Its Weak Point: Its underbelly, which it doesn't expose frequently; usually only after a solid hit that leaves it floundering.
- Fragile Speedster: Practically impossible to hit thanks to its absurd speed, but its health is not particularly high and a good hit will flip them on their back like fish out of water, exposing their weak spot for more fire.
- Mix-and-Match Critters: These things are essentially Sand Worm meets Threatening Shark.
- Personal Space Invader: The Trawler will grab dwarves and drag them through the sand.
- Pushy Mooks: Their attacks cause considerable Knock Back and they can also grab and drag dwarves around the sandstone.
- Sand Is Water: The only creature that seems to act this way, Trawlers carve through the sandstone fast, possibly faster than any living creature in the game (even including a Scout using the Grappling Hook).
- Spider-Sense: Those with the Heightened Senses perk can sense if a Trawler is making a beeline for them, indicated by the screen going white. This can really screw with people paranoid of Cave Leeches, but thankfully the Trawlers tend to make a lot more noise, and can be detected on the ground.
- Untouchable Until Tagged: They move horribly fast, dodging your shots... right until they take any significant amount of damage, at which point they get ejected from the rock and flop around like fish plucked from water trying to find their way back into the sand; this exposes their weak belly, letting you properly execute them.
- What a Drag: If a Trawler manages to grab onto a Dwarf, it will drag them around the sands for a while before releasing them, rendering the Dwarf helpless all the while. While this doesn't deal any damage, it will often place the Dwarf in unfavourable positions.
Xynarch Charge-Sucker and Breakpoint Explosives Transport — Combat-Specification


The Xynarch Charge-Sucker is a tentacled alien that can attach to machines to drain and control them.
The Breakpoint Explosives Transport — Combat-Specification, or BET-C, is a quadrupedal robot similar to the M.U.L.E. The only BET-C's that the dwarves encounter are hostile because of their corruption by the Xynarch Charge-Suckers.
Xynarch-corrupted BET-Cs are encountered on rare occasion by the dwarves, remaining dormant unless provoked.
- Attack Its Weakpoint: The BET-C cannot be damaged at all, they can only be defeated by destroying the attached Xynarches.
- A.I. Is a Crapshoot: The BET-C is susceptible to alien fauna despite being from another planet.
- Brainwashed and Crazy: An AI variant of this; the Charge-Suckers override the BET-C's programming. When both Xynarches are destroyed, the BET-C will fight on the side of the dwarves again after being repaired.
- Cute as a Bouncing Betty: What might be the most lethal piece of equipment down in the caves has a name pronounced "Betsy".
- Defeat Equals Friendship: Kill the Charge-Suckers and the BET-C will shut down. Restart it and it will spend the rest of the mission following you and engaging enemies for you.
- Deflector Shields: The BET-C has a shield generator that it can protect itself with.
- Gone Horribly Wrong: Among the first attempts by Deep Rock Galactic to tame the planet, the BET-C model was designed to face down the worst of Hoxxes' wildlife and come out on top. Unfortunately, the previously-undiscovered parasitic species of Xynarch Charge-suckers have taken over every BET-C deployed to the underground, causing the whole line to backfire on DRG employees and become yet another threat on Hoxxes.
- Grenade Launcher: The BET-C has one of these on its back. Unfortunately not Friendly Fireproof. Mind the orange circles telegraphing where it's firing!
- More Dakka: It packs a turret-mounted machinegun that it will sometimes use instead of its grenade launcher, and it packs enough power to mulch anything, insect or dwarf, in seconds.
- Purposely Overpowered: BET-C can engage and take down a swarm or even Dreadnoughts by herself, given her weapons, infinite ammo and invulnerability. It's almost like her non-Friendly Fireproof grenades is a Necessary Drawback!
- Redemption Demotion: A BET-C defeated and restarted by the dwarves loses the shield of when it was an enemy.
- Tactical Suicide Boss: Downplayed - it shielding itself can actually be an excellent time for a dwarf in the right position to run into the shield and fill the charge-suckers with lead as BET-C will be completely still during this time and always only shoots out eight grenades around it, giving a few vital seconds where it reliably cannot shoot at the dwarfs.
- Team Killer: Even when repaired and fighting for the dwarves, BET-C can still kill them by shooting grenades at Glyphids. Especially in situations where the dwarves need to hold a specific location like defending Doretta or salvage mission uplinks.
- Unwanted Assistance: When it's rebooted to be on the player's side, its sticky grenades can occasionally be a nuisance. Don't be too surprised when it shoots at a bug and you happen to be in its explosive radius. Also, it's size can amplify whatever issues you had with Molly occasionally coming by and knocking you off ledges or filling up the space of a tunnel while trying to run through it.

- Cores-and-Turrets Boss: A biological example. You need to take out the turrets that are the Healing Pods and the Korlok Sprouts, and then the Core will open up to seed more of them, giving you a chance to deal actual damage.
- Hit-and-Run Tactics: For all of its power, it's still an immobile plant. You and your team can feel free to run away if it becomes too much of a risk to take on and come back latter after you resupply and rearm.
- Kill It with Fire: In addition to taking double damage from fire, when set ablaze, Korlok Sprouts cannot shot, encouraging you to burn that overgrown weed to ashes.
- Optional Boss: Spawns randomly and takes quite a bit of coordination and ammo to bring down, but doing so adds a hefty credit and experience bounty to your end-of-mission payout.
- Piñata Enemy: It has a valuable core, whose fragments drop out on death and can be stuffed into the MULE like any mineral for a bonus.
- Savage Setpiece: The Korlok is one of the few neutral enemies in the game. You can get surprisingly close to it without it awakening. It's only when you physically touch it or start shooting it does it become hostile.
- Shielded Core Boss: In order to render it vulnerable, the dwarves have to kill off the Healing Pods and Korlok Sprouts it spawns. This forces the main plant to open up and expose its vulnerable core to spawn more Pods and Sprouts, giving the dwarves a clean shot at it before it quickly closes again. Depending on the difficulty, it is possible to empty an entire section of its lifebar simply by dropping a satchel charge near its core and detonating it when the plant opens.
- Skippable Boss: Because it's perfectly stationary (and relatively harmless from a long enough distance), it's usually possible to just ignore it, complete your objective, and leave without killing it, even if you've activated it. This is particularly helpful if it happens to spawn in an area that makes it difficult to fight in, or if your team can't afford the ammo.
- Tactical Suicide Boss: Downplayed; the Core needs to make itself vulnerable to continue attacking you by actually planting more Sprouts, but it would survive more easily if it just stayed shut, stopped attacking, and just waited for the dwarves to go away.
- When Trees Attack: Not quite a tree, but it's certainly a big piece of hostile foliage.
- Your Head Asplode: Occasionally, headshot deathblows against Korlok Sprouts causes a unique animation where their head explodes, followed a moment after by the stalk.

An enormous, glowing geode embedded in a bed of hardened crystal, found only in Escort Duty missions. Its core is insanely valuable in the galactic market, but this geological formation will not let it go easily.
- As You Know: Averted. All the in-universe characters presumably already know exactly what these things are, and as such never really discuss them in a way that would explain what they are to the players.
- Bag of Holding: Averted. This is one of the few loot items that doesn't vanish into the MULE, and is instead strapped to its exterior like a backpack.
- Cores-and-Turrets Boss: An interesting variant. The Drilldozer is the one breaching its thick shell to reach its glowing, valuable core. Meanwhile, you have to protect the Drilldozer from the various threats it summons, including the Obelisk of Light-esque turrets it periodically summons.
- Decapitated Army: When its inner shell finally gives out, it will send out a huge shockwave that kills every enemy in the vicinity but leaves the Dwarves unharmed, giving the Dwarves a reprieve after a hard-fought battlenote .
- Desperation Attack: Implied with its laser-shooting crystals, who only appear in the last phase of its boss battle.
- Dishing Out Dirt: During its second phase, it will raise boulders into the air that must be destroyed before they can be dropped on the Drilldozer.
- Energy Weapon: Its last phase has it grow crystalline towers that shoot beams of intense light that can melt through the Drilldozer worryingly quickly; these towers need to be mined out like any other mineral.
- Flunky Boss: The biggest threat it throws at you are the endless waves of bugs it seemingly summons from the caverns around it, bringing them down on the Drilldozer and the mining team protecting it. On its final phase, it also summons pillars of crystal that fire a continuous laser at the drilldozer.
- Gemstone Assault: In its final phase, it summons crystal spires that fire lasers at the Drilldozer.
- Instant-Win Condition: Downplayed - fully drilling through the heartstone to expose its core will cause an explosion around it that will probably kill all of the bugs in the room and can save the team even if they're on their last legs and barely managed to keep it together...but this is still no guarantee that the team will survive to make it back to the Drop Pod after that.
- It Can Think: It's able to recognize it's in danger, and what is the nature and source of said danger, and take protective measures against it, so it's clearly sentient to some degree.
- Logical Weakness: The crystal spires that it summons in its final phase are terrain structures rather than enemies, which makes them especially vulnerable to being mined out or defeated by terrain-destroying weaponry/equipment. Bosco is also quite adept that taking them out with his mining capabilities if you order him to do so.
- Maybe Magic, Maybe Mundane: It's never explicitly stated to be magic (or given an explanation of any sort really), but the setting already has dwarves, elves, and dwarven "empires of old," and it's difficult to think of a better way to explain the flying rocks and instant laser-shooting stalagmites than "magic MacGuffin mineral" anyway. An Engineer may even occasionally remark that it's "indistinguishable from magic" regarding his Shard Diffractor, which is powered by a Heartstone.
- Power Crystal: The Engineer's Shard Diffractor reveals that a use of the Heartstone is to power technology.
- Rock Monster: With a twist. A rock that is a monster rather than a monster made of rock, in fact. It appears to be a natural mineral formation that just happens to be alive and keen on remaining in one piece.
- Sequential Boss: It has four phases, each representing a layer of the geode; the battle only ends when the last layer is pierced and the actual Heartstone is freed.

A hostile vine-like creature found embedded in the walls of the Hollow Bough in clusters of three. Any dwarves that walk into their range and stand still for too long will be violently impaled and blasted backwards at high speed.
- Impaled with Extreme Prejudice: What it will attempt to do to any Dwarf foolish enough to approach it. Averted however, since if its stabs do connect, they deal extreme knockback instead of impaling.
- Sound-Coded for Your Convenience: It moves fast once stabbing, but it needs time to aim first, and it creaks pretty conspicuously while it does; soon as you hear a sound like wood and foliage, it's time to take cover before you get shanked into the wall.
- Stabbed Across The Room: If this thing's already insane damage doesn't do you in, the sheer knockback will.
- That's No Moon: Unnervingly enough, when you kill all three Stabber Vines from a bunch it becomes clear you didn't kill three individual organisms, but rather cut off three tiny limbs from something very big, which makes this clear with a cavern-rattling screech of pain. It’s implied in the Miner’s Manual entries for the Hollow Bough and Stabber Vine that the Stabbers and all of the other vines (Creeper Vines and Bloated Vines, as well as Thorn Pots) are all appendages of the same parasitic superorganism that is sapping the life out of the Hollow Bough.

- Body Horror: These bugs have huge glowing crystals growing out of their bodies at odd angles. The chunk they drop when they die is also almost as large as the entire body of the Spitter and Mactera, implying that a significant portion of their internal organs have been replaced by Kursite.
- Optional Boss: A small pack of one of the three types can be summoned by activating a Kursite Grinder machine event found randomly in any level. The objective is to kill these bugs and take the Kursite chunks they drop to the grinder before time runs out, keeping in mind that once freed from its hosts the volatile Kursite will rapidly decay and shatter after only a few seconds.
- Underground Monkey: Function nearly-identically to their non-infected counterparts but are recolored blue and have glowing yellow Kursite chunks embedded in their bodies, which they will drop when they die.
Passive Creatures
A slug-like alien that drops gold as well as nitra.
- Eat Dirt, Cheap: The reason they erupt into showers of Gold and Nitra upon dying — they eat them. As of the January 2020 patch, if you leave your resources unguarded near a lootbug it will slowly waddle over and eventually eat the raw ore on the floor. Unfortunately for them, any mineral eaten by them gets multiplied by 1.5x, adding even more incentive to kill them. This diet also gets realistically explored; lootbugs are inedible to the predators of Hoxxes because they are so heavily comprised of minerals.
- Money Multiplier: Any minerals they eat get added to their death loot explosion with a multiplier of 1.5x, meaning you can indeed "farm" minerals at a slow and impractical rate.
- Money Spider: Justified; as seen above they're full of valuable minerals because they eat them.
- Normal lootbugs will explode with a roughly equal mix of Nitra and Gold.
- Golden lootbugs can rarely show up in caves; they don't drop any Nitra when killed but will drop enough gold ore to line an entire team's pockets when killed.
- Pet the Dog: Or Pet the Bug, in this case — while the prompt is (currently) not visible, pressing E on a Lootbug will cause your Dwarf to pet them, with the bug wiggling and purring in response. There's also a victory pose that has a dwarf holding and petting a loot bug before letting it loose.
- Piñata Enemy: They drop minerals when they are hurt and burst in a shower of minerals when they die.
- Too Dumb to Live: They tend to show up in droves where there's scattered minerals... including those scattered by injured or murdered loot bugs. Not so dumb by itself, but when combined with some of Hoxxes IV's deadlier terrain features it can lead to large fields of both heavily injured loot bugs and piles of nitra and gold surrounded by toxic gas, molten rock or what have you; the bugs themselves make no effort to avoid any of this, and crawl right to it like lemmings. Their entry in the bestiary notes that their diet makes them inedible to most predators on Hoxxes, explaining their absolute lack of any survival instinct.


Small, mostly-harmless creatures that hang around the caves; according to the Miner's Manual, each maggot is apparently a conglomerate of symbiotic creatures. The Magma Core region hosts glowing maggots that explode when killed, while the Radioactive Exclusion Zone and Fungus Bogs have green maggots that release a cloud of fumes instead. The Hollow Bough and Azure Weald also have their own maggot types- yellow-green and blue respectively- but they're the same as normal maggots.
- Action Bomb: The Magma Core maggots explode on death, though they don't do anything to intentionally detonate themselves or go near the dwarves, making them more of a stage hazard. The Fungus Bogs variant leaves a cloud of toxic gas akin to Praetorians on death.
- Harmless Enemy: The regular maggots don't do anything that can hurt the dwarves, and in fact are completely inconsequential.
- Palette Swap: Maggots come in standard pinkish-brown, yellow-green, and glowing blue (all harmless) in addition to sickly green (toxic) and glowing orange (explosive).
- The Pig-Pen: They're apparently utterly gross in both texture and smell, compared to a pile of used diapers lit on fire on both accounts. The Toxic maggots are so horrid that the gas cloud they release on death actually deals Scratch Damage!Dwarf: (retches) Gross!
Dwarf: Watch the moving turd! - Power Glows: The only maggots that pose an actual threat worth worrying about are the glowing, explosive ones in the Magma Core. Averted with the glowing Azure Weald maggots, which don't do anything.

A harmless tentacle-like organism that sits on cave ceilings and... gently boops dwarves on their heads if they get in range.
Not to be mistaken for its larger, dangerous cousin, the Cave Leech.
- Cuteness Proximity: You can pet them, just like lootbugs, breathers and Steeves. And the voicelines your Dwarves can say when doing so imply they're actually quite fond of those things.Dwarf: "Wee-oo, wee-oo, wee-oo, the Cute Police just got alerted!"
- Expy: Though the dangerous Leeches behave like Half-Life barnacles, the harmless Vines look like barnacles at a distance, as their stalk hangs down like a barnacle's tongue.
- Face Full of Alien Wing-Wong: Whilst they don't want to eat you like Leeches, Vines do want to pet you with a weird squishy thing on the end of a stalk. It's kinda gross. Then again, the loot bugs might think the same thing about your hands for all we know.
- Harmless Enemy: They resemble the Cave Leeches closely, but don't attack at all.
- Unpleasant Animal Counterpart: Inverted. They're the Pleasant Animal Counterparts to Cave Leeches, hanging from the cave ceiling in a similar manner but are entirely harmless, petting the dwarves instead of snaring them.

The Dense Biozone, Radioactive Exclusion Zone, and Fungus Bogs are home to these floating critters that feed off the land.
- Cranium Ride: They don't exactly have heads, but dwarves can ride around on the top of them. They don't go very fast, but sometimes they can help reach high places. They can also be used to get some breathing room during a swarm, as most glyphids won't be able to reach you if the Harvester is floating high enough.
- Harmless Enemy: They do not react to Dwarves whatsoever, more concerned with searching for food in the dirt.

Huuli Hoarders are slugs which act much the same as Lootbugs; however, they're considerably hardier and will actually flee when attacked.
- Acrofatic: It moves around a lot faster than something with a body that chubby mounted on legs that stubby should probably be able to.
- Artificial Stupidity: It will run away in a panic as soon as it spots a Dwarf, which is actually the smart thing to do... But it won't flee otherwise, even if a solo player out of its field of view sics Bosco on it.
- Cowardly Mooks: The game itself refers to the Hoarder as an "abject coward" in the patch notes that introduced it. When hurt, it runs off screaming very quickly, and from there you have roughly ten seconds to actually kill it before it burrows into the ground and escapes entirely.
- Gonk: It looks really... strange, to the say the least. It's a large, purple bug-like thing with stubby legs, eye stalks, a chubby physique, and one hell of a backside crammed full of minerals which jut through its flesh.
- Metal Slime: They are rarely encountered enemies that attempt to flee and remove themselves from the level once approached or damaged, and also have a surprising amount of health to whittle down. If successfully killed, they drop resources and crafting materials.
- Money Spider: Like the Lootbug, Hoarders drop resources upon death. Unlike the Lootbug, their drops also include crafting materials.
- Piñata Enemy: Just like the Lootbug, but with a considerably bigger payout.
- Screw This, I'm Outta Here: Seemingly the only thing on Hoxxes smart enough to try running away when heavily-armed two-legged aliens start shooting them.

Tiny, flying creatures that zip across the caverns making ethereal, echoing calls. Harmless to you, but less so to the mining equipment they clog up once they've got a greater population going. They're so annoying in this last regard that Management has actually tasked you with exterminating as many as you can.
- Explosive Breeder: The big problem with them, they can go from just single digits to thousands in a very short time. They'll clean the local flora up like locusts, and then probably go and get eaten up by local mining equipment, damaging it.
- Fragile Speedster: Not particularly durable, but if you approach or damage one without killing it, it will zip away extremely quickly.
- Gameplay and Story Segregation: Their description states that management will punish you for every individual one you allow to live, but the actual objective only requires a set number to be killed like any other secondary objective, and also like all secondary objectives the map always generates significantly more than is needed to complete the objective. Finally, even if you and your team don't actually kill any of the buggers, you don't get your pay docked or anything. You just lose out on the secondary objective credit and xp bonus, same as if you don't bother with any other secondary objective.
- "Get Back Here!" Boss: Not boss and barely counts as enemies, but you need something strong enough to one-shot, or quickly kill them or you'll be chasing them around for a while since these things are fast and move away the moment they take damage. We recommend the M1000, CRSPR Flamethrower, but some may opt for the Deepcore 40mm PGL's Fat Boy overclock.
- Harmless Enemy: They can't damage you at all; you're just killing them because otherwise Management is gonna be pissed.
- Notice This: They make a distinct buzzing noise whenever they're nearby.

Vaguely manta ray-like flying creatures found only in the Azure Weald. Dwarves can latch onto the vestigial legs on the creature's underbelly and steer them around like self-propelled hang gliders.
- Flying Seafood Special: Resemble manta rays, except they float through the air in an underground environment that resembles the deep sea rather than actually being underwater.
- Harmless Enemy: Does not try in any form or way to hurt the players.
- Helpful Mook: The HUD registers them as hostiles, but they can't attack (or do anything other than fly around, really) and they're useful as transportation.
- Ironic Name: It's called a Mobula Cave Angel, even though Mobula is the real-world genus name for Devil rays.
- Mellow Mantas: Despite their unnatural appearance, Mobula Cave Angels are entirely peaceful, pose no threat to the Dwarves, and can even help the Dwarves by flying them around as an impromptu hang glider.
- Non-Indicative Name: From the name and that fact that they're graceful fliers based on a sleek sea creature, you'd expect them to share a similarly sleek appearance. This is not so- the Cave Angel's skin is quite craggy and rough and their mouths are perpetually agape. The dwarves will even comment on this.Dwarves: If that's an angel, I don't wanna see a demon!
- What the Hell, Player?: Some of quotes from the Dwarves show indifference, somw show the same anger they show towards the bugs, but some show they're not too proud of shooting one down:Dwarves: Nah, why did I do that!
Dwarves: Almost makes me sad killing something so pretty, almost...
Dwarves: Yes! I took out the Cave Angel for no good reason.

Harmless, purple-red, multi-winged insectoids found exclusively in the Azure Weald. They behave similarly to Fester Fleas, spending their time randomly crawling around and occasionally taking flight, but unlike the Fester Fleas they're completely irrelevant to your objectives and as such can be safely ignored (or petted, if you're fast enough to catch one).
- Cuteness Proximity: They're one of the very, very few things on Hoxxes the Dwarves show any tenderness towards.
- Meaningful Name: "Hexawing", as in "six wings"- which Hexawing Gniffers do in fact have.
- Ugly Cute: The dwarves express a similar affection to these bugs as they do the lootbugs, and like lootbugs they can be petted by pressing E (though their tendency to fly away when anything gets too close makes this difficult).
- What the Hell, Player?: If one gets killed, a dwarf may mention that they're killing the wildlife for no reason or question why they're attacking a harmless Gniffer. This is in opposition to most other passive bugs in the game, which don't earn any response when killed.

- Bizarre Alien Biology: Like their Naedocyte brethren, they sustain themselves off of electricity. Unlike them, they're content to just drift around absorbing ambient static electricity rather than attack living creatures.
- Harmless Enemy: They're Naedocytes that harmlessly drift around and do not attack. Even the substance they rain down does absolutely nothing.
The Rival Corporation
An unnamed rival mining company that is attempting to muscle its way into Hoxxes despite Deep Rock Galactic already having the claim on it. DRG will not stand for this, and thus it falls to the Dwarves to give these interlopers the boot.
- Achilles' Heel: They possess a severe weakness to fire; if any Rival Tech bot reaches the "On Fire" status effect, they're instantly destroyed.
- Arc Villain: Of Seasons 1 and 2. They suddenly appear and begin their own operations on Hoxxes, clearly trying to stake their claim. DRG isn't having any of it, and sets up missions to interfere with the Rival Corporation's plans.
- Ambiguous Robots: It's not definitively known if they are a corporation and not something else entirely: all their units are robotic, including their scout ships, and their fleet has no signifiers of any known group. They seem to have some level of sentience, given how the Nemesis is constructed as a response to DRG's attacks, but there's no explicit confirmation that it was built by non-robots.
- Attack Drone: They make use of Patrol Bots and Shredder Drones to defend their interests.
- Big Bad: The closest thing the game has to one, at least in the first and second seasons.
- Elves vs. Dwarves: Possibly. Industrial sabotage missions will often generate with “Leaf Lover” in the name (slang for elf) and when killing bots dwarves will sometimes remark that the Rival Company “should have stuck to building treehouses”. That said, calling others elves is a common insult among the dwarves.
- Floating Limbs: Some of their creations have parts that are visibly not attached to each other. The Nemesis and the Caretaker's tentacles have their claws' grasper parts float independently of the connecting arm. The patrol bot meanwhile is separated into three parts. A ball/core, a quadpod thruster array attached to a ring above the ball/core, and the turret itself resting above all that.
- Horde of Alien Locusts: Give off this general vibe with a robotic twist. While Deep Rock Galactic are hardly environmentalists and want to strip mine the planet just like the rivals, the dwarves mining under DRG are just people in small teams. The hordes of self replicating automatic robots the Rivals use come off as eerie and sinister when compared to that, especially since it doesn’t even seem like they possess actual intelligence or operate with any kind of organic oversight.
- Killer Robot: All of the Rival Tech enemies are robots of some fashion, ranging from sentry turrets, to drones, to the massive Caretaker, and all of them except the Prospector come equipped with deadly firepower or offensive capabilities. In particular, the Nemesis is made with the specific purpose of killing the Dwarves.
- Kill It with Fire: All the Rival Tech robots (except the Prospector and the Caretaker but not the latter's tentacles) are vulnerable to being overheated. They will all instantly explode upon being ignited. In the Patrol Bot and the Shredder's case, their huge resistance to cold and weakness to fire contrasts the weakness of most other Airborne Mooks that shatter when frozen.
- Long-Range Fighter: All of their units except the Shredder and Nemesis attack at range, in contrast to the melee heavy Glyphids.
- Mecha-Mooks: There are no organic members of the Rival Corporation used for combat, none that we can tell anyway. Instead, all of their units are mechanical.
- No Name Given: The exact name of their company isn't known. They're simply identified as the Rival Corporation, with their units falling under the Rival Tech category.
- No-Sell: Thanks to being mechanical, poison attacks and effects do absolutely nothing against them.
- Outside-Context Problem: DRG is well known for being the only mining company bold enough (and batshit insane enough) to not only go out and mine the resources of Hoxxes, but complete multiple operations with just a four-man crew at most. That changes when the Rival Corporation suddenly appears and starts budging in on DRG's line of work without warning.
- Out of Focus: Outside of the Nemesis getting "WE'RERICH!" and "mushrüm!" voice lines, The Rival Corporation has not made any major moves since the start of season 3.
- Sinister Geometry: A lot of things associated with the Rival Corporation are designed with very angular appearances with lots of edges and sharp angles, and the Rival Corporation are the antagonists of Season 1 and 2.
- They Know Too Much: The dwarves may randomly quip that, were the information on the Data Cells kept by various Rival Tech units allowed out, Hoxxes would be swarming with other mining companies.
- Those Were Only Their Scouts: Implied so far. The only thing that the Rivals' machinery appears to be doing at the moment is surveying valuable mineral deposits and storing the data collected from said surveys in massive vaults for later collection, yet they still have a huge arsenal of firepower deployed on Hoxxes, including who knows how many of the gigantic Caretaker machines. Only time will tell if they'll start sending down even stronger excavator robots to start collecting the valuables they've "laid claim" to.
- Weak to Fire: If any of their Patrol Bots, Shredders, Turrets, Robotic Appendages or Nemeses are set on fire, they are instantly defeated. All their technology in general barring the Caretaker is also more flammable than usual, and takes extra fire damage; going by the Miner's Manual, it seems Rival Tech circuitry is poorly insulated and flammable, leading to catastrophic short-circuits when ignited.

The weakest Rival Tech enemy, the Shredder Drone is rarely if ever spotted alone. Traveling in packs, they roam about until they encounter the Dwarves. Each Shredder Drone's melee ram is relativley weak and annoying, but like the Glyphid Swarmers, the sheer amount of them can quickly add up the damage.
- Airborne Mook: Flying swarm-based enemies that harass the dwarves in a manner similar to Naedocytes. However, these are far less vulnerable to cold than other flying foes.
- Close-Range Combatant: In contrast to all other Rival Tech enemies which employ ranged weaponry, these guys are pure melee.
- Heel–Face Brainwashing: The Engineer's Shredder Swarm grenade is comprised of captured and reprogrammed portable Shredder Drones.
- The Swarm: Similar to Naedocytes, they come in groups, but trade the ability to shock the Dwarves for more attack power and a little extra durability. They're also much more vulnerable to fire than cold.
- Zerg Rush: Their main attack is to swarm around players to harass them.


Stationary defense platforms deployed by the Rival Corporation to defend the data vaults in the Industrial Sabotage mission. They guard the cables and stations powering the Caretaker's Force Field. In levels with Rival Presence, groups of them can be found near a Turret Controller.
- Antepiece: The attacks used by the Burst and Repulsor turrets foreshadow similar attacks used by the Caretaker boss and its Combat Tentacles, and the Sniper Turret, encountered earlier in isolation, makes it easier to respond to when the boss summons yet more of them during its fight.
- Barrier Warrior: Repulsor Turrets fire energy barriers in the four cardinal directions around them.
- Decapitated Army: Those that are controlled by a Turret Controller will be immediately destroyed if the Dwarves successfully hack the controller.
- Ceiling Cling: The Sniper Turret, unlike the other turrets, rests on the ceiling. Unlike the dreaded Cave Leech however, the Sniper Turret uses this position to more easily keep a line of fire on potential targets and makes no attempt to hide itself.
- Converging-Stream Weapon: It's hard to see at a distance, but the Sniper Turret projects several energy beams into a single lens before firing its laser pulse.
- Deflector Shield: Burst and Repulsor turrets have a shield protecting them from weapons fire until they're activated and can shoot back. The Repulsor turret specifically weaponizes these by pulsing out radial shields to disrupt incoming fire and prevent dwarves from getting too close.
- Glass Cannon: Sniper Turrets can inflict quite a bit of damage, but they can't take much punishment themselves.
- Kill It with Fire: Dealing enough Heat damage to ignite a turret instantly destroys it.
- Laser Sight: Employed by the Sniper Turret to keep its target Crosshair Aware. Once it's on you, you have only a few seconds to either destroy the turret, or break its line of sight behind cover, before getting hit with a nearly Always Accurate Attack with a blisteringly fast projectile.
- Logical Weakness: Being robots made up of circuitry, apply enough heat to them and they'll completely breakdown and blow up. Likewise, a power swing from a dwarf's pickaxe can cause major damage or even outright destroy them in a single hit since major physical damage would seriously mess up a robot's circuits.
- More Dakka: The Burst turret features an automatic cannon, which can be dodged but requires constant movement to avoid being punished.
- Sound-Coded for Your Convenience: You hear that ominous deep buzzer sound? A Sniper Turret has lined up a shot on you and is about to fire.

One of the mainline combatants of the Rival Corporation, the Patrol Bot is a well rounded foe. It can fly in the air for extra mobility, or land on the ground to increase its speed, utilize a melee ram, and reduce its hitbox size. It can fire a burst of energy shots, or charge up for a faster more damaging blast. It's also equipped with missiles, allowing it to deal splash damage. Occasionally, it won't be fully destroyed, but be rendered temporarily inert. This presents an opportunity for the Dwarves to hack into it, converting it to their side.
- Achilles' Heel: Patrol Bots have more health than a Praetorian and are resistant to freezing unlike other Airborne Mooks. However, they're very vulnerable to fire, which causes them to instantly explode if they ignite.
- Airborne Mook: Flying enemies that can fire at the Dwarves. Unlike Mactera, they're much more resistant to cold, but are much weaker to fire damage.
- Attack Its Weakpoint: The gun turret itself takes extra damage from being shot.
- Enemy Exchange Program: The Dwarves can invoke this on Patrol Bots with some hacking tools, should they not be outright destroyed.
- Jack of All Trades: Able to fly, attack at a range, roll along the ground if it needs to go faster, and is equipped with homing missiles, giving it an unusually diverse selection of attacks.
- Kill It with Fire: Not only does it take extra damage from fire, if it fully ignites, it instantly dies.
- Lightning Bruiser: They possess high-damage ranged attacks, an extremely fast ground speed, ramming attacks, hover jets, and a high healthpool, making these arguably the toughest "normal" enemy in the game. If you're not exploiting their fire weakness or otherwise in the possession of very high damage weaponry, you'll have a very hard time fighting them.

A special flying drone that can be encountered in missions, similar to Machine Events. Prospector Drones can be fought to retrieve the minerals and Data Cell it holds, but watch out - it may be cowardly, but it's all to willing to send out enemies to defend itself!
- Attack Its Weak Point: The engines on its backsides. Destroying them heavily reduces its move speed and consequently, its ability to flee.
- Contractual Boss Immunity: It is completely immune to being set on fire, unlike most of the common Rival Tech enemies. Perhaps it has some high grade coolant flowing through it?
- Cowardly Boss: This thing has literally no way to attack you by itself. It relies entirely on sending its Mecha-Mooks out to protect it. All while it tries to run away flailing its tentacles.
- Flunky Boss: When its health falls at certain intervals, it becomes temporarily invulnerable and calls in Rival Tech enemies to try and make the Dwarves go away.
- Macguffin Guardian: It carries a Data Cell inside along with precious minerals.
- Optional Boss: It's an optional enemy that rewards players with minerals and a Data Cell should it be successfully destroyed.

The strongest Rival Tech unit known of thus far, this massive, pyramidal machine is the target of the Industrial Sabotage missions, which tasks the Dwarves with destroying it and stealing the Data Rack it guards.
- Achilles' Heel:
- Four weakspots that are always in close proximity? That's just asking, nay, begging for a Driller to drop a Satchel Charge onto it. Two Satchel Charges can instantly destroy all vents at once if the Driller manages to place them well enough.
- While the Caretaker itself is fireproof, its tentacles are just as vulnerable to being ignited as the rest of its ilk.
- A.I. Roulette: In between its second and third healthbars, it will deploy one of three random things: a bunch of Sniper turrets onto the cave ceiling, a swarm of Shredders or a salvo of Phase Bombs. The Shredders and Turrets are easy enough to manage, but the Phase Bombs are extremely worrisome because the Caretaker will directly teleport them right where a dwarf is standing, and they usually do enough damage to two-shot a dwarf at full health and shields unless they immediately get out of the way. Unlike the other two summons, it also keeps perpetually launching Phase Bombs until its next phase, making it much more of an issue to deal with.
- All Your Powers Combined: Uses the plasma barriers of the Repulsor Turret and barrages of the Burst Turret, can summon Shredders and Sniper Turrets, and can periodically call in supporting Patrol Bots. Although the Nemesis was introduced after, the Caretaker shares its Phase Bombs and to a certain extent its Combat Tentacles.
- Anti-Frustration Features:
- The Robotic Appendages will not attack when it's firing out its giant plasma barriers, giving the players some breathing room to avoid the barriers and cutting the frustration from being unable to damage the Appendages through the barriers.
- Glyphids will no longer spawn (outside of hazards like swarmer tunnels or eggs) once it wakes up. It's just you and your team against the Caretaker and its minions.
- Attack Its Weak Point: The vents on its top and its four eyes are its only damageable parts.
- Bag of Holding: Averted. Its data rack is one of the few loot items that doesn't vanish into the MULE, and is instead strapped to its exterior like a backpack.
- Barrier Warrior: It's capable of projecting giant versions of the Repulsor Turret's plasma barriers, firing three sets in a row. These will destroy the Dwarves' shots, and damage while pushing them back if they connect.
- Boss Battle: Industrial Sabotage missions have these at the end, where the focus is to disable a shield around the Facility Caretaker, then destroy it to access the Data Rack held within. It's heavily armed and armored, regularly summoning Rival Tech enemies and defending itself with barrier waves, shock blasts, and Robotic Appendages. It certainly gives the Glyphid Dreadnaughts a run for their money!
- Combat Tentacles: Is guarded at all times by four Robotic Appendages that respawn consistently when destroyed.
- Contractual Boss Immunity: Unlike all other Rival Tech units, you cannot set it on fire to instantly kill it.
- Cores-and-Turrets Boss: Quite literally. It has four Robot Appendages that constantly respawn and shoot at the dwarves like turrets, four vents in the top corners that need to be taken down to render it vulnerable, and four "eyes" in the middle that serve as the actual weakspots.
- Crosshair Aware: Its Robotic Appendages project a spotlight wherever they "look". If the ground below you suddenly turns orange, get ready to dodge a flurry of projectiles or a giant claw sent to impale you!
- Decapitated Army: Once the Caretaker is destroyed, there won't be any more Rival Tech forces spawning in the level.
- Eye Scream: The only way to do any actual damage is by shooting it in one of its four eyes (assuming they actually are eyes).
- Flunky Boss: During its fight, it will constantly summon legions of Shredders, Turrets and Patrol Bots on top of everything else it's throwing at you..
- Futuristic Pyramid: The Caretaker looks like an upside down pyramid.
- "Instant Death" Radius: Getting too close to the Caretaker will cause Tesla coils to deploy on the vault door, giving you a few precious seconds to get off the damn thing before they electrocute you on the spot. Downplayed in that it's not exactly instant, but staying that close is not an option, much to the Driller's chagrin.
- Instant-Win Condition: Downplayed - killing the Caretaker will cause it to emit an explosion that kills other nearby and causes no more Rival Tech enemies to spawn any more...but it's still possible for the team to perish trying to reach the Drop Pod after that, though extracting will still probably be much easier than other missions due to the lack of Rival Tech and the wide caves that tend to be created for Industrial Sabotage maps will rarely be difficult for teams to navigate on their way to the Drop Pod.
- Kaizo Trap:
- When the Caretaker explodes after going down, it'll send a shockwave that doesn't deal damage but does Knock Back. If you're unlucky with terrain and it knocks you off a high ledge, you'll be taking falling damage.
- Even after that, it's easy to forget the Caretaker was sitting on a vault door that opens upwards to reveal the Data Rack, but you'll be quickly reminded if you're standing on it, once it swings open and throws you off hard enough fall damage is guaranteed.
- Macguffin Guardian: The Caretaker is in charge of protecting a precious Data Rack hidden within the vault it defends. It won't go down without a fight!
- Power Floats: The Caretaker serenely levitates above its vault. Unlike the Patrol Bot, Prospector, Shreder or Sniper Turrets it spawns, it does not appear to use thrusters to keep itself afloat.
- Roar Before Beating: It unleashes one hell of a mechanical scream before it begins the fight proper.
- Sequential Boss: Even though the Caretaker only appears to have three healthbars, it technically has six. Between each phase you'll first have to do enough damage to the vents on its head for it to open one of its four eyes, which allows you to do damage to it. In between the first two-thirds of its health, it will begin summoning a random effect before replenishing its vents and forcing you to destroy them again. While its vents are active, it also uses a much stronger version of the Repulsor Turrets' attack that it doesn't use while they're destroyed.
- Shielded Core Boss: To damage the Facility Caretaker, you need to destroy the four corner vents to force it to open its weakpoints. After a third of its health is depleted, it restores the four vents and summons flunkies before the vents become vulnerable again.
- Shock and Awe: In addition to its Combat Tentacles, it can also shock the floor directly below it for very high damage.
- Spectacular Spinning: It spins around when its vents are exposed, and spins faster and faster for each vent taken out, making it hard to deal the killing blow on the last vent.
- Stuff Blowing Up: Its batteries that come out of its force field projector? They explode, though slightly less easily than the nanite bombs used for mining Tritilyte Crystals. Toss them hard at Rival Tech to save yourself some ammo (or at least make sure they don't inadvertently explode when nearby a Dwarf)!
- Taking You with Me: Subverted. When it is defeated, it explodes in a huge shockwave that doesn't damage the Dwarves, but knocks them back by a huge amount. This shockwave however does damage and likely kills off mooks, including its own allies.
- Throw Down the Bomblet: One possible attack sequence during its second and third phases is to teleport explosive Phase Bombs to where the Dwarves are, forcing them to keep on the move.
- Weaponized Teleportation: Phase Bombs would be wholly normal time bombs if it weren't for the fact they're directly teleported right in your face. Not so bad in open terrain, but if you're inside a bunker of some kind you're going to taste some pain.
- You Will Not Evade Me: One of its potential attacks are Phase Bombs, which can teleport themselves anywhere the dwarves are. Digging a bunker to avoid the tentacles and defensive bots can potentially end in disaster if even a single Phase bomb manages to catch the team offguard. Its tentacles are also capable of chasing down Dwarves by tunneling next to them.

Created specifically for hunting down Dwarves, the Nemesis is able to go toe to toe with a full team of them, and is committed to tearing them apart.
- Achilles' Heel: It's more difficult to set it on fire and instantly kill it than the other Rival Tech enemies (especially since it repeatedly launches out force fields toward its target that will block weapon fire), but it's still possible to set it alight and save the team some ammunition. Just...be careful trying doing it with a flamethrower without reach increases, lest you suffer its "Instant Death" Radius.
- Airborne Mook: Like most of its non turret ilk, it is airborne. All the better to rain death down on the dwarves.
- Attack Its Weakpoint: The Nemesis has glowing vents on the side that can be shot for extra damage, as well as the pyramid on top of it.
- Barrier Warrior: In between the Repulsor and the Caretaker's projected shield size, the Nemesis is able to project a rectangular shield and send it forward, pushing and damaging dwarves while destroying their projectiles.
- Blood Knight: Its voice lines largely consist of it ranting about how much it wants to annihilate the Dwarves.
- Boss in Mook Clothing: A deadly and durable foe that can appear in any mission, albeit rarely.
- Cyber Cyclops: It has a giant glowing eye optic in the front. Assuming that giant circle in the front is an eye in the first place that is.
- Close-Range Combatant: While it has a ranged attack in the form of a projected shield, its primary killing method is getting close enough to a dwarf to grab and crush them.
- Dying Vocal Change: Curiously, the Nemesis uses its dwarf voice when speaking its dying words rather than the distorted legionesque voice it normally speaks with.
- Electronic Speech Impediment: Its attempt to imitate dwarf voice lines falls a bit short: some lines have noticeable stutter and background noise.
- Eye Scream: Its eye takes weakpoint damage. After being shot enough, it will be destroyed and a gout of fire will pour out of it. This does NOT hamper its ability to locate dwarves though.
- Grapple Move: After a short telegraph, it can use its arms to grab onto dwarves and incapacitate them, not unlike a Cave Leech.
- Heavily Armored Mook: Its internals are protected by medium armor, which partially negates damage. This necessitates either focused fire on one section to punch through, or careful sniping of the eye, side and back panels.
- Hero Killer: It is designed with the exact purpose of killing the Dwarves, and can indeed do so if it manages to grab them. On higher Hazard levels, it's practically a death sentence if it grabs a Dwarf.
- "Instant Death" Radius: You do not want to be close enough to get grabbed, as it deals brutal damage while you're snatched up and it's very hard to make it let go before it kills you.
- It Can Think: It tries to lure dwarves in with fake calls for help, and actually speaks to the dwarves, even if it's mostly to threaten them. When defeated it even lets out some unnervingly thoughtful last words, panicking about incoming death, resigning itself to it or even lamenting it never had any friends and thought the dwarves were it. Either the Rival Company is resorting to genuinely sentient murderbots to strike against the dwarves, or a programmer in there is both really messed up and keen on psychological warfare.
- Kill It with Fire: Surprisingly, it doesn't have Contractual Boss Immunity to fire or heat, so it can be instantly defeated by igniting it. Unsurprisingly, actually setting it aflame is a challenge, as it takes some effort to raise temperature that high and Flamethrower range has a lot of unfortunate overlap with the Nemesis' grabbing range.
- Killer Robot: Even moreso than its ilk. Unlike the other Rival Tech robots, the Nemesis is made for the specific purpose of killing the Dwarves. And unlike these same robots or anything else on the planet, it vocally expresses actual desire to do so.
- Kung Fu-Proof Mook: The Heightened Senses perk will usually kill an enemy who has grabbed you, but it only causes the Nemesis to let you go with no damage done.
- Laser-Guided Tyke-Bomb: Built specifically as a response to DRG's attacks on its rival. Its pre-recorded lure lines are specifically meant to draw attention from dwarves, it has a shield that blocks gunfire, its crushing vices have incredibly high damage and are hard to escape once caught, and not only does it leave nothing of use behind, it bombs its immediate surroundings in the case that it goes out.
- Last Ditch Move: Upon losing all its health, it'll fill a large area around it with Phase Bombs before expiring.
- Luring in Prey: Nemeses mimic a dwarf calling for help in order to lure players towards them. The lines aren't perfect, with a notable distortion effect that can give away the Nemesis' presence to a savvy dwarf.
- Meaningful Name: It's made with the very specific purpose of hunting down, luring in, and killing the Dwarves.
- Mirror Character: Whoever or whatever made this thing, they took a lot of inspiration from the other Boss in Mook Clothing, the Glyphid Bulk Detonator. Both the Nemesis and Bulk Detonator are slow and bulky units, dig through terrain so dwarves can't avoid them, exert an extremely threatening presence by their high-damage, close-ranged attacks, and create an explosive Taking You with Me attack if they are felled.
- One-Hit Kill: Its grab move at hazard 4 and above deals enough damage to down a dwarf from full health and shield.
- Schmuck Bait: The prerecorded dwarf voice lines it plays when it's idle might trick a player once, but the ruse is up after that first time — and potentially even before it, if thought through. Those lines aren't connected to the team's status, so players might hear a dwarf yelling for medical help while their entire team is healthy. Someone who isn't in the know might assume it's from a lost dwarf in the caves... which isn't really possible, since the only signs of other dwarves on Hoxxes are their remains when they die on the mission.
- Shout-Out:
- Many of its lines are shout-outs.
- As a robot with dual claw arms, a laser projector and a deadly ability of grabbing up to two characters to render them helpless while dealing constant damage to them, it bears more than a passing resemblance to Final Fantasy VII's Carry Armor.
- Strong Enemies, Low Rewards: Unlike other rare Boss in Mook Clothing enemies such as the Crassus Detonator, Bet-C, Korlok-Tyrant Weed, Prospector, or Lithophage Corruptor, which give the Dwarves something beneficial upon defeat, the Nemesis drops nothing but a ton of primed explosives. These explosives aren't even as likely to help the team by killing off many other enemies as a Bulk Detonator would be, since they home in on dwarves in sight (and the dwarves really should not be very near the bugs).
- Super-Persistent Predator: Once it becomes aware of a dwarf's presence (indicated by a switch from dwarf voice lines to its normal ones), it will relentlessly chase them down until either it or the dwarves are dead. It can even dig through terrain to get at dwarves attempting to escape into the terrain.
- Taking You with Me: In death, it will spam phase bombs absolutely everywhere, forcing one last set of mad dashes on the Dwarves to avoid getting blown to bits.
- Throw Down the Bomblet: Like the Caretaker, it can carpet bomb the area with teleporting Phase Bombs, but only uses this upon death.
- Voice Changeling: While inactive, it will mimic the Dwarves "I need revival", "Come over here", "MUSHRÜM!" and "WE'RE RICH!" shouts to try and lure them to it. The imitations are imperfect, however, and an attentive player can tell them apart.
- Voice of the Legion: When it's not trying to imitate a dwarf, it simultaneously speaks with both a high-pitched robotic voice, and a deep, imposing, digitally-distorted growl.
The Lithophage Infestation
- Arc Villain: Of Season 3: Plaguefall and Season 4: Critical Corruption. The Rockpox puts DRG's mining operations on Hoxxes at huge risk due to its infection of the planet's rock, and Management really does not want to see what will happen if it mutates to infect the dwarves.
- Artistic License – Biology: Played for Horror alongside Artistic License – Geology. A disease that infests rock seems farfetched... and yet, here it is, in all its ungodly horror.
- Attack Its Weakpoint: In exchange for toughening their victims' skin to ludicrously tanky levels, the body will have large, ugly blisters sticking out of them. Destroying all of them will instantly kill the creature regardless of its current health.
- Body Horror: Infected glyphids aren't having a good time at all, what with the bizarre growths and the horrid blisters that not only hurt, but will outright kill the host if popped. Mission Control may even tell you after one of the season's mission that, according to R&D, infected glyphids are pretty much in permanent agony thanks to these changes.Dwarf: Even the glyphids don't deserve this!
- Came from the Sky: Fragments of a passing comet seem to be the disease's main vector. And they will keep falling, too, sometimes even interrupting your missions and nuking a huge area in the process.
- Comet of Doom: The plague's apparent source; more specifically, fragments of it that've sloughed off a mysterious comet and into its trail, and are now raining down all over Hoxxes IV. These even can land in the middle of a mission, causing a deadly explosion on impact.
- The Corruption: Any Glyphid infected by the Rockpox becomes extremely resilient and can spread the plague. However, they also grow unsightly growths that become very weak points.
- Evil Evolves: As seen in Season 4, when a Plagueheart is allowed to stay where it landed, it forms into a massive Corruptor to make expanding the plague even easier. Now, instead of just staying where the initial infestation arrived, it has a chance of moving beyond that area. The Rockpox also spread to other Glyphid subtypes and even the Mactera, showing that it's only a matter of time before it can spread to every creature on Hoxxes.
- Gameplay and Story Segregation: The Miner's Manual states that some Rockpox creatures are capable of infecting nearby wildlife, but normal enemies can never be infected during an in-game mission, and those already afflicted with the Rockpox will exclusively target the Dwarves.
- Gang Up on the Human: Rockpox-infected victims will always go after Dwarves, instead of targeting other creatures that are near.
- It Can Think: More than your average pathogen, at least. It displays several behaviors that either indicate the disease is just part of something bigger with an actual life cycle, or the very disease itself has a manner of thought process. In particular, the Rockpox plague spikes have actual defense mechanisms against purging despite otherwise being seemingly non-living rock. Mission Control even speculates that the comet is actively targeting Hoxxes with its meteors, and seeing that meteors never land in places with already-active Contagion Spikes, he might be even more correct than he thinks. Season 4's events get even worse about this, as a stray line from Mission Control can reveal that one such meteor fragment directly struck one of the other space rigs with good enough aim to kill everyone inside.
- Knight of Cerebus: The Lithophage is by far the darkest enemy faction in the game so far, with everything about the infection and it’s effects on Hoxxes, the Glyphids and DRG itself played dead seriously and for all the horror it’s worth. Mission Control can occasionally reveal that three other teams got completely wiped out by it after your team completes a Lithophage Outbreak mission, and one of the story missions notes that an entire separate Space Rig was destroyed by another meteorite.
- No Biochemical Barriers: Averted, luckily enough for the dwarves. The otherwise irreversible disease can't seem to infect them properly yet, and the worst you see happening to them is getting coated in hostile, strangling biomass they need to break free of.
- Played a bit straighter in Season 4: Critical Corruption, as the Rockpox has finally spread to Exploders, Acidspitters, Mactera Goo Bombers, and Naedocyte Breeders. Not even the more fragile Glyphids and the flying creatures are safe!
- Outside-Context Problem: The Lithophage was practically unknown and unheard of until the infected meteorite entered Hoxxes' orbit. From there, its meteorite fragments begin to infest the rock and Glyphids, requiring the Dwarves to clean it while also bringing the Plague Hearts to R&D to study it.
- The Plague: And the dwarves are very lucky it hasn't managed to infect them yet, because it spreads very quickly and through any biomass that is itself infected, even Praetorian toxins and gases. Mission Control will get pissed if you so much as touch the containment tanks on the Space Rig because he knows any leak could be catastrophic.
- Spikes of Villainy: Areas infected by the Rockpox are covered in several reddish-brown spike-like growths. The activated disease vectors are even called Contagion Spikes, and look the part with each spike being far taller than you are.
- Status Effects: If Rockpox infection builds up sufficiently on the Dwarves, it encases them in pox growths, causing a temporary stun and damage over time effect that requires Smashing Survival to remove.

The weakest vector of the Rockpox disease, consisting of strands of ambulatory biomass that will leap at Glyphids and dwarves alike and try to infect them.
- Fragile Speedster: They die as quickly as any maggot under fire, but slither around fast and with agility, making them hard to target.
- Gang Up on the Human: Despite these being the primary vector for Glyphid Rockpox Infestation, they often tend to target the player(s) instead of nearby Glyphids.
- One-Hit-Point Wonder: They die in one hit from almost any attack.
- Suicide Attack: Larvae leap at a target and explode into a burst of pure plague, infecting Glyphids and covering dwarves in hostile biomass.


Infected fauna of Hoxxes, suffering from severe symptoms of Rockpox infestation, violently mutated and bent to its will. A commonality between them is a nearly invulnerable outer shell, requiring dwarves to focus on the blisters erupting from their body to put them down for good. Rockpox Grunts crawl around the caves as both vectors and defensive measures, their bodies hardened by the plague; Rockpox Praetorians gain even harder defenses and have had the acid in their attacks swapped out for plague-clouds. Both also gain a plague parasite-flinging attack, though strictly speaking it's actually the Rockpox inside them doing that.
Season 4 added the Rockpox Spitter, Exploder, Goo Bomber, and Naedocyte Breeder to the list of infected monsters. They mostly act the same as their nominate counterparts, but with their attacks replaced by Rockpox versions.
- And I Must Scream: According to tests from R&D, Glyphids infected by the Rockpox are affected in both the cognitive and pain receptors in their brains, putting them in perpetual agonizing pain, to the point where killing them is a mercy.
- Attack Its Weak Point: Toughened as they are, their blisters take more damage to the point popping the three of them is a death sentence. On Praetorians, attacking the pustules is a must because of how hardy they are otherwise.
- Body Horror: Rockpox is nasty. Numbing, hardening of chitin and pulsating, glowing blisters aren't signs of a healthy physique. All the symptoms you see in a normal Grunt are made even worse on a Praetorian: The numbing and hardening has made them almost unkillable, and they have many blisters all over their bodies. These blisters are, according to R&D, rooted deeply in their internals and it seems likely that the Rockpox is the only thing keeping them alive, as removing enough blisters causes the host bug to instantly die.
- Elite Mook: Hijacked and more elite than ever, Praetorians are this to the regular infected Grunts, with more health, much more armor, and many more abilities.
- Long-Range Fighter: Compared to normal glyphids, these are far less mobile and can often be taken down before they enter melee. However, they all come with a long ranged Rockpox-flinging attack that inflicts a substantial amount of infection.
- Nigh-Invulnerable: The Rockpox makes their bodies take Scratch Damage from anything that doesn't target their blisters.
- Stone Wall: They aren't that much more damaging than a regular grunt and move much slower than one, but their bodies minus the blisters are near-indestructible and they apply Rockpox with every bite.
- Technically-Living Zombie: The Rockpox turns Glyphids into entities completely subservient to the Lithophage itself and seek to spread it, converting their bodies into an extremely hard substance while forcing them into a state of constant pain. They're still considered "alive" in a sense, since their cognitive receptors are still functioning.
- Weaksauce Weakness: The Lithofoamer guns you have access to when clearing Rockpox infestation normally do the scratchiest of Scratch Damage if you fire it at living things, but if that thing is a Rockpox infectee then it causes it to temporarily run away in fear.
- Zombie Puke Attack: Rockpox Praetorians can vomit a stream of Rockpox-bearing fluid at the dwarves, causing a significant rise in their infection meter.
A horrific amalgamation of biomass and Plaguehearts that is presumably born if Plaguehearts are left to fester in their meteors for too long. It can spread hazardous Rockpox wherever it goes by discharging spores, and its shell is impervious to normal attack, only taking damage from DRG's lithofoam cleansing equipment. However, the Corruptor doesn't go down without a fight, and will retaliate violently when threatened.
- Attack Its Weakpoint: It has three blue "cores" that can each be shot at once their respective shell segment has been stripped away. Destroying a core will cause massive damage to the Corruptor, and destroying all three will instantly kill it.
- Combat Tentacles: It can send out damaging waves of tentacles to ensnare and damage any dwarf caught in it. The corrupted patches of rockpox it leaves behind also have wriggling tentacles that will damage any dwarves standing on them.
- Flunky Boss: Can spawn masses of Plague Larvae whenever a segment of its shell is broken.
- Geo Effects: Whenever its spores make contact with the ground, it will cause that ground to become a more aggressive form of rockpox, quickly sapping away the health of any dwarf foolish or unfortunate enough to be standing inside it. These can fortunately be cleansed using the Lithofoamers and Lithovacs.
- Gonk: It looks very weird, to say the least. Not that that stops it from being incredibly dangerous when provoked.
- Kryptonite Factor: Its outer shells make it invulnerable to almost anything the dwarves throw at it... even a Bulk Detonator will fail to scratch it. The exception is of course, lithofoam and lithovacs, which can strip away its shell quickly.
- Lightning Bruiser: Don't let its strange method of locomotion fool you. This thing can be surprisingly quick when it wants to be, and its tentacles and slams deal quite a large chunk of damage.
- Meaningful Name: It corrupts the very rock and stone it slithers by, turning it into more rockpox.
- Metal Slime: The Plaguehearts that give the Corruptor its form will be released once it is destroyed.
- Mini-Boss: It can randomly show up in the middle of most missions, gets its own healthbar, and can hit as hard as a dreadnought, but its destruction isn't necessary to complete the mission. However, it provides a nice points bonus from the Plaguehearts it drops on death, and killing it will also stop it from spreading its spores all over the place and interfering with the mission proper.
- Optional Boss: Fighting it is totally optional, but killing it will net you some Plaguehearts for extra EXP and also stops it from spreading its corruptive rockpox all over the terrain.
- Savage Setpiece: The thing won't even react to your presence at first. It is content to merrily spread rockpox wherever it wanders. The moment it gets hit by a single glob of lithofoam though, all bets are off.
- Shielded Core Boss: It has an outer and inner shell made of hardened rockpox and biomass that must be stripped away with lithofoam and a lithovac. Both the outer and inner shell must be removed before the Corruptor can be properly damaged. The inner and outer shells themselves are divided into 3 segments around the core, necesitating that at least one segment of the shells be completely removed to damage it, although removing all three will greatly expedite the process since all of its weak points will be exposed.
- Shockwave Stomp: If a Corruptor lets out a prolonged screech as dust gathers around it, that's a dwarf's cue to get out of the radius before the Corruptor slams the ground for heavy damage and knockback.
- Turns Red: When first attacked, the Corruptor is content to fleeing at full speed and laying down damaging rockpox areas in its wake to discourage the dwarves from following it. Once a core is exposed for the first time, the Corruptor begins to actively fight back full force.