Playable Characters | Allies | Monsters and Hostile Mobs | Neutral and Passive Mobs | Bosses and Giants | Other Characters
This character sheet is about the various bosses and giants found in Don't Starve.
Introduced in the base game


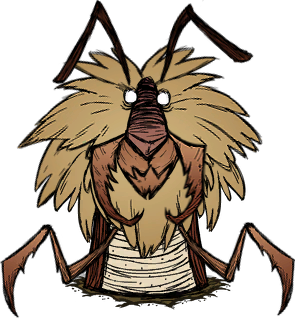
Sentient evergreen trees that can be awakened in anger sometimes, when the player has cut down an evergreen. They can easily be pacified by planting back evergreens' seeds. They drop living logs when killed, which is one of the few ways to get them.
- Boss in Mook's Clothing: They are among the hardest enemies that will constantly spawn. The ones that appear in Shipwrecked even have a ranged attack.
- Gaia's Vengeance: Cutting down too many trees can cause them to spawn and attack you in retribution. You will need to undo the damage you've caused by planting new trees in order to calm them down. They'll get angry at you again if you chop a tree too close to them.
- Heel–Face Turn: Planting pinecones has a chance of pacifying them.
- Kill It with Fire: While it does significantly reduce the loot dropped by it (reducing it all to ash) simply setting the things on fire and running away is a viable tactic. They are still made of wood after all
- Mighty Glacier: Very powerful and with high health, but slow.
- Treants: Powerful monsters resembling humanoid pines, they will try to kill you if you cut down too many trees unless you pacify them by planting pinecones. The Shipwrecked DLC adds Palm Treeguards, which resemble a cluster of palm leaves with a face and arms mounted on two trunks serving as legs. They spawn when palm trees are cut down and are pacified by planting coconuts.
- Underground Monkey: In addition to the regular, evergreen tree-based Treeguards, the Shipwrecked DLC adds a tropical palm-based variant that spawns in tropical beach biomes.
- When Trees Attack: They are fairly neutral when left to their own devices, but if you cut down too many trees or attack them first they will do their level best to kill you.

A humongous spider that eventually spawns out of a Spider Den if it's grown big enough. It will frequently give birth to new Spiders as long as it remains alive but will eventually settle into a new Spider Den if left alone. They're neutral to Webber.
- Big Creepy-Crawlies: If you thought the regular Spiders were big, this thing easily stands several heads taller than a regular character.
- King Mook: Or Queen Mook of the Spiders, obviously.
- Mighty Glacier: Like the Treeguards, they're very powerful but are otherwise extremely slow moving.
- Mook Maker: A Spider Queen will keep giving birth to Spiders, including the exclusive Nurse Spider in Don't Starve Together.
- Off with Her Head!: Killing one will grant its head as an Organ Drop. Wearing it as a hat grants the ability to mind control nearby Spiders for a short period of time.


A giant, one-eyed deerlike creature with a fondness for destroying player structures. It shows up near the end of winter.
In Don't Starve Together, when the Lunar Rifts have opened, a Brightshade Gestalt will posses any dead Deerclops', reanimating it into the Crystal Deerclops.
- An Ice Person: The Reign of Giants DLC makes it the Giant of Winter and gives it the ability to freeze its enemies while attacking. The Crystal Deerclops is even more of one, gaining a freezing aura and ice spikes, but also a vulnerability to fire.
- Back from the Dead: The Crystal Deerclops is re-animated by a Brightshade Gestalt when you kill a regular Deerclops. Killing it again makes it drop rot instead of anything edible.
- Came Back Strong: The Crystal Deerclops is an undead Deerclops with more health, a projectile attack and freezing aura, and a far more aggressive attack pattern.
- Cyclops: A variant, in both the one-eyed and classical (giant, that is) senses of the word.
- The Dreaded: About half the characters express fear of the Deerclops in their examination quotes for it.
- Eye Scream:
- It drops its eyeball when killed, which can be used to make a headgear item that's just the membrane stretched over some sticks.
- Because of the above reason, the Crystal Deerclops is missing its eye entirely, an ice spike jutting out of it when its still frozen. The spike itself is melted if you set it on fire, and the eye socket will remain hollow until the Crystal Deerclops regains its freezing aura, acting as a useful indicator.
- Female Monster Surprise: While most characters refer to it as male, Wurt and the description for the Glass Eyebrella skin implies it's actually female.
- Kill It with Fire: Stun it with fire, more like. Setting the Crystallized Deerclop on fire as it recharges its eyespikes is the only way to stun it and get rid of its freezing aura.
- Palette Swap: Subverted unlike the other seasonal giants. It gains a more menacing appearance during Winter's Feast with dark fur and a glowing red eyeball, but it gains a new attack in the process.
- Red Eyes, Take Warning: It gains a glowing, red eye during Winter's Feast, which is bright enough to ward off Charlie and capable of firing a laser as an attack.
- Rent-a-Zilla: It's a giant, like most of the other bosses.
- Video Game Caring Potential: If you let it destroy ten structures, the Deerclops will be pacified, and will simply leave you alone and despawn for the season. Won't stop it from coming back next year, though.

A creature found in the Ruins. In Don't Starve Together, it guards a key to activating a gateway in the caves.
- Alien Blood: As its health is lowered in Together, the Ancient Guardian will begin to bleed nightmare fuel. These sometimes form into shadow tentacles that can attack you.
- Back from the Dead: In Don't Starve Together the Ruins reset caused by the defeat of the Ancient Fuelweaver applies to all the creatures living in the Ruins as well. Which means that every time the Ancient Fuelweaver is defeated, the Ancient Guardian will be back to life to be challenged again.
- Beast in the Maze: The Ancient Guardian can be found at the end of a maze infested by spiders in the Ruins.
- But Thou Must!: Defeating the Ancient Guardian in Don't Starve Together grants the player the Ancient Key required to fight against the Ancient Fuelweaver.
- Odd Friendship: With Maxwell, apparently. If the Guardian is killed, Maxwell will seem regretful, and apologizes for killing his "old friend". There's also the fact that the Clockwork Rook resembles it greatly.
- Ramming Always Works: It shares the same attack pattern as the Clockwork Rooks. Funnily enough, as of a Quality of Life update in Together, ramming does not always work, as getting it to hit the pillars in its arena will stun it.
Introduced in the Reign of Giants DLC

The Giant of Summer. In Don't Starve Together, she is instead encountered on a set piece by a desert biome year-round.
- Big Creepy-Crawlies: It's a giant fly-like dragon (or maybe a dragon-like fly?).
- Dreadful Dragonfly: It's considerably bigger than the players or most other enemies in the game, and will attack the moment it sees you. It's also a lot more reptilian and pyrokinetic than dragonflies usually are, being a literal dragon-fly.
- Dragon Hoard: In Don't Starve Together, defeating the Dragonfly makes it drop lots of different gems, including the hard-to-find Yellow, Green, and Orange Gems which are normally only found in the Ruins.
- Magma Man: It spits globs of lava, in order to burn things into ashes that it can then eat.
- Mix-and-Match Creatures: A dragon-like creature with a fly's eyes and wings. Also a tongue-in-cheek pun of the word "dragonfly".
- Our Dragons Are Different: It's a living pun on the word "dragonfly", but besides that it's a fairly standard dragon — a big, aggressive flying reptilian creature strongly associated with fire and heat, which it uses to attack you. It even drops a bunch of gems and gold in Don't Starve Together, akin to a dragon's hoard.
- Palette Swap: Gains a mistletoe-like design in Winter's Feast, with its enraged state becoming pure white instead of black.
- Playing with Fire: It can spit lava and create rings fire, and it is immune to flames.
- Pun-Based Creature: It's a literal take on the wording of "dragonfly", with a dragon's overall appearance and fiery breath and a fly's eyes, proboscis and wings.
- Weaponized Offspring: When fighting it in Don't Starve Together, it will summon its maggot offspring, Lavae, to attack players. Lavae run towards players and promptly explode into flames upon making contact.


The Giant of Autumn. In Don't Starve Together, it is encountered year-round, hibernating in the Winter and Spring, and being active during Summer and Autumn.
When a Bearger is killed while a Lunar Rift is open in the world, a Brightshade Gestalt will posses its corpse and re-animate it into the Armored Bearger.
- Back from the Dead: Armored Bearger is a Bearger re-animated by a Brightshade Gestalt. Killing it in this state will have it drop rot instead of meat.
- Bears Are Bad News: Meant to be a bear and encountering it is very bad news to your beloved base if it starts rummaging for food there. Armored Bearger is even more dangerous, and aggressive to you at all times.
- Berserk Button: In Don't Starve Together, it's passive unless provoked but it will attack players on its own if they have honey in their inventory.
- Big Eater: Its main motivation is finding lots of food to eat.
- Bigfoot, Sasquatch, and Yeti: Its appearance changes during the Winter's Feast, and is meant to look like a stereotypical yeti.
- Came Back Strong: The revived Armored Bearger has more health, a more aggressive fighting style that's complimented with Planar Damage, and a new butt stomp attack for anyone who tries to kite its attacks.
- Cycle of Hurting: The biggest danger of the Armored Bearger. If its claw swipe hits you but doesn't knock you out of its range, the Bearger will keep swiping until you die.
- Ground Pound: Armored Bearger will perform a ground pound on you every time you get behind it. Or, if you get too far away from it, it'll perform a leap towards you to catch you in the stomp. Attacking it with Planar Weapons while it's recovering will stun it and open it to attack.
- Mix-and-Match Creatures: A bipedal cross between a bear and a badger.
- Palette Swap: In Winter's Feast, it gains a coloration that makes it resemble a yeti.
- Stock Animal Diet: It's particularly fond of eating honey (like any other stereotypical bear or badger), and will raid your Bee Boxes.
- Too Dumb to Live: Bearger will eat any food item including harmful ones like monster meat or red mushrooms, making it easy to kill it without having to fight it directly. You can even make Bearger gather the food itself by leading it to a swamp, where it will kill tentacles and eat the dropped monster meat, eventually poisoning itself to death without the player having to lift a finger.
- The Worf Effect: It's swallowed whole by the Eye of Terror in "Eye For An Eye".

The Giant of Spring.
- Beware the Silly Ones: It looks silly and absurd, yet it's still just as dangerous as any of the other giants.
- Big Eater: The Moslings eat every piece of food they can find around them.
- Cub Cues Protective Parent: In Don't Starve Together the Moose/Goose arrive to lay the egg and leaves shortly after, but it gets summoned every time something appears to hurt the hatchlings (and as the nest location is always close to a pond where aggressive frogs live, it will happen quite often).
- Mix-and-Match Creatures: A giant Canada goose with the head and antlers of a moose.
- Moose and Maple Syrup: It's a combination of a Canada goose and a moose, two animals commonly associated with the country. Woodie even lampshades this in his examination quote for the giant:
- Palette Swap: It gains a different coloration during Winter's Feast, not to mention its attributes are swapped. Normally it has the face of a Moose and feet of a Goose, but here they're swapped.
- Turns Red: Not the Moose/Goose itself, but the Moslings after their parent/s die. They will accumulate electric power and start to chase the player as living, lightning-summoning whirlwinds until the player dies or they are all slain.
Introduced in Shipwrecked

A shark that spawns during Monsoon season. Is accompanied by Sharkittens.
- Ground Pound: One of her main attacks involves jumping up and landing on the player.
- Mama Bear: It's not naturally aggressive, unlike most mobs. It'll only attack if the player approaches their den or harms her Sharkittens.
- Mix-and-Match Creatures: A tiger and a shark, of course.
- Stealth Hi/Bye: It has a tendency, especially during Hurricane and Monsoon Seasons, to suddenly appear without warning in the ocean when doing anything on a boat. It's also passive to players unless provoked when it appears this way (though she'll go around attacking other mobs nearby), and will just despawn if the player leaves the area she suddenly appeared in.
- Terrestrial Sea Life: Can swim and walk on dry land.
- Threatening Shark: A more downplayed trope. It's certainly terrifying and a huge threat, but it doesn't actively threaten the player unless it's attacked first or if they attack her Sharkittens.
- Visual Pun: Its appearance is a literal interpretation of the real life species of shark that it's named after.


The Giant of the Hurricane season. It appears in the form of a living tornado.
- Bad People Abuse Animals: Once it is defeated the Sealnado reverts to its true form... an adorable baby seal unable to control its own powers. The player can let it go away or kill it for some extra meat and a nice visit from Krampus.
- Blow You Away: It can control wind. And it can destroy your base if you are not careful enough.
- Circling Birdies: Defeating its tornado form will cause the seal to fall down dizzy, with stars rotating above it.
- Expy: Of the Deerclops, as they both appear as giants near the end of a challenging season (the Deerclops appearing in Winter, and the Sealnado appearing in Hurricane Season) and have a fondness of destroying the player's structures.
- Ridiculously Cute Critter: When defeated it will reveal that its true form is an adorable baby seal. Even Maxwell finds it cute.
- Shout-Out: To Sharknado, what with it being a ridiculous sea creature-centric tornado.
- Tender Tears: In its seal form, it will look around with shimmering eyes as if it's about to cry.

A sea monster that spawns when the player is using a Trawl Net in the Deep Ocean or in the ship graveyard.
- Combat Tentacles: You need to avoid them so you can reach its head.
- "Get Back Here!" Boss: Dealing enough damage to its head will cause it to run away and reappear in a nearby part of the ocean. You'll have to catch it at least four times before actually managing to kill it.
- Kraken and Leviathan: It's so massive you can only see its head and its tentacles.
- Mix-and-Match Creatures: It's a three-eyed duck fused with the legendary Kraken.
- Super Spit: It will spit globs of ink at the player. The ink will also slow down boats caught in it for a short time.
Introduced in Hamlet

A boss that spawns every day when the Aporkalypse is occurring.
- Biblical Motifs: All of its summons are references to the plagues of Egypt in the Book of Exodus. The Ancient Spirits being death, the Shadow Creatures being darkness, the Dragoon Eggs being a storm of hail and fire, and the Poison Dartfrogs being a plague of frogs.
- Mayan Doomsday: It and the Aporkalypse appear when the Aporkalypse Calendar in its temple, stylized after the Maya Calendar, are all aligned at the bottom.
- Sign Of The End Times: It appears only when the Aporkalypse is occurring. Many characters even call it as a sign that The End Is Nigh.
- Zerg Rush: It's main source of attack is trying to summon lots and lots of creatures to try to attack the player. It's not uncommon to have something like 30-50 different creatures in the map all at once at the end of the fight.

A huge automaton. It is initially found in the first island disassembled and covered in moss, but can be reassembled by activating each of the parts and leading them together.
- Scenery Gorn: The places the parts are initially found are in areas littered with craters, scorched earth, rubble, and burnt trees. It's not hard to see why, because all the individual parts can be reactivated by lightning strikes (which are common during Humid Season and can be summoned by certain mobs that may spawn nearby) and, once they're up, are hostile to anything that gets close to them and start fires with their attacks.
- Superboss: You don't have to fight the Large Iron Hulk, as the player has to go out of their way to try to assemble it together in order to fight it in the first place. Said fight itself is pretty tough, as the Iron Hulk has more attacks in its disposal than any other boss in the single player games.
- Taking You with Me: It will explode after it dies, which can deal a lot of damage to unwary players after the fight ends.
- We Can Rule Together: WX-78 tries to offer this to an activated Iron Hulk. Unfortunately, the Iron Hulk is not keen on talking.

A large serpent that appears after the player harvests the Fountain of Youth.
- An Ice Person: One of its attacks involve Eye Beams that freeze mobs on contact.
- Attack Its Weak Point: Pugalisk is normally impervious to damage thanks to its scales but chipping off the scales gives you a weak point where you can attack it. And if you're quick enough, a well shot Coconade explosion at it's weak point will kill it in one hit.
- Eye Beams: It possesses one and getting caught in it will freeze you solid. After killing it, you can use its skull to shoot its own eye beams to freeze other mobs solid too!

The queen of the Mants, and is hidden in the deepest part of the Mant Hills. She has Queen Malfalfa's crown and is needed to be fought in order to return the crown and unlock Wilba.
- Brown Note: When her health gets low, she'll play a horn which stuns players and significantly lowers their sanity in the process. The stun effect is particularly dangerous if she does it in the middle of an earthquake.
- Flunky Boss: She herself doesn't actually attack directly, instead relying on the Mant Warriors she gives birth to and triggering earthquakes during the fight in order to attack the player.
- Stationary Boss: She doesn't move at all during her boss fight, so she's vulnerable to a stack of Gunpowder exploding near her.
- Weaponized Offspring: She'll try to drop Mant Warrior Eggs during the fight directly on top of the player. Said eggs will promptly hatch into Mant Warriors which will attack as well.
Introduced in Don't Starve Together

A fungal frog monster found in the caves.
- And Your Reward Is Clothes: Manage to beat it? Enjoy your hats.
- Green Thumb: Can summon exploding mushrooms and spore clouds that rapidly rot your food supplies.
- Poisonous Person: Detonating a volatile canary near its Toadstool Cap will instead cause it to summon a Misery Toadstool, a much tougher variant.
- Pun-Based Creature: It's a pun on the term "toadstool", meaning colorful and toxic mushrooms, in the form of a gigantic toad with vivid mushrooms growing from its back.
- Superboss: Its Misery Toadstool form, which can be achieved if the player lets explode a volatile canary next to its mushroom before its summon. The fight mechanic is unchanged, but it has a higher attack and defense and the insane health cap of 99999 HP. It also drops the Napsack's Blueprint upon death.
A summer exclusive mob who lives in the Oasis Desert. It needs to be appeased by the player with trinkets or it will start to create sinkholes on the surface and collapses inside the caves.
- Dishing Out Dirt: It can cause earthquakes and sinkholes very far away from its position. And during the fight it uses the desert sand to trap you and it will attack you causing sand spikes to emerge from the ground under your feet. You can set these structures on fire to get some nice glass decorations.
- Evil Counterpart: Of the Pig King. They are both stationary mobs, but if the Pig King will always ignore you unless you pay him a tribute, the Antlion will actively try to damage you and your structures if you don't pay tribute in time.
- Mix-and-Match Critter: Nominally a literal mix of ant and lion, although its head is more similar to a grasshopper's and its forelegs distinctly mantis-like.
- Pun-Based Creature: Real antlions are burrow-dwelling insects so named for their ferocity. This antlion is a burrow-dwelling insect with an actual lion's mane.
- Stationary Boss: The Antlion can't move from its position, so he uses its power to manipulate the desert sand to trap and attack you.
- Skippable Boss: You don't need to fight it to get its drops. If you offer it the Beach Toy it will reward you with its exclusive Lazy Deserter Blueprint, and it will offer its Desert Stones for every other trinket. The only extra thing that you will obtain by killing it is some meat and, if you are fast enough to set the sand on fire, some glass sculptures.

An enormous bee summoned by hammering a Gigantic Beehive.
- And Your Reward Is Clothes: Much like the Spider Queen, she drops a Bee Queen Crown, an armor which converts insanity auras to sanity auras (which can be really useful as some of the most dangerous mobs in the game have an important insanity aura) and forces the other players to bow to you instead of doing their idle animation.
- And Your Reward Is Edible: The Bee Queen is the only mob in the game who drops Royal Jelly, a very useful food item. It can be eaten directly to restore 40 HP, 15 Sanity, and some Hunger, or it can be used in a Crock Pot with 3 filler food (barring Monster Food and Twigs) to create a stack of 3 Jellybeans, the best healing item in the game. Jellybeans heal 2 HP and 5 Sanity when directly consumed, but then they heal 2 HP every 2 seconds for 2 minutes, making it actually 122 HP recovered by eating them. And the good news are that even the characters who don't normally gain the full heal from food still benefit from the Jellybeans' prolonged healing effects.
- Bragging Rights Reward: The Bee Queen also drops the Bundling Wrap's blueprint, which gives the player the chance to create an item who stops altogether the spoilage of every perishable item in the game.
- Expy: Its design bears a striking resemblance to Vespiquen.
- Flunky Boss: One of her main attacks is summoning Grumble Bees to have at you.

A boss exclusive to Winter. He gets summoned when the player tries to open his sack with a Deer Antler.
- 1-Up: Klaus is the only boss in the game to own a Life Giving Amulet. This means that you need to kill him twice before getting his loot.
- Bad Santa: He gets summoned by trying to open a sack full of useful stuff (and charcoal), he travels with magic deers, and he can summon normal Krampii to assist him during the fight. Also, during the Winter's Feast event, he is always available until the end of the event.
- Belly Mouth: He has a second mouth kept closed by chains. He will use it to attack during the second phase of the fight.
- Berserk Button: Killing any of the Gem Deer or otherwise forcibly separating them from him a distance away (ie, via Telelocator Staff) will cause Klaus to become enraged, which significantly boosts his combat power. It is highly advised you leave them alone during the fight.
- Bragging Rights Reward: His sack contains four Bundled Supplies which can contain mundane stuff like Charcoal, Gold and an occasional Life Giving Amulet, or exclusive drops from other Monster Bosses and rare Blueprints.
- Chained by Fashion: His body is bound by a locked chain. It keeps his real mouth shut.
- Facial Horror: His eyelids and mouth are all stitched shut.
- King Mook: Klaus seems to be related to Krampus and he can summon some of them to fight for him.
- Mouth Stitched Shut: For some reason his mouth and his eyes are stitched shut. And the second mouth on his stomach is kept closed by some chains.
- The Nose Knows: He uses his nose to smell the position of his enemies as he is blind.
- Turns Red: He gets bigger and stronger when his Gem Deer get killed. Not even Wigfrid wants to fight him in that form.
- Wolf Pack Boss: He always takes with him a Red Gem Deer and a Blue Gem Deer, who help him fighting trying to set on fire or freeze the player. It is advised to leave the Gem Deer alone.

A large bird that guards a Deep Bass shoal in the Ocean. Normally passive, but it will turn hostile if it catches players trying to fish out of the shoal it's guarding.
- Feathered Fiend: Downplayed. It's terrifyingly large but it's passive to players unless provoked and will actually go around attacking hostile mobs for you if you let it be. The only time it will attack first is if it catches you trying to fish out of the shoal it's guarding.
- Mix-and-Match Critters: It's an odd mix of an albatross and a fish.
- Organ Drops: When killed, it will drop its beak. The beak is a very handy tool to use as an oar for your boat by itself but it can also be crafted into an efficient watering can.
- Perpetual Molt: It will always drop some feathers when it takes damage, which you can take as crafting ingredients.
- Tail Slap: It primarily attacks by slapping its enemies with its fish tail.

An oversized fruit fly that appears to threaten a player's farm crops when there's enough of them in one spot.
- Beelzebub: Its name and fly motif gives it a not-so-subtle reference to the Lord of the Flies himself.
- Big Creepy-Crawlies: Possibly the smallest sized boss in the game but this thing is still gigantic, especially compared to a regular fruit fly.
- King Mook: A boss version of Fruit Flies.
- Mini-Boss: It isn't as strong as the other bosses in Don't Starve Together but ignoring it will decimate your farm so you will end up having to engage in the long fight against it if it appears and you want to save your crops.
- Pest Controller: It will summon Fruit Flies in combat, which also go around to make your crops stressed.
- Plant Person: When killed, it will drop Leafy Meat, many crop seeds, and a Fruit Fly Fruit from its abdomen, which makes this a literal Fruit Fly.
- Shout-Out: To Lord of the Flies.
- Bat Out of Hell: The Shadow Bishops will turn themselves into shadow bats to chase and damage the player.
- Beat Still, My Heart: A level 3 Shadow Piece will drop a Shadow Atrium after their defeat, a twisted, still beating black heart which can be used to bring the Odd Skeletons back to life.
- But Thou Must!: If you want to challenge the Ancient Fuelweaver you need to defeat the Shadow Pieces first to acquire the Shadow Atrium.
- Character Level: A unique case: all the Shadow Pieces start as Level 1 at the beginning of the fight, and they are not more difficult than most of the common enemies. Kill one of them, and the other two will upgrade to Level 2, and their power level will be similar to a boss monster in classic Don't Starve. Kill a second one, and the last piece standing will reach his final form. No matter which Shadow Piece will reach that level, it will still qualify as one of the hardest bosses in the game.
- Chess Motifs: Just like their mechanical counterparts. It can be extended to the Queen (with a comedy and a tragedy version), the King (the Maxwell statues) and the Pawn if you consider the other sculptures you can find in the world too.
- Evil Counterpart: Of the Clockwork Monsters. To the point that mining the Marble Sculptures during a Full Moon night will release regular Clockwork Monsters instead of these guys.
- Fighter, Mage, Thief: The Shadow Rook deals more damage and has more health than its companions, but it is so slow it is the easiest one to hit at the same time; the Shadow Bishop turns into bats to attack the player and teleports away shortly after, because it is the easier one to take down when it is not attacking because he has less health; finally, the Shadow Knight chases the player and has a ranged attack that will be upgraded with each level up.
- Guide Dang It!: You might never meet these guys in game unless you don't follow an intricate series of instructions. First of all, you need to find the Suspicious Marble corresponding to the missing pieces of the Marble Sculptures set piece (the correct one can be recognized by the presence of the Rook. The Bishop and the Knight are disguised as an amphora and a headless torso respectively and they need to be mined to reveal their true, broken form); once you managed to find the three missing pieces and having marked their position on the map, you need to tame a Beefalo so it will help you carry all the pieces in the right place in a reasonable time. Once the sculptures are put back together, you need to wait for the New Moon to mine the shaking statues to release the mobs in the world. It is important to fight all the three pieces together so they will all level up when one of them dies, or the last one won't evolve to level 3 to drop the Shadow Atrium and it will be All for Nothing. Luckily the destroyed statues will always drop the Chess Pieces sketches, so you can create your own Chess Figures to hammer on the next New Moon day in 20 days to try again in case of failure.
- Long-Range Fighter: The level 3 Shadow Knight has one of the longest (if not the longest) ranged attack in the game.
- Malevolent Architecture: They are trapped inside marble statues. Destroying the shaking statues during a New Moon night will summon them.
- Notice This: There might be multiple Suspicious Marble set pieces in one world, but the correct set piece to activate the fight will always feature a central Rook surrounded by four Marble Statues and a skeleton with a 100% durability pickaxe and some marble next to it. Try to mine the set piece and you'll notice that the Rook and two of the sculptures won't completely break down when mined, revealing instead the headless versions of a Bishop and a Knight, whose marble heads you possibly already saw before during your early explorations. With these little clues you know that something is bound to happen if you somehow bring in there all the missing pieces to repair the sculptures.
- Villain Teleportation: The Shadow Rooks attack teleporting directly on the player.

A creature that is revived using the Shadow Atrium on a correctly assembled fossil piece. It will have different forms depending on where it is revived, but if it is revived in the Ruins with the Ancient Key in the Ancient Gateway, it will turn into the Ancient Fuelweaver.
- The Battle Didn't Count: It's Charlie who deals the final blow to him during his death animation.
- Bragging Rights Reward: Defeating him provides two of the best armors in the game, the tool to control the Forest and the Caves Reanimated Skeletons, and it will reset the Ruins back to their original state, making their limited resources renewable.
- Fertile Feet: If reanimated above ground, it will leave Light Bulb plants and ferns wherever it walks, which wilt in a few seconds.
- The Extremist Was Right: While the Fuelweaver does try to kill the survivors, he's completely in the right about the Gateway. Unfortunately, Charlie takes him away and the Gateway opens, dragging everybody present at the opening into a series of dangerous realms...
- Gameplay and Story Segregation: What the Gateway does in-game when it's fully activated is completely different from what it does in the Forge trailer.
- True Final Boss: Of the A New Reign expansion of Don't Starve Together. The Ancient Fuelweaver defeat by the hand of Charlie and the Survivors and the activation of the Ancient Gateway are what canonically sets in motion the events of the Forge and the Gorge. In the game it just causes a World Reset for the Ruins.
- Was Once a Man: He's heavily implied to be the last king of the Ancient Civilization.
- Well-Intentioned Extremist: He attempts to stop the player characters from activating the Ancient Gateway by killing them.

A giant crab that guards treasure. Socketing gems on its castle will cause it to attack, but socketing Pearl's Pearl and defeating it will cause it to give its real treasure, the Inactive Celestial Tribute.
- An Ice Person: One of its attacks involve summoning a freezing shockwave that freezes characters and severely decreases their body temperature. If filled with enough Blue Gems, this attack can get so strong it will easily make any character start freezing to death even if they were in the middle of overheating when the attack hit.
- Giant Enemy Crab: Goes without saying. The thing is twice as large as your boat and is a proper boss fight on its own.
- Guide Dang It!: The gems socketed into it will increase its power in a certain way depending on the color of the gem socketed, though the game itself will not tell you that. Socketing Pearl's Pearl in particular will boost its power as if it has three of each gem socketed.
- Making a Splash: One of its other attacks involve summoning geysers to try to make leaks on your boat.
- The Lost Lenore: He's the addressee of the Crabby Hermit's bottle messages.
- Stationary Boss: It won't move from its spot during the fight. The particular danger when fighting it comes from the sheer damage it will do to the boats you're standing on in the process.

A mysterious creature that spawns from a meteor strike after the player helps finish Wagstaff's experiment with the Lunar Siphonator. It has three phases in its boss fight.
- Bragging Rights Reward: Managing to destroy it grants some pretty awesome loot, including a powered up version of the Celestial Orb, which grants all crafting recipes in the Celestial Tab, and the Enlightened Crown which spawns Gestalts to attack the enemy of whoever wears it.
- "Get Back Here!" Boss: In its third phase the Celestial Champion frequently runs away from the player, requiring players to chase after it to deal damage.
- Light Is Not Good: Its main attacks include using light beams to attack and getting Gestalts to make players go to sleep. It's also the only boss in the game with a positive sanity aura, though the fact that you're fighting it in the Lunar Isles, where enlightenment is a danger, that's a very bad thing.
- Marathon Boss: The Celestial Champion has lots of HP in all three of its phases. Trying to kill one will take at least one and a half in-game days, and on average two to three in-game days for a character with regular damage multipliers to defeat it. Fortunately, you're fighting it in an eternal full moon so there's no risk at fighting it at night without a light source.


A giant, disembodied eye from another world entirely, summoned by interacting with a Terrarium. Feeding the Terrarium with Nightmare Fuel beforehand will spawn the Twins of Terror, twin mechanical copies of the eye.
- Adaptation Name Change: It's known as the Eye of Cthulhu in its home game; the change is likely meant to signify the survivors' unfamiliarity with the beast, and to hew closer to the naming scheme of Don't Starve's own Eldritch Abominations. On a lesser note, one of The Twins' names is spelt differently, as it's called Retinazer in its home game.
- Adaptational Wimp: The Twins have neither Retinazor's laser spam, nor Spazmatism's Cursed Flame breath.
- Crossover: It's the Eye of Cthulhu from Terraria, transposed into the Constant.
- Dual Boss: The Twins of Terror, as the name suggests, are fought as a duo.
- Eye Scream: It's a disembodied, veiny eyeball that makes all of the sounds its design entails.
- Flunky Boss: The Eye of Terror can spawn Suspicious Peepersnote to aid it in combat.
- Giant Eye of Doom: Goes without saying.
- Normal Fish in a Tiny Pond: In Terraria, the Eye is a Warm-Up Boss. Here, it can devour a Bearger whole and is a threat on the level of the Giants.
- Plot-Irrelevant Villain: The Eye/Twins of Terror are just a crossover boss for the player to fight, and have no real bearing on the story.
- Ominous Visual Glitch: The Eye and its Suspicious Peepers are constantly randomly stuttering and pixelating on the menu screen and in the "Eye For An Eye" trailer, aptly summarizing both halves of its nature.
- Optional Boss: Neither one of the eyes have to be fought to progress in the game. They do drop a pretty strong helmet/shield, though.
- Outside-Context Problem: It's a boss from a different game, and an entity so alien the survivors don't even know its name.
- You Don't Look Like You: In their home game, the Twins initially appeared nearly identical to the Eye and were connected by a tendril, only revealing their mechanical natures in their second phase; here, they're visibly mechanical from the get-go. Additionally, Retinazor's laser cannon is swapped for a gaping maw like Spazmatism's.

- The Battle Didn't Count: You can't actually kill the Nightmare Werepig. It's health will always stop at 1, in which case it will collapse and drop its loot, and then respawn back in its chains several days later.
- Bullfight Boss: The first and third phase of its fight has it make use of the pigs ability to kite, charging at you in order to knock you over with a swipe. Dodging these attacks is key to fighting it, as it'll exhaust itself after three misses, leaving it open to attack.
- Helpful Mook: The only way to get more dreadstone for the recipes the Nightmare Werepig drops is to destroy the pillars, which are too tough to be destroyed normally. The solution? Have the Nightmare Werepig do it.
- Hulk Speak: Like it's surface-bound brethren, it speaks in broken english, and in all caps. It appears that whatever power it has obtained has allowed it to retain this ability, as regular werepigs stop talking after they transform.
- King Mook: A giant sized Werepig.
- Meaningful Name: Its name in the code is Daywalker, and its a Werepig that doesn't need the light of the full moon (or four monster meat) to stay transformed.
- Regenerating Health: It rapidly heals itself as it enters its stalking state, meaning you have to keep goading it to attack you in order to keep it from undoing any damage you deal to it.
- Ungrateful Bastard: It begs to be freed by the survivors, but when they do so (and deal with the Parasitic Shadelings harassing it), it rewards them by attacking them.

- Anti-Frustration Features: While a lunar rift is active, any suspicious dirt piles you follow will gain a new look featuring teeth and clawmarks, with the end result of following the trail being a guaranteed Varg encounter, ensuring you don't have to rely on luck in order to encounter and fight the boss as part of Wagstaff's quest.
- Back from the Dead: A Varg revived by a Gestalt.
- Breath Weapon: It breaths a stream of endothermic fire in a fan shape in front of it as a new attack. Striking it with Planar weapons while it breaths will stun it and leave it open for attack.
- Came Back Strong: A common Varg brought back to life, now with more health and a new fire breathing attack.
- Enemy Summoner: Calls upon Hounds like a regular Varg, only these Hounds are guaranteed to revive into Horror Hounds.
- Glass Cannon: It's the frailest of the Mutated Bosses at only 3,000 health, but it's ability to summon mooks makes it the most dangerous of the three by a longshot.
- Mook Promotion: Varg's are considered regular mobs despite their danger, making this a rare occassion where one gets promoted to a bonafide boss creature.

- Boisterous Bruiser: It's clearly having the time of its life fighting you, peppering its dialogue with a bunch of ice jokes.
- Contrasting Sequel Antagonist: Well, update antagonist, but it's a comparable to the Nightmare Werepig as regular mobs that have somehow gained incredible power. The difference is that while the Nightmare Werepig is an aggressive, power obsessed jerk who will attack the survivors after they free it, the Frostjaw is an amiable if rough shark who only fights you if you initiate it, and is otherwise good company whenever you meet it.
- An Ice Person: It appears to be a Rockjaw with ice powers. It can create ice spikes to block your path, and swim through the ice of its island like it's nothing.
- King Mook: To the Rockjaws, being an ice themed variant.
- Non-Malicious Monster: It's down for a fight if you attack it, but it's otherwise a pleasant creature who'll happily accept the survivors as its new boss if beaten.
- Pungeon Master: It loves itself some ice and fish puns.
- Threatening Shark: Subverted. It's a giant, scary looking ice shark that's no slouch in a fight, but it's completely passive on encountering. You need to pick a fight with it deliberately in order to initiate its boss battle, and even after that, it's perfectly cordial with the survivors.