This is a page for the Fighting Fantasy villains fought in Khul: one of the three continents of the world of Titan, called "the Dark Continent" due to the colour of its soil and the mark of evil that devastated it during the nightmarish Chaos War, devastating it and reducing it to small kingdoms and city states surrounded by hostile wilderness. It serves as a Fantasy Counterpart Culture of the Middle East, China and Japan.
Given the nature of the gamebooks, any vital plot-relevant twists and weaknesses (especially weaknesses) should be kept under spoiler tags.
Rulers


The despicable tyrant of the Isles of Dawn, the Fantasy Counterpart Culture of Ancient China. Fifty years before the start of the story, three powerful wizards known as the Triurge attacked his palace and destroyed his rule, but not before he made his twin sons Human Popsicles so that one could one day rise and take back his throne, after his enemies would be gone. As his son Feior has awoken and is about to topple the kingdom, and with his son Maior unaccounted for, future will tell whether his prophecy comes true...
- 0% Approval Rating: Bezenvial was a loathsome dictator, ruthless, violent and reviled by pretty much everyone save from his sons and his High Priest. His downfall is still regarded as the best thing that could happen to the Isles of Dawn.
- All-Encompassing Mantle: He wore one when he was alive.
- Antagonist Abilities: His invulnerability to attacks and magic, control of winds and Mental Time Travel powers make him fearsome. Though the latter can (and must) prove useful.
- Asshole Victim: The country owes a big thanks to the Triurge for blasting the sod to smithereens.
- Attack Reflector: Don't cast spells against him, or you will get destroyed by your own magic.
- Badass Armfold: The pose he is depicted in in the flashback.
- Badass Cape: We never got to see how badass he truly was, though he was an Evil Sorcerer of not inconsiderable power, and he wore a lavish, royal All-Encompassing Mantle when alive.
- Big, Screwed-Up Family: Between the tyrant father as the Greater-Scope Villain, the evil brother as the Big Bad and the heroic brother as The Hero, his line qualifies.
- Black Eyes of Evil: As a spirit, his eyes are pitch-black and void-like. He looked normal in the flashbacks.
- Blow You Away: He controls winds, and will make you plummet down a cliff to your doom with a huge gust of wind, if you cannot destroy him for good.
- Braids of Barbarism: Played with. Bezenvial sports his hair in many long, thin braids gathered at the back of his head, but while powerful, barbarian he was not. Not by a stretch.
- The Caligula: Not crazy, but definitely vicious, twisted and rotten to the core. His rule was a nightmare.
- Deader than Dead: His final, well-deserved fate. No one would waste a single tear for him.
- Evil Eyebrows: Casting a creepy shadow over his eyes.
- Evil Sorcerer: Zig-zagged as Bezenvial clearly has magic powers, as evidenced by his lingering spirit, and each son of his is a considerably powerful Magic Knight, but whether he himself masters magic or gets his power from something else is left unexplained.
- The sequel The Crimson Tide confirms that he mastered magic, and was enough of an expert to develop his own techniques. Which Maior, now the Big Good and The Good King uses to solve your quest, out of gratitude from unmasking his treacherous advisor.
- Ghostly Gape: As a spirit, his mouth is wide open like in a twisted angle, seemingly full of emptiness...
- Greater-Scope Villain: He is the reason behind Feior's invasion, but he does not directly influence the plot. Even his surprise appearance after you defeat Feior is more of a way to tie-up the remaining plot threads than a real Boss Battle.
- The Heavy: Without him, there would have been no plot whatsoever, no Big Bad, and no hero even!
- Hero's Evil Predecessor: Bezenvial was the king of the Isles of Dawn like you will become. But suffice to say that your idea of the job vastly differs from his own. Not to mention that you'll have to settle your score with him before getting that cosy throne.
- I Have No Son!: When he attacks you, he tells you to your face that he sees you as a disgusting disgrace for siding with his enemies. But you could not care less, as you already rejected him for quite a while, and you defeat him for good shortly after.
- Luke, I Am Your Father: Maior, I am your father. Though you learn this long before confronting him.
- Mental Time Travel: He sends your spirit back to your child body, to relive the moment he put you to slumber. You must find a way to escape while glancing at your future (the present battle) to safely escape. Beware, for botching things can send you back through time to the very beginning of the story.
- Nice Job Fixing It, Villain: Thank you for appearing Bezenvial, now we can destroy Feior's deadliest weapon and you with it, which would have been waay harder, if not impossible, had you not showed up.
- Nigh-Invulnerability: Nothing you can dish out will do anything against his spirit when he attacks you. Defeating him is a matter of making the right choices.
- No-Sell: All your attacks mean little more than ant bites to him.
- Not Quite Dead: Bezenvial is long dead and gone, but his spirit remains on the Earthly Planes, though he can only manifest himself through one of his sons, unable to directly threaten the land any longer.
- Offing the Offspring: He appears to kill you after you defeat Feior, as a revenge for betraying his legacy.
- Our Spirits Are Different: He manifests as a gigantic dark cloud, shaped like a snake prolonged by his own face when faced at the end. It turns out that he can still manifest on the Earthly Planes through his sons.
- Post-Climax Confrontation: His spirit appears after you defeat Feior, forcing you to destroy him for good.
- Posthumous Character: Bezenvial is long dead and gone by the time the story takes place, but with Feior running amok, his shadow still looms over the Isles of Dawn In more ways than one.
- The Prophecy: The entire story revolves around the titular Black Vein Prophecy he uttered, according to which his kin will once again become king of the Isles of Dawn, after his sons awake.
- Prophecy Twist: His son Maior, (you in fact) does become king after defeating Feior, since the last king of the dynasty that succeeded Bezenvial died in battle. But you rule as a wise and noble king, instead of a wretched tyrant like your father was.
- Puzzle Boss: He makes you relive the moment you were sealed as a child. You must avoid detection and find a globe that shows the future (in fact your battle against him), and shout a warning to your future self, before being found and put to slumber. You will then hear your own warning and dodge the Sturramak, the mighty draconic monster that Feior used as his major asset. The Sturramak will then collide with Bezenvial's spirit, destroying them both and winning the game.
- Revenge by Proxy: His entire plan amounts to getting delayed revenge on his successor's heirs.
- Royally Screwed Up: There are many ways describe Bezenvial and his line, but "sound of mind" and "fit to rule" are not in the list. Until one of them gets better.
- Seers: Bezenvial had to have some ability to foretell the future, since he uttered the Black Vein Prophecy and bet everything he had left on it.
- Snakes Are Sinister: The dark cloud that is the manifestation of his spirit first appears as a gigantic snake.
- Social Darwinist: He clearly values power over all. He is hinted to have set his twin sons to fight to the death to see who would reign, instead of cooperating.
- Sorcerous Overlord: A tyrant with magic powers.
- Strong Family Resemblance: His sons are his spitting image.
- Thanatos Gambit: The entire plot is one that he devised, hoping that with him dead, his sons presumed dead and his kingdom in shambles, the Triurge would leave without investigate, while his sons would grow into powerful successors fit to seize back the throne with the Triurge gone or too old to do anything.
- Villainous Cheekbones: Bezenvial sported those when alive.
- Walking Spoiler: The sheer amount of blanked text gives enough indication.
- See his entry on The Pit page under The Snake Demons, Rulers of the Pit

The evil ruler of Stayng Island, who almost took over the Arrowhead Archipelago, two centuries before the story. He fell in battle against the Legendary Hero Qadarnai, wielder of the magic, elven-crafted Ivory Spear. Alas he is back from the grave, taking over Stayng Island, and threatening the archipelago once more, having allied himself with the bloodthirsty Chaos Pirates. But another hero is sent by the Varradian Alliance ruling the archipelago, to take him down once and for all...
- 24-Hour Armour: Mortis is never seen without his antiquated, tarnished silver armour.
- Achilles' Heel: He is highly vulnerable to the Ivory Spear of Quadarnai, which cost -4 stamina to undeads instead of the regular 2. You can use it to slay him without fight.
- All Your Base Are Belong to Us: He takes over Bloodrise Keep, the citadel of the governor, to use it as his evil lair.
- Antagonist Abilities: He exudes a powerful Aura of Fear, that weakens you and can decrease the damage you deal, which against such a foe means real trouble. Fortunately, he lacks it when fought at full power.
- Aristocrats Are Evil: Mortis jumped the gap from Feudal Overlord to Evil Overlord in one go.
- Back from the Dead: He was killed two hundred years ago and has now returned, though as an undead.
- Badass Cape: A long, black cape billowing behind him.
- Big Bad: The ruthless undead overlord dead set on destroying the Varradian Alliance and turning all who resist into his undead slaves.
- Blue Blood: A man of noble descent, and a downright monster in more ways than one.
- Cannot Cross Running Water: Being undead, rivers and seas are unsurmountable obstacles to Mortis and his troops, hence his alliance with the Chaos Pirates who have the boats he needs.
- Carry a Big Stick: He uses a huge mace as his weapon, with considerable proficiency.
- Cool Helmet: Complete with horns and an impressive-looking black tassel behind.
- Crippling Overspecialization: His undeads are meant for warfare alone, so he has no choice than to keep living slaves for the menial tasks.
- Despotism Justifies the Means: Dark Lords like him are never satisfied with what domain they already rule. They always want more and more and more...
- The Dreaded: Everyone is terrified of Mortis, especially in Stayng Island where he enacts his exaction.
- Elite Army: Mortis commands a battalion of the fearsome undead Knights of Alptraum summoned from the nether world: two hundreds powerful Elite Mooks with skill 10 stamina 9 each.
- Even Evil Has Loved Ones: Mortis cares enough about his wife Lady Lotmora to raise her as a powerful and sentient vampire, free to establish her own power base. He has something to gain from it of course, but she rules by his side in life and in death.
- Evil Gloating: Not directly to you, but Castellan Braxis, the governor he overthrew and is holding captive, reports that he indulged in this. It leads to his downfall, as he boasted about his dam, a crux of his plan and a possible key factor in his final demise.
- Evil Sorcerer: He is a very powerful wizard, but the warlord aspect of his character gets more focus.
- The Faceless: Mortis always hides his face under his helmet. You do see his face as you destroy him, but he is so ugly and makes such a Game Face in the throes of agony, that the sight turns your hair white.
- Feudal Overlord: He started out as the ruler of Stayng Island. And then...
- Final Boss: One you can fight in two different places. You can kill him without fight with the Ivory Spear.
- If you exit the fortress and head to the Dam of Bones, he exits in turn to confront you personally. He has skill 10 stamina 20 and weakens you with his Aura of Fear, costing -1 skill and risking diminishing the damage you inflict if you lose a test of resolve, making him a powerful and dangerous enemy. You can destroy the Dam to kill him without fight.
- If you head to the throne room, night falls by the time you reach him and he will fight at full might. Oddly but fortunately, he lacks his Aura of Fear, but with skill 11 stamina 20, he is powerful enough to give you a run for your money even without it.
- Fog of Doom: He weaponizes it and summon ghastly mist to kill you when you enter his throne room, if you were not stealthy enough.
- For the Evulz: Pretty much all he does outside being a conqueror is to be a jerk for shits and giggles.
- Frontline General: He leads his troops to the battlefield, and confronts you himself instead of sending his phalanx of skeletons to Zerg Rush you when you fight him on the dam.
- Genius Bruiser: Mortis is a fearsome warrior, but also a very powerful wizard and a talented strategist.
- Glowing Eyelights of Undeath: His only visible feature.
- Hand Blast: Mortis never uses it against you, but he killed the hero Qadarnai with a dark energy blast.
- Hoist by His Own Petard: The Dam of Bones sure comes in handy. For him to come and go out of his keep, for you to destroy it and obliterate him in the ensuing tidal wave.
- Horns of Villainy: Ornamenting his helmet.
- Keystone Army: As soon as you kill him, his undead soldiers start shambling around and dying again. If you kill him by destroying the dam, the undead soldiers destroy themselves by setting fire to the citadel, and their liberated souls fly to the Afterlife under the shape of hundreds of white birds.
- Kill It with Water: As per tradition, running water is deadly to undeads, even one as powerful as Mortis. If you destroy the Dam of Bones with the Charm of Unbinding, the released river sweeps him away and dusts him without fight.
- Knightly Lance: He bears one when he exits Bloodrise Keep on horseback to fight you on the Dam of Bones. But this is just for a (rather cool) illustration, since he ditches it for his trusty mace.
- Magic Knight: Mortis is a very powerful sorcerer, but he needs nothing more than his mace in a fight.
- Marathon Boss: He has lots of stamina, which makes him quite tough to take down.
- Meaningful Name: "Mortis" evokes death, and he is undead.
- Monster Lord: Mortis is this to every undead you will face. That is to say roughly 90% of the battles.
- Monster Progenitor: He has the nasty habit of raising all of his victims as undeads.
- Mutual Kill: How Mortis died two-hundred years ago, struck down by the Ivory Spear just at the same time as he struck down the hero Qadarnai with a dark energy blast.
- Names to Run Away from Really Fast: A necromancer named Mortis, how nice does that sound?
- Necromancer: A consummate expert of the field.
- Night of the Living Mooks: How he "recruits" his troops. Made all the gloomier in that everyone he kills will soon rise under his command.
- No Body Left Behind: If you manage to destroy Mortis without fight, he is totally obliterated.
- Obviously Evil: Who would be keen on spending time with a Tin Tyrant in a black cape with creepy Glowing Eyelights of Undeath?
- Our Liches Are Different: Mortis is described as a lich, and fits the bill by being a very powerful undead necromancer. But he lacks the Soul Jar of classic ones and is presented as a Tin Tyrant warlord.
- Race Against the Clock: If he makes his junction with the pirates, the Varradian Alliance is screwed.
- Red Baron: The Lich Lord.
- Reduced to Dust: His fate after you slay him in battle.
- Sadist: He passes time torturing and tormenting prisoners, keeping them alive to toy with.
- Sealed Evil in a Can: Mortis became an undead lich immediately after his death, and only the Ivory Spear still piercing his corpse, prevented him from rising and starting a second reign of terror. Then came a Too Dumb to Live grave-robber, who even without knowing his story should have known that putting the spear out of the ominous looking corpse in an Obviously Evil armour was not a smart move...
- Shoulders of Doom: Ornate, imposing and creepy.
- Silver Has Mystic Powers: Averted. Mortis has the traditional undead weaknesses to daylight and running water, but not to silver. Heck, he wears a 24-Hour Armour made of the stuff without a care.
- Skeletons in the Coat Closet: His shoulder pads are shaped like skulls.
- Skippable Boss:
- Wherever you confront him, you can kill the sod without fight by successfully throwing the Ivory Spear at him. But miss and the battle becomes harder.
- Mortis is too powerful to be affected by the Charm of Unbinding, but if you cast it on the Dam of Bones, poof! No more dam and Kill It with Water ensues.
- Slouch of Villainy: He is shown sitting on his throne normally when confronting him in the keep, but he does so in illustrations showing him on a throne carried by skeletons And he does so wearing an armour!
- Sorcerous Overlord: While many villains of the franchise are Evil Sorcerers ruling a domain and an army of monsters, this one is more of a warlord who happens to be a master of Dark Magic on the sides.
- The Strategist: He is touted as a formidable one, and given the alliance he strikes with pirate fleets and how he organizes his armies, he has strong credentials.
- Summon Magic: He summons a dangerous Skull Beast, neither alive nor undead, from beyond the Veil.
- His Fog of Doom attack is full of phantasmal hands ready to rip foes to shreds.
- Supernatural Fear Inducer: Mortis and his undeads exude an Aura of Fear that can weaken you if your determination is not strong enough.
- Take Over the World: Downplayed, he "just" targets the Arrowhead Archipelago. Though it is hinted that he covets the rest of the continent of Khul.
- Throne Room Throwdown: You battle Mortis there in the hardest path.
- Throwing Your Sword Always Works: Throwing the Ivory Spear at him can destroy him without fight. But if you fail you lose the Weapon of X-Slaying for the Final Battle.
- Timed Mission: You have one week to reach Bloodrise Keep, before his undead troops join with the Chaos Pirates, leaving a deserted citadel.
- Tin Tyrant: He is clad in a silver armour of ancient design.
- Too Important to Walk: Downplayed as he can and does move by himself, but illustrations depict him sitting on a creepy throne carried by four skeletons.
- Undeath Always Ends: For him and for all his soldiers.
- Unholy Matrimony: He was married to an equally evil noble lady named Lady Lotmora, whom he made into The Dragon after his return, turning her into a Classical Movie Vampire. She is the second hardest enemy of the game, but nothing more than a tough Boss Battle, and a Skippable Boss at that.
- Villainous Valour: Calling him loathsome is a hell of an Understatement, but him going to face you upfront during daytime, when he is not at full power takes guts. Sure he cannot fathom defeat, but still.
- Weakened by the Light: He and his undeads are weaker during daytime.

An evil archmage who long ago founded the twisted cult of the Howling Gods and gained power in the city of Zagoula, devastated by the Chaos Wars. He turned its denizens into a fanatical cult and invaded Khul, only to be felled in battle by the Legendary Hero Skarlos, and sealed under the city of Neuburg. His fanatical servants just took control of Neuburg and help him swarm it with awful creatures. But an old friend of the Lord of Neuburg, will put a dent in his plans...
- Achilles' Heel: Being an undead fuelled by magic, the Trident of Skarlos is more than happy to shred his hideous body. The text even mentions that it "seems to revel in skewering the mountain of limbs", costing him a whopping -5 extra stamina points with every hit.
- Antagonist Abilities: His enormous stats are well over the normal maximum, making him next to invincible with normal means.
- The Archmage: Xakhaz bears the title and given his immortality and creations, he sure has the power.
- Ax-Crazy: Stark raving mad and highly dangerous.
- Bald of Evil: At least now. Though given the extent of his mutations, this is his least creepy feature.
- Big Bad: The ultimate threat you must eradicate in order to save Neuburg.
- Bio Manipulation: Xakhaz's signature power. He does it through twisted Black Magic.
- Body Horror: Both to him and to others.
- What he loves to inflict to his many victims.
- His current aspect is a gigantic, walking pile of Body Horrors, going out of his way to gather as many corresponding tropes as he can for a truly repellent result. And the worse being that he is proud of what he has become. Proud for crying out loud!
- It can get even worse if you harm him with the Holy Hand Grenade but fail to destroy him, reducing him to a gigantic walking pile of Body Horrors maimed by an explosion. You still have to fight him, but he's grievously weakened.
- Body of Bodies: His current form is a repellent amalgamation of atrociously mutated human, animal and monster corpses patched together
- Brown Note: Xakhaz and his creations are so ungodly atrocious that the mere sight of them affects your sanity. If your willpower score becomes too low, you run the risk of losing your mind as well as the game.
- Combat Tentacles: Either "normal" ones, tipped with claws, or even ending in fanged mouths.
- The Corrupter: Xakhaz corrupted the destitute population of Zagoula after their city's ruin, twisting their desperate needs into greed and hatred. He made them a fanatical army still worshipping him after centuries. Even buried under Neuburg, his presence still spreads to the surface, twisting people's mind.
- Creepily Long Arms: The three arms on his left size are so long that they reach the ground, and appear boneless for further creepy factor, one looking almost liquid.
- Creepy Long Fingers: Going hand-in-hand (ahem) with the trope below to double the creepy factor, the fingers of his long arms are stretched too far.
- The Dark Arts: Xakhaz excels in those, using and abusing them in all his twisted experiments.
- Dark Messiah: He presented himself as a saviour to the people of Zagoula in dire need of guidance. Even now, his fanatical devotees revere him as a real messiah.
- Despotism Justifies the Means: He aimed to control Khul and impose his twisted cult to everyone. He still does but what he would make of it after centuries of festering madness would be even uglier...
- The Dreaded: The sheer damage he caused was never forgotten, and the prospect of his return clearly rises no enthusiasm.
- Eldritch Transformation: This nutcase inflicted one to himself, to become the... thing described at Transhuman Abomination. Mercifully, the process is never shown.
- Evil Gloating: He boasts about his power and "artworks" for most of his dialogue...
- Evil Is Bigger: His makeshift body towers over 13 feet, as evil as he is hideous which means a lot.
- Evil Sorcerer: Xakhaz was this at first, and still is in some ways but has become something far worse.
- Extra Eyes: He has six pair of eyes on two tentacles, just to mention the ones on what can evoke a face.
- Eyes Do Not Belong There: All over his body.
- Facial Horror: Self-inflicted. This should be pretty clear by now, but good looks are the least of this nutcase's problems.
- Faux Affably Evil: He taunts you under a transparent veneer of cordiality before you confront him. But when you destroy him, his still living face can do nothing more than cursing a blue streak at you, helpless to prevent being sealed away for good.
- Final Boss: An enormously powerful foe with skill 14 stamina 32 (2 over the regular maximum in the former, 8 in the latter). You stand no chance without the Trident of Skarlos. It raises your skill scores and deals huge damage, and the Talisman of Loth costs him -1 skill. With both, you can defeat him quite easily. You also have means to destroy him without fight or to drastically weaken him.
- High Priest: The founder and supreme leader of the cult of the Howling Gods and the Khaz Priesthood. Whether the idols worshipped by his cult exist is another question...
- Holy Burns Evil: The Talisman of Loth weakens him.
- Holy Hand Grenade: You can make one by infusing an orb of green glass with the Talisman of Loth's light. If you successfully throw it at his ugly mug, the blast vaporizes him. A half-failed throw still deals a crippling -4 skill and -23 stamina, making the Final Battle considerably easier.
- Knight of Cerebus: Xakhaz is one of the most awful and disturbing villains of the series, which is saying quite a lot, and plagues the story with a creepy, nerve-wracking atmosphere, not to mention among the most disturbing foes faced in a gamebook.
- Large and in Charge: The humongous, hideous leader of the vile Khaz Priesthood.
- Leaking Can of Evil: Senyakhaz provides him with the means to create his new body and awful monsters, and to spread his influence through her.
- Lovecraftian Superpower: The ability to create atrocities such as his own, not to mention to madden and corrupt people as he does, are definitely eldritch.
- Mad Artist: He regards his horrendous creations as works of arts, and scorns you for not appreciating them. Crazy we tell you...
- Mad Scientist: His experiments to "enhance" lifeforms are almost as hideous as he is himself.
- Malevolent Mutilation: As you gathered, he really gets his kick in inflicting those.
- The Man Behind the Man: He's this to Senyakhaz, The Dragon, who is this herself to Baron Tholdur.
- Manipulative Bastard: He selected people in dire need of help knowing that they would be more receptive to his "teachings", and knew which buttons to push to make them the fanatical army confronting you.
- Marathon Boss: His phenomenal skill score makes him very long to take down, if you face him without special weapons to make the fight easier.
- Mind Rape: He attacks both the body and the mind of his victims.
- Mix-and-Match Critter: Literally. He created his new body with all the body parts he could find.
- More Teeth than the Osmond Family: All of his many, many mouth reveal sets of sharp fangs.
- Multi-Armed and Dangerous: Xakhaz is covered in arms of all shape and size, sporting enormous claws.
- Narcissist: As if building a cult whose adepts revere him almost as much as they worship his degenerate idols was not enough. Having all priests adding "Khaz" to their name, and waxing lyrically about his genius and "artworks" makes clear that this psycho's greatest love is his own self. Eeewww!
- Natural Weapon: Big fists, claws, pincers, tentacles, fanged mouths... The sod's spoilt for choice.
- Nightmare Face: What used to be a human face is now a permanent one, a twisted caricature of human traits deformed by manic expressions.
- Ninja Pirate Zombie Robot: An Evil Sorcerer slash High Priest slash Evilutionary Biologist slash The Undead slash Transhuman Abomination slash whatever...
- One-Winged Angel: Played with as you never see him transform, for he built himself a new, mightier and monstrous body between his defeat and now. Still one of the most ghoulish examples in the entire series. Even the Demon Princes look pleasant compared to him.
- Playing with Syringes: He specialises in creating horribly twisted Animalistic Abominations and Humanoid Abominations, and causing atrocious mutations on unfortunate victims, through The Dark Arts instead of science, but the spirit of the trope remains.
- Religion of Evil: His cult dedicated to the Howling Gods is, in short, an utterly depraved, fanatical and violent sect, as well as a factory of twisted horrors from beyond the veil. Whether it was made out from scratch by Xakhaz or not is left unexplained, but it is hinted that this is in fact an even more twisted than usual worship of the Dark Gods and Demon Princes.
- Resurrective Immortality: Xakhaz's body can die but his soul cannot. He has to create himself a new body to fully be reborn, though.
- Sealed Evil in a Can: Being dead (at least in body) and buried deep under Neuburg Keep. Then Senyakhaz managed to awaken him.
- Shout-Out: His creation and his entire character, all warped and maddening beyond belief, are clearly inspired by the works of H. P. Lovecraft.
- Skippable Boss: You can destroy him without fight should he prove too powerful for you, by successfully throwing him a makeshift Holy Hand Grenade. If you fail but win a test of luck he still must be fought, but grievously wounded and much easier. If you fail completely, it explodes without harming anyone.
- Sorcerous Overlord: An undying Evil Sorcerer who controls a Religion of Evil, the entire dead city of Zagoula and an army of monsters. Not to mention the city of Neuburg through Senyakhaz. He used to control all this himself, but now rules by proxy due to being a Sealed Evil in a Can.
- Stuff Blowing Up: You can inflict this on him with a Holy Hand Grenade.
- Take Over the World: Downplayed, as he only (ahem) covets the continent of Khul, but even a city under his control is still waaaay too much.
- Too Many Mouths: His body is covered with mouths, including one on the knee of one of his four disproportionate legs.
- Transformation Horror: What he inflicts to his unfortunate victims.
- Transhuman Abomination: He might be an artificially mutated mortal, but the grotesque, shapeless, biology-defying, logic-shattering... thing that he has become is as close to a genuine Eldritch Abomination as can be. Just look at the picture. The mere sight of him attacks your mind...
- As noted above, anyone he gets his clawed hand upon becomes one of those.
- The Undead: Being long dead with a body made of corpses, Xakhaz fits in the category, albeit strangely.
- Undead Abomination: One of the most hideously twisted and atrocious undeads in fiction, being an undying soul incarnate in a huge Transhuman Abomination of sewn-together corpses who can only function through dark magic of the foulest kind.
- Vertebrate with Extra Limbs: He still retains a... somewhat human-looking torso, very loosely keeping him in the vertebrate category, and has far too many appendages.
Conquerors and Warlords

A formidable magic-wielding warlord, threating the Isles of Dawn with his forces. He is one of the twin sons of the evil king Bezenvial, out to restore his father's rule as tyrannical as he was.
Fifty years ago when he was a child, three highly powerful wizards known as the Triurge were taking down Bezenvial's rule. Knowing that his time had come, the tyrant put his two sons in a magical slumber, during which they would grow up to adulthood and have their power reach its peak, so that one of them would one day take back the throne. Feior awoke and raised an enormous army, ready to fulfil the titular Black Vein Prophecy. But his twin brother Maior is unaccounted for, and prophecies are not known for their accuracy...
- Affably Evil: Feior is quite cordial and friendly with you when you meet him before the Final Battle. He clearly regards you as inferior to him, but he values you as a potential right-hand.
- And I Must Scream: If he casts Shangshuo, the Power of Locking on you, he takes your paralyzed but still conscious body ornate his future throne room.
- Antagonist Abilities: Feior perfectly masters the unique spells of the Isles of Dawn, better than you, and uses them for great effect during the Final Battle.
- Badass Bookworm: A learned prodigy in magic and strategy, as well as a very skilled fighter.
- Benevolent Boss: Judging by his vassals' high esteem and Undying Loyalty to him, he treats his men well.
- Big Bad: The Sorcerous Overlord coming close to take over the country with his forces. Who can only be defeated by his twin brother Maior.
- Big Brother Bully: Flashbacks hint that Feior was this to his brother Maior in their childhood. And he definitely gives this vibe in the way he taunts you when you settle your score.
- Big, Screwed-Up Family: Between the tyrant father as the Greater-Scope Villain, the evil brother as the Big Bad and the heroic brother as The Hero, his line qualifies.
- Bling of War: His suit of armour insists on the "suit" as much as the "armour"...
- Braids of Barbarism: Played with. He is no barbarian, but he wears his long hair in many long, thin braids gathered at the back of his head. And he is a powerful general that could cower many a barbarian army.
- Breath Weapon: Baopo, the Power of Disruption, fires a devastating bolt of pure heat from his mouth, scalding enough to melt rocks. Riposting with a Baopo of your own sends you both plummeting to your doom in the chasm. It can be countered with Shangshuo.
- Brought Down to Normal: He loses all his powers after you defeat him in the Golden Ending.
- Cain and Abel: He is your twin brother and the Big Bad, dead set on honouring his father's legacy of tyranny, while you, Maior, are The Hero dead set on averting the Black Vein Prophecy.
- Cool Helmet: A bit on the gaudy side but quite impressive, figuring a crown.
- Cool Sword: He had one as a child that he always kept with him. He is depicted wielding one as an adult, but the narration states that he fights with a dagger.
- The Dark Arts: Feior is gifted enough to bind a freaking Kaiju to his will, and can conjure dark forces.
- Defeated and Trophified: The fate he has in store for you, should he manage to get you with his The Paralyzer magic. Leaving you conscious in a And I Must Scream situation to show you for the rest of your life how a true heir of Bezenvial shall rule.
- Devious Daggers: He fights with a dagger and is no pushover. In a direct battle, he has skill 9 stamina 14, which considering that the maximum skill score here is 10 instead of the usual 12, makes him a deadly foe. But fighting him like this only leads to the bad ending.
- Despotism Justifies the Means: He intends to take over the Isles of Dawn, and restore his late father's despotic and twisted rule.
- The Dreaded: Everyone is deathly afraid of Feior and his forces. Everyone but the boy king Poo Ta, delusionally fancying himself as invincible just for being king, much to his generals' dismay. In case you're asking, yes, the twerp king is as Too Dumb to Live as he sounds and ends accordingly.
- The Dutiful Son: A villainous example. He wants to honour his father's legacy by ruling as badly as he did.
- Evil Eyebrows: His own cast shade on his sunken eyes.
- Evil Is Hammy: He is pompous and grandiloquent, but underestimating him would be the last mistake you would make in your life.
- Evil Sorcerer: Feior is never referred to as a wizard in story, but he is a consummate master of magic.
- Evil Twin: Literally. He is your twin brother and a nasty piece of work.
- Fashion-Victim Villain: His armour is luxurious, but a bit on the gaudy side. At first glance, you'd be hard pressed to take him seriously, but only until you witness how deadly he is on the battlefront.
- Final Boss: The last true (and challenging) foe of the game, faced in a Wizard Duel as a Puzzle Boss. Though defeating him is not enough to conjure the curse of your line...
- Foil: He and his brother could not be any different. Feior being the evil twin who follows your evil father's footsteps, while you are the heroic champion of the Triurge, the wizards who toppled your father's tyranny and task you to finish the work. You face him in a Wizard Duel, to see who of you masters the spells of the isles best. Even their Meaningful Names illustrate the contrast.
- Forced Transformation:
- Biantai, the Power of Mutation, forces a Fusion Dance between the target and their surroundings, causing an excruciating and debilitating mutation. It is countered by Tiao He, the Power of Harmony.
- He can turn you into a metal coin during the Final Battle. You can do it as well, but you must turn him back to normal to avoid the bad ending, and you have a 50/50 chance of suffering the same fate and losing the game, or draining his power and defeat him in the process.
- Four-Star Badass: Feior's army outnumbers the royal forces ten to one, and he is a mighty Magic Knight.
- Frontline General: He leads his troops from the front lines and fights along with them, only leaving when things go south to turn back the tide in his favour with The Dark Arts.
- Human Popsicle: Feior was placed in a magical variant as a child: While the Triurge were destroying his kingdom, Bezenvial put him in a magical slumber in a sarcophagus, where he would grow up to adulthood and master his powers, until the time he could topple the new king and take back the throne. While Feior awoke and followed the path his vile father set for him, his twin brother Maior woke up amnesiac, purged of the evil of his line, and his quest to discover who he was would lead him to defeat his brother and avert the Black Vein Prophecy, by becoming king but ruling fairly.
- I Shall Taunt You: Feior spends the entire Final Battle taunting and mocking you.
- If You Kill Him, You Will Be Just Like Him!: Literally. The reason why you cannot just skewer him through where he stands after defeating him. If you do, go get instantly corrupted by your evil bloodline and replaces him as the tyrannical Overlord Jr..
- Impossibly Tacky Clothes: Feior's armour is described as this, too ornate and gaudy to be as impressive as he wants. Still, it serves its purpose.
- Locked in the Dungeon: His final fate in the Golden Ending is to end his life in jail. While you, his brother becomes king, but rule as a wise and benevolent ruler instead of a tyrant.
- Luke, I Am Your Father: Maior, I am your twin brother.
- Magic Knight: Feior is deadly with magic, and not so slouch with weapons and strategy.
- Master Swordsman: He clearly is this, given the sword he carried around in his childhood, but as an adult he prefers daggers as his weapons.
- Meaningful Name: Feior's name sounds like "fear", fitting his role as The Dreaded and the Big Bad.
- Names to Run Away from Really Fast: Again, being basically called "fear" doesn't sound sweet and dandy.
- No-Sell: Feior can dispel the magic you use against him. But then again, so can you.
- Overlord Jr.: The son of a powerful and vile Evil Overlord. This one does not seek to second his father, but to restore his rule with him on the throne.
- The Paralyzer: Shangshuo the Power of Locking, paralyses the targets and leaves them conscious.
- Puzzle Boss: Fighting Feior involves essentially figuring out what spell can counter each of his own, and how to defeat him without killing him.
- Rank Scales with Asskicking: Feior's fighting skills and deadly magic makes him the mightiest fighter in his army. While one of his officers is much better than him in battle, his powers keep him firmly on top.
- Red Baron: The Dark Son of Bezenvial. Exactly What It Says on the Tin but still ominous.
- Right-Hand Attack Dog: A fantastic example of the trope taken up to eleven. He controls an enormously powerful, giant draconic monster known as the Sturramak as his major asset. It breathes devastating energy blasts, spawn’s purple leeches that can decimate a squadron and absorbs magic. It has skill 11 (1 point over the maximum here) stamina 25 (1 over the maximum), making it a deadly foe. Avoid fighting it no matter what, otherwise you have no way to fully win the game.
- Rightful King Returns: A villainous aversion. He sees himself as this, aiming to topple the current kingdom and succeed his tyrannical father, before ruling as viciously as he did.
- Roaring Rampage of Revenge:
- Feior is dead set on destroying every trace of the kingdom that succeeded his father's own.
- His return is in fact a Revenge by Proxy and Thanatos Gambit by Bezenvial, who kept him as a Human Popsicle until he grew-up into a Magic Knight powerful and evil enough to take back the throne.
- Royal Blood: The guy is a prince by blood and would be satisfied by nothing less than being king.
- Royally Screwed Up: There are many ways describe Bezenvial and his line, but "sound of mind" and "fit to rule" are not in the list. Until one of them gets better.
- Sequential Boss: You must counter spell after spell before finding an opening. How much sequences you will face depends on what you chose and how you fight.
- First you must survive his Baopo spell casting Shangshuo. Then survive Biantai by casting Tiao He. Now it's your turn and you must cast Biantai to force him on defence. If you can summon the Genie Izkhao, he knocks Feior out and you win. Otherwise, you must cast Shangshuo, but help him before he gets paralysed (or get corrupted and suffer the bad ending), and turn him into a metal coin with a final spell. Finally, you must flip the coin to turn him back to normal, but break his power to capture him. If you succeed, all is well that ends well, if not he "returns the favour" and you lose.
- Shadow Archetype: Feior represents what you would have become, had you not been purged of the evil of your bloodline. You must avoid becoming like him at all costs.
- Sibling Yin-Yang: He is evil, ambitious, hammy and quite over-the-top, while Maior is heroic, generous, subdued and rather down-to-earth.
- Signature Move: Feior's favourite attack is the devastating Baopo spell.
- Sorcerous Overlord: Like Lord Mortis before him, Feior is more of a warlord who masters magic than a wizard subjecting hordes of monsters to his will through the Dark Arts.
- The Strategist: Feior is an excellent strategist, whose overwhelming numbers and Right Hand Attack Dragon are the least of his military assets. He uses archers for a Rain of Arrows first, turns his enemies' forces, encircle them, ambushes them, among others. You must not only recruit troops to face his own, but also organize them to be able to face the threat. Don't recruit mercenaries or he buys them off and they slaughter you. If you did not stole his battle plans, you are done for.
- Strong Family Resemblance: He looks like a clone of his father and of his twin brother of course.
- Take Over the World: Downplayed, for he (cough) merely (cough) covets the Isles of Dawn.
- Tin Tyrant: Feior is clad in an oriental suit of armour. A rather gaudy one, but efficient nonetheless.
- Transformation Horror: What happens to the victims of his Biantai, you included if you cannot counter it.
- Trial-and-Error Gameplay: You can only know what can counter each of his many spells until you try.
- Villainous Cheekbones: Like his father, his cheeks and facial features are very sharp.
- We Can Rule Together: If you meet Feior before the Final Battle, he offers to make you The Dragon and let you rule by his side. You know, being brothers and all that. If you accept you are both killed by the evil-destroying McGuffin you were carrying. If you refuse, he kills you on the spot.
- "Well Done, Son" Guy: He follows his father's footsteps and gladly embraces his vile heritage.
- Wizard Duel: You fight him with spells of the Isles of Dawn, blocking his own and beating him with magic.
- See his entry on the Pit page under Greater Demons.

Once the wisest and mightiest of the Mage Order in south-west Khul, Jaxartes got corrupted when delving too much into The Dark Arts, and was banished. He gained the allegiance of the mighty warlord Ostragoth the Grim, using his formidable armies to destroy the city of Zamarra (and the Mage Order he belonged to) before taking over the continent. He is depleting the fire of the Fangs of Fury: the titular volcano powering the magic Dragon Statues making the city impregnable, the only threat to his forces. Time runs low before the city's defences fall, but the king and the Mage Order tasked one of their officers to thwart him...
- Affably Evil: Jaxartes is rotten to the core but perfectly courteous. Even his taunts show an amount of respect.
- Antagonist Abilities: A powerful Magic Knight you cannot defeat in a straight fight, who can grow gigantic and cast vicious spells. The volcano is indeed your only hope, against him and his troops.
- Arch-Enemy: He is this to Astragal, the new leader of the Mage Order. He swore to kill him, and Astragal is the one who sends you on your mission while he is busy defending the city.
- Attack Animal: He sics his two pet wolves on you if you are captured and brought before him. Fortunately, your allies launch an attack to force him on the front lines, before he can do worse.
- Badass Bookworm: Jaxartes is a seasoned expert in magic, a very clever mastermind, and a fighter more than able to kick your ass.
- Badass Long Robe: Fitting the Evil Sorcerer shtick.
- Badass Teacher: Only implied, but Jaxartes' order of powerful Mage Warriors could only have learnt their Magic Knight fighting style from him, the best mage and best Master Swordsman among them.
- The Battle Didn't Count: Literally. After you best him in a fight he merely gets back up, laughs, dusts off his clothes and teleports away. Justified since you cannot harm him with a sword.
- Beard of Evil: He sports a long, bushy dark beard.
- Became Their Own Antithesis: Started as a wise Benevolent Mage Ruler, but became a card-carrying, continent-threatening Sorcerous Overlord.
- Black Mage: As expected of an Evil Sorcerer Big Bad, Jaxartes masters nasty attack spells.
- The Chessmaster: Jaxartes' Evil Plan is much more intricate than it seems. He directs Ostragoth's invasion and backs it up by breaking the magic protecting Zamarra. Knowing the secret of the volcano, he deduces the nature of your mission, sending his Elite Mooks always one step ahead of you to kill potential allies before you reach them, and putting a bounty on your head for good measure. And he planted a mole in his enemies' ranks, to gain intel and cause distrust, before having him lead you into a trap.
- The Dark Arts: Delving into forbidden knowledge is dangerous, and he paid the price. He now masters them, but lost himself along the way.
- The Dark Side Will Make You Forget: Jaxartes is now a Card-Carrying Villain hellbent on killing the Mage Order he used to lead and conquering the land he used to protect.
- Despotism Justifies the Means: He wants power for the sake of power.
- Dishing Out Dirt: He casts a spell causing a cave in before the Final Battle. If you lose a test of luck you end up crushed under the rubbles. If not, you still get grievously wounded, losing -2 skill and -6 stamina. Fortunately, you don't need your skill score to fight him, but you might miss the lost stamina.
- Evil Counterpart: To Astragal.
- Evil Genius: He might be a nasty sod, but he sure is a very smart and crafty nasty sod.
- Evil Gloating: Jaxartes indulges in this when he has you prisoner, and especially when he snuffs out the volcano at the end of the gamebook.
- Evil Sorcerer: A staple of the series.
- Fallen Hero: He was once a wise Benevolent Mage Ruler, but had a Face–Heel Turn.
- Final Boss: The last enemy you face in the game, as per tradition. But the Boss Battle is a Puzzle Boss instead of a straightforward battle. Instead, you'll try solving an enigma while tanking his attacks.
- Final Boss Preview: You can encounter and fight Jaxartes before the Final Battle. He has skill 10 stamina 12, making him a powerful foe, but your blows don't affect him and your victory merely prevents him from killing you. Yet, the final fight unfolds very differently.
- Fireballs: His attacks are not exactly described as such, but still give this vibe.
- Foil: As the former ruler of the Mage Order who became a Big Bad Sorcerous Overlord, he failed to protect the realm to which Astragal is devoting himself to as the Big Good Benevolent Mage Ruler.
- Giving Someone the Pointer Finger: Does this to you on the illustration, either threatening you or showing his pet wolves their next meal.
- Good Witch Versus Bad Witch: A male version between Jaxartes and Astragal, plus their followers.
- Hero's Evil Predecessor: Not to The Hero but to the Big Good.
- In the Hood: He wears his hood over his head, though the illustration is nice enough to show his face.
- Laser Blade: His Mage Warriors wield Battle Wands that create an energy blade on the tip, which he very likely devised himself, though he never uses one himself. Fighting his goons without one costs you -2 or -3 skill unless you wield a Battle Wand as well.
- Magic Knight: Jaxartes and his Mage Warriors are powerful mages as well as proficient fighters.
- Magic Wand: Jaxartes wields one on the illustration.
- Make My Monster Grow: Jaxartes grows giant before the Final Battle.
- Master Swordsman: An expert with the blade, able to take on the best warriors.
- Meaningful Name: Fitting the gamebook's historical Theme Naming, Jaxartes is the Ancient Greek name of the Syr Darya river.
- The Mole: He has one working for him in the city of Zamarra, right into the court of King Elidor. He provides intel for his master and works from the inside to weaken the city's defences. It's Chancellor Snuffserk, and Jaxartes sends him lead you to a trap, making it look like that Astragal has been captured.
- No-Sell: If you face Jaxartes in a Sword Fight, you do win attack rounds normally but don't harm him.
- No Body Left Behind: He is seared into oblivion by the volcano after you defeat him.
- The Paragon Always Rebels: He was the best and wisest of the Mage Order, until his fascination with forbidden knowledge led to his Face–Heel Turn.
- Pitiful Worms: He calls you a "feeble scum" upon meeting you, in the middle of his Evil Gloating. He does not compare you to an insect, but to something even lower.
- Playing with Fire: He attacks you with fire blasts during the Final Battle. You can resist a blast with a Black Cube, or lose -4 stamina.
- Praetorian Guard: The Mage Warriors of Jaxartes serve as this. A group of powerful, Black Cloak clad Magic Knights, expert in wielding Battle Wands, whom he sends to the most difficult missions. They are led by the Dark Action Girl Jinxana.
- Price on Their Head: Jaxartes offers a hefty reward for your capture or death.
- Puzzle Boss: Literally, as you spend the confrontation withstanding his attacks while solving a numerical problem on the magic White Cube covered with keyholes, to reactivate the volcano and roast him alive. If you got the clue and the key, it's quite easy, but if not good luck to find it. You must try each keyhole one after the other, while he blasts you with fire at each attempt. Trying this without the slightest clue, and you risk running out of Black Cubes and Life Meter before you can figure it out. The correct keyhole is 18.
- Rank Scales with Asskicking: Jaxartes used to be the most powerful mage of the Mage Order and their leader. He's still the mightiest Mage Warrior you will fight.
- Recurring Boss: You can face Jaxartes several times before the end, though he only fights you in one of these occurrences. And the last Boss Battle against him is nothing like the others.
- Roaring Rampage of Revenge: He really wants to destroy the Mage Order, and the entire city with them just because it stands in the way of his vengeance.
- Shout-Out: Hard to say if it's intentional, but being In the Hood and Laser Blade-wielding Magic Knights, Jaxartes and his Mage Warriors call into mind the Jedi from Star Wars. The gamebook was written before Sith Lords became mainstream with the Prelogy though.
- A Sinister Clue: He holds his Magic Wand in his left hand.
- Sinister Scimitar: His weapon when it comes to armed battle.
- Sinister Surveillance: He can see you and often mentally taunts you throughout your mission.
- Sizeshifter: Jaxartes can change sizes at will, and uses it to grow giant for the Final Battle.
- Sorcerous Overlord: A powerful wizard who rules a huge army and seized most of the land.
- Take Over the World: Downplayed. Jaxartes only (cough) aims to take over the continent.
- Telepathy: He can communicate with his servants and perceive their calls through his mind. He speaks to you this way on occasions.
- Villain: Exit, Stage Left: Performing this is quite convenient when you can teleport, as he does when you defeat him in a Sword Fight.
- Villain Teleportation: He uses this often, but never in battle.
- Wizard Beard: A classic.
- Wizard Classic: Jaxartes was this prior to his Face–Heel Turn, complete with the wand, the robe and the beard, and remains a cut-out standard-looking Evil Sorcerer.
- You Are Too Late: The Climax happens in the heart of the volcano powering the city's magic defences, which you were tasked to revive, but which he just extinguished. As he finds out the hard way, it is indeed too late to prevent the fire to be put out, but not too late to reactivate it.

One of the few female Big Bads of the franchise, Morgana is a very powerful evil witch, ruling the dangerous Krill Garnash mountains. She is assembling the Twelve Sigils representing every aspects of creation, to gain power over it. She created eleven immensely powerful Giant Golems, each imbued with a Sigil, and only needs the twelfth Sigil to create her final Golem and make them fully unstoppable. As the King of Arion, one of the many kingdoms she threatens, you cannot let this happen...
- Amazonian Beauty: Morgana is quite beautiful, but lithe and physically fit, with a slender yet powerful built. The illustration even depicts her jumping into battle in an almost feral way.
- Antagonist Abilities: A mighty witch and a dangerous fighter with a powerful Damage Reduction.
- Badass Boast: Arrogant as she sounds, when Morgana boasts to your face that her plan worked, or that she can respawn in a finger-snap the Golems you just destroyed, she is right.
- Badass Bookworm: Morgana is an expert witch, able to harness the Twelve Sigils's power and create the mightiest golems ever seen, an exceptional (if catastrophic) breakthrough. Not to mention a tough Black Mage.
- Badass Long Robe: She wears a robe cut for ample movements (like the jumps, dodges and strikes required in battle), adorned with many jewels.
- Big Bad: The evil witch who threatens to unleash eldritch forces and must be stopped at all costs.
- Black Mage: Morgana fights with magic and needs nothing else.
- Cool Crown: She is depicted wearing a nice diadem in the illustration.
- Curse: Morgana casts a curse on you to decrease your stats, when she taunts you in your dreams.
- Damage Reduction: Any wound you inflict her deals only -1 stamina instead of the regular 2.
- Dark Action Girl: Like any self-respecting Final Boss, she can fight good. A real witch all right, with a capital W as much as a capital B...
- The Dark Arts: She is considerably skilled with these, creating incredibly powerful golems from corpses.
- Despotism Justifies the Means: She plans to rule the continent and spread mayhem for shit and giggles.
- Did Not Think This Through: She'd never think that you could learn the truth about the Sigils, thus realize that your mission is a trap. To her credit, she could not foresee your meeting with the The Omniscient Big Good Vashti the Ageless, the only way for you to learn it. Also, you'd have never stood a chance against her golems on your own, hence getting supernatural help from beyond the Veil.
- The Dreaded: Morgana is feared all across the region, even by her servants.
- Dream Walker: Morgana appears to taunt you in your dreams at the beginning of your quest.
- Evil Eyebrows: Making her quite sinister looking.
- Evil Gloating: Morgana indulges in this in both of her interactions with you. She gives a vital clue about her accomplice in it. She is too certain of her victory to care about it.
- Evil Is Hammy: She sure loves Chewing the Scenery and does it with abandon before the Final Battle.
- Evil Sorcerer: A rare female example. Played straighter than a ruler, but played quite well.
- Faux Affably Evil: Morgana speaks mock formally, but openly taunts and scorns you in the same breath.
- Femme Fatalons: Bearing pointed nails, fitting her feral style.
- Final Boss: Morgana fights you after you destroy her Golems. She is very powerful, with skill 11 stamina 6, and her Damage Reduction compensates her laughable stamina score, making her a very tough foe. Though while she is your last true challenge, there is a smaller one still lurking in the shadows...
- Golem: Morgana created eleven, imbued with the Sigils' divine power. They are in fact the undead corpses of the Sigils' former bearers, awfully transformed. And she plans to do the same to you.
- Gotta Catch Them All: Morgana is after the Twelve Sigils, capturing everyone bearing them (each mastering a distinct trade). She only lacks the last and most important one: Yours, the Sigil of Royalty.
- Hot Witch: A bit too much on the feral side, but still a beautiful woman.
- Lady of Black Magic: A regal and (over)confident woman, and a powerful spellcaster.
- MacGuffin Delivery Service: She covets you, the bearer of the Twelfth and most powerful Sigil, to turn you into her last golem and gain power over all creation.
- Manipulative Bastard: Or bitch in that case. Leading you into a trap disguised as the standard Fantasy quest is quite well played.
- Meaningful Name: She is named after one, if not the most famous Evil Sorceresses of all fiction. Namely Morgan Le Fay, a stock Fantasy Villainess Older Than Print.
- Nothing Can Stop Us Now!: Morgana's state of mind since the very beginning, culminating during the Final Battle. The "us" has its importance.
- Praetorian Guard: Her Golems serve as her last line of defence, far too powerful for you to face head on. If you cannot summon an army of ghosts you are screwed.
- Pride: Morgana is much too overconfident for her own good, gloating about her victory before even facing you, and mocking your destruction of her Golems as meaningless. So much certain to win that she does not even bother to hide details of her plans.
- Red Baron: Morgana is feared all around as the Fell Sorceress of Krill Garnash.
- Rock Monster: Her golems are gigantic and massive stone humanoids with Glowing Eyes of Doom, with the Sigil they are born from glowing on their forehead.
- Saying Too Much: "Our plan"? "We"? What are you babbling about you hag? Could you mean that you have an accomplice?
- Scary Teeth: Morgana seems to have pointed teeth on the picture. Feral we tell you...
- See the Invisible: Before fighting her, you are warned that the Cloak of Temporary Invisibility would be useless against her.
- Sexy Villains, Chaste Heroes: Downplayed, as Morgana is indeed beautiful but a bit too much on the wild side to be really alluring. The narration never mentions her to be as beautiful as other villainesses of the franchise.
- Shout-Out: To Morgan Le Fay herself, from Arthurian Legend. See Meaningful Name above. Not only her name, but she opposes you, The Hero and The Good King, set apart among rulers by a special artefact.
- Smug Snake: Considerably powerful, pretty clever, and a world-threatening Sorcerous Overlord, but as Luke Skywalker would say, her overconfidence is her weakness.
- Sorcerous Overlord: A witch queen who rules Krill Garnash and controls all sorts of monsters and evil beings around through sorcery and fear.
- Squishy Wizard: Squishy Witch, to be precise. Morgana bears great power and skill, but very low stamina. She is aware of it, and she did cast protective magic on herself to lower it.
- Stock Evil Overlord Tactics: Using a powerful McGuffin and controlling unstoppable creatures are classics, and she combines both. But how Morgana intends to get the final Sigil deserves mention. She has her secret right-hand (your own court wizard Ifor Tynin) send you against her, a trap disguised as a standard Fantasy quest. They want you to die against the Golems you could not defeat, to take your helmet bearing the final Sigil, and turn your corpse into the final Golem.
- Take Over the World: Downplayed, since she covets the continent of Khul, but still...
- Too Many Belts: At least five. Evil Witch fashion it would seem...
- Weak, but Skilled: Despite lacking raw strength, Morgana is very agile, nimble and highly skilled with magic. The narration even lampshades that her vast power more than compensates her lack of strength.
- See his entry on the Pit page under Greater Demons.
Oddly enough, Shanzikuul is the only villain of the franchise never depicted in any illustration.
A powerful and demented Evil Sorcerer, rumoured to be immortal. He was killed three hundred years ago during the Chaos Wars, in which the Demon Princes invaded the world, but now he is Back from the Dead. He based himself in the ruins of the lost city of Kabesh in the continent of Khul, and stole the Staff of Rulership, from the Mage Order of the Old World, planning to use it for his nefarious goals. But a warrior was sent to retrieve it...
- Affably Evil: He is very polite and genuinely friendly, welcoming visitors warmly. As long as they play by his rules of course, if not he becomes much less personable...
- Antagonist Abilities: Shanzikuul has superhuman stats and uses many very powerful magic trinkets.
- Antagonist Title: The gamebook's title refers to his main alias.
- Artifact of Doom: The Staff of Rulership he stole is the mightiest Staff of Power ever created: An indestructible Magic Wand of enormous Evil that can unite and control the forces of Chaos. A dark wizard of Shanzikuul's calibre could use it to Take Over the World with ease.
- Ax-Crazy: He hides it much better than most under a Mask of Sanity, but make no mistake, he is an unhinged, violent psycho with a Hair-Trigger Temper who enjoys skewering any opposition.
- Back from the Dead: Shanzikuul was resurrected through unknown means. Given his final fate, demonic intervention is implied.
- Badass Boast: He gloats that he can make just about all he wants real, and he is right.
- Badass Bookworm: A brilliant if demented mage, among the only ones skilled enough to wield the Staff of Rulership to its full potential.
- Badass Long Robe: Shanzikuul wears a black robe ornate with silver runes and sigils, fitting the powerful Sorcerous Overlord he is.
- Ballistic Bone: If you give him enough time to use the Staff of Rulership, he first conjures a wall of bones on which you crash and automatically lose -4 stamina.
- Benevolent Boss: The only good thing that can be said about Shanzikuul is that judging what he offers you, he treats his followers well.
- Big Bad: The Evil Sorcerer who stole the Artifact of Doom to Take Over the World, and must be slain.
- Combat Tentacles: If you give him enough time to use the Staff of Rulership, his second attack is to conjure a tentacled... thing that costs -3 stamina if you cannot dodge them.
- Continuity Nod: Being a powerful Magic Knight and Sorcerous Overlord with Reality Warper powers, prone to Evil Gloating and living in a luxurious subterranean palace, Shanzikuul calls into mind Mordraneth, the Big Bad of Keith Martin's first book Stealer of Souls.
- The Dark Arts: Shanzikuul is expert in dark magic, monster creation and demonology.
- Despotism Justifies the Means: He seeks world domination to feed his ego and lord over people.
- Dissonant Serenity: Shanzikuul raves about violence and tyranny in a genial tone, as if saying he enjoys the weather. This is the first of many hints that "unhinged" is the kindest thing that can be said about him.
- Dragged Off to Hell: After you kill Shanzikuul, a demon appears to take his soul to the Pit. And he deserves every second he will spend there.
- The Dreaded: Everyone who remembers him or knows about him is intensely scared of him.
- Elaborate Underground Base: Shanzikuul made the ruins of Kabesh into one, aptly named the Chaos Pits.
- Evil Cannot Comprehend Good: He is thoroughly unable to process that someone could refuse serving him and reject the power and wealth he promises.
- Evil Gloating: He spends half of his speech praising your skills in earnest, and the other half telling you that he is the coolest being to ever dwell Titan.
- Evil Is Hammy: The guy is a bit... enthusiastic. To say the least.
- Evil Sorcerer: Add a new one to the already furbished collection.
- Evilutionary Biologist: Most of the monsters you fight are his creations. Or worse, the subjects of hideous mutations he inflicted them to "better" them.
- Final Boss: The Big Bad and by far the mightiest foe of the story. He is a very powerful fighter with skill 13 stamina 16. Fortunately, there are ways to weaken him. But while he is the biggest challenge, there is a lesser enemy lurking around after you slay the bastard.
- "Get Back Here!" Boss: If you drop his stamina to 2 without killing him, Shanzikuul tries to teleport away to heal. If he wins the next turn, he does and reappears later with +6 stamina. You can take profit of the delay to heal as well, especially if you own a Spell Book.
- Hair-Trigger Temper: Don't get fooled by his manners, he gets livid the second he doesn't have it his way.
- The Hedonist: Shanzikuul uses the staff to indulge in any kind of pleasure luxury can give him. Including slaves implied to be sex slaves. Given that they are beast-women, he seems quite adept of the Furry Fandom. But this is meant to Squick you out...
- Know When to Fold Them: When driven into a corner, Shanzikuul does not hesitate to get the hell away to regain health. Don't mistake this for cowardice, as he jumps back into the fray as soon as he is healed.
- Magic Knight: In addition to being a highly powerful wizard, Shanzikuul is more than able to take on the best warriors with his blade alone. Even without his Ring of Swordsmanship.
- Magic Staff: The Staff of Rulership is this, albeit evil and with powers Beyond the Impossible.
- Magic Wand: In terms of size, his staff is closer to the trope.
- Magical Accessory: He wears an amulet that enables him to teleport wherever he wants, and a Ring of Power. You can use both after slaying him.
- Man of Wealth and Taste: Shanzikuul surrounds himself with over-the-top luxury.
- Mask of Sanity: He is evil and twisted, but quite affable. However, it becomes clear as soon as you speak to him that he is totally off his rocker.
- Master Swordsman: An exceptional fighter, made even deadlier by the Ring of Swordsmanship he wears.
- Narcissist: He's is full of himself big time. He has grandiose sense of self-worth, loving flaunting his "greatness" and lording over people just because he can. If you obey him, fine. If not, Prepare to Die.
- No, Mister Bond, I Expect You To Dine: Shanzikuul welcomes you with a wondrous feast, giving you +4 stamina. Justified in that he fully expects you to accept his offer and bears you no ill will. At first...
- Reality Warper: He becomes this with the Staff of Rulership. He can use it to create and transform pretty much whatever suits his fancy. He created his lavish palace and his Furry Fandom Sex Slaves this way.
- Red Baron: He is known and feared as the Master of Chaos, the Cheater of Death, and the Master of the Undead. All Names to Run Away from Really Fast.
- The Red Mage: In addition to his deadly magic, Shanzikuul is able to heal himself. Though he needs to teleport away to do so.
- Ring of Power: He wears a jewelled ring on his hand. in fact a Ring of Swordsmanship that grants him +2 skill. If you can take it from him, he falls to skill 11, making the battle easier. And if you can take it off and put it on, pocketing the power boost in addition to weakening him, you will utterly own him.
- Sequential Boss: Exactly how many sequences and which ones are you going to face are up to you.
- First, you can attack him on sight, but he will cast two spells with the Staff of Rulership before crossing swords with you. If you dine with him, you can try to weaken him when his guard is down, stealing either the Staff of Rulership or his Ring of Swordsmanship. If you succeed you fight him head on, if you fail he teleports away and spell casts beforehand. Unless you take on the ring, giving him time to teleport. Even after engaging the fight, he can teleport away to heal, adding yet another sequence.
- A Sinister Clue: He keeps his sword near his left hand, wielding the staff with his right one.
- Smug Snake: Highly competent, gifted and dangerous all right, but very full of himself, and owing much of his threat to the Artifact of Doom of the week.
- Sorcerous Overlord: Shanzikuul took over the ruins of Kabesh and swarmed it with monsters, and has many spies and agents far beyond his domain.
- Summon Magic: Gifted enough in this to summon and command the very powerful Astral Slayer demons.
- Suspiciously Similar Substitute: As stated in Continuity Nod above, Shanzikuul is very much alike to Mordraneth. Still, he is an unhinged Smug Snake using an Artifact of Doom, while Mordraneth is a cool-headed Evil Genius who can warp reality on his own.
- Take Over the World: He plans to subjugate Titan to his will.
- Temple of Doom: He controls pretty much the entire ruins of Kabesh.
- They Look Just Like Everyone Else!: He is described as a slim and fit young man, with no apparent trace of evil. Except a manic gleam in his eyes.
- Transformation Horror: Inflicts this on his unfortunate guinea-pigs, be they captives or servants.
- Villain Respect: Your skill and determination impress him enough to offer you a place by his side. It is quite clear that he does not grant it to the average Joes he regards as beneath him.
- Villain Teleportation: He uses his amulet to teleport often during the Final Battle.
- We Can Rule Together: When you confront him, he offers you give you wealth and power if you accept to become The Dragon. Contrary to many a Big Bad, his offer is totally genuine and he has no intention of pulling You Have Outlived Your Usefulness anytime soon. You can accept, but it leads to a Non-Standard Game Over, in which you do gain wealth and power but end up skewered on the blade of a worthier hero.
- Young Conqueror: Shanzikuul is described as a young adult, meaning that he was first one of the major assets of Evil in the Chaos Wars, then close to Take Over the World at an early age, while it took decades to most other Evil Overlords of the series to reach this level of threat.
Cultists


A powerful witch and High Priestess of the Howling Gods, the twisted Religion of Evil founded centuries ago by the mad archmage Xakhaz. She rules the fanatical southern warriors from the dead city of Zagoula, and exerts her influence over the city of Neuburg in secret, working to revive Xakhaz. Then an old friend of Baron Tholdur of Neuburg comes by, realizing that something is amiss...
- All-Encompassing Mantle: What she wears around Baron Tholdur.
- Amulet of Concentrated Awesome: She wears a ruby pendant that seems to be the source, or at least the catalyst, of her magic.
- Antagonist Abilities: This wench's magic will give you no shortage of trouble, and she can cripple you with words alone.
- Badass Bookworm: Senyakhaz masters powerful magic, is a skilled fighter, and a crafty, manipulative schemer.
- Badass Long Robe: A beautiful, ornate, red-coloured one, signalling a powerful and dangerous foe.
- The Baroness: Regal, poised, seductive and dangerous, all she lacks is a proper nobility title. Then again, she is the High Priestess and leader of the Southern Warriors, worth many a title in itself.
- Black Cloak: The above plus In the Hood serve to conceal her identity and keep her innocuous "servant girl" charade. Except that the cloak is deep red instead of black.
- Charm Person: Senyakhaz can magically influence people's minds and actions, making them do as she says. Just ask poor Baron Tholdur. She brainwashed him when he explored Zagoula and controls Neuburg through him, bringing her warriors as enforcers.
- Climax Boss: The third-to-last boss yet the culprit behind the plight of the city, of your friend Baron Tholdur and of your own. With 9 in skill and 8 in stamina, she is very tough, but not very durable.
- Compelling Voice: Senyakhaz can influence people's actions, feelings and sensations with words alone. Never, ever speak to her as you confront her, for just her telling you that you should rest tires you so much that it deals a crippling -4 stamina.
- Dark Action Girl: She much prefers mind games and manipulation over direct battles, but when push comes to shove she proves a dangerous fighter.
- Dirty Coward: When she fails in subjugating people, she runs away and tries to escape. She only fights when she has no other choice.
- Distracted by the Sexy: One of her favourite tricks to distract then mesmerize people.
- Doppelgänger Spin: Senyakhaz can create illusory doubles of herself to confuse her foes. Strike her two doubles without finding her and she mesmerizes you, feeding you to a monster.
- The Dragon: Senyakhaz leads Xakhaz's followers in his name, and helps him prepare his return.
- Dragon-in-Chief: Xakhaz being a Sealed Evil in a Can, he can only direct things from afar, while Senyakhaz helps him rebuild his body. It is her who rules Neuburg and does most of the work.
- Emotion Bomb: Senyakhaz's Compelling Voice is enough to alter your emotions and state of mind.
- Even Evil Has Standards: Even someone as coldly sadistic as Senyakhaz is disturbed by your gory fate, when she tricks you into looking at a mirror wearing the Talisman of Loth, causing your messy demise.
- Evil Sorcerer: A rare female example.
- The Faceless: She conceals her face, and even her gender when "advising" Baron Tholdur.
- False Innocence Trick: She often uses illusions to get the drop of her foes with unassuming aspects. If you meet a pretty servant girl, or three entrancing dancing maids, it is her trying to mesmerize you.
- Faux Affably Evil: She congratulates you for unveiling her traps and resisting her sway, but her praises are laced with scorn and her politeness is blatantly ironic.
- Femme Fatale: Senyakhaz knows how to charm foes in every sense of the world.
- The Fundamentalist: She is fanatically devoted to Xakhaz and his twisted cult.
- "Get Back Here!" Boss: She flees as soon as you unveil all her tricks, doing all she can to impede you as you track her down so that she can escape through her Magic Mirror. It is only when you corner her for good that she fights back. But despite this, don't peg her for a wimp.
- Giant Spider: She summons one to stall you when you uncover her trick. It is but an illusion, rush through the web without a care or she escapes.
- The Heavy: The one through whom everything happens and the most direct threat you face.
- High Priest: Senyakhaz is the current ruler of the Khaz priesthood, the twisted cult of the Howling Gods. All priests add "Khaz" at the end of their name when ordained.
- Hot Witch: Senyakhaz is young and pretty, but very evil and dangerous.
- Hypnotic Eyes: One of her many ways to mesmerize people.
- In the Hood: Baron Tholdur's new southerner advisor, clad from head to toe in a hooded cape, is in fact Senyakhaz controlling him.
- Kick the Dog: She put Tholdur's adopted daughter into a bewitched suit of armour that forces her to attack anyone she comes across. Why? Because she could. The poor girl is horrified by what it forces her to do, weeping and begging any newcomer to get the hell out.
- Lady in Red: A dangerous and sultry seductress, wearing an ornate red robe.
- Lady of Black Magic: She is beautiful and dignified, and formidable with magic.
- Lady of War: She is beautiful and dignified, and a force to be reckoned in battle.
- Magic Dance: Another of her mesmerizing tricks. If it works on you, she tries to feed you to a monster.
- Magic Mirror: She has one through which she can teleport. And you need it to reach Xakhaz.
- The Man in Front of the Man: Senyakhaz pretends to be Baron Tholdur's advisor.
- The Man Behind the Man: The woman behind the man to be precise. As everyone thinks Tholdur has gone mad, she in fact has him under her control to use as a Puppet King, while passing as his advisor.
- Manipulative Bastard: She is very good at deceiving and using people, or if needed distracting them with illusions playing on their fears and desires.
- Master of Illusion: Her main field of expertise in magic, and boy is she good at it!
- Mind Control: A consummate expert of pretty much every form of mind-control magic.
- Older Than She Looks: She states that the passing years mean little to her, hinting to be this.
- Puzzle Boss: Which double to strike? Is that Giant Spider real? For the matter, the one on the left and no.
- Raven Hair, Ivory Skin: She has the look.
- Recurring Boss: You can fight her twice, but only by accidentally returning to the past after killing her.
- Religion of Evil: The cult of the Howling Gods is utterly depraved, fitting its inspiration. They create atrocious Humanoid Abominations and Animalistic Abominations and horribly mutate innocents. Whether the Howling Gods really exist or were made out by Xakhaz is left unexplained, but it is hinted to be in fact an even more twisted than usual worship of the Dark Gods and Demon Princes.
- Samus Is a Girl: Tholdur's mysterious advisor who secretly controls him, is in fact Senyakhaz.
- Screw This, I'm Outta Here: As soon as she is unmasked. If she manages to pull it, you're screwed.
- Sequential Boss: You must overcome Senyakhaz's many tricks before fighting her.
- She first appears as three dancing maiden (in fact herself and two illusions) doing a mesmerizing Magic Dance. You must resist her sway and strike one (the one on the left), and the Trident of Skarlos can detect her. Second, she escapes and summon a Giant Spider (chase her through the door on the right and ignore the beast, it's just a mirage). Finally, you can settle your score with the wrench.
- Sexy Villains, Chaste Heroes: She is very beautiful, but utterly heartless.
- Soft-Spoken Sadist: Senyakhaz is much more reserved and poised than her lord, but she is no less vicious and eager to inflict Body Horror and suffering For the Evulz.
- Sorcerous Overlord: One who serves another, but one nonetheless. She rules the southern warriors and the ruins of Zagoula. And she rules Neuburg from the shadows.
- Squishy Wizard: Very powerful but frail. She is is tough but armed combat is obviously not her forte.
- They Look Just Like Everyone Else!: And she milks it for all it's worth.
- Thinking Up Portals: Senyakhaz's mirror is a magic device, likely created by her or by Xakhaz, that creates gateways into different locations, like Zagoula or Xakhaz's crypt. You can even go back through time and fight her again, or worse get teleported miles away with no hope to return if you misuse it.
- Trial-and-Error Gameplay: When facing the three dancing maiden, unless you can Take a Third Option with the Trident of Skarlos.
- Weak, but Skilled: She is an expert witch as well as a very skilled fighter, but she is frail and has low stamina. It is clear that her mastery of magic, mind-control and illusions are what make her truly formidable. She knows it as she'd rather not fight if she can avoid it.
- Xanatos Speed Chess: Senyakhaz is good at dealing with the unpredicted.
- When she notices that you escaped the jail she had you thrown into, she tries to have her soldiers kill you. But that's only the beginning.
- If you reach Baron Tholdur, he cannot recognize you due to her magic and she has him sentencing you to jail. If you can prove your claim to be Tholdur's friend, she quickly adapts and welcomes you warmly, only to sic assassins on you the moment your guard is down.
- If you show her the evil-weakening talisman of Loth, she immediately distracts you into looking in her mirror, which she knows is fatal when wearing it. And predictably...
Others
- See his entry on the Pit page under Demonic servants.

When the royal Princess Telessa of Arion was kidnapped and held for ransom, a brave warrior - YOU - set out to save her within 3 days. However, you arrived a day too late, and King Jothane of Arion have already commissioned the task of rescuing the princess to Fang-Zen of Jitar, a ruthless, greedy mercenary which is also your arch-enemy, your biggest rival, whose fee for the quest is half the entire kingdom. You decide to take on the quest yourself, but as usual Fang-Zen isn't willing to play fair in this quest.
- Alcohol-Induced Idiocy: You can goad him into a fight while he's drunk. Since he's full of alcohol he fights you with a malus, allowing you an easy victory.
- Always Someone Better: Relax, your stats are always ahead of him, despite what he claims.
- Arch-Enemy: He swears to become your enemy once you took over his quest. The feeling may or may not be mutual.
- Badass Boast: And you want to fight me? You must be joking. You aren't worth it.
- Delinquent Hair: Sports a greasy mohawk.
- Dirty Coward: Gloats at you and acts tough when he is surrounded by thugs working for him, but once he's on his own he'll act like a sneaky little bastard. Such as trying to spear you in the back while you're not watching.
- Disc-One Final Boss: You confront him outside of the titular moor, and fight him to the death. He's out of the adventure once you killed him.
- Disproportionate Reward: His price for saving the princess? Half a kingdom!
- The Drunken Sailor: According to his backstory in the FF wiki he's a sailor by trade, and he drinks a lot.
- Foil: Both of you are commissioned to undertake the same quest, but for different reasons. You're doing this for honour, he's doing this for his own selfish desires.
- Greed: His only motivation for taking the quest.
- Irony: His supposed Badass Boast is a really bold thing to say for a guy whose skill is at least 2 point behind yours, by the way.
- In the Back: His preferred way of ambush, he'll hit you in the back while in a tavern when he had a chance, and later in the moor he stalks you while aiming a spear at your back.
- Martial Arts Headband: He wears one of these, although its mostly just for show.
- Miles Gloriosus: For all the gloating and self-praise he gave himself, he doesn't even have the guts to confront you directly like a true warrior.
- Paper Tiger: His entire character can be summed up as such.
- The Rival: He is your arch nemesis and rival.
- Rugged Scar: One on his right cheek, just below his eye.
- Sinister Scimitar: His weapon, the standard for most FF-villains.
- Small Name, Big Ego: After all the hype that's piled upon him throughout the book, when you finally get to fight him outside the moor... you discover his skill is in fact 2 points lower than yours, with stamina 12. Not really a difficult fight.
- Which is made doubly hilarious if you rolled the minimal stats for yourself, since that would mean Fang-Zen's skill stat would be 5. A guy barely stronger than the average orc wants to rule an entire kingdom for himself?
- Sore Loser: When you've proven youself to be more worthy of the quest, he tries to kill you...
- Utility Belt: Dons a huge one that goes around his chest.
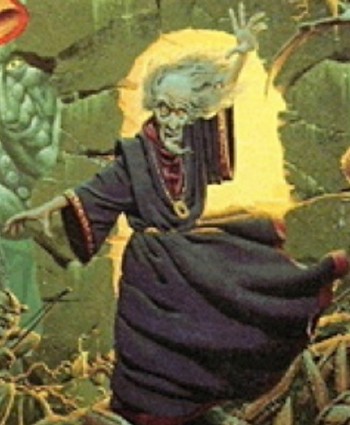
An Evil Sorcerer living in a tower near the gloomy and highly dangerous Scorpion Swamp. You just got a Ring of Power to always find your way and detect danger ahead, and can choose between three quests of different moral alignment: Searching a magical plant for the good wizard Selator, drawing a map of the Swamp for the neutral merchant Poomchucker, or stealing the Amulet of Concentrated Awesome of five mages: the Mistress of Birds, the Master of Gardens, the Master of Frogs, the Master of Wolves and the Master of Spiders, for the evil wizard Grimslade. Whether you accept the quest, fight the wretched mage, or ignore him altogether is up to you...
- Amazing Technicolor Population: The US cover art depicts him with a creepy, ghoulish, pale grey-blue skin.
- Antagonist Abilities: Grimslade is a powerful Magic Knight who can counter your spells, reduce your life points, give himself Super-Strength and turn you to a spider, depending on what you do against him.
- Attack Reflector: If you cast the Fear spell, he deflects it back at you, costing you -1 skill.
- Badass Boast: Upon meeting you, he is utterly unimpressed and tells you that fighting you would waste his time, but if you wish it he can give you something to fight. Cue Living Statue.Grimslade: I see no need to waste my strength on such as you. But you may prove your mettle against this, my servant.
- Badass Long Robe: A black robe covered in crimson magic symbols befitting his wizarding status.
- Beard of Evil: On the US cover art, he is depicted with a white goatee.
- Benevolent Boss: Out of Pragmatic Villainy and nothing else. Grimslade does heal you and provides you with spells and a magic Cool Sword if you strike a bargain with him. He offers a handsome reward, and while he first tries to swindle you, if you remind him of the price you decided, he chuckles and pays you the right amount. But if you fail your mission, for Titan's sake steer clear of the sod.
- Big Bad: Not in the proper sense of the trope, as Grimslade is no direct threat and only influences the plot if you seek him out. But he is still the closest thing to a primary antagonist in the story. He is the most evil character and the most dangerous enemy you might face, and he is definitely up to no good.
- Climax Boss: Fight him after destroying his summoned demon or his Living Statue and insulting him ends the evil quest before it starts. He is a tough foe with skill 9 stamina 10, but you can next try the neutral or good quests, with an Infinity +1 Sword to boot.
- Collector of the Strange: An evil and greedy version. Grimslade collects and gathers all sorts of valuable and powerful magic trinkets, and seeks to expand his collection no matter the cost. He mostly does this to increase his wealth and power, but he genuinely covets them. Don't you EVER tell him about your magic ring, or he sends his virtually invincible summoned demon to take it from your corpse.
- Cool Sword:
- He owns one of the Magic Swords of Great Power, a jagged blade glowing red boosting its owner by +2 skill. He somehow incorporated it in his Magic Wand, as he transforms it into the sword before fighting. You can take it from his corpse and pocket the bonus. If he is the Climax Boss, you might use it in another quest. If you kill him after the quest, the story ends here and it does not benefits you.
- He gives you a magic sword granting you +1 skill for your quest if you impressed him enough.
- Curse: Grimslade masters all sorts of nasty ones, and can teach you the Curse spell: It costs a dice roll worth of stamina but causes undetermined bad things to the target. Be careful, for it is unpredictable. He might regret to have taught it to you, as it kills him instantly when used against him.
- Deal with the Devil:
- Played with, the bargain you strike with Grimslade looks very much like one, but if you succeed, you get nothing worse than a feeling of unease, and possibly less than what he promised.
- He himself is implied to have made one, as a demon appears to take his soul when you kill him.
- Dragged Off to Hell: His final fate if you kill him, with his soul taken by a demon. No one wastes a tear.
- The Dreaded: He is reviled and feared in the city and all the swamp's surroundings, and nobody wants anything to do with him.
- Evil Mentor: If you agree to work for Grimslade, he gives you spells and indications.
- Evil Old Folks: Grimslade is past his prime, but still very dangerous, and rotten to the marrow.
- Evil Sorcerer: Arguably the only one in the franchise not interested in conquest and control, but still plenty vile, ambitious and dangerous.
- Evil Tower of Ominousness: He lives in a very sinister one.
- Evil Wears Black: A bad guy Color-Coded for Your Convenience. As if he was not Obviously Evil enough. He wears purple on the American cover art, however.
- Faux Affably Evil: Grimslade can be perfectly courteous and cordial, even healing you and providing you assets, but only if you prove useful to him. If not, he addresses you with disdain at best, and scathing insults at worst. And the least we speak about when you fail him the better...
- Final Boss: He becomes this if you fight him after getting paid at the end of the evil quest, to punish him for swindling you, to atone for your actions, or just because you want to. Oddly enough, he is considerably mightier than when he is the Climax Boss. With skill 13 (1 over the normal maximum) stamina 18, he is a very powerful foe. Fortunately, there is one spell that can One-Hit Kill him.
- Forced Transformation: He turns you into a spider if you performed poorly on his test fight against the Living Statue and are coward enough to beg him for mercy.
- Good Hair, Evil Hair: White, scarce and unkempt. Yeah, the sod is definitely up to no good.
- Gotta Catch Them All: Grimslade covets the Amulets serving as the Masters of the Swamp's power source, to gain their powers. He promises you 500 gold coins for each, no matter how you took it...
- Greed: Grimslade is defined by greed. He covets every valuable trinket he learns about, fully willing to kill their owners or have them killed, and while he promises a handsome reward, he tries to swindle you first when you collect it. If he learns about you magic ring, he will immediately covet it and try to kill you for it.
- Healing Hands: He restores all your scores back to the maximum with potions if you two strike a bargain.
- Hoist by His Own Petard: Casting the Curse spell he taught you kills him outright.
- Know When to Fold Them: If you defeated his Living Statue, (or if Titan is on your side the Demon) and refuse to fight further, he will know better that pointlessly antagonising you.
- Lean and Mean: Grimslade is described as tall and skeletally thin, and he is a truly nasty piece of work.
- Living Statue: He animates a statue representing a goblin for you to fight as a test. With skill 7 stamina 6, it is an easy fight, but you destroy his table to use the leg as a makeshift club, for your sword is next to useless against stone. How well you fare in this fight shapes Grimslade's opinion of you.
- Load-Bearing Boss: His death does not destroy his tower, but is still the trigger. If you don't leave quickly after killing him, a demon appears to take his soul, making everything explode while he is at it.
- Magical Weapon: His serrated sword is a very powerful one, granting a +2 skill bonus instead of the regular +1.
- Magic Carpet: He owns one, and uses it to track you down after you flee from the battle against his Living Statue or his Demon. If you do so, head for the village and hide as soon as your ring warns you. Anything else and he catches you and kills you.
- Magic Knight: Grimslade is a powerful wizard and a good swordsman.
- Magic Mirror: He owns one that enables him to see everywhere in his surroundings, but he cannot spy the Masters of the Swamp, whose power he covets.
- Magic Wand: He uses one to spellcast, and can turn it into a Cool Sword.
- Make Them Rot: He can teach you the Withering spell, rotting plants and trees in your way to nothing.
- Master Swordsman: Grimslade is obviously no stranger to Sword Fights. If you fight him as a Climax Boss though, he needs his Cool Sword to be a threat. As the Final Boss on the other hand beware.
- More Teeth than the Osmond Family: Has pointed teeth.
- Names to Run Away from Really Fast: Grimslade hardly sounds pleasant and enjoyable...
- No-Sell: Most of your spells will only make him laugh. He dispels them easily and retaliates. He is highly vulnerable to the Curse spell on the other hand.
- Obviously Evil: Clad in Red and Black and Evil All Over clothing, thin as a rake, pointed teeth... Nah! don' t be judgemental, he sure is nice and friendly.
- Percent Damage Attack: If you did not bring back any amulet and fail a test of luck, he casts a spell that halves your Life Meter, regardless of how high it is. Given how powerful he is as the Final Boss, this makes him even harder to fight.
- Pragmatic Villainy: Grimslade is not stupid enough to pointlessly antagonise a warrior who proved his worth, and if you strike a bargain with him, he gives you all sorts of items to help you, knowing that a healthy and well-equipped agent stands a better chance in a place where Everything Is Trying to Kill You.
- Prepare to Die: Says this word for word before fighting you.
- Purple Is Powerful: The US cover art depicts him wearing purple, in contradiction to the description. It still fits him as a powerful wizard though.
- Quest Giver: Grimslade tasks you to take the Masters of the Swamp's amulets if you choose the evil path.
- Red and Black and Evil All Over: Wears black robes covered in crimson designs that glow in accord with his mood, though the US covert art depicts him in dark purple robes.
- Red Mage: He casts nasty spells, but can gain Super-Strength, restore your luck, or brew healing potions.
- Right-Hand Attack Dog: Grimslade uses the most ludicrous example of the franchise, summoning a highly powerful demon with skill 16 (4 over the normal maximum) stamina 12, making the local Demon Lords and Archdevils and all but a few Final Bosses look like pansies. You have zero hope to survive such a ridiculously broken battle, plain and simple. To add insult to injury, the narration treats it as no big deal, as if putting down a rabid wolf, while other gamebooks provide you with Game Breakers and/or ways to nerf or avoid overpowered foes, to even the odds. This one? Zilch! Nada! Mercifully this is a Skippable Boss.
- The Demon might have been intended to have the still formidable but more manageable skill 12 stamina 16, or plainly punish the Schmuck Bait situation leading to the battle... Who knows?
- Schmuck Bait: If you're stupid enough to tell him about your one-of-a-kind Magic Ring, he summons a virtually invincible demon to kill you and take it from your corpse. Your only chance then is to attack him at once, before he can summon it. If you're lucky you might wound him before fight.
- Serrated Blade of Pain: His magic sword has a jagged blade.
- Shrink Ray: He can magically shrink things to fit them in his pocket, then revert them to normal size.
- Sinister Surveillance: He uses it to watch over the region, knowing who you are and who told you about him before you knock at his door.
- Skippable Boss: Choose the good or neutral quest, and you will never meet Grimslade, and might very well go on your merry way without hearing about him.
- Summon Magic: Grimslade can summon a horribly powerful demon to fight in his stead.
- Super-Strength: Grimslade can gain it with a spell. He uses it when pursuing you on his Magic Carpet as you flee his tower. If he catches you he lifts you with one hand, rise high and drops you to your doom.
- Supernatural Fear Inducer: He can teach you the Fear spell, which cause intense, irrational fear to foes to make them easier to deal with. Don't bother using it against him if you knows what's best for you.
- Trap Door: He has one in his study. If you try to flee, you must test your luck to avoid it or lose the game.
- Villain Respect: Averted then played straight, for you have to earn it. At first he has nothing but disdain towards you, but if you prove your fighting talents he changes his tune and genuinely praises you, seeing how much use you can be for him.
- Wild Hair: According to the US cover art at least.
- Winds of Destiny, Change!: He can restore your luck score.
- You Have Failed Me: Woe betide you if you come back to him empty handed.
As you, the Monarch of Arion, sets out to defeat the evil witch Morgana, you face some strange ordeals during your quest, as if someone was hindering you. It turns out that someone from your inner-circle is in cahoots with the witch, and must be unmasked...
- Anti-Climax Boss: The Traitor doesn't even have the decency to have a skill score in the double digits. Seriously, skill 8 is good for Mooks, but downright lame for the final enemy of a gamebook. This joke is a Post-Final Boss who can't hold a candle to Morgana.
- Astral Projection: He tells you that he used it to spy on Morgana. In fact, he might use it to confer with her without leaving the royal castle, not to raise suspicion. Or lying through his teeth.
- Badass Long Robe: Subverted. He wears a robe, being a wizard and all that jazz, but badass he is not.
- Court Mage: His official position.
- Dirty Coward: He counts on Morgana and her Golems to kill you, and then stabs you in the back, only risking a direct fight when he has no other choice.
- The Dragon: The Traitor is secretly this to Morgana herself.
- Dragon Ascendant: Even with Morgana gone, it is implied that he can remake the Golems and make the final one from you to Take Over the World, meaning that the threat only ends with him. Then again...
- Dragon Their Feet: The Traitor only makes his move after Morgana is killed.
- Evil Chancellor: He is your Court Wizard and primary advisor Ifor Tynin.
- Evil Old Folks: An old bastard, who gleefully sends the king he is supposed to serve to their death, while playing nice and friendly.
- Evil Sorcerer: Your Court Wizard Ifor Tynin is in fact yet another example of the trope.
- False Friend: Who could guess? Your court wizard and advisor is a traitor planning Khul's doom.
- Faux Affably Evil: He speaks to you with all the respect due to his king in the intro, but this is an act and he plans to send you to your death. When you unmask him, he curses you.
- Flat Character: Aside from The Reveal, there is little to say about him.
- Forgot About His Powers: It's a wonder why he uses a mere dagger instead of his magic, especially since he proves proficient with it and you already know that he can by the time of the Boss Battle. Perhaps not to clue readers in the same page to the paragraph in which you fight him.
- He Knows Too Much: The most likely reason for killing Kevin Truehand. See right below for details.
- Hero Killer: While you are away, the Traitor kills your loyal armourer Kevin Truehand, who might have discovered his treachery. He adds insult to injury by sending his corpse possessed by a demon after you.
- In the Back: If you cannot guess his identity or have no reason to suspect his existence, you get stabbed in the back to death.
- The Mole: He's Morgana's agent in your own kingdom.
- Post-Final Boss: Being much easier than Morgana herself, having only skill 8 stamina 10, cements him as this and Morgana as the real Final Boss. The real challenge is to discover him, for he is pitifully weak foe you will mop the floor with.
- Punny Name: A plot-relevant one, because at one point you have to deduct which paragraph you must visit in order to fight him. Seasoned players would have known that there was something fishy about the name Ifor Tynin. Not to mention that the narration states that you cannot help but be wary of mages.
- Secret Identity: He is Ifor Tynin, your own Court Mage.
- The Starscream: Two instances, once played straight and the other played with.
- He only takes orders from you and plans your demise to seize control of Arion. But he does not stop at your kingdom and seeks to rule the continent under Morgana.
- Also, he would shed no tears if Morgana were to die, leaving him to rule supreme. He might even have been counting on it when sending you after her.
- Summon Magic: He summons a Hellfire Spirit to possess Kevin's corpse and sends it to fight you.
- Treacherous Advisor: The Traitor is your main advisor, but is in fact a power-hungry, two-faced creep, who literally sold the kingdom he was supposed to serve.
- Treacherous Quest Giver: He sends you slay the local evil witch. No big deal right? WRONG!
- True Final Boss: Downplayed. You can only confront him and fully finish the gamebook by unmasking and killing him, but contrary to the trope, he is a pathetic wimp.
- Villain Ball:
- Killing Kevin because He Knows Too Much is a smart move. Sending his possessed corpse fight you, giving blatant clue that only someone in your castle could have done it... Not so much. All the stupider in that only a wizard could have killed him this way!
- During the Final Battle, he stabs you instead of casting a deadly spell and passing it as a Dying Curse from Morgana. Even stupider, he fights you with weapons when he stands no chance. Justified since having him spell cast would give away his identity, but still.
- Villain with Good Publicity: A respectable figure of authority he is... not!
- Walking Spoiler: So much blanked text... His existence and identity are the main Plot Twist of the book.
- A Wolf in Sheep's Clothing: He appears to be a noble man concerned with the kingdom, but is not.
- Zero-Effort Boss: After defeating a powerful skill 11 Final Boss, snuffing this small fry is a breeze.

Horfak is a mine owner, one of many whom ventured to the Cloudhigh Mountains of Khul seeking gold and wealth. Unfortunately, during his excavation, he stepped into the titular Portal, and is immediately consumed by its power; his ambitions now twisted, he is the Portal's new warlord and the closest the adventure has to a Big Bad for the player characters attempting to seal the Portal for good.
- And I Must Scream: When you reveal Horfak's true reflection, his shock at seeing his own reflection will turn him into a helpless vegetable in fear... but the Portal will still force him into battle, using his body like a mechanical puppet.
- Badass Boast:Horfak: You dare face me? Fool! I am Horfak! My strength alone could defeat you; with the Portal, I am invincible. Feel my power!
- Badass Cape: Well, no high-ranking warlord would be complete without one.
- Bad Boss: Horfak overworks his slaves to mine gold for him and have no qualms sending massive amount of slave warriors to their doom.
- Bald of Evil: It may or may not be part of the Portal's side effects, though.
- BFS: Uses one to attack you. Keep in mind that he is already a giant of a man - imagine how huge actually is that sword he's wielding in the illustration?
- Brainwashed and Crazy: And there's no turning back for him now. Well, one doesn't actually suffer from insanity if he's enjoying it, right?
- The Brute: Depending whether you're counting Horfak as the Big Bad, or the titular Portal... if the Portal is the real villain, then Horfak would be this.
- Evil Gloating: Horfak boasts of his sheer power and his invincibility, allowing you to either ambush him or think of a plan to stop him.
- Evil Makes You Monstrous: He wasn't a giant of a man before entering that accursed Portal.
- Evil Makes You Ugly: The shinning example in the entire franchise.
- Face-Revealing Turn: When you confront him in his quarters, hus back is facing you. At which point he turns around...
- Facial Horror: This is why you shouldn't hang out near evil ancient Portals, kids!
- Final Boss: He's the very last obstacle opposing your attempt to seal the Portal for good.
- From Nobody to Nightmare: From a simple miner to a dangerous, power-hungry warlord.
- Frontline General: In one of the two routes you can take to confront Horfak, he is shown in a chariot leading his army into battle.
- Fur and Loathing: His cape is apparently made from the furs of some skinned animal.
- Gonk: His appearance invokes this.
- Gravity Master: One of the abilities granted by the Portal, Horfak can drag you down with gravity manipulation powers and making you struggle just to stand up and fight, as such you battle him with your SKILL reduced.
- Heel–Face Brainwashing: He used to be a neutral, if somewhat greedy, mine owner. Now he's a ruthless warlord and powerful villain.
- House of Broken Mirrors: Referenced, it is mentioned that Horfak orders all mirrors to be destroyed and forbids any reflective objects in his territory.
- Keystone Army: Subverted; if you defeat Horfak, the Slave warriors are now easy pickings for the La Résistance, however the Portal is still active and you still need to shut it down for good. If you cannot seal the Portal effectively, even with Horfak dead, you quest is still a failure.
- Large and in Charge: A giant of a man who's in command of the slave army.
- Marathon Boss: Due to his monstrous size, Horfak has a whooping stamina 20. Although if you uncover his weakness you can half it down.
- Mooks: Commands an army of Slave Mooks, appropriately called Slave Warriors.
- Nightmare Face: Sweet dreams...
- Praetorian Guard: His personal guards are Troll Slave Warriors.
- Rage Against the Reflection: During the final confrontation, you can choose to give Horfak a mirror or mirrored helmet, showing him his true hideous mug. At which point he will recoil in horror, drop the mirror, and curse the Portal in shock, barely able to defend himself. You may fight him with his SKILL and STAMINA greatly reduced.
- Shock and Awe: When you confront him mano-on-mano, he will channel the Portal's evil powers and summon black bolts of lighting.
- Shut Up, Hannibal!: Before the penultimate finale, you decide to intervene his gloating and confront him immediately.
- Sinister Surveillance: Horfak can see you, through the eyes of his slave warriors.
- Tainted Veins: Part of several side-effects of his exposure to the Portal.
- Tranquil Fury: While he does gloat at you, he did it in a low whisper and in comparative calmness, which considering his monstrous size, feels a little jarring.
- Was Once a Man: In exchange for unlimited power and wealth, by stepping through the Portal... worth it?
- Weaksauce Weakness: Revealing Horfak's true reflection to him will cripple his powers, making the Final Boss battle a lot easier.
- What Have I Become?: Invoked, if you show him his true face using a mirror.
- See their entry on the Pit page under Demonic servants.

A powerful and surprisingly honourable Dark Elf Warrior you meet on your quest to kill the Evil Sorcerer Shanzikuul and bring back the Staff of Rulership to the Mage Order it was stolen from. You might first find an agreement with him, following the way you lead your quest. But while he is not a threat for now, you know full well that he is after the Staff for his own sinister purposes, and will not let you have it for long. Provided you get it before him that is...
- Affably Evil: Naas is sincerely polite, but still very evil.
- Antagonist Abilities: A powerful fighter who can appear anywhere and turn invisible. Played with in that he does use the invisibility in battle, but not against you.
- Badass Cape: Naas wears a long, black cape that makes him look quite imposing.
- Badass in Distress: You can meet him Bound and Gagged, with a sack on his head, having been captured by agents of Shanzikuul. If you save him, he proves that even Always Chaotic Evil dark elves know the meaning of gratitude.
- Badass Normal: He owns magic trinkets, but only relies on his trusty blade to kick ass and needs nothing else.
- Baddie Flattery: Any praises he gives, he means it.
- Bound and Gagged: Even grade A badasses can get in trouble.
- Cool Crown: He wears a simple, yet nice-looking diadem.
- Cool Sword: Naas wields a long, elven sword as his weapon.
- The Dragon: Naas was sent by the unseen Dark Elven Monarchs, and states to serve his people. Though he makes it crystal clear that he's expecting a huge reward and a comfy position of power.
- Drop-In Nemesis: He appear out of nowhere with a magical rope after Shanzikuul is dealt with.
- Dystopia Justifies the Means: He makes it quite clear that he covets the Staff of Rulership for evil purpose. Probably to spread chaos, or to help his people Take Over the World.
- Enemy Mine: You can help Naas fighting a kidnapper who just captured him, and in gratitude he later helps you fight the powerful necromancer Vardrath.
- Escape Rope: Naas owns a bewitched rope that uncoils upwards at his command and teleports him wherever he wants.
- Even Evil Has Standards:
- He makes no mysteries of his evil, but it does not prevent him from disliking slavery and unnecessary cruelty, among others.
- He loathes the wretched necromancer Vardrath. Hard to blame him, as said necromancer is an utterly despicable Big Bad Wannabe and grave robber, as repellent in terms of personality than in looks.
- Evil Counterpart Race: He is a Dark Elf, a group of elves who got corrupted by arrogance and tried to dominate the other races, only to be driven away in subterranean kingdoms. They are now Always Chaotic Evil masters of The Dark Arts, twisted by darkness.
- Evil Virtues: Evil and ambitious he might be, but honour is not a vain word for him. He goes as far as intervening in favour of mistreated innocents even when it is Someone Else's Problem.
- Fair-Play Villain: Naas has the means to fight dirty, and does not hesitate to use them. But he refrains against foes he deems worthy like you.
- Foil: You both want to slay Shanzikuul and take the Staff of Rulership, but not for the same reasons.
- High Collar of Doom: Adorning his Badass Cape for additional badass points.
- I Owe You My Life: You can save him during his Badass in Distress episode, he repays you with presents and an Enemy Mine against a common foe.
- Invisibility:
- Naas uses magic to turn invisible when he helps you kill Vardrath, but he does not use it against you as he thinks you deserve an honourable death.
- It is implied that his Badass Cape is an Invisibility Cloak, as such artefacts are common among elves.
- Let's Fight Like Gentlemen: Naas promises you an honourable Duel to the Death when comes the moment to settle your score, and he keeps his word.
- A Lighter Shade of Black: One of the most nuanced villains of the series. Compared to scum like the Ax-Crazy Big Bad or the Grave Robbing Big Bad Wannabe, he is downright pleasant to be around.
- Master Swordsman: He is an expert with the blade, and you will get a taste for yourself.
- Noble Demon: He helps you without even knowing who you are, and reprimands the captain of a ship from being a Bad Boss at the start of the game. If you end up saving his life or fighting against the necromancer Vardrath alongside him, he will thank you in earnest and give you precious artefacts.
- Pointy Ears: A given for an elf.
- Post-Final Boss: The very last opponent you face after dealing with Shanzikuul. He is a tough nut to crack with skill 10 stamina 13, yet hardly a match for someone who just defeated the formidable Sorcerous Overlord. Especially if you took Shanzikuul's Ring of Swordsmanship.
- Recurring Boss: You can fight him twice, but the first Boss Battle is skippable. If you face him the first time, when his stamina (or yours) drops to 5, the fight is interrupted by incoming guards and he teleports away on his magic rope.
- Averted when he fights you for real after you get rid of Shanzikuul.
- The Rival: An evil variation, Naas is in many ways similar to you, and pursues the same goal.
- Rival Final Boss: Albeit a Post-Final Boss, right after the much mightier Shanzikuul. Beware still...
- Shadow Archetype: A powerful and honourable, yet determined warrior sent by a higher authority to get the Artifact of Doom for a huge reward, who meets a warrior of the opposing side and can team up with him before fighting to the death in the end. Are we speaking about you or him?
- Superior Species: Elves are described as tall, handsome and powerful, and even as a dark elf, who are notably rougher, uglier and less refined, he fits the bill. Played with in that they are only superior in terms of magic, can be matched by powerful individuals, and are are frailer than other races.
- Tall, Dark, and Handsome: Naas is much easier on the eyes than other dark elves, who bear the corruption of evil much more visible.
- Technicolor Eyes: Bright violet eyes are quite uncommon, even among supernatural beings.
- Villain Respect: He develops this towards you after the Enemy Mine episode.
- Villain Teleportation: With that magic rope of his, he can teleport everywhere. Like just before your nose shortly after you killed the Big Bad to seize the McGuffin.
- We Will Meet Again: He warns you after you helped each other, that next time will be the last.
- Worthy Opponent: He regards you as one, and the feeling is implied to be mutual. But this does not prevent either of you from fighting to the death at the end.