This page details noteworthy enemies and bosses fought in Dark Souls. Head back through here for other character pages. Contains unmarked spoilers.
General
Hollows

The basic enemy of the game's first half. People afflicted with the Darksign who have succumbed to their curse, turning into nearly-mindless zombies.
- Despair Event Horizon: Undead become Hollows when they lose their will to keep going, usually because they were trapped in a hopeless situation or decisively failed at the goal that was helping them push forward.
- Elite Mooks: They have several stronger variations, mostly Undead Warriors and Soldiers who have armor and heavier weapons. The most dangerous among them wield torches that can kill even a strong player in a single brutal combo, though thankfully they are otherwise only as strong as a standard Hollow.
- Fragile Speedster: Some of them attack with surprisingly quick flurries of slashes, which can easily kill low-leveled players or those not paying attention, but they still go down in one hit to any mid-game weapons.
- Glass Cannon: The torch-wielding Hollows are no stronger than the standard variants, but fire damage is devastating to the player if not blocked.
- The Goomba: The weakest and most common enemy, found throughout many areas and growing increasingly less effective as the game goes on. However, a large swarm of them can still be dangerous to unprepared players.
- Our Zombies Are Different: While they are completely insane and almost mindless, they are less animalistic than usual zombies, with most using weapons and some even utilizing ambush tactics.
Vagrants

Bizarre, incredibly rare creatures resembling dark blobs with claws and white tendrils. They only spawn when a player in another game loses a great amount of humanity and dies before being able to reclaim it (spawning an "evil" Vagrant), or drops a valuable item and leaves it behind for some time (a "good" Vagrant).
- Glass Cannon: The "evil" varieties are as fragile as the others, and their main strike is weak, but their other attack is often a One-Hit Kill.
- Jump Scare: Hostile Vagrants have a tendency to do this to players unaware of their spawn locations, as their creation is unpredictable and they can often be run right into without warning.
- Metal Slime: They’re very elusive, can quickly disappear if not swiftly engaged, and the hostile varieties can One-Hit Kill you. However, managing to kill them in time usually yields great rewards.
- Random Encounters: Since having one appear in your game is a Luck-Based Mission dependent on another player's actions, it's very easy to go through multiple playthroughs without ever seeing a single one.
The Black Knights

Former knights of Gwyn, their equipment charred black in their wars against the demons. These solitary knights are found as Minibosses scattered throughout Lordran, while large groups of them only respawn in the Kiln of the First Flame.
- Acquired Poison Immunity: Of a sort — getting burned so badly and constantly has made them nearly impervious to flame, a quality which helps you if you can get their shield.
- Animated Armor: This is what the Black Knights in the final area actually are - scorched armor left behind by the knights who burned with Gwyn, still moving around to defend him while their actual spirits roam the stairway between the Kiln and the Firelink Altar.
- Black Knight: Obviously. Unlike most examples, however, their armor isn't black by design; they were Silver Knights from Anor Londo who were scorched black during Gwyn's campaigns against the demons.
- Boss in Mook's Clothing: In the early game, they vastly outmatch your damage and their swings can nearly One-Hit Kill most builds, making it extremely hard to kill them if you're not good at dodging/parrying. They get easier as you progress, but not by much.
- Elite Mooks: They're essentially this to the Silver Knights, even though you encounter them long before the latter. By the time you finally encounter the respawning versions blocking the path to Gwyn's chamber, the two are about on par with each other.
- Undying Loyalty: They were some of Gwyn's most powerful and loyal knights, always at his side in battle while the other Silver Knights stayed behind to guard Anor Londo; many even accompanied him on his suicide mission to link the Flame, and were burned alive in the process — and even then, their empty armors still guard their fallen lord by the time you arrive.
Crystal Lizards

Tiny, solitary lizards either made of or covered in sparkling crystal. They are one of the few creatures in Lordran not out for your blood, instead fleeing when discovered and vanishing if not struck down.
- Defensive Feint Trap: They run away immediately upon seeing the Chosen Undead and vanish shortly afterwards. However, more often than not they run right into enemies or other hazardous areas.
- Disappears into Light: A non-lethal variety, they run in place and vanish into thin air if not killed quickly enough.
- Metal Slime: They’re rare, pretty fast, and disappear quickly if not killed, remaining gone until the zone is reloaded. They’re also the most reliable source of twinkling titanite and similar rare drops, especially in the early game.
Titanite Demons

Ferocious demons that spawned from the Titanite Slabs when the nameless deity of blacksmiths passed away. Despite looking like partially broken statues, their immense durability and powerful attacks make them forces to be reckoned with.
- Beef Gate: The first one most players will encounter guards the entrance to Darkroot Garden from Andre's basement, and it's almost impossible to kill with the gear and stats available at that point. That said, it's fairly easy to just run past.
- The Faceless: Their heads are missing, if they ever had them at all. This doesn't seem to interfere with their sight.
- Hell Is That Noise: Their deep, heavy breathing (if that's truly what they're doing) can often indicate their presence well before you see them, especially when you encounter one in the palace of Anor Londo.
- Mighty Glacier: They are very slow outside of their rare jumping attacks, but their defense is incredibly tough, and their attacks can easily take half your health or more with one strike.
- Miniboss: Classified as such due to their rarity, difficulty, and lack of respawning. However...
- Piñata Enemy: The sole respawning one in Lost Izalith is the only respawning enemy in the game that drops Demon Titanite. It's going to make you work for it, but it does drop two.
- Rock Monster: They emerged from Titanite Slabs, they seem to be made of the stuff, and they drop Demon Titanite when killed.
- Scratch Damage: Since their bodies appear to be made of solid titanite, most attacks merely graze them and put small dents in their health bar. Even a lot of powerful mid-game weapons take time to chip them down.
- Shock and Awe: At range, they cast powerful lightning spells that deal significant damage. Strangely, they themselves take extra damage from lightning, making Sunlight Spears and Gold-Pine Resin-infused weapons pretty handy.
Northern Undead Asylum
Asylum Demon

A large, goblin-like demon that guards the Undead Asylum. The go-to tutorial boss.
- Ass Kicks You: Sticking close to it isn't a good idea since it will do a groundpound in this manner.
- Boss-Altering Consequence: You can go out the cell door to the left and head to the top of the Asylum and use a plunging attack against it. However, you can only win its weapon if you beat it the normal way.
- Carry a Big Stick: Its massive Demon Great Hammer, which it uses to clobber you to death (and which is presumably what mortally wounded Oscar). If you kill the demon on your first try, you can nab it for yourself, although it's extremely heavy and unwieldy.
- Early-Bird Boss: It is met mere moments after you start the game, and you begin as a weaponless undead, forcing you to either flee to acquire your starting equipment, or kill it with your bare fists. However, you can defeat it easily if you chose the Black Firebombs as your starting gift.
- Leitmotif: "Taurus Demon"
 , shared with the Taurus Demon and the Demon Firesage.
 - Recurring Element: Its role as a tutorial boss is identical to the Vanguard in Demon's Souls, and it features similar moves as well, namely stomping its butt on you.
- Small Role, Big Impact: It's just the boss of the tutorial area, but it's heavily implied to be what killed Oscar of Astora by smashing him through the roof, making it essentially the only reason you get your quest and Estus Flask.
- Warm-Up Boss: It's the very first enemy you encounter in the game, and the first one to give you a taste of the
 game's difficulty.
Stray Demon
An optional boss similar to the Asylum Demon. It resides in the floor below the latter's, and is only available once you return to the Undead Asylum. The primary difference between this boss and the Asylum Demon is its weapon choice and an added ability to create magic blasts.
- Ass Kicks You: Same as the Asylum Demon. Ironically, this is actually preferable to letting it fire off its magic bombs, as it's a predictable and fairly easily to avoid attack.
- Carry a Big Stick: Unlike its weaker brethren, it uses a massive staff that allows it to fire magic bombs that explode over a large radius.
- Damage-Sponge Boss: For a boss you can fight almost at the start of the game, this guy can take a serious beating — in your first playthrough, his health-pool even exceeds the Gaping Dragon's, and whilst he doesn't scale as much as other bosses in the New Game Plus, he's still amongst the most durable foes you'll face.
- Early-Bird Cameo: When first exiting the prison cell at the beginning of the game, the Stray Demon can be seen wandering around its boss arena through the bars to the right, although it can't be reached at this point in the game. Most players will end up mistaking it for the Asylum Demon, leading to surprise and confusion when they initially kill the Asylum Demon only for the Stray Demon's trudging footsteps to still echo around the boss arena.
- Having a Blast: Launches a few magic bombs that have a very wide radius of impact, and once it plants its staff into the ground, this is your cue to run.
- Leitmotif: "Iron Golem", which is shared with the boss of the same name.
- Mighty Glacier: Oddly enough, its moveset is slower than the Asylum Demon, and it's susceptible to bleed damage. However, the bombs it launches bring on the pain and are hard to dodge.
- Dub Name Change: It's originally named "Voracious Doragon" in Japan.
- Optional Boss: It's not encountered as part of the main game, and it takes some time to figure out how to get back to the Asylum. Fittingly, it is also much tougher than the tutorial boss, having stats that match late-game bosses. It also drops the incredibly rare Titanite Slab needed to bring a weapon to its maximum power in the standard and lightning upgrade paths.
- Underground Monkey: It's basically an Asylum Demon with a magic catalyst instead of a hammer, with stats befitting a boss met outside of the main plot.
- Weaksauce Weakness: Bleeding. It only takes two or three hits with a bleed-inflicting weapon to cause it to bleed, and bleeding takes away about 10% of its health. Combined with the fact that such a weapon is available in the Firelink Shrine, this makes confronting him at the start of the game surprisingly doable... IF you know what you're doing.
Upper Undead Burg
Sewer Rats

Large rats that primarily occupy sewers. They mostly make their home in the Depths, but they can also be found under the bridge in Undead Burg.
- Cowardly Mooks: Due to bugged AI priorities, basic rats aren't always hostile, and some in fact will flee from the player rather than engage in a fight, only to then attack after running themselves into a corner. This behavior isn't always consistent depending on where the rats are.
- Elite Mooks: Snow rat varieties can be found in the Painted World. They're identical but for their white color, higher aggression, and ability to inflict Toxic damage instead of standard Poison.
- Rodents of Unusual Size: They come in several sizes, with the largest (outside of a unique Miniboss) around twice the player's size.
- Swarm of Rats: They're usually found in groups of 3-5, and attacking one will aggro all of the others.
- You Dirty Rat!: Even by the standards of video game rodents, the rats of Dark Souls are particularly filthy and disease-ridden, with milky white eyes and pustulent bald patches in the fur.
Taurus Demon

A large, minotaur-like demon that blocks your way to the Undead Parish. It is the second boss fought in the game (barring Sequence Breaking). Several Taurus Demons appear in the Demon Ruins, although most of them can only be fought after the Ceaseless Discharge dies, draining the lava lake.
- Bad with the Bone: Its Demon's Greataxe is carved from the bones of other demons.
- Degraded Boss:
- There's a group of seven Taurus Demons as non-respawning enemies on your way to the Demon Ruins, guarding the Ember needed to forge weapons upgraded down the Chaos path.
- There's also three respawning ones after the Capra Demons. One guards the front of the Demon Firesage's arena, while the other two are guarding the basic Fire Ember.
- Easy Level Trick: It's possible for the first one to accidentally fall off the bridge it's on.
- Flunky Boss: There are two archers on the tower you enter the arena from. You can easily kill them before you trigger the Taurus Demon to jump down, though, and should always do so unless you're glutton for punishment.
- Leitmotif: "Taurus Demon", shared with the Asylum Demon and the Demon Firesage.
- Mighty Glacier: Uses slow and easily telegraphed axe swings. However, each swing can launch you off your feet even when blocked by a greatshield and a direct hit is usually enough to kill beginning players in one hit.
- Our Minotaurs Are Different: It's based on a minotaur and vaguely resembles a wingless Zodd in that regard, although its horns are curled, resembling a ram's, and it has a skull-like face.
- Skippable Boss: The Taurus Demon can be skipped entirely through various means, all of which are so arduous and require so much foreknowledge you're definitely not making things easier for yourself.
- If one chose the master key as their item in the character creation menu, you can take a detour through the Valley of Drakes and go all the way up from the Darkroot Basin, to reach the Undead Parish without ever having to tackle the Undead Burg.
- Alternatively, you can just make your way down Havel's tower and try to make your way up the Darkroot Basin to Andre's. Still not exactly easy, but easier than the Valley of Drakes at an early level (and Havel, while extremely tough for new players, is not exactly a fast runner).
- The third doesn't require the Master Key, but it's easily the most difficult of the three. Breaking certain pots in New Londo Ruins grants the player Transient Curses, which can be used to fight through New Londo Ruins, kill Ingward, and open the seal, which drains directly into the Valley of the Drakes. However, those pots only drop two or three Curses each, which is about how many are needed to make the run in the first place (so if you die in your first attempt at it, you aren't likely to get a second one until much later in the game).
- Wakeup Call Boss: It's fought in a narrow arena with archers firing at you in the background, which makes the fight much more difficult (and teaches you to fully explore an area before proceeding). It can also knock you off the wall to your doom if you don't watch your footing. However, the spot with the archers can be exploited for drop attacks, as with the Asylum Demon.
Havel the Rock

One of Lord Gwyn's followers, Havel is actually a Bishop, though if he belongs to the Way of White is not known. He is also the sworn enemy of Seath the Scaleless. He is found in the locked watchtower leading from the Undead Burg to the Darkroot Basin.
- Anti-Magic: Invented the Great Magic Barrier miracle to combat the sorcery he hated. Although he doesn't use it in combat.
- Attack! Attack... Retreat! Retreat!: He's either smart enough to realize he's being lured into a trap or scared to fight outside the confined space of the tower when he runs back into the tower after going through the entrance.
- Ax-Crazy: After going Hollow. Locked up for his own and everyone else's safety by Gwyn. Although the item description when it says "For his own good, of course" can be taken as sarcastically toned, since it was more likely done not to protect him from others, but to protect others from him.
- Badass Preacher: As one of Gwyn's followers, there's no doubt he faced several dangers and came out on top.
- Beef Gate: Acts as this for one entrance into Darkroot Basin should the player use the Master Key to unlock the door in the Undead Burg's watchtower. Though with some skillful dodging and backstabbing, it's possible to beat him even at a low level, and there's always the option of just running past him.
- Carry a Big Stick: His Dragon's Tooth, which is speculated to be made from one of Seath's teeth.
- Church Militant: Bishop, even.
- Does Not Like Magic: Was known to hate sorcery. This was also one of the reasons he hated Seath.
- Improbable Weapon User: He wields a huge tooth. As a club.
- La Résistance: Speculated to be the reason his loot stash in Anor Londo notably includes an Occult Club, a weapon designed to attack gods. What strengthens this connection is a possible Meaningful Name; Vaclav Havel was an instrumental figure in the Czechoslovakian Velvet Revolution.
- Luckily, My Shield Will Protect Me: His signature greatshield, on top of being the heaviest in the game as well as the one with the highest resistances overall, has a special ability which adds a layer of rock on its user, greatly increasing their poise for a few seconds at the cost of the shield's durability.
- Mage Killer: He has high Magic resist armor, a weapon that increases Magic and Pyromancy resistance, and a shield with very high Magic defense. He also is the creator of the Magic Barrier spells, which very heavily reduce Magic damage. His flavour text states that he hated magic almost as much as he hated Seath, who just so happened to be the father of sorcery.
- Meaningful Name: His equipment is made either from solid rock, or in the case of the Dragon Tooth, a huge Dragon's tooth.
- Mighty Glacier: Wields one of the heaviest weapons in the game. Is he slow? Definitely. Can he one-shot a bitch? Oh yeah.
- No-Sell: His armour set has the highest poise in the game, which means there is next to nothing that can stagger him in one hit.
- One-Hit Kill: Unless you have a large amount of health or defense, getting hit by his smash attack could result in instant death.
- Super-Strength: Again, Solid Rock Armor.
- Tin Tyrant: Although not really metal. His armor is actually carved out of solid rock.
- Unique Enemy: Barring invading players who try to cosplay him, he is only fought once and does not respawn.
Hellkite Dragon / Red Drake / Bridge Wyvern

A massive red drake which soars around the Undead Burg. Appears when you first arrive in the Undead Burg, and then harasses you when you try to cross the bridge from the Burg to the Parish. With lots of fire. Can be skipped, and with good reason.
- Beef Gate: More like a Beef Wall; a low-level player will have trouble just surviving this thing, let alone trying to kill it.
- Healing Factor: It can regenerate health after it's taken a certain amount of damage, which makes it harder to needle it to death with arrows from a safe distance unless you can do more damage than it can heal.
- Informed Flaw: By the lore, it's much weaker than any true dragon, but it's sometimes even more difficult to kill than Kalameet; its tail is very easy to destroy, in contrast. (Although to be fair, you can only properly fight Kalameet after one of his wings is crippled.)
- Law of Chromatic Superiority: Unlike the purple, lightning-breathing drake whelps you find in the Valley of Drakes, this one is a big red wyvern that breathes fire, and is correspondingly more deadly.
- Luck-Based Mission: The way it attacks with its flames can make killing it extremely difficult when you first encounter it, because more often than not, it will simply one-shot you with its flames. On successive New Game Plus runs, fighting it is basically suicide.
- Marathon Boss: Most of the strategies used to bring it down are time consuming, given trying to get it in melee range is not a safe option; not only does it try to crush you when it lands on the bridge, it can also fly off again with a trail of fire in its wake.
- Miniboss: It's an unique, non-respawning enemy that prevents you from accessing a strategic bonfire.
- Names to Run Away from Really Fast: The official guide names it as the Hellkite Dragon/Wyvern, and it certainly delivers on its intimidating presence.
- Nonindicative Name: It isn't actually a dragon, it's a drake: a much weaker, unintelligent, and mortal creature only distantly related to dragons. It says something about the power the ancient dragons possessed that this thing is considered weak by comparison.
- One-Hit Kill: For all intents and purposes, its flame attack is this. You might get away with only a good chunk of damage the first time, though; consider that a warning shot.
- Our Dragons Are Different: Not one of the immortal dragons, but rather being one of their weaker cousins, the drakes.
- Playing with Fire: Mostly its modus operandi. And it takes care to roast the entire bridge, making it extremely difficult to evade or defend against — most of the time, it's a One-Hit Kill.
- Skippable Boss: It's more of an environmental hazard than a boss by itself, and can be circumvented simply by traveling underneath the bridge it's guarding. You don't even need to beat it to reach the bonfire behind it; you can force it to land by shooting it once then sprinting past it before it can prepare another flame blast, which will cause it to fly away for a few minutes. That said, these options exist because it is a very tough boss and fond of using insta-kill, unavoidable flame attacks that make beating it a Luck-Based Mission.
Undead Parish
Fang Boars

Huge boars clad in nigh-impenetrable armor. One blocks the entrance to the Undead Parish along with a horde of Hollows, while two more wait in the entrance hallway to the Duke's Archives.
- Ass Shove: Assuming you can manage to backstab the first one, you'll be giving it a colonoscopy with whatever weapon you have equipped.
- Attack Its Weak Point: The one in the Undead Parish has a missing section of armor on its rear, leaving it vulnerable to a backstab. The two on the path to the Duke's Archives have no such weakness.
- Beef Gate: Both instances are found right at the entrances of their areas, and they are respectively as difficult as the areas they protect.
- Bullfight Boss: The first one especially; its weak point is its unarmored backside, it mainly attacks by charging forward, and you have ample space to dodge around it and strike from behind. The two in Duke's Archives fight the same way, but lack the weak point and fight in tight hallways, making them much harder.
- Full-Boar Action: They're just boars in armor, but they're some of the toughest enemies at the points you encounter them.
- Made of Iron: Their armor is incredibly sturdy, deflecting most forms of damage with little effect. The two in the Duke's Archives don't even have a gap in their armor like the Parish boar does, making the fight even more difficult.
- Red Eyes, Take Warning: All three of them have glowing red eyes, and you definitely shouldn't underestimate them.
- Unique Enemy: Only three of them appear in Lordran; one guarding a gate in Undead Parish and two guarding the Duke's Archives.
Undead Balder Knights
Knights of the kingdom of Balder, hollowed out and wandering Lordran after their kingdom's fall. Most of those encountered have congregated to guard the Undead Parish, though some can be found atop Sen's Fortress.
- Lightning Bruiser: Very quick and agile, but able to hit hard with their own attacks and parry yours if you're not careful.
- Master Swordsman: The rapier wielders prioritize graceful swordsmanship and counters over pure offense and defense, and the side sword wielders are no slouches either.
- Royal Rapier: Several of the knights wield rapiers to great effect, and all were in direct service of the Knight King Rendal.
- Zombie Apocalypse: Their kingdom was destroyed by the Undead curse overtaking too many people, causing it to collapse.
Berenike Knights

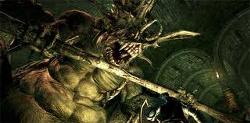
Huge knights in heavy armor, wielding great maces and shields. They were renowned for their immense power, but as many in Berenike succumbed to the curse, the knights ventured to Lordran in desperation to reach Anor Londo. With the exception of the mighty Tarkus, they all failed and went Hollow, becoming imposing obstacles for the Chosen Undead.
- Luckily, My Shield Will Protect Me: Their colossal Tower Shields will halt any attacks from the front.
- Miniboss: The sole non respawning one in the Undead Parish, who guards the Fire Keeper Soul, can be a difficult fight for a low-level player. The respawning ones in the Painted World of Ariamis and Sen's Fortress are more manageable due to being encountered much later in the game.
- Mighty Glacier: Some of the mightiest and glacieriest in the game, only matched by certain bosses and people like Havel the Rock.
- Mythology Gag: They bear many visual and behavioral similarities to Demon's Souls' Tower Knight, just dramatically shrunk down.
Channelers

Dark sorcerers who serve as Seath's assistants, sent out to various areas of Lordran to gather human specimens for the mad dragon's research. They prefer to stay out of range and pelt their opponents with Soul Arrows, while buffing any other enemies within radius.
- Co-Dragons: The Channelers collectively seem to be Seath's most trusted minions.
- Evil Sorceror: They're accomplished sorcerors, and as servants of Seath, they're evil to the bone.
- Projectile Spell: They almost exclusively use Soul Arrow, which shoots a solid projectile across a long distance. This usually isn't too dangerous even at a low level, but if the Channeler overlooking the Gaping Dragon's arena isn't killed beforehand, it will rain them down constantly throughout the fight.
- Squishy Wizard: Their Long-Range Fighter capabilities and tendency to teleport on a dime obfuscate the fact that they'll go down in a few hits to most weapons.
- Status Buff: The first thing they will do after being aggroed will almost always be to do a funny-looking dance that buffs the damage of every enemy in the vicinity, including themselves. Should you acquire their (very rarely dropped) Channeler's Trident for youself, you can do the same to yourself and you allies. And yes, the one overlooking the Gaping Dragon's arena can and will buff the boss if not killed.
- Teleport Spam: Whenever the player gets into melee range with them, they will almost always teleport across the room after a few seconds. This can draw out any fight with them well beyond their small health pool.
- Unusable Enemy Equipment: Of a sort; while you can get their trident and use their dancing buff, you cannot use it as a sorcery catalyst like they can or ever use their teleporting spell.
Bell Gargoyles / Belfry Gargoyles

A pair of demonic gargoyles hiding under the guise of statues atop the Undead Parish's church, and guardians of the first Bell of Awakening. Another pair are seen guarding the outskirts of Anor Londo.
- Beware My Stinger Tail: Their tail is basically a large double-ended axe. You can sever it to acquire it as a weapon.
- Breath Weapon: If you're keeping your distance too much, they'll start spewing flames over a large area. The ones encountered in Anor Londo breathe lightning instead.
- Degraded Boss: In Anor Londo, where they are met individually, have around the same health as their boss counterpart, and don't respawn, effectively making them a Miniboss for the bridge section.
- Dual Boss: In a bit of a subversion, the second gargoyle doesn't actually enter the fight until you reduce the first's health down to half.
- Expy: Their fighting style and general appearance is reminiscent of the Maneaters. Heck, the second Bell Gargoyle/Maneater appears in the same manner after you've dealt enough damage to the first one.
- Flight: They're quite capable of it, though it's mostly used to do jump attacks on you.
- Leitmotif: "Bell Gargoyle".
- Mighty Roar: The first one you fight does this during its introductory cutscene.
- Our Gargoyles Rock: They're made of patinated bronze instead of stone — appropriate since they're fought in a Gothic church.
- Shield Bash: Often if you're too close to them.
- Shock and Awe: The miniboss versions in Anor Londo trade fire breath for lightning, even though the boss versions are weak to it.
- Sword and Sorcerer: To a degree. The first gargoyle is more heavily armored, wields a shield in addition to a halberd, and prefers to use physical attacks. Meanwhile the second gargoyle has less health and tends to stand back and breathe fire.
- Tail Slap: They will fly into the air and roll to chop at you with their tail.
- Wakeup Call Boss: The fact that there are two of them makes it a big challenge. They also are smaller and move a lot faster than previous bosses, making them a lot harder to both hit and dodge, and have a larger variety of attacks.
Lower Undead Burg
Undead Attack Dogs

Zombified hounds that patrol the lowest parts of the Undead Burg and the surface of the Depths.
- Angry Guard Dog: As soon as you get in their aggro range, they'll attack relentlessly, growling all the while.
- Elite Mooks: A tougher version of them is found in Blighttown, and can attack with fire breath.
- Fragile Speedster: They're not that tough, but they're among the fastest enemies in the game, with barely telegraphed lunges and a fondness for leaping out of the way of your attacks.
Hollow Thief / Undead Assassin

Vicious Hollows found only in the Lower Undead Burg. While their savage brethren attack mindlessly on sight, they prefer to wait in ambush and overpower their prey.
- Devious Daggers: They use throwing knives at range and attack with a dagger when they close in.
- Fragile Speedster: Like the dogs that fill the same area, they evade nimbly and dish out high-damage attacks at high speed, but make up for it with comparatively little health and defense.
- It Can Think: Hollow Thieves seem to be the smartest of the standard Hollows, as they are able to parry attacks and most of them attack by kicking down doors in coordinated ambushes.
- Slashed Throat: If you let them parry your attack, they'll usually retaliate by jumping onto your shoulders and slicing your throat open.
Capra Demon

A humanoid, goat-headed demon that lurks in the lower section of the Undead Burg, alongside two Undead Attack Dogs. It holds the key needed to access the Depths. Several Capra Demons are also encountered in the Demon Ruins.
- BFS: Wields a pair of aptly-named Demon Great Machetes, some of the most powerful weapons that scale with the Strength stat.
- Degraded Boss: You meet several Capra Demons in the Demon Ruins, although their health and damage aren't anything spectacular by the time you venture there. Their aggro range is also reduced, making them skippable if you jump down a ledge directly leading to a bonfire.
- Easy Level Trick: The Capra Demon boss fight is renowned as a newbie killer, since the attack dogs combined with the extremely small combat space makes him a terrible menace that requires players to learn how to dodge his attacks while kiting him and the dogs and waiting for an opening to take the dogs out. But with some readily available and extremely cheap consumables, he can be killed from outside the boss arena.
- Extra Eyes: Has four eyes, and they're red. As if it wasn't Obviously Evil enough.
- Fake Ultimate Mook: Once you get rid of the attack dogs flanking it, you find out that the Capra Demon has fairly telegraphed sword swings, allowing you to counter it without much hassle.
- Flunky Boss: It is accompanied by a few attack dogs that can inflict bleed damage, providing enough distraction to swing its swords at the player.
- Leitmotif: "Centipede Demon", which is shared with the boss of the same name.
- Lightning Bruiser: Has a plethora of stamina-draining sword attacks, and it rarely pauses while trying to break your guard. Only a shield with heavy deflection can ward off its attacks, but the only one available is via a single drop from a miniboss that doesn't respawn.
- Machete Mayhem: They dual-wield Demon Great Machetes.
- Meaningful Name: In biology, "Capra" is a genus of goats and goat-like mammals. What does its face look like again?
- Monster Knight: Fits the trope since, despite being one of the demons roaming Lordran, it's still a dual-wielding warrior.
- Monster Modesty: Inexplicably wears pants in contrast to the other demons.
- Skeletons in the Coat Closet: Wears a goat-like skull for a helmet, although it's unclear whether it's the demon's actual head.
- Skippable Boss: Surprisingly enough, you can skip it along with the entirety of the Depths if you chose to reach Blighttown through the Valley of Drakes. While doing that is much more tedious than fighting the Capra Demon, it potentially spares you from many brutal deaths if you're not prepared for this boss.
- Wakeup Call Boss: The last boss to truly count as this, it's a Lightning Bruiser that is fought in a small area and is accompanied by two fast enemies.
The Depths
Butchers

Two hulking cannibals who operate a large kitchen at the start of the Depths. One is hacking up huge slabs of meat, while the other guards several corpses in barrels (and a very alive Laurentius) in the back.
- BFS: Their enormous meat cleavers rival several of the game's larger swords in scale.
- The Faceless: Like Maneater Mildred, who is speculated to be one of them, they cover their faces with sacks.
- Female Monster Surprise: Despite looking extremely masculine, the Butchers are actually female.
- I'm a Humanitarian: They seem to hack up and eat whoever they can get their hands on, alive or Undead. If Maneater Mildred is one of them and is searching Blighttown of all places for more sources of meat, they may very well eat worse things too.
- Unique Enemy: There are only two of them in the game, they don't respawn, and they both occupy the same area of the Depths.
Slimes

Living blobs of slime that infest the ceilings of the Depths' sewer canals.
- Blob Monster: They're big blobs of an indeterminate substance, with no other features beyond that.
- Ceiling Cling: They start off clinging to the ceiling, and will only drop down if hit with a ranged attack or if the player steps underneath them. Which can then lead to...
- Death from Above: While they have little attack power once grounded, having one drop on you from above deals plenty of damage, sometimes even a One-Hit Kill for more fragile characters.
- Kill It with Fire: They are extremely weak to fire.
- Piñata Enemy: As the most reliable sources of many varieties of titanite, they're an incredibly popular enemy for farming, despite only being found in a few rooms.
- Stone Wall: They have considerable health and barely flinch when damaged, but they're absolutely pitiful at attacking once they drop down.
Giant Rat

A gargantuan version of a normal Sewer Rat, serving as an optional Miniboss in the Depths. It waits within an early room that it nearly fills up, guarding some loot and a shortcut with potent poison attacks.
- Eye Scream: Evidently someone tried and failed to kill it before you, as there's an axe lodged in its left eye.
- Rodents of Unusual Size: It's a Sewer Rat that can barely fit in the enormous antechamber you find it in.
- Skippable Boss: It's located in one of the first rooms of the Depths, but it's behind bars and doesn't attack you, and the most critical piece of loot in its room (the key to the area's sole bonfire) is still accessible from these bars; both of the paths to the rat proper are out of the way and completely optional. You can also just kill it through the bars with a bow or spear, negating the fight entirely.
Basilisks

Bizarre creatures mainly found in the deepest subsection of the Depths, as well as the Great Hollow. While they look ridiculous and attack very slowly, they are some of the most dangerous enemies in the game, as their breath inflicts Curse.
- Basilisk and Cockatrice: The former, though they don't resemble conventional depictions of the monster.
- Beware the Silly Ones: Their squat bodies and cartoonish bulging eyes (which are actually sacs; their real eyes are much tinier) make them look like something from a much sillier game than Dark Souls. And if you treat them like that, you'll find yourself very quickly killed, and respawn with your maximum health cut in half.
- Breath Weapon: Their breath releases a large cloud of toxins that rapidly inflicts the Curse status effect for as long as you're immersed in it.
- Hell Is That Noise: Their distinct croaking is usually the first sign that they're around, especially in the relative quiet of the Great Hollow.
- Helpful Mook: Downplayed example. Getting Cursed is one of the few ways to effectively handle the ghosts in New Londo Ruins, and combined with some early Sequence Breaking, can lead to the player getting some late-game equipment before even facing the first boss. As Basilisks provide an easy source of Curse, this makes them a decent step toward the goal of breaking the game. In pretty much any other context, however...
- One-Hit Kill: Curse, if the meter stacks to full (which it can, very quickly).
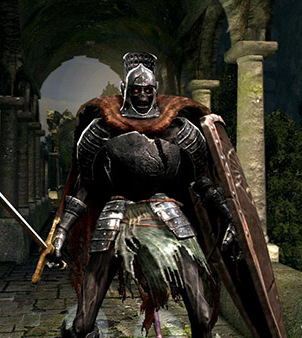
Kirk, Knight of Thorns

A notorious Darkwraith who attacks the protagonist several times over the course of the journey.
- Anti-Villain: Possibly. Not only are the Darkwraiths more morally ambiguous than outright evil, but
 Word of God confirms that he's actually a Chaos Servant. Indeed, you even find his armor near the Daughter of Chaos after defeating him during all three encounters. If that's the case, he was never attacking you For the Evulz, he was gathering humanity to help soothe the girl's pain!
 - Black Knight: A more traditional version, since he's a notorious figure who blocks your way several times throughout your adventures.
- Did You Just Scam Cthulhu?: Word of God confirms that he's a Chaos Servant posing as a Darkwraith.
- Expy: The reveal that he's actually a Chaos Servant makes him a darker version of Garl Vinland; a knight willing to commit violence against strangers in order to aid a good-natured ill girl.
- Recurring Boss: He’s notable for being the only invading NPC who attacks you more than once. He invades you a total of three times, once in the Depths should you head towards the Basilisks, next in the Demon Ruins before the Capra Demons, and finally at the very end of Lost Izalith, with added assistance of the Bed of Chaos Guardian if you haven't killed her already.
- In Dark Souls III, he returns as Longfinger Kirk, only as a servant of Rosaria.
- Red and Black and Evil All Over: He's uniquely encountered as a red phantom invader, and will always try to kill you. Subverted once you learn about his true motives.
- Right Hand Versus Left Hand: He will attack you even if you're a fellow Darkwraith. Or a fellow Chaos Servant, for that matter, though with the way invasions work between alternate worlds, he may just be favoring his world's Fair Lady over yours.
- Spikes of Villainy: He's called the Knight of Thorns, and his sword, shield, and armor are all appropriately covered with spikes. Rolling into or kicking an opponent with the armor equipped actually deals some damage, however small, and both the sword and shield have bleeding effect.
- Stalker without a Crush: Invades you three times for your Humanity.
Gaping Dragon

A dragon who grew obsessed with its own hunger, devoting so much of itself to eating that its entire body transformed into a mouth. Killing it gives you the key to Blighttown.
- Attack Its Weak Point: Its head, which is only reachable when it slams down its entire body and prepares to charge at you, takes slightly more damage than the rest of its body.
- Belly Mouth: Its entire torso is one. The "teeth" used to be its ribcage.
- Big Eater: According to Word of God, it was originally a normal dragon that became so obsessed with eating, its body mutated into a giant maw. Now it can only think about eating.
- Body Horror: It was originally a normal stone dragon. Then its obsession with hunger turned its ribcage into a massive maw...
- Breath Weapon: Sort of. Unlike nearly every other dragon in the game, the Gaping Dragon does not possess any sort of elemental/magic breath attack, but instead unleashes a massive amount of corrosive vomit that can eat away at your equipment's durability.
- Bullfight Boss: One of its most common attacks is to drop to all six feet and charge at the player, then stopping and leaving itself vulnerable to attack long enough for the player to land a good few hits.
- Damage-Sponge Boss: Has a ludicrous amount of health (4,401 in your first run, 8,800 in your second) for how early in the game you fight it — ignoring the Stray Demon Optional Boss, no other enemy you fight can take more punishment until you've obtained the Lordvessel and unlocked the end-game Lord Soul bearers.
- Draconic Abomination: It was originally a normal dragon, but the onset of life filled it with an all-consuming hunger that mutated it into a grotesque beast with a massive Belly Mouth reaching from the base of its throat to its pelvis — with even its ribs serving as teeth.
- Eaten Alive: Once it has you in its sights, it will proceed to slam down its maw to the ground, and, if it catches you, will proceed to devour you alive, although it's possible to break free from its grip.
- Eyeless Face: On two levels — its atrophied, vestigial head has no facial features whatsoever, while the torso now serving as its "face" only has a mouth and no eyes or nose.
- Extreme Omnivore: Can eat naked Undeads and heavily armoured champions all the same.
- Leitmotif: "Gaping Dragon".
- More Teeth than the Osmond Family: Its most obvious physical feature.◊
- Obsessed with Food: So obsessed with eating that it became corrupted by this desire.
- Skippable Boss: In the same vein as the Capra Demon, the Depths are entirely skippable if you reach Blighttown through the Valley of Drakes.
- Tail Slap: Get too far behind it and you'll be on the receiving end of one. Fortunately, you can also cut it off, which not only reduces the range of the tail slap but also rewards you with the Dragon King Greataxe.
- Tiny-Headed Behemoth: Its head has atrophied and is now an absolutely tiny, featureless vestigial organ that only serves as a weak point.
- Vagina Dentata: Its enormous Belly Mouth is split vertically rather than horizintally, making it look less like a mouth and more like one of these.
- Villainous Glutton: It only wants to eat and keep on eating. It has no higher motivation.
Blighttown
Infested Ghouls

Hollowed residents of Blighttown, who have been mutated into dangerous creatures by the area's numerous toxins. They patrol the area's upper platforms and will pounce upon intruders from every angle.
- Ax-Crazy: Even more so than the standard Hollows, if the fact that they often hit you with mutilated corpses is any indication.
- Body Horror: Their bodies are grotesquely warped and distended, making them look more like lizard people on first glance than other Hollows.
- Help, I'm Stuck!: One Ghoul can be found stuck inside a pot. If freed, it will still attack you.
- I'm a Humanitarian: Getting killed by their grab attack will result in them devouring you alive. Some of them also carry around chewed-up human corpses in place of conventional weapons. It may also be the reason they are one of the only enemies that drop soul items.
Infested Barbarians

Hulking mutants that wield huge clubs, usually found in Blighttown's cave passages and poisonous swamp.
- Carry a Big Stick: The standard variety carry large clubs.
- Elite Mooks: A second type, only found guarding the entrance to Quelaag's Domain, have exchanged their clubs for massive boulders that they can throw or strike with. Since this does much more damage and there are a group of them tightly packed together, they're extremely difficult to take on, and many players will take the long way around the nest just to avoid them.
- Mighty Glacier:
- They're very slow, but their attacks are incredibly powerful — and will almost certainly knock you straight off one of Blighttown's many precarious ledges.
- The rock-carrying version are even slower than the club-bearing ones, and have a horrible turning radius during their rolling attack.
- Mighty Roar: Will occasionally roar while fighting the Chosen Undead, which will draw in other enemies towards them but also leave them vulnerable to attacks.
- Our Trolls Are Different: They more resemble trolls and ogres than the game's giants.
- Poisonous Person: Their large clubs can inflict Poison.
- Toilet Humor: When killed, they have a 50% chance of dropping Dung Pies.
Blowdart Snipers

Slender humanoids that inhabit precarious ledges all over Blighttown, from which they fire darts that inflict Toxic damage. You will learn to hate them.
- Artificial Stupidity: They have a tendency to just walk off whatever ledge they're standing on and die, sometimes only after you've triggered their movement and sometimes before you even know they're there.
- Blow Gun: As stated in the name, they blow their poison darts through a tube.
- Carrying the Antidote: They drop Purple Moss Clumps on death, which cure poison. Too bad their darts inflict Toxic instead, which requires Blooming Purple Moss Clumps to cure.
- Glass Cannon: They're pretty fragile and have almost no way to retaliate effectively once you get to them, other than trying to run away. It's actually getting to them that's the problem.
- Long-Range Fighter: Ridiculously so. Their darts are slow, but they can cross a huge distance, making it hard to tell where they're actually coming from or when one is about to hit you.
- Poisoned Weapons: Their darts inflict Toxic, a much more lethal version of Poison that more rapidly depletes your health.
- Unique Enemy: In a sense; while there's quite a few of them scattered throughout Blighttown, they do not respawn once you've killed them. Praise the sun.
Parasitic Wall Hugger

A huge... thing that clings to a cavern wall near the bottom of the Blighttown platforms. It guards a unique pyromancy spell, but very little is known about it.
- Attack Its Weak Point: Navigating to its underside and attacking its soft, completely defenseless underbelly is much easier than just fighting it head-on.
- Bizarre Alien Biology: It has several clawed tendrils that hook it to the side of the cavern, multiple other tentacles that appear to be useless other than for feeling the air around it, and it's constantly and wildly pulsating for little apparent reason.
- Combat Tentacles: It has clawed ones that it can swipe out at you if you let it attack.
- Proportionately Ponderous Parasites: Its name indicates that it's a parasite of some kind, yet it's significantly larger than anything you find in Blighttown.
- Unique Enemy: It's the only enemy like it in the whole game, which only serves to make it more inexplicable.
Cragspiders

Large fire-breathing spider creatures found in Blighttown's lower platforms and swamp.
- Ambiguously Related: Their appearance and harnessing of pyromancy indicate that they might be spawns of Quelaag.
- Giant Spider: A miniaturized version of the spider Quelaag is fused with, making a relation between the two likely.
- Kill It with Fire: They have fire breath, and can also spawn a flaming tendril attack.
Giant Mosquitoes

Huge mosquitoes infesting the swamp. Notably, they are one of the only enemies in the game to respawn onscreen without the area being reloaded (although they do have a respawn limit).
- Big Creepy-Crawlies: Mosquitoes blown up to be the size of your character's head. You can start screaming now.
- Bloody Murder: Their ranged attack involves spraying blood at their target.
- Fragile Speedster: It should only take one or two hits to kill them by the time you encounter them, but they have a bad habit of hovering quickly around in directions your weapons can't target. Their actual movement speed when closing is very low, though.
- Poisonous Person: Both their blood and string attacks can inflict Poison.
- Super-Persistent Predator: The mosquitoes have some of the highest aggro range in the game, and once they're locked onto you, they won't stop flying at you until you either deplete their respawns or escape Blighttown altogether.
- Unflinching Walk: The flying equivalent of it. Mosquitos will almost never give up chasing you, but they are slow, drifting towards at a very leisurely rate that suggests they have all day to catch up with you. Unfortunately, unless you have the Rusted Iron Ring, they're probably right.
Giant Leeches

Overgrown leeches that populate the Blighttown swamp, particularly the area around the Great Hollow entrance. While their numbers can be intimidating, they're slow and have a small aggro range.
- Blob Monster: They're functionally identical, and visually fairly similar, to the Slimes in the Depths. The only real differences are a slight speed boost and lack of a drop attack.
- Deadly Lunge: Their main attack involves lunging at their enemy.
- Piñata Enemy: Similar to the Slimes, they're great for farming titanite and not much else.
- Poisonous Person: Another attack has them spit a large poisonous projectile.
Maneater Mildred
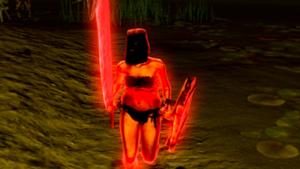
A mysterious woman wearing a sack on her head who invades you in the swamps of Blighttown. Defeating her allows you to summon her for help against Quelaag.
- Assist Character: If you kill her when she invades you, you can summon her for assistance in the battle against Quelaag.
- BFS: She wields a giant butcher's knife of sorts.
- Brawn Hilda: Her character model is bottom-heavy according to the character creation options, and she's a rare, melee-oriented female NPC.
- Dark Action Girl: She invades you in an attempt to kill you, wielding a giant butcher's knife.
- Defeat Equals Friendship: Defeating her causes her summon sign to appear just outside Quelaag's boss arena.
- Expy: To the nameless Black Phantom from Demon's Souls who attacks in the second Valley of Defilement area. Fortunately much easier because she uses a much smaller weapon and there's more dry land that's easily accessible. Also a Composite Character with Executioner Miralda.
- The Faceless: Wears a sack on her head.
- Full-Frontal Assault: Save for the Sack on her head, she's as naked as a Player Character can get in the game, clothed only in the scraps of underwear you get when you have no armor equipped.
- Girl with Psycho Weapon: A heavyset woman in loincloths who attacks you with a giant meat cleaver!
- I'm a Humanitarian: Laurentius claims that if you hadn't rescued him from the Depths, someone he only refers to as "her" would have eaten him. Given Mildred's moniker (her Japanese name, "Mildred the human-eater", is even more explicit), and the fact that she wears a sack on her head and wields a Butcher Knife just like the similar enemies found in the Depths, there's little doubt that she is who he was referring to.
- Karma Houdini: Has apparently cannibalized several people, yet unlike every other NPC summon or invader, her fate following her final appearance is unknown. In Dark Souls, this pretty much means you get away scot-free.
- Stone Wall: Her white phantom summon for Quelaag's fight has a gigantic amount of health, but does little else, even with her butcher knife. She's also easily stunned due to her lack of armor.
Chaos Witch Quelaag

One of the seven Daughters of Chaos, this woman has been fused into the body of a gigantic, bloated spider creature. As the guardian of the second Bell of Awakening, she attacks any who intrude on her domain with Chaos-based pyromancies.
- Anti-Villain: It turns out she was trying to alleviate her sister's illness, using the Bell of Awakening as an excuse to kill any Undead who journeyed into her domain as a source for harvesting the humanity needed to ease said illness.
- Attack Its Weak Point: You can shoot her human half with a bow to stunlock her over and over again.
- Barbie Doll Anatomy: Neither Quelaag nor her sister actually have nipples on their character models under their Godiva Hair. Of course, dedicated fans have modded them back in.
- Body Horror: A naked woman's upper body on top of a demonic fire spider. That said, she's still better off than her sister, who fell deathly ill from the blight pus she sucked when saving one of her followers.
- Cute Monster Girl: She's quite fetching once you get past the horrible spider she's fused into.
- Dark Action Girl: A woman fused to a giant spider and can be a potential challenge to the Chosen Undead.
- Femme Fatalons: Noticeable in a close-up shot of her pre-battle cutscene.
- Flaming Sword: Has her own personal sword, with the unique effect of producing fire with each swing. Like so many other boss weapons, you can forge one by infusing a +10 curved sword with her soul.
- Godiva Hair: Her human torso is naked, so she has long hair to cover her breasts.
- Half-Human Hybrid: See Body Horror above. She and her sister were fused with Chaos Spiders when the Bed of Chaos came into existence.
- Having a Blast: Stay too close to her and the spider body will start roaring, creating a wide explosion that can potentially take you out in one hit.
- Infinity -1 Sword: Quelaag's Furysword, with sufficient dexterity scaling and a reasonable amount of liquid humanity, is known to wreck enemies with low fire resistance (namely the undeads in the starter areas and a few enemies in the Darkroot Garden), and while it's weaker than a fully upgraded Falchion or Scimitar, it's still more affordable than its brethren, and has a longer reach to compensate for its dependence on fire damage.
- Leitmotif: "Chaos Witch Quelaag".
- Magma Man: She'll blech out pools of lava periodically as a floor hazard, forcing the player to detour around those areas and making dodging somewhat more difficult. Best not to let her spread too much in the same place.
- Ms. Fanservice: A beautiful naked woman whose nakedness is only hidden with her hair... just don't focus on anything below her waist.
- Multiple Head Case: The spider she's fused to has its head intact and can spit lava. It's unclear whether this trope is in play, though, as we don't get any insight as to whether the spider has a mind of its own and her cut lines don't indicate anything of the sort.
- Noob Bridge: If you're using lock-on to cheese enemies with spells, stop. Free-aiming them against Quelaag's human body is much more reliable as it not only does more damage, it stun-locks her (which is a good thing for sorcery builds).
- No-Sell: Fire-type attacks will not work on her.
- One-Hit Kill: While it's not an actual guaranteed kill, her area blast attack does such an unbelievable amount of damage that it's effectively guaranteed to one-hit anyone who's only at roughly the natural level for reaching her (SL 30-40 or so, depending on how much trouble they had getting through Blighttown), unless they've sunk an insane amount of levels into Vitality. This goes double if it's a counter hit, which it usually will be, because players who get hit by it generally can't see her winding it up due to wailing away at her side. Pretty much everyone falls for it at least once before they learn to recognise the tell (Quelaag leaning forward and embracing the spider's head)
- Really 700 Years Old: As with her sisters, she fought alongside the Witch of Izalith against the Everlasting Dragons.
- Slasher Smile: Flashes one right at the end of her boss intro.
- Super Spit: The spider to which her body is fused has a moveset that mostly consists of puking various quantities of lava.
Valley of Drakes
Drakes

Smaller descendants of the dragons for whom the Valley is named. They reside only near the end of the Valley, by the floodgate of New Londo Ruins.
- Breath Weapon: Their main attack, other than swooping and lunging, is a stream of lightning breath.
- Forgot About His Powers: Hilariously, if they do a flying attack in the wrong area, they will accidentally miss the ground and plummet into the pit, despite being perfectly able to fly.
- Gameplay and Story Segregation: Despite their draconian lineage, they actually don't have any vulnerabilities to Lightning or Magic damage (it wouldn't make sense for a lightining-spitting creature to be damaged to electricity), although fire, bleeding, and toxic damage is much more effective.
- Mighty Glacier: They're pretty tough even on their own, but often they will slowly trudge towards you... until they get into the air.
- Our Dragons Are Different: They're some of the smallest creatures in the Dark Souls dragon family, though they're still larger than your character by a fair margin. It's left ambiguous whether this is their natural size or whether they're still whelps, although their close resemblance to the Hellkite Wyvern suggests that they're just younger members of the same species.
- Piñata Enemy: The only respawning source of Dragon Scales, with a 5% drop rate.
Undead Dragon

A massive, long-decayed dragon corpse that, when approached, springs to life as a Dracolich.
- Beat Them at Their Own Game: Formidable though they are, the Undead Dragons have three weaknesses; being unable to move, a limited range, and a common undead weakness to fire. All of these combined makes the fire breath from the Dragon Head Stone a good choice for fighting them.
- Breath Weapon: Instead of fire or lightning like their brethren, they breathe clouds of poison.
- Dracolich: Gigantic dragons who stuck around long after death for reasons unknown.
- Half the Man He Used to Be: The dragon in the Painted World is actually split in half, which only becomes apparent when you kill it and see its legs blocking the other end of the bridge. The legs themselves are still alive, and can be made to stand up with a properly aimed jumping attack, opening up a handy shortcut to the area’s end.
- Stationary Boss: They've lost their ability to fly, so they remain immobile and defend themselves with their attacks.
- Unique Enemy: Only two are even encountered; one in Valley of the Drakes and one in the Painted World of Ariamas.
Sen's Fortress
Man-Serpents

Large, bipedal Snake People who guard Sen's Fortress and the prison in Duke's Archives. Context points to them being some of Seath's experiments, but an item description in Dark Souls III implies that they (or at least the similar creatures in that game) are descendants of the dragons.
- BFS: The main weapon of the soldiers is the Man-serpent Greatsword.
- Bizarre Sexual Dimorphism: Unconfirmed, but presuming that the mage variant is female then they're distinguished from the male warrior version by having four arms and the heads of cobras.
- Half-Human Hybrid: If Seath created them, this is most likely what they are.
- Lightning Bruiser: The first common enemies along the mandatory game path that are simultaneously incredibly strong, resistant to most forms of physical damage, and dish out quick attacks that can rapidly drain your stamina and health.
- Multi-Armed and Dangerous: The sorceress version has four arms, and dishes out deadly lightning spells.
- Screw This, I'm Outta Here: Despite being very dangerous enemies in and of themselves, the ones in the Duke's Archives prison are terrified of the Pisacas, and will high-tail it out once they've been released, completely ignoring you in the rush even if you start attacking them.
- Snake People: Unlike most examples, they have fully humanoid bodies and snake heads. These heads are unfortunately prehensile, and can attack you from above.
Mimics

A particularly nasty type of monster that imitates chests, devouring those foolish enough to open them and viciously attacking those who don't fall for the ruse.
- Chest Monster: A classic example that recurs throughout the series.
- Glamour Failure: They are nigh-indistinguishable from normal chests when inactive, but observant players will spot a few subtle differences: their coloration is slightly paler, their chains are straightened rather than curved, and zooming in on them with binoculars or a bow will let you see them taking an occasional breath.
- Noodle People: Their full bodies are disturbingly thin, with elongated limbs and stilt-like legs.
- One-Hit Kill: Opening them up normally is almost always this, while their grabbing bite attack in bipedal form can be this if you don't mash the right buttons.
- Weaksauce Weakness: Intimidating as they can be in either form, throwing a Lloyd's Talisman at one instantly stuns it and allows you to take whatever is inside, negating the need to fight it.
Undead Prince Ricard

An undead knight whom you meet atop Sen's Fortress and who is implied to be a noble from Astora. He attacks you when you approach him, suggesting he is hollow.
- Blue Blood: Implied to be from Astora royalty, judging from his weapon and armor set.
- Bow and Sword in Accord: On top of wielding a rapier, he will occasionally switch to shooting you at a distance with arrows.
- The Faceless: Due to wearing a full set of armour.
- Hero of Another Story: According to item descriptions, his adventures before he went hollow were narrated in a well-known monomyth.
- Iconic Outfit: Wears the Elite Knight Set, which is also worn by Oscar of Astora.
- Jack of All Stats: Has rather mediocre stats for a hostile NPC, having a few decent weapons, decent health pool, and medium mobility.
- Royal Rapier: His signature weapon, which can quickly rack up combos with its strong attacks.
- Shields Are Useless: Subverted. While it's true that his shield is poorly suited for blocking, he will instead use it as a setup for parrying you, which spells disaster given his rapier's powerful riposte modifier.
- Unique Enemy: He's a non-respawning NPC who wields a rapier that is found nowhere else in the game.
- We Hardly Knew Ye: Yet another in a long line of NPCs that you kill without as much as an introduction.
Gate Giant, Boulder Giant, and Fire Giant

A trio of Giants conscripted by the gods to run most of the fortress's defenses from the roof: one opens the gate when the Bells of Awakening are rung, the second rolls boulders down into the fortress, and the last tosses massive firebombs across the roof to kill any who make it that far.
- Mad Bomber: The Fire Giant's bombs are the biggest threat on the fortress's roof, splashing large radiuses with fire that sticks around for several seconds. If you fail to kill it before entering the fog door, it will continue to toss these bombs into the Iron Golem's arena, making the fight infinitely harder.
- Mighty Glacier: They are Giants, after all.
- Miniboss: They're unique and quite powerful, but not enough to warrant a health bar.
- Rapid-Fire Fisticuffs: One of their attacks involves flailing around violently, which temporarily exhausts them and allows for some free hits.
- Skippable Boss: None of them are mandatory to fight, and in fact, the game only indicates that you can fight the Fire Giant to make things easier; the Boulder Giant is out of the way and the Gate Giant is hidden, and neither pose any threat to you normally.
- Unique Enemy: Out of the three, only the Boulder Giant respawns.
The Iron Golem

A massive, humanoid suit of armor standing atop Sen's Fortress. Defeating it is the final trial before the Chosen Undead can gain access to Anor Londo and obtain the Lordvessel.
- Achilles' Heel: A somewhat literal example. If hit with a sufficiently strong melee attack in its leg, it falls on its rear end for a little while, allowing the play some free hits on him. Particularly notable in that doing this at the edge of the arena still causes him to fall backward... off the building, ending the fight.
- Animated Armor: Its core, which you obtain after defeating it, is actually the power source of that humongous giant, and without it, it's nothing more than a useless suit of armor, as evidenced by the core and the armor set's descriptions.
- Climax Boss: It is the final obstacle you'll meet before reaching Anor Londo. This is right after braving the many traps and enemies in Sen's Fortress, and it provides you with an epic finish to the dungeon.
- Easy Level Trick:
- If you summon Black Iron Tarkus before the battle he can literally solo it for you. After all, he's better at this game than you.
- The Golem will fall over if you attack his legs enough. Get him near an edge at the right angle, and he'll fall right off, netting an instant win.
- Flunky Boss: If you don't kill the firebomb-throwing giant directly above the fog gate before fighting the Golem, it will attack you from outside the boss arena.
- Hero Killer: Said to have ended the quests of thousands of would-be Chosen Undead since its creation, and those are the ones who had survived Sen's Fortress to reach it.
- Hobbling the Giant: Whack at its legs enough and it will fall to one knee. From there, more attacks will cause it to fall backwards. During all of this, you can attack freely until it gets back up.
- Leitmotif: "Iron Golem", which is shared with the Stray Demon.
- Living Statue: It doesn't move at all when you peek from outside its boss arena.
- Mighty Glacier: Slow and cumbersome, but each of its swings and punches are likely to knock off most of your health.
- Our Dragons Are Different: The Iron Golem's core is said to be the bone of an Everlasting Dragon, which is proven when you use it to forge the Dragon Bone Fist.
- Our Giants Are Bigger: Definitely the largest humanoid opponent you will face in Sen's Fortress, although it turns out to be just a suit of armor. It also falls short of the Ceaseless Discharge.
- Razor Wind: It can send out damaging wind slashes with its axe if you're too far away to hit.
- Recurring Element: The nearest equivalent of Demon's Souls Tower Knight, mainly because you need to eliminate an enemy that distracts you with ranged projectiles before trying to properly engage the boss; both bosses also fire ranged attacks if you are too far away, and you can temporarily make them stumble off their feet if you hack away at their legs.
- Ring Out:
- The battle against the Iron Golem takes place at the top of Sen's Fortress, and there are no guardrails to prevent you from falling off. The same applies to the Iron Golem, if you can manage to knock it over in the right spot.
- The Golem also ruthlessly exploits this fact; one of its attacks involves grabbing the player and spiking them into the ground. If this happens near the edge of the arena, weeell...
- Tin Tyrant: A massive suit of armour which serves as the final trial within Sen's Fortress.
- Tiny-Headed Behemoth: Its head is well out of proportion to the rest of its massive body.
- The Worf Effect: On your own it's a fairly difficult fight, and one that requires being careful so he doesn't chuck you off the ledge. If you bring Tarkus with you, however, he easily overpowers it and kills it in only a few hits, and thanks to his high poise, he can walk.
Anor Londo
Sentinels / Royal Sentinels

Giant knights who stand guard all over Anor Londo, guarding the path to the palace and the Duke's Archives.
- Ambiguous Situation: At 14 feet tall, they're much larger than the Silver or Black Knights, or the Anor Londo royal family (Gwynevere possibly excepted, since she was an illusion), but it's not clear whether they're Giants or just particularly big Gods/Lords (like Smough and Lorian, who are actually taller). Their item descriptions suggest that they're giants but come just short of outright confirming it; calling them "giant" in a way that leaves it ambiguous if that's their species or just a physical descriptor (it's not capitalized).
- Blown Across the Room: The Royal Sentinels can use the Wrath of the Gods miracle, which knocks back all attackers in a violent blast.
- Elite Mooks: Two elite varieties, the Royal Sentinels, block the way to Ornstein and Smough's room. They're larger compared to regular Sentinels and don a blue tabard.
- Heal Thyself: The Royal Sentinels will use Great Heal if they sustain too much damage, regenerating almost all of their health if the player doesn't intervene.
- Mighty Glacier: The Square-Cube Law really hits them hard. Despite their high damage and reach, most players can dance circles around them easily.
- No-Sell: Those massive shields aren't for show. Most attacks from the front will get blocked by the shield, forcing the player to attack from the sides or rear.
- Shield Bash: Both varieties of Sentinels can slam their enormous shields to the ground, dishing out suitably enormous damage.
Painting Guardians

A clan of robed, graceful warriors found only in Anor Londo's church, devoted to guarding the painting within which leads to the Painted World of Ariamis.
- Ancient Order of Protectors: They've defended the Painted World for many generations, though their reasons for doing so have long since faded into history.
- Devious Daggers: They share a moveset with the Hollow Thieves, and thus will throw knives and try to backstab you with their swords.
- Dual Wield: Their main weapon is two Painting Guardian Swords.
- Fragile Speedster: While they're very nimble, they're also very easy to kill by the time you encounter them.
Batwing Demons

Large, batlike humanoids who defend the exterior of Anor Londo's castle. Despite their demonic natures, they only serve the gods, and show up to both escort worthy Undead to the city and defend it tooth-and-nail.
- Bat Out of Hell: They resemble giant humanoid bats with smooth skin and warped heads.
- Forgot About His Powers: Despite being capable of flight, they will plummet to their deaths if they fall off the area.
- Glass Cannon: Despite having relatively powerful attacks, they have some of the lowest enemy poise in the game, and are thus very easy to stagger and knock off the various ledges.
- Non-Malicious Monster: The trio that show up to escort you from Sen's Fortress to Anor Londo are completely non-hostile. One stays behind afterward, and will transport you back and forth at will no matter how many of its brethren you slaughter.
- Our Demons Are Different: They don't look or act much like any other demons in the game.
- Shock and Awe: They use their spears to cast ranged lightning spells, and their normal melee strikes are imbued with lightning.
Silver Knights

Former knights of Gwyn, but unlike those who became the Black Knights, they were left behind to guard Anor Londo during Gwyn's departures, and their equipment is still pristine. Though weaker than their charred counterparts, they still put up a good fight as the standard enemies within the castle.
- Ambiguously Human: They're probably not human, but what they are is ambiguous. In the Age of Fire comic, one character refers to Arkon as "that man", at which point his companion laughs and accuses him of knowing nothing about the Silver Knights. They may be the same race as Gwyn, only weaker.
- Bow and Sword in Accord: Several of them use gigantic Dragonslayer Greatbows, but will still pull out a sword and defend themselves with melee if approached. This includes the infamous Anor Londo Archers, a pair of bow-wielding knights guarding the very thin precipice into the castle proper, notorious for slaughtering many players who try to kill them at close range.
- A Day in the Limelight: One Sliver Knight, Arkon, serves as the protagonist to the comic series Dark Souls: The Age of Fire.
- Elite Mooks: The standard soldiers of Anor Londo, they're this compared to just about all the other enemies in the game up to this point.
- Knight in Shining Armor: Since their armor was never burned by the flames of Chaos, they maintain their silver sheen and will shine prominently when exposed to light.
- Semi-Divine: They're lesser gods than Gwyn's family, but clearly see themselves as distinct from mere humans. Physically indicated by them being just an inch or two shy of eight feet tall.
- Undying Loyalty: Even though Anor Londo is mostly empty and Gwynevere is an illusion, they are still devoted to guarding the city with their lives.

A pair of high-ranking knights that guard Princess Gwynevere's chamber. The bosses of Anor Londo.
Both In General:
- Beef Gate: Among Dark Souls fandom, these two are known as the "skill check" bosses, meaning if you can't beat them, you're not ready for what the rest of game is gonna throw at you. Notably, the mandatory bosses start throwing a lot more curveballs at you after these guys, so there is some merit to that thought.
- Big Guy, Little Guy: For a relative sense of little, since said "little guy" is just about ten feet tall.
- Breakout Character: Despite being just a single boss fight in the middle of the game, Ornstein and Smough became hugely popular with fans, owing to their incredibly challenging but memorable fight and interesting characterization. Because of this, both men's armor were made items in subsequent games, complete with expanded lore.
- Curb-Stomp Battle:
- Even as far as Dark Souls difficulty goes these two are notorious for delivering these to players facing them for the first time.
- Can get turned on them very easily if you summon Solaire. Because the encounter is balanced around you fighting both of them at the same time, individually they're actually surprisingly weak for bosses. If Solaire can just distract one of them for a minute or two, that's more than enough time for any decent player at this point to obliterate the one they're fighting.
- Devour the Dragon: Defeating one of them will cause the other to regain all their health and absorb the power of their fallen comrade. Smough gains lightning power while Ornstein becomes huge.
- Dual Boss: They're the second pair of bosses fought together, but unlike the Gargoyles, they do so right from the start.
- Fat and Skinny: Although Smough turns out to be well-built underneath that fat-looking armor, if the official artbook is any indication.
- Foil: One of the reasons their boss fight works so well is that they complement each other perfectly.
- Smough is lumbering and massive, and thus relatively easy to avoid by getting behind the pillars in the room; while Ornstein is extremely quick and nimble, and can zip around the pillars to get to you. Smough relies mostly on brute force, but Ornstein often couples his attacks with lightning magic.
- Even in lore, the two are vastly different—Ornstein is an honored knight, and one of Gwyn's most trusted men, while Smough is widely reviled as a sadistic executioner whose own desire for knighthood was denied thanks to his cannibalistic tendencies.
- Force and Finesse: Smough is the Force to Ornstein's Finesse.
- Humongous-Headed Hammer: Smough wields a massive hammer as his weapon of choice. The player can use Smough's hammer as well by forging a plus ten hammer or great hammer and then ascending it with Smough's soul. Smough's hammer reappears in Dark Souls III, found in Irithyll of the Boreal Valley inside a chest on the second floor of a room with two Silver Knights in it.
- Infinity -1 Sword: Ornstein wields the Dragonslayer Spear, while Smough has his own trademark hammer. Either one can be forged from the soul obtained from whoever you defeated last, and are decent endgame weapons with the right stats.
- Kung-Shui: During their fight, they'll often destroy the pillars in the room while trying to get you with their stronger attacks.
- Leitmotif: "Ornstein and Smough", which features an entire orchestra and makes an early cameo once you are transported from Sen's Fortress to Anor Londo.
- Scary Impractical Armor: Both wear intimidating armor sets, but one can wonder how they're able to see with the weird disposition of their helmets.
- Scylla and Charybdis: If the player dies after killing either Ornstein or Smough then the fight becomes this. Do you kill Smough first so that Ornstein gets a speed reduction at the cost of becoming larger? Or do you kill Ornstein first because of Smough's low agility but at the cost of Smough using electric attacks?
- Semi-Divine: They're lesser demigods, in the same vein as Artorias and Ciaran.
- Sequential Boss: Once you defeat either one of them, the remaining one will take his fallen comrade's powers and fight at full health.
- Teeth-Clenched Teamwork: Neither of them like each other, but they put their differences aside so that they can protect Gwynevere.
- Villain Team-Up: They're not too fond of each other (given Smough's I'm a Humanitarian tendencies), but they'll still fight together to kick your ass.
- Villainous Valour: Both of them are defending Gwynevere from the Chosen Undead.
- Ornstein respects bravery and loyalty, as he shows a brief moment of respect towards Smough if he dies first.
- According to Dark Souls 3, Ornstein may have been a fake and Smough was the only one to stay in Anor Londo to protect it. Earning esteem from the others and finally achieving his dream of being knighted.
Dragonslayer Ornstein
One of Gwyn's Four Knights, associated with the Lion. He guards the Cathedral of Anor Londo along with Executioner Smough.
- Ambiguous Situation: Whether or not Ornstein is an illusion like Gwynevere and Anor Londo's sun. Evidence has come up in for both sides of the argument as the series went on.
- Animal Motifs: Lions, as shown by his ring and armour set.
- Ass Kicks You: If you defeated Smough first, Ornstein will absorb him, and his new moveset includes a groundpound that sends lightning shockwaves.
- Authority Equals Asskicking: Has an impressive trophy room full of dragon heads, adding to his credibility as Dragonslayer, and is implied to be the current captain of Gwyn's Four Knights.
- Boom Stick: Ornstein will sometimes fire small lightning bolts from his spear if he's not launching larger ones from his hand.
- Cutting Off the Branches: Part of Dark Souls III's lore implies that Ornstein actually survived the encounter against the Chosen Undead, but eventually left Anor Londo in search of his old teacher, the Nameless King. However, considering that Gwynevere and Anor Londo's sunset was an illusion, Ornstein could've been too.
- The Dragon: Although he'd object to the trope name, he is believed to be the Captain of the Four Knights and is thus one of Gwyn's top lieutenants. Also a minor subversion, in that you kill him about halfway though the game.
- Dragon Their Feet: He's the last of The Four Knights and he left Anor Londo to find his friend and mentor, Gwyn's first son.
- Due to the Dead: If you kill Smough first, Ornstein will pause a bit during the cutscene before absorbing his comrade's powers. Not that the Executioner would return him the favor…
- Early-Bird Cameo: A statue of him is found in one hall of Anor Londo's beginning area.
- Everyone Has Standards: Like all the other knights, he was disgusted by Smough's cannibalistic tendencies and barred him from being a knight. However, if Smough dies first, Ornstein still shows respect when absorbing Smough's soul and power, acknowledging him as a comrade-in-arms.
- Flash Step: Ornstein's hyper-fast attack in which he glides across the ground. If you're helping fight him as a phantom, even a little bit of latency tends to make it look like a Flash Step.
- Impaled with Extreme Prejudice: His most dangerous attack in the second phase, and it will most likely kill you in one hit.
- Irony: His signature ring, the Leo Ring, is poorly suited for his signature weapon, the Dragonslayer Spear since the ring only boosts the physical damage of counter-hits from a thrusting attack, and the spear's damage is split between physical and lightning, so the ring's better off paired with a purely physical thrusting weapon.
- I Will Find You: Dark Souls III states that the real Ornstein left Anor Londo after watching over it for a long period of time following the war with the dragons. All for the sake of finding his friend and teacher, the Nameless King, who is all but stated to be Gwyn's firstborn. This would retroactively mean that the Ornsteins faced in 1 and 2 could be fakes.
- Lightning Bruiser: Most of the time, his first move is to charge the player very fast with his spear.
- Not Quite Dead: As soon as you defeat Ornstein first, he falls to the ground, but in a blink-and-you'll-miss-it moment, one of his fingers is still twitching. Of course, Smough, being the asshole he is, promptly crushes him with his hammer to gain his lightning powers. Though, if the implications from Dark Souls 3 are correct, he might have smashed Ornstein so nonchalantly or recklessly because that Ornstein was a fake
- One-Winged Angel: If you kill Smough first, Ornstein absorbs his power and turns into a giant, gaining several new abilities in the process.
- Pet the Dog: If Smough dies first then Ornstein will show a brief moment of respect towards Smough before absorbing his body suggesting that Ornstein admired Smough's loyalty to the kingdom.
- Scary Impractical Armor: Some of the coolest armor in the game, making him look like a blinged-out Dragon. He presumably sees through his lion-head helm's open mouth, though his field of vision would be ridiculously limited.
- Shock and Awe: Not only his spear, but he can also send bolts of lightning from his off hand, just like Solaire does.
- The Slow Walk: When he's not jumping around or attacking, he tends to swagger slowly towards the player.
- Sole Survivor: He is the only one of Gwyn's Four Knights to be still alive in the present day.
Executioner Smough
The Executioner of Anor Londo, seeking the approval of Gwyn. Guards the Cathedral of Anor Londo alongside Dragon Slayer Ornstein.
- Acrofatic: He's very agile for someone his size. Justified as he's a minor God, and he's actually not that bulky under his armour, as confirmed by the official artbook.
- Ass Kicks You: One of his attacks involves jumping the air and slamming down rear-end first. This attack becomes imbued with lightning in the second phase if you defeated Ornstein first.
- Blood Knight: Smough is often heard laughing during the battle and his tactics forgo any strategy or concern for collateral damage as he swings his hammer haphazardly to crush the protagonist. If Ornstein dies first, Smough quickly finishes him off and laughs when he sees that he absorbed Ornstein's power over lightning, clearly excited with the rush of his newfound power.
- The Brute: Especially compared to Ornstein: he's less respected by the rest of Anor Londo, and his fighting style is comparatively slow and clumsy, relying on brute strength.
- Brutish Character, Brutish Weapon: Smough is an all-around reprehensible guy hated by all his cohorts. Accordingly, he wields a massive hammer covered in spikes whose uneven proportions reflect how little Smough gives a damn about subtlety and decorum. If Ornstein dies first, Smough crushes him with his hammer without hesitation and is visibly excited to use Ornstein's lightning powers.
- Due to the Dead: Averted, both in his day job and boss battle. Ornstein is respectful of Smough if he's killed first, but the latter just smashes Ornstein flat if the Dragonslayer falls first, letting out a chuckle as he does so. Also, the guy uses a Giant hammer to execute people, presumably by smashing them into paste.
- Dying Moment of Awesome: Dark Souls III indicates that he actually stayed behind in Anor Londo long after everyone else was departed or dead. It seems that Smough, in a brave but ultimately futile effort to protect Gwyndolin, went down fighting against either the forces of the Cathedral of the Deep or (given the fact that you find his armor after killing Aldrich) in single combat with Aldrich himself.
- Early-Bird Cameo: Not him, but his armor. The max-stat Black Phantoms released into the games of players who broke the street date wore his armor. Also, a statue of him is displayed in the hall opposite of Ornstein's statue in the beginning area of Anor Londo.
- Evil Laugh: Chuckles a lot during the fight. He lets out one as well when smashing down Ornstein to get his powers.
- Evil Virtues: As repugnant as he is, Smough's loyalty to Gwyn and Anor Londo is admirable, to say the least. Even Ornstein, who despises Smough's cannibalism, shows his respect if Smough dies first.
- Eyes Do Not Belong There: Thanks to the exaggerated anatomy of his armour, the tiny 'head' is just a decoration and its real eye-holes are in its neck.
- Fat Bastard: His armour gives this impression, though the artbook shows that he's just big and well-muscled underneath it, not fat.
- Hero-Worshipper: He desired to be one of the four knights but he repulsed them with his cannibalism.
- Heroic Sacrifice: Dark Souls 3 reveals that Smough was the sole god in Anor Londo other than Gwyndolin to stay behind after the first game. Even after the other Four Knights had long since fled, Smough remained at his post and, when the Cathedral of the Deep invaded, fought to the bitter end to protect Gwyndolin. In fact, given that you receive his armor for killing Aldrich (in the same chamber where you fought Smough in the first game, ntoably), it's quite likely that he died in single combat with Aldrich himself. Considering how tough a boss Smough is, that must have been one hell of a fight.
- I Choose to Stay: Smough chose to stay in Anor Londo despite all the knights leaving, even Ornstein chose to abandon it in order to find the Nameless King. If Smough is killed first, Ornstein respectfully absorbs his soul, showing that Smough had finally gained the respect he saught for from the Knights of Gwyn.
- I'm a Humanitarian: Used the bones of criminals he executed as food seasoning. This naturally horrified those around him. This is implied to be something of an act. Note that out of all the possible things he could actually do, he chose to grind bones into seasoning, as opposed to say, actually eating any of their flesh, something that still ended up backfiring on him.
- Irony:
- The entire ruling body of Anor Londo can't stand him, Four Knights included, so he hates them back, spitefully dispatching Ornstein while he's down if you take out the Dragonslayer first. If Smough goes down first instead, we see Ornstein briefly offer his respect to the body before absorbing it... meaning that Ornstein, who Smough would kill in envy, was the one person who didn't completely hate his guts after Smough chose to stay.
- By Dark Souls 3, he dies defending Gwyndolin from Aldrich, a cannibal viler than he is. This would qualify for Karmic Death, if he hadn't redeemed himself by remaining defending Gwyndolin until the bitter end, the only knight to do so.
- Jerkass: A sadistic cannibal who is despised by pretty much everyone in Anor Londo and treats Ornstein like crap, should Ornstein be defeated first.
- Jiggle Physics: Definitely present. Just watch his chest. Which is kind of weird what with that chestpiece being metal plate...
- Kevlard: Surprisingly averted. Yes, Smough appears very fat, and yes, he can take a high amount of punishment. However, both of these aspects come exclusively from his armor. It hides the fact that he's actually just as well built as Ornstein, and protects him even more.
- Kick the Dog: Look closely at Ornstein's fingers, should he fall first. He was still alive when Smough decided to smash him and take his soul.
- Last Disrespects: He doesn't hesitate to crush Ornstein's body, Dark Souls 3 suggests that the Ornstein he fought alongside with was just an illusion or a fake. As Smough was said to be the only knight who stayed in Anor Londo but it's never said if Smough knew of this.
- Last Stand: By the time of Dark Souls III, Smough was the last knight at his post when the Cathedral of the Deep invaded Anor Londo. He died fighting against them.
- Mighty Glacier: Of the two, Smough is the slower one, but his hammer strikes also put the hurt on even high-poise players.
- People in Rubber Suits: Smough's armor is basically a metal kaiju costume, given that it doesn't correspond to his actual facial position and body type; he looks out of the "neck" of the helm (similar to the actual Godzilla suit), and has a very muscular body underneath the obese-looking chest armor.
- Punny Name: It's quite subtle in English, but in Japanese his name is pronounced "sumou" - exactly like the well-known sport played by very large men.
- Pyrrhic Victory: Dark Souls 3 indicates that Smough finally achieved his dream of becoming a knight, only to be killed in a valiant defence against the Cathedral of the Deep. Not only that, but he was also the only knight to stay in Anor Londo when they attacked.
- Redemption Equals Death:
- Some items in Dark Souls III imply that not only did he become a respected knight of Anor Londo, but that he was the only one who stayed there, even Ornstein left. When the Cathedral of the Deep invaded, Smough sacrificed himself in a failed but valiant defense.
- If he is killed before Ornstein then Ornstein will give a moment of respect before absorbing his soul.
- Scary Impractical Armor: Not really scary, but pretty intimidating and definitely impractical — there are no visible eye holes (his "face" is actually part of his helm and judging by the player version, sits above where his actual head is) and he can't even walk normally in it. Not that it really slows him down. note
- Shock and Awe: If Ornstein is defeated first, Smough will crush him with his hammer, powering his attacks with lightning for the second phase.
- Stout Strength: Despite not actually being overweight under that armor of his, he's still quite broad.
- Super-Strength: Even by Dark Souls standards. That hammer is ridiculously heavy, easily dozens of tons, yet he can easily swing it around and puts it through three-foot thick marble pillars as if they were tissue paper.
- The Team Wannabe: To the Four Knights. Interestingly, in Dark Souls III, it was revealed that, according to his Great Hammer, he eventually did become a knight.
- Undying Loyalty: His horrible aspects aside, Smough's loyalty to Gwyn and his family is sincere. Sincere enough that he dies at his post, trying to protect Anor Londo from Aldrich's followers.
- Unexplained Recovery: Despite them not being in any way an optional boss, neither Ornstein nor Smough actually died in Dark Souls, as both were mentioned in Dark Souls III. But while Ornstein simply wasn't there in the first place (you're only fighting an illusion or copy of him, as he has presumably already left Anor Londo to search for his former master, the Nameless King), there's no explanation for how Smough survived the encounter to die fighting the worshippers of the Cathedral of the Deep.
- Unskilled, but Strong: Smough isn't a trained knight like Ornstein, he's the sadistic yet loyal executioner of Anor Londo. Smough's strategy is to swing his hammer haphazardly and crush anything within his radius, clearly showing his reliance on his strength and weight. He has some of the most telegraphed and easily-dodged attacks in the entire game, and his big horizontal swing can even miss you altogether without you even needing to dodge if you simply stand too close to him; it's Ornstein constantly harrying you with his superior speed (and in the second phase, the addition of lightning AOE damage to Smough's attacks) that makes his clumsy blows threatening. He also underutilises his lightning abilities in the second phase, as he never uses them for ranged attacks. His weapon and armour descriptions confirm this, his hammer requires no dexterity and only strength to wield it. His armour is said to be able to be worn by anyone who's strong enough to wear it.
- "Well Done, Son" Guy: Desperately seeks the approval of Gwyn and the Four Knights leading him to full-heartedly embracing his role as an Executioner, up to and including using the ground-up bones of his victims as seasoning, presumably to show how ruthless he is. This backfires spectacularly: Kingseeker Frampt, a personal friend of Gwyn, thinks so little of him that he'll only pay one soul for Smough's, and it's implied the Four Knights, including Ornstein, don't like him much more than that.
- What You Are in the Dark: Surprisingly. Smough is a sadistic executioner who grinds people's bones to put on his bread and is despised by every living being left in Anor Londo, and probably quite a few who've left, including the Four Knights. Gwyn denied his request to become a knight, Kingseeker Frampt will only pay you a measly single soul for Smough's, and, given how Smough responds if Ornstein dies first, then the antipathy is probably mutual. Yet by the time of Dark Souls III, every being who knew Smough is either dead (like Artorias and Ciaran) or long gone (like Gough and Ornstein). Anor Londo is practically deserted and every other being has long since fled the city even before Aldrich and his followers invaded. Not Smough. The bloodthirsty executioner, alone in a city of people who always hated him and gods who never respected him, stays behind to protect Gwyndolin, and - if the fact that you find his armor after killing Aldrich is any indication - almost certainly died defending him.
Dark Sun Gwyndolin
The lastborn son of Gwyn and leader of the Blades of the Darkmoon. Is fought as a Optional Boss through special circumstances. For more information on this character, see Dark Souls Covenants.
The Catacombs
Skeletons

Exactly What It Says on the Tin, skeletons reanimated by Necromancers to serve Gravelord Nito. They are found in the Catacombs and the Tomb of the Giants, and respawn when killed unless their corresponding Necromancer is killed or they are struck down with divine weapons. There also exist giant varieties, which commonly populate the Tomb.
- Dem Bones: Hordes of skeletons brought to life through necromancy.
- Faux Death: Skeletons often appear as a pile of bones, only to reform themselves when approached.
- Giant Mook: There are giant skeletons that wield a [[BFS giant Falchion]], and are much tougher than the regular versions. There are also giant skeleton archers, which don't have as wide a range of attacks but can still stomp at you if you close in.
- Impossible Item Drop: Shield-wearing Skeletons use the Warrior's Round Shield, but will drop the Red and White Round Shield. Likewise, the Giant Skeletons wield large Falchions, but drop Murakumos.
- Pulling Themselves Together:
- Smaller skeletons can have their upper torso obliterated by a strong blow, assuming it isn't fatal, and will simply reform their upper body and keep attacking after a few moments. It's essentially their version of a stun state, and is a great opportunity to finish the job.
- After being "killed" without the use of divine weapons, they will constantly form again until their necromancers are killed.
- Sinister Scimitar: Most of them wield scimitars.
- Zerg Rush: The primary danger of the standard skeletons. While they have little health and can be cut down fairly easily, they will constantly regenerate under normal circumstances, and unprepared players will swiftly find themselves trapped in a dozens-strong mob.
Necromancers

Withered old men bearing lanterns made from human skulls, they lurk in the Catacombs commanding hordes of skeletons in the service of Gravelord Nito. While they don't respawn once killed, until you dispatch them all the skeletons in the area will constantly revive unless killed with a divine weapon.
- The Minion Master: It's their ability to constantly revive the skeletons in the surrounding area that makes them such a high priority target, because if you don't you'll be buried in a never-ending horde of angry bones.
- Necromancer: Obviously. Each one is responsible for maintaining a group of skeletons in the Catacombs.
- Squishy Wizard: Necromancers are almost no threat in combat, only capable of throwing some weak fireballs at you and dying in a few swipes of your weapon.
- Unique Enemy: Like the Blowdart Snipers in Blighttown the Necromancers aren't hard to kill, but are such a nuisance that once you kill them they stay dead for good.
Wisps

Strange spirits manifesting as floating skulls. Their only attack is to float at you and blow themselves up. While they are mainly found throughout the Catacombs, the Masses of Souls that lurk in the depths of New Londo also spawn them. More of an environmental hazard than an enemy, they cannot be locked onto or damaged and give no souls or item drops.
- Action Bomb: All they do is detonate when they get close.
- Expy: They're very similar to the Lost Souls from Doom.
- Our Ghosts Are Different: They don't behave much like the ghosts New Londo is rife with, as they lack bodies and are only capable of screaming and exploding.
Bonewheel Skeletons

Skeletons strapped to spiked wheels, found only in the deepest cavern of the Catacombs and the basement of the Painted World. Despite their rarity, they are some of the most feared and hated enemies in the game.
- Collision Damage: They do damage just by running into you, and their constant spinning will swiftly drain your stamina if blocked. Getting caught by one isn't much of a hassle, but a mob of them can take out even the most hardened of players.
- The Dreaded: Out of all the normal enemies, few are more reviled than the Bonewheels, and for good reason.
- Fragile Speedster: Emphasis on speed. They're not that hardy, but they more than make up for it in how quickly they'll close the distance and do lethal damage.
- Irony: Occasionally, upon death, they'll drop their wheels as items, which the player can then use as a shield. Specifically, this shield works wonderfully well as a way of blocking their Rolling Attack; it's large and takes very little stamina to use, allowing the player to take the full duration of the attack head-on with minimal damage.
- Shout-Out: Like many other references to Berserk, these take inspiration from the undead strapped to◊ breaking wheels, who use similar forms of locomotion to run over Guts and Isidro.
Pinwheel

A necromancer residing in the Catacombs below Lordran.
- And I Must Scream: Whatever it/they used to be, we know that it's sentient. And self-aware. And conscious. It's quite possible that it's even doing more and more horrific experiments of its own volition.
- Body of Bodies: If you believe the common fan theory that Pinwheel is a family of three fused together after one of them tried to reanimate the other two. No matter who you think did it, the end result is not pretty. A father or mother trying to revive her loving family, or a child doing everything in their power to bring back their parents...
- Doppelgänger Attack: Creates some doubles during his boss fight. And you can see disposed clones on the way in. The fan theory outlined below suggests he may have developed the ability as part of his scheme to disentangle his components from each other.
- Came Back Wrong: Whatever Pinwheel was before becoming... it, it now is an abomination.
- Cool Mask: He has three of them, almost depicting a family due to their name (Mask of the Father/Mother/Child).
- Degraded Boss: You find several weaker Pinwheels just outside of Nito's chamber.
- Early-Bird Boss: Inverted; his health and damage values are about on par with early-game bosses like the Taurus Demon... But by the time you have to fight him, his statline is more on par with a standard Mook.
- Glass Cannon: He has one of the lowest Hit Points reserves of all the bosses, but his attacks do great damage when they connect. Fortunately for players, he telegraphs very early, attacks very slowly, and is committed to an attack when he makes it.
- Humanoid Abomination: Whatever he looks like under those robes, he's got three heads and six arms. Three heads, it should be noted, that have separate minds, if looking at each other when you show up before he goes into battle stance is any indication.
- Leitmotif: "Pinwheel", which includes creepy whispers along the lines of "I'm sorry", "Help me", and "Make the pain stop".
- Mask of Power: Once you defeat him, he drops one of his three masks, each one giving a decent boost in one stat (equip burden, health, and stamina regeneration).
- Meaningful Name: His name in the Japanese version is "sannin haori", meaning either "three person coat" or "three person weave". Helps with the theory that there's three people under that cloak.
- Multi-Armed and Dangerous: Has six arms, with each holding a lantern.
- Necromancer: His introductory cutscene consists of him performing some sort of experiment with a corpse laid bare on a table. As if that wasn't enough, there are dozens of bodies left hanging all over the boss area...
- Power Parasite: He siphons off Gravelord Nito's abilities while Nito lies dormant, which helps explaining the latter's Drama-Preserving Handicap.
- Recurring Element: He's the Fool's Idol in all but name; similar attacks, same teleportation, same doppelgangers. The only difference being that you can't usually stomp the Fool's Idol in ten seconds flat.
- Squishy Wizard: His health is remarkably low for a midgame boss (assuming you're meeting him after having acquired the Lordvessel), and he gets staggered rather easily. His magic blasts are quite powerful, though, and they're hard to dodge.
- Teleport Spam: He will often teleport away to a safe distance after creating a double of himself.
- Totem Pole Trench: A very disturbing variation. It's strongly implied that there's actually three people under that coat...fused into one.
- Well-Intentioned Extremist: Implied. The current fan theory is that Pinwheel was a necromancer who tried to resurrect his family. The result...
Tomb of the Giants
Skeletal Beasts

Hulking, quadrupedal skeleton monsters that lurk in the darkness of the Tomb.
- Non-Human Undead: It's unclear what these things actually are, since they're clearly not human skeletons. They look like animals, but what animals?
- Lightning Bruiser: Among the deadliest examples in the game. They soak up hits from most weapons and retaliate with incredibly fast, punishing, hard-to-read attacks. One of their flurrying combos can even be a One-Hit Kill to players without significant health and stamina. Their one weakness is a slow turning speed, like most large enemies.
Bone Towers

Tall pillars of crudely reassembled bones that spring up from the ground in the deeper parts of the Tomb. Despite their unwieldy appearances, they can attack lethally with spiraling arms or by slamming the entire structure down.
- It Can Think: The last two encountered seem to knowingly set up a Kaizo Trap for the player: one springs up to draw the player in, only to retract to reveal a Giant Skeleton archer immediately behind it. Running forward to attack will get the player knocked off the ledge by another Giant Skeleton hidden around the corner, while trying to retreat will make them run smack into another Bone Tower that now blocks the way while the first Tower reemerges to pin them in.
- Schmuck Bait: Nearly all of them spring up in response to conspicuously placed treasure in the middle of a room (usually White Titanite).
- Walking Ossuary: They form out of clusters of random bones.
Skeleton Babies

Hordes of what appear to be infant skeletons, only found in the chamber before Nito along with several Pinwheel clones.
- Death by a Thousand Cuts: They're very easy to kill (they are just babies, after all) and don't do much damage individually, but their bites inflict Toxic damage and it's pretty easy for them to pop up just out of sight and nip at your heels, which can rapidly build up if you're not careful.
- Piñata Enemy: Their fragility and the huge masses that spawn make them ideal for farming Humanity (outside of the DLC), which they have a not-insignificant chance to drop.
- Zerg Rush: While they're nearly useless on their own thanks to their low damage and slow speed, a great many of them rise up all around the chamber, and all will rush you at once if not cut down quickly.
Gravelord Nito
One of the four original holders of the Lord Souls, the first of the Dead and leader of his own covenant. For more information on this character, see Dark Souls: Main Characters and Lords.
Duke's Archives / Crystal Cave
Undead Crystal Soldier

Hollows that have been experimented on by Seath, and fused with powerful crystals.
- Elite Mooks: For all intents and purposes, they're just substantially tougher versions of the standard Hollow enemies.
- Palette Swap: Of the normal Hollows.
Crystal General

An unknown Hollow knight who attacks you on your way to Seath's boss room (at least, his first boss room). His armour set can be found lying in the garden leading to the Crystal Cave.
- Bling of War: On top of being covered with crystals, his armour set is remarkably ornate, implying he was a knight of sorts before turning Hollow.
- Body Horror: Parts of his body and armour are partially crystallized on top of being Hollow.
- The Computer Is a Cheating Bastard: He's able to parry with his Crystal Shield, when normally the shield only allows a bash attack.
- Luckily, My Shield Will Protect Me: Wields a Crystal Shield which is decent for blocking elemental attacks, but is otherwise unrepairable and cannot be upgraded.
- No Name Given: As with many hostile NPCs who aren't red phantom invaders, but this is made more jarring due to having no signature item.
- Unique Enemy: One of the more standout examples. He wears an armour set of unknown origin, and does not respawn once defeated.
- We Hardly Knew Ye: You simply kill him and move on to Seath's boss room.
Pisacas

Twisted results of Seath's immortality experiments, these slithering masses of tentacles are kept in the Archives prison and released to deal with escapees.
- Body Horror: They used to be people, but you wouldn't be able to tell by looking.
- Combat Tentacles: Used to grab people and kill them with a hidden prehensile spike.
- Harmless Enemy: Two crying Pisacas will not attack at all and will attempt to hide if attacked.
- Non-Malicious Monster: It's strongly implied that they don't really want to attack you, and are only doing so out of the fear and confusion the prison alarm brings them. When you visit their cage with the alarm turned off, none of them will attack, and you can hear some of them whimpering.
- Piñata Enemy: They're the first enemies you're likely to encounter that drop Humanity at a decent rate, they're not particularly dangerous, and there's a big group of them not far from a bonfire.
- Tragic Monster: Some of the most tragic enemies in a game full of Fallen Heroes and cursed civilians; they're innocent women experimented on by Seath and turned into tentacled monstrosities. Inside their cell, you can hear them crying.
- Was Once a Man: This is what happens to the women kidnapped by the Channelers and brought to Seath.
Crystal Golems

Hulking crystal constructs developed by Seath to guard the Crystal Cave. Weaker varieties can also be found all over the Darkroot Basin.
- Crystalline Creature: Apparently mindless bruisers made entirely of quartz-like crystal.
- Crystal Prison: Bizarrely, the Golden Crystal Golems seem to function as this. The one at the end of Darkroot Basin has trapped Dusk of Oolacile inside of it, while the one outside Crystal Cave contains Siegmeyer's daughter Sieglinde. They are the only standard enemies to function this way, and it's unknown why or how they do this, although it may have something to do with Seath's proclivity for abducting human women for his experiments.
- Elite Mooks: Several golden varieties exist, only differentiated by being much tougher than the blue varieties and not respawning when killed.
- Golem: They are artificial constructs with no minds of their own, and exist purely to do Seath's bidding.
- Mighty Glacier: They'll do a lot of damage if their attacks connect, but their attacks are slow and highly telegraphed.
Maneater Shells

Giant ambulatory clams that reside only in two places: a cavern near the end of Crystal Cave, and the shores of Ash Lake.
- Beware the Silly Ones: They're clams, and seeing them walk around on disproportionately small crab legs is inherently silly. However, they're surprisingly deadly opponents even at a high level, with multiple attacks that drain the better part of a stamina or health bar.
- Killer Rabbit: Dopey-looking clamshells that will absolutely wreck your day if you're not prepared to fight them.
- Piñata Enemy: If you know where to find them, the main reason they even exist is to be an early source of Twinkling Titanite.
Seath the Scaleless
A primordial dragon who betrayed his kin during the war preceding the First Age of Fire. Has been granted a shard of Gwyn's Lord Soul and is currently residing in the Duke's Archives. For more information on this character, see Dark Souls: Main Characters and Lords.
Darkroot Garden / Basin
Demonic Foliage

Bipedal plant creatures that roam Darkroot Garden, ambushing travelers on the narrow paths.
- Ambushing Enemy: Many of them disguise themselves as normal shrubs and plant life, only to burst out of the ground just in time to strike unsuspecting players.
- Botanical Abomination: Their names imply that they're normal plants possessed by a demonic force, but any more about this is unknown.
- Vine Tentacles: They mainly attack with their arms, which can be used as whips or in dangerous grab attacks.
- When Trees Attack: Humanoid plant monsters.
Frog-Rays

Bizarre creatures that seem to be native wildlife, resembling (as their name indicates) hybrids between frogs and stingrays.
- Mix-and-Match Critters: It's all in the name, really.
- Multipurpose Tongue: They attack with their long, prehensile tongues.
Tree Lizards

Twin-headed lizards that hide on the trees of the forest, biting at passerbys with venomous fangs.
- Multiple Head Case: The lizards have two heads on long, snake-like necks.
- Poisonous Person: Their bites are venomous, and the Poison they inflict is one of the deadliest at 10 damage per second.
- Stationary Enemy: They're content to stay on trees and bite at the player, but they will become mobile if they're knocked off their trees with a hit.
- Unique Enemy: Only two exist in the game, both in the area before the Moonlight Butterfly, and they're pretty avoidable.
Possessed Trees

Giant living trees that block secret paths in Darkroot Forest.
- Harmless Enemy: The trees can move slightly, but can't attack at all and are felled by any decent weapon.
- NPC Roadblock: Their main purpose is to block the portion of the forest that leads to Artorias' Wolf Ring, pretending to be normal trees.
- Interestingly, approaching the fog gate to the Moonlight Butterfly will cause the first Possessed Tree to move and block the path to the bonfire.
- Unique Enemy: More of a weird obstacle than an enemy, there are only two Possessed Trees in the forest and neither of them respawn.
- When Trees Attack: Unlike the Demonic Foliage, they are non-anthropomorphic trees that can't fight back, but they are enemy trees nonetheless.
Great Stone Knights

Animate stone warriors that guard the deeper parts of the forest. The main thing that differentiates them from similar enemies is that they can cast the Tranquil Walk of Peace spell, which binds you and dramatically slows your movement.
- Golem: Completely artificial stone constructs.
- Faux Death: When encountered, they're initially laying on the ground motionless and seemingly lifeless, but then rise up once you get close to them.
- Magic Knight: They certainly do fit the mold, being large armored warriors who can use a spell to slow down trespassers.
- Mighty Glacier: As is the case with most giant enemies, they are very slow. However, their attacks do a lot of damage if they connect, and having Tranquil Walk of Peace cast on you sets you on an more even playing field with them and makes it even HARDER to avoid their swings.
Hydra

A monstrous, multi-headed creature that haunts the basin found at the bottom of the Darkroot Garden. A stronger Hydra is found in the Ash Lake.
- Making a Splash: It fires multiple streams of water at very long distances, way before the player can even get near them. The amount of streams is proportional to the amount of heads remaining.
- Miniboss: Just like the Hellkite Dragon, they're one-of-a-kind monsters that only appear once per playthrough.
- Multiple Head Case: The Hydra possesses seven heads which it uses to either fire massive streams of water at you or simply try to bash you. Each of them can be cut, and it's possible to kill the Hydra by severing all heads before its health bar is depleted.
- Optional Boss: Both Hydras are easily missed due to having no relevance to the plot and being a pain to access.
- The one in Darkroot Basin is fought on water, which requires the Rusted Iron Ring to even move normally, and even then, the long pathway down from the Darkroot Garden is often ignored in favour of the Moonlight Butterfly, another Optional Boss. Killing it is required to access the Downloadable Content, though.
- The one in Ash Lake is self-explanatory, as getting access to this location in the first place is tricky and never mentioned at all in the game.
- Our Hydras Are Different: Early concept art reveals that the Hydra's heads were actually meant to be the tails of an even bigger crocodile-like beast. This was ultimately scrapped in favour of a shell-like body connecting the heads.
Moonlight Butterfly

A magic-wielding creation of Seath the Scaleless. Though its purpose is unknown, it's found guarding a bridge in the Darkroot Garden, and readily attacks all that try to pass with an impressive flurry of spells.
- Degraded Boss: Later on, a great deal of Moonlight Butterflies can be found in the Crystal Caves, sleeping. They're all about as strong as the original,note though none of them actually need to be fought.
- Early-Bird Cameo: If you look up at the Undead Burg while traversing the path down from the Parish to Garden near the first bonfire, you can see the Butterfly clinging to the side of one of the towers, slowly beating its wings.
- Easy Level Trick: Step 1) Revert to human. Step 2) Find Witch Beatrice's summon sign hidden in the bushes at the foot of the stairs leading up to its fog door. Step 3) Idly dodge its attacks for about half a minute while Beatrice's devastating magic disintegrates it with casual ease.
- Leitmotif: Dark Sun Gwyndolin, shared with the boss of the same name.
- Light Is Not Good: Don't be fooled. Yes, it is a giant beautiful butterfly, but it's also a giant beautiful butterfly that will kill you. Unexpectant players will find themselves dying very quickly to this one.
- Moth Menace: Beautiful as this mysterious butterfly might be, it is still out for your blood.
- Optional Boss: It’s very out of the way and all killing it gives you is the items you’d make from its soul, the ability to make divine weapons, and the key to Havel’s tower—the latter of which you can use the Master Key as a substitute.
- Pretty Butterflies: Definitely one of the more genuinely beautiful enemies. Almost makes up for it trying to kill you.
- Squishy Wizard: While its spells are devastating and fairly difficult to dodge, even the smallest amount of damage can take off huge chunks of its health. The trouble is finding an opportunity to hit it, because it fights you almost exclusively at long range.
- Tactical Suicide Boss: If it never landed on the bridge, it would be nearly impossible for melee characters to kill it.
Forest Protectors

Members of the Forest Hunters covenant, who have dedicated their lives to protecting the forest and Artorias' grave. They are found throughout the interior forest, and will remain hostile unless you join the covenant.
- An Adventurer Is You: Though there are a lot of them, they are not exactly unique. Each one has the starting equipment and spells of a generic player classnote except for the archer, who has a unique bow and hat.
- Ancient Order of Protectors: They've apparently been around since Artorias's burial, and have remained stalwart against all trespassers since.
- Artificial Stupidity: An infamous exploit lets you aggro many of them and lure them back to the entrance stairway, only for them to run up and jump to their deaths trying to hit you as you stand beside the stairs.
- Combat Pragmatist: They have no problem fighting dirty. Besides having the homefield advantage and superior numbers, they can and will gang up on you if you aren't careful. They have three (four if you count the cleric's hefty mace) heavy hitters for melee, there are an archer and mage pelting you from a distance and an invisible thief lurking in the shadows. These are not proud red phantoms seeking a duel.
- Fighter, Mage, Thief: The seven warriors are a versatile bunch.
- There are a matching pair of sword-and-shield armored knights and an hard-hitting bandit with an axe.
- There is a Stealthy back-stabbing thief and an archer loosing arrows from afar.
- There is one sorcerer flinging soul arrows and one cleric who heals herself and her friends.
- Forest Ranger: Warriors of the forest who fight to protect what's inside.
Mushroom People

Walking mushrooms found in Darkroot Garden and the deepest parts of the Great Hollow. They come in two varieties: the nearly harmless Mushroom Children, and the rarer Mushroom Parents, which are far from harmless.
- Beware the Silly Ones: You might expect stubby, cartoony-looking mushroom people that toddle around the area to be pushovers. You'd expect this right up until the larger ones hit you with a nearly One-Hit Kill Megaton Punch.
- Mama Bear / Papa Wolf: Implied. The Mushroom Parents are always around Mushroom Children, and will react ruthlessly if you approach.
- Megaton Punch: A Mushroom Parent's punch attack is one of the most damaging non-boss attacks in the game, and will dish out a great deal of knockback if it doesn't kill you outright.
- Mighty Glacier: Mushroom Parents are absurdly slow and clumsy, and can be outrun without much trouble. That said, their colossal health pools and punishing attacks mean you should still be afraid when you see them.
Great Felines

A trio of giant cat beasts resembling much larger versions of Alvina, which guard one of the paths to Artorias's grave.
- Artificial Stupidity: Thanks to their wonky pathfinding, it's very easy to get them stuck on trees and inclines provided you know what you're doing.
- Cats Are Mean: Zig-zagged. Their goals are noble, but they're still vicious toward you.
- Lightning Bruiser: Extremely fast and powerful in equal parts, making them some of the most dangerous enemies in the game.
- Miniboss: The three of them form a unique encounter slightly off the beaten path to the real boss, do not respawn, and are found nowhere else in the game.
- Optional Boss: They're fought in a clearing just to the right of the entrance to the Garden from Darkroot Basin, but players who head left on the faster path or enter the forest through the sealed gate won't run into them at all. Since they don't drop anything other than souls and don't guard any loot, there's not much reason to fight them.
- Rolling Attack: They will sporadically curl up in a ball and ram into you, which, similarly to the attacks of Bonewheel Skeletons, will rapidly drain your stamina if blocked and take off most of your health if it hits.
Great Grey Wolf Sif

Great Grey Wolf Sif is the wolf companion of Sir Artorias, the Abysswalker. After Artorias passed away, Sif became the guardian of Artorias' grave in the Darkroot Garden. Sif wields Artorias' Greatsword and uses some of his moves in combat.
- Ambiguous Gender: It is unknown if Sif the Great Grey Wolf is male or female. Sif is a female Norse name, but the wolf is referred to as a "he" in the English translated strategy guide. Japanese versions don't mention gender in the game, guide, or any of the original material.
- Badass in Distress: In Artorias of the Abyss, the player can encounter a younger Sif, separated from its dead master, weak and surrounded by Humanity phantoms, with only Artorias' shield keeping them away. Should the player attempt a rescue, Sif can be summoned for Manus' boss fight.
- Big Damn Heroes: If you took the time to rescue Sif in the Chasm of the Abyss, and its summon sign will appear during the fight against Manus, although the wolf is not going to do much beside distract the boss. Then again, Manus is so viciously relentless in his attacks that even the smallest reprieve can make a world of a difference.
- Canis Major: Sif is effectively Hachiko on steroids, being huge for a wolf, and you're mouse-sized compared to it. In Artorias of the Abyss, Sif is around your size, given this takes place in the past.
- Cutlass Between the Teeth: Uses the Greatsword of Artorias in this way during the boss fight and as a summon against Manus.
- Fighting Your Friend: It's very clear given Sif's reaction to the player if he rescued Sif during the DLC that Sif was grateful to the player for the rescue and the player even tries to pet Sif before Sif howls mournfully and takes up its master's sword to fight the player. Both the player and Sif had formed a bond that tragically must be severed in order for the player to continue.
- Fragile Speedster: Sif is extremely fast and agile, but comparatively low in defense and armor.
- Friendly Enemy: If the player completed the DLC before fighting Sif.
- Gender-Blender Name: Sif is a Norse goddess's name. Only Miyazaki can tell Sif's gender as it stands now.
- Handy Mouth: Sif is a giant wolf boss that carries a sword in his jaws. He is able to swing the sword and shift it around his mouth quite adeptly.
- Heartbroken Badass: If guarding the tomb of its own late friend is any indication. Should you manage to save Sif prior to the mandatory boss fight against it, a different cutscene will trigger, where Sif will recognize the player and whimper softly at their approach. The player reaches out to pet it, but Sif pulls away and howls mournfully, before reluctantly grabbing Artorias' greatsword.
- Honor Before Reason: If the player saved Sif during the DLC, it should be clear to Sif that the player is the good guy and doesn't have any bad intentions when he visits the grave of Sif's master. Sif still fights them anyway, although it's clear that Sif really doesn't want to.
- Howl of Sorrow: If you saved Sif's younger self in the Downloadable Content beforehand, once you go into its boss fight, a different cutscene will trigger where Sif recognizes you, but still has to defend Artorias' grave, letting out a slower, lower-key howl than the normal cutscene.
- Leitmotif: "Great Grey Wolf Sif".
- Noble Wolf: Sif is a sort of cross between this and Savage Wolf. In the past, it was a longtime companion of the late knight Artorias, and even now guards its master's grave, almost to a fault. True to the original trope, Sif is both large and formidable, and is relatively relentless during the boss fight. In the area where you fight it, there are many swords stuck into the ground and corpses littered around, implying that Sif fought a lot of potential grave robbers before you came. This is emphasized heavily if the player completes the DLC and saves Sif. When Sif recognizes the player he whimpers and howls mournfully because he truly doesn't want to kill the one who saved his life but at the same time is honor bound to defend the grave of his master.
- Reluctant Warrior: If the player saved Sif during the DLC, Sif's actions and behavior during the alternate cutscene shows that he really doesn't want to fight the player.
- Punch-Clock Villain: Sif is one of the few bosses in the game to be utterly non-antagonistic. The wolf is only defending its master's grave, which the player needs access to in order to traverse the Abyss.
- Turns Red: Inverted. With most of his HP gone, Sif starts to limp and his attacks become much slower. His slash combo even causes him to fall over and struggle to get back up.
- Undying Loyalty: Defends the tomb of Artorias to the death, even when it is too weak to stand. The Player Punch is even greater if the player saves Sif in the new content before entering Artorias' grave. Sif actually recognizes the player, before reluctantly drawing Artorias' greatsword for the boss fight.
- Well-Intentioned Extremist: One interpretation for why he fights you if you've rescued him is because, if he doesn't, you will enter into the Abyss where it fears you will succumb to The Corruption, and besides, it's not like you will die no matter how many times he defeats you anyways.
- Your Size May Vary: Sif is absolutely huge in the Darkroot Garden fight. When you save Sif in the DLC and then summon him for the Manus fight, Sif is still a very large wolf, but is much smaller than his older version
New Londo Ruins / The Abyss
Ghosts

The spirits of the residents of New Londo, who were killed when the city was flooded to seal the Darkwraiths. Being ghosts, they are completely intangible, and can phase through anything to attack while being impervious to all retaliation. Another variety, Banshees, have an additional scream and magic attacks.
- Bedsheet Ghost: Their forms are mostly hidden by ragged cloaks, giving them this appearance at a distance.
- Devious Daggers: Dual wield two Ghost Blades.
- The Grim Reaper: Modeled after such; they have flowing cloaks, visible skulls, and attack by manifesting scythes.
- Intangibility: They can phase through walls and floors, and cannot be attacked unless the player is Cursed (either genuinely or through the use of a Transient Curse).
- Our Banshees Are Louder: Banshees will scream to alert other Ghosts to their presence.
- Our Ghosts Are Different: These ghosts are different from most of the spirits found elsewhere in the series; they've lost their physical appearances, can't talk, and are uniformly hostile.
- Tragic Monster: They were once just citizens of New Londo, but the city's collapse rendered them enraged phantoms.
- Undead Child: Banshees cradle a ghost baby, which they can use to fire lightning at their target.
Darkwraith Knights

Sinister knights who have joined the Darkwraith covenant, dedicated to the spread of Dark and the Abyss. Along with the Four Kings, they were the cause of New Londo's fall, as they were considered too evil to let loose and the entire city was flooded just to contain them below. Draining the city unleashes them once again, and they set upon the Chosen Undead with deadly blades and dark spells.
- Ambiguously Evil: As is the case with much of Dark Souls, how evil they actually are is up to the player's interpretation once they hear Kaathe's Exposition Dump and learn the truth about the Dark. Are they really the dread beings New Londo had to be sacrificed to stop, are they warriors of justice fighting to bring humanity to their true potential, or are they something in between?
- Black Knight: Clad in dark suits of armor with intimidating designs and skull-shaped helms.
- Black Magic: They use Dark Hand, which creates a shield of dark magic, and can steal your stored Humanity with a grab attack.
- The Computer Is a Cheating Bastard: Minor example. Darkwraith Knights carry (and sometimes drop) the Dark Hand weapon, which they use to block attacks and steal liquid humanity. What makes this an example is that they can do both with the same hand; for the player, the grab attack can only be done if the Dark Hand is on the right hand, and the shield can only be done with the Hand on the left, so a player using both these abilities can only do so if they're dual-wielding Dark Hands (instead of carrying a BFS like the Darkwraith Knights do).
- Deal with the Devil: They and the Four Kings made a pact with Darkstalker Kaathe, gaining power over the Abyss in the process.
- The Dreaded: The gods and the sages were so terrified of the Darkwraiths that they destroyed the city and all of its residents just to keep them contained.
- Mighty Glacier: Slow to react, but once they attack, they can deal huge amounts of damage.
- Piñata Enemy: They drop the rare Titanite Chunks and even rarer Titanite Slabs, so you'll be slaughtering them on the regular if you have multiple weapons you want to max out.
- Sealed Evil in a Can: They were trapped in the flooded depths of New Londo until the Chosen Undead let them out.
- Your Soul Is Mine!: Their grab attack can steal all of your liquid Humanity if it lands.
Masses of Souls

Towering monsters found in lower New Londo, formed from the collected masses of agonized souls trapped by the city's flooding.
- Mook Maker: They generate Wisps while they attack, implicitly lone souls breaking off from the mass to attack by themselves.
- Our Ghosts Are Different: Unlike the regular ghosts of New Londo, the Masses of Souls are physical entities resembling warped blobs of screaming faces.
- Tragic Monster: Like the regular ghosts, with the added factor that they've been trapped in the flooded city with only the Darkwraiths for company for an untold period of time.
- Unique Enemy: Only two of these monsters are found in New Londo, and both don't respawn. Even more uniquely, even for this trope, their spit attack also inflicts a unique debuff that not only combines the effects of being poisoned and walking through deep water, but also reduces the health restored by the Estus Flask.
The Four Kings
The former rulers of New Londo, sealed away in the Abyss deep below the present-day New Londo Ruins. For more information on this enemy, see Dark Souls: Main Characters and Lords.
Demon Ruins
Egg Burdened / Egg Carriers

Undead servants of the Fair Lady who congregate in the Demon Ruins, just outside her chambers (though two are found outside Quelaag's room earlier). They have taken on parasites that cause their bodies to fill up with eggs, and as such are hunched over in constant pain. Attacking and killing them will release the hostile maggots within, while getting attacked by one will cause you to start taking on their condition.
- Body Horror: Their backs are disgustingly swollen with clusters of eggs, and their skin is much more decayed and diseased-looking than other Hollows. And if you get attacked by one that successfully implants the parasite, your own head will swell up with the same after some time (though Eingyi will thankfully give you the cure when you visit him).
- Non-Malicious Monster: The majority of them will pay you no mind as long as you don't harm them, and the few that will attack you without provocation seem to do so more out of an insane desperation to spread the eggs rather than active malice.
- Prayer Pose: Their hands are clasped in front of them, and they seem to be constantly muttering an unheard prayer or chant.
Ceaseless Discharge
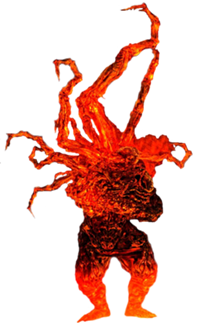
This massive fire creature is the source of all the lava that fills the Demon Ruins and restricts access to Lost Izalith. This creature watches over an altar, on which is placed the body of one of the Daughters of Chaos. Picking the Gold Hemmed Black armor set up will anger the beast, leading to a boss battle.
- Beef Gate: As the source of the lava covering the Demon Ruins, you'll have to defeat him before setting foot in there yourself, although going there immediately after defeating Quelaag isn't recommended since you have yet to acquire the Lordvessel.
- Berserk Button: He seems content to ignore you (or otherwise doesn't even notice you) up until you desecrate the tomb of his Chaos sister and take her Gold-Hemmed Black robes. Then he shows no mercy. Notably, if you just attack him normally he won't be enraged enough to rip his fused arm out of its socket to use it against you, or to make a suicidal leap to try and reach you if you run back to the fog gate.
- Big Red Devil: Aesthetically, at least, he's a very sick, very mutated one, in the middle of a Fire and Brimstone Hell that he created.
- Body Horror: He was originally born with inflamed sores that oozed lava. That is horrifying enough, but after he lost the ring his sisters made to ease his pain, his sores eventually turned him into the abomination you see now, representing Chaos's endless potential for growth, but also its inability to control that growth. His arms are also fused together as part of this mutation. Making matters worse, if you press his Berserk Button he tears his right arm right out of its socket so he can use his left arm to smash you to death, leaving a huge gaping wound through which you can see the inside of his body.
- Fate Worse than Death: Perpetually being burned by lava certainly counts.
- Grievous Harm with a Body: If you steal his sister's clothes rather than just attack him, he prepares for the fight by ripping one of his fused-together arms clean out of the shoulder to beat you to death with it.
- Leitmotif: "Ceaseless Discharge". The One-Woman Wail in the middle part is strikingly similar to "Chaos Witch Quelaag", if a bit toned down, foreshadowing his identity as the Daughters of Chaos' brother.
- Big Little Brother: The youngest of the Witch of Izalith's children, yet he is a titan compared to his older sisters.
- Magma Man: Is practically made of molten lava and closely resembles a wingless Balrog.
- Mighty Glacier: Moves and attacks incredibly slow, but will put an end to even the toughest character if he hits them.
- Non-Malicious Monster: He certainly appears monstrous and demonic, but he won't actually attack you unless you do something to provoke him. Even after entering his boss arena, you can stand directly in front of his face and he won't do anything. He only attacks if attacked first (understandable), or if you pillage the nearby corpse (which is also understandable, seeing as that's his sister's corpse you're desecrating). Unfortunately, you have to kill him to progress deeper into the Demon Ruins.
- The One Guy: He is the only known male relative of the Witch of Izalith.
- Our Monsters Are Weird: He's vaguely humanoid due to his legs, but otherwise he's huge, covered in lava, and has several tentacle-like appendages on his back, not to mention a grotesquely demonic face.
- Outside-the-Box Tactic: The way you're supposed to beat him is to wait for him to attack, dodge, and then strike the arm/tentacle he used to attack you, killing him via a Death of a Thousand Cuts... or, if you've been paying attention to the level architecture, make him chase you along the cliff and trick him into falling off a cliff of his own, instantly killing him. If you just run past him and go back to the fog gate, he throws himself at you (missing entirely if you hug the fog) and then is stuck hanging off a cliff, where you can attack his arm until he falls off and dies immediately. However, if you shoot him with a bow to aggro him instead of looting the corpse of his sister, he doesn't pull out his arm, but instead, he casts a fire attack with his tentacle from a far distance.
- Playing with Fire: Has the ability to fire a powerful stream of fire as a side effect of his primary tentacle thrust. Only shields with high stability and fire resistance are able to counter this otherwise lethal attack. If you shoot him with a bow to aggro him instead of looting the corpse of his sister, this would be the only attack that he would use.
- Skippable Boss: With the pyromancy Flash Sweat (increased resistance to fire and lava), the Dark Wood Grain Ring (flipping animations which give you more invincibility frames) and a healthy dose of Estus Flasks, you can bypass the lava lake and head straight to the Demon Ruins, although the bonfire there will not appear if you do so.
- Tragic Monster: According to the Japanese official artbook, the Ceaseless Discharge is the brother of the Daughters of Chaos mentioned in the Orange Charred Ring's description. Due to his unusual condition and the fact he guards over the tomb of one of his sisters, he certainly qualifies.
Demonic Statues

Squat stone beings dotted all over the Demon Ruins and Lost Izalith, pretending to be the identical statues lining both areas. Functionally the demonic equivalent of The Goomba, all they do is slither forward and breathe fire.
- Breath Weapon: Their sole attack is breathing a stream of fire.
- The Goomba: The weakest and most common enemy in the Demon Ruins and Lost Izalith.
- Rock Monster: They seem to be made completely of stone, though they react exactly the same way to being attacked as fleshier creatures.
Burrowing Rockworms

Gargantuan worms that burrow through the burning rock of the Demon Ruins.
- Big Creepy-Crawlies: The biggest in the game, towering well over the player and even slightly outsizing the nearby Taurus Demons.
- Sand Worm: In essence, though they look more like gargantuan millipedes or pillbugs than proper worms.
Demon Firesage

A powerful demon found at the very end of the Demon Ruins. Yet another obstacle between you and Lost Izalith.
- Ass Kicks You: Come too close to it and it will slam its posterior on you.
- Damage-Sponge Boss: To a slightly lesser extent than the Stray Demon — it has slightly more health, but you'll typically face it much later in the game, meaning that you'll have much better offensive options. It makes up for it with raw killing power instead.
- Having a Blast: Just like the Stray Demon, it can launch bombs in front of it or plant its staff into the ground. Dodging them is slightly more difficult with all the roots and branches scattered all over the boss room.
- Last of His Kind: According to the Demon's Catalyst, the Demon Firesage is the last living master of the ancient fire arts after the creation of pyromancy. The trope is also inverted because according to the same catalyst, the Demon Firesage was also the very first demon to be created following the birth of the Bed of Chaos.
- Leitmotif: "Taurus Demon", shared with the Asylum Demon and the Taurus Demon.
- Mighty Glacier: Just like the Stray and Asylum Demons, though with an even greater emphasis on the 'mighty'. Its attacks are slow but enormously powerful, and their huge area-of-effect makes them hard to dodge.
- Non-Indicative Name: Despite being named Demon Firesage and being on fire, it's still susceptible to fire attacks and its explosion attacks are magical, not fire.
- Skippable Boss: Provided you ranked up a bit in the Chaos Servant covenant, it's possible to skip this boss fight by opening a shortcut to Lost Izalith.
- Underground Monkey: It has the exact same moves as the Stray Demon, as well as similar stats and appearance, but is Wreathed in Flames and more likely to be met without Sequence Breaking.
- Wreathed in Flames: Ironically enough, it's not immune to pyromancies.
Centipede Demon
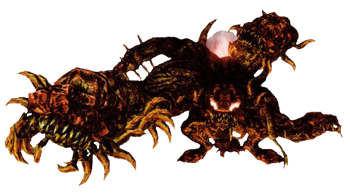
A monstrous demon born from the spot where the Ceaseless Discharge carelessly dropped the ring that soothed his pain. It attacks the Chosen Undead on their way to Lost Izalith.
- Big Creepy-Crawlies: It's based after several gargantuan centipedes joined together. And it looks certainly intimidating.
- Easy Level Trick: There are two ways to make the fight so much easier:
- The first is to lure it into the alcove to the right of the entrance; the floor there is solid, so the player can run around without fear of burning up. The boss's AI also causes it to use a lot of punishable attacks there, making it the ideal place to fight.
- The second is to cut off its arm or tail as soon as the opportunity presents itself. This makes it drop the Orange Charred Ring, letting the player walk around on lava (thereby opening up its arena for traversal).
- Eaten Alive: Just like the Gaping Dragon, it will attempt to grab you and force you into its ribcage, although it's actually less damaging than it looks if you struggle hard enough.
- Having a Blast: Occasionally jumps in the air to release dozens of bombs all over the lava field.
- He Was Right There All Along: The Demon Centipede can be seen clinging to the side of the building with the bonfire and Capra Demons directly preceding the Demon Firesage, but can only be fought once you reach the lava lake below said building.
- Leitmotif: "Centipede Demon", shared with the Capra Demon.
- Mighty Glacier: Makes slow, dramatic lunges and jumps that can take a large chunk off your health each time.
- No-Sell: As with Quelaag, this monster takes no fire damage at all, becoming a very potent threat for dedicated pyromancers.
- Organ Autonomy: You can cut the Centipede Demon's tail and arm, turning those severed limbs into independent centipedes that you can kill (and make them drop the Charred Ring). The Centipede Demon can also regenerate its lost limbs after half a minute or so, up to five times for each appendage.
- Our Monsters Are Weird: A very twisted creature that looks nothing like its name indicates. Bonus points for being born from a ring that was supposed to cure another weird monster.
- Red and Black and Evil All Over: Its skin is charred black, and due to the lighting of the boss room (a large field of lava), it also has shades of red and orange. It's also extremely aggressive, ruthlessly attacking the player with heavy strikes from its massive arm.
- Skippable Boss: Same as the Firesage Demon, since its boss fight is immediately after the latter's.
Lost Izalith
Bounding Demons of Izalith

Bizarre-looking giant demons that fill Lost Izalith's lava fields. Due to the majority of them standing on lava and their aggro ranges being rather small, they are mainly dangerous to those getting lost or exploring the full area for items.
- Damage-Sponge Boss: They're really tough to kill normally, even soaking up damage from endgame weapons. Luckily, they're prone to killing each other by accident, as their attacks damage each other and they come in large clusters.
- Giant Foot of Stomping: They have two stomp attacks if you get too close. One has them just stomp in place with both feet, the other has them stomp at you with their right foot three times. The latter is much more damaging, but fortunately they aren't ambidextrous.
- Half the Man He Used to Be: They are just a pair of legs and a tail, somehow ambulatory all by themselves.
- Hoist by His Own Petard: Since they are capable of damaging each other, it's easy to get them to take each other out by aggroing several at once and letting their attacks harm each other. Assuming you have a reasonably safe place to avoid damage, the survivor should be easy pickings.
- Tail Slap: They can swing their tail at you, sometimes twice, for massive damage if you don't dodge or block.
- Underground Monkey: Infamously, these so-called demons are just reskinned versions of the Undead Dragon's severed legs, given a very basic moveset and scattered through Lost Izalith. This is one of the elements attributed to the game's development cycle, which left much of Izalith unfinished and rushed for time.
Chaos Bugs

A number of small, scurrying insects found exclusively inside and just outside of the shortcut between Demon Ruins and Lost Izalith, accessible only via ranking up in the Chaos Servant covenant. They are completely harmless, at least to you.
- Beware the Silly Ones: They're tiny, harmless bugs that reside exclusively in an out-of-the-way shortcut. They're also essentially what kills Solaire if the Sunlight Maggot hasn't been retrieved.
- Puppeteer Parasite: One of the bugs hosts the Sunlight Maggot, a glowing parasite that doubles as a valuable helm to use in dark areas. But if Solaire finds it first, it completely overtakes him, turning him Ax-Crazy and causing him to turn on you.
- Red Eyes, Take Warning: The bug hosting the Sunlight Maggot has glowing red eyes.
- Small Role, Big Impact: They couldn't be less important to the game overall, except that they have to be killed to save Solaire.
Chaos Eaters

Easily Lost Izalith's strangest creations, these alien-looking beings mostly inhabit a sewer canal deep inside the central temple, though two cling to the outside.
- Combat Tentacles: They mostly attack with these.
- Eaten Alive: As implied by the name. Getting caught by their grab and failing to escape will result in them eating you, which is almost always a One-Hit Kill.
- Hero Killer: If Siegmeyer's quest is followed to this point, these creatures can inflict a mortal wound on him, causing him to die on the spot when the battle concludes. Not that saving him from this fate results in something better.
- Hollywood Acid: Their main attack is a spray of acid from their front appendages, and getting caught in it will rapidly corrode all of your equipped gear to the breaking point.
- Lamprey Mouth: Their most distinguishing feature is their round leech-like mouths, which occupy the entire top of their heads.
- Our Monsters Are Weird: Nothing else in the game looks like them, and they're more comparable to aliens than to any demons or monsters encountered in the depths of Lordran.
Bed of Chaos Guardian

The eldest of the seven Daughters of Chaos, she protects the Bed of Chaos from any invaders that wish to harm it. While she shares the same model as Quelana, they are not the same character. Creator of the Chaos Fire Whip pyromancy spell, which was her signature spell.
- Black Cloak: The same robe that Quelana wears.
- I Choose to Stay: This is the only explanation as to why she would do something as crazy as guarding the entrance to the lair of her mother's murderer instead of fleeing the god-forsaken place that is Lost Izalith.
- In the Hood: Her face is obscured by the Gold-hemmed robes she wears.
- No Name Given: Much like her sister, the Fair Lady, no name is given for her in-game. The Official Guide gives "her" name as Quelaana, but it also erroneously describes her as male.
- Playing with Fire: Fittingly, given she created the Chaos Fire Whip pyromancy, although she's more likely to cast Chaos Fireballs and Chaos Firestorms if you drag out the fight for too long.
- Squishy Wizard: She fights with nothing but her powerful pyromancy spells, which boast unlimited castings.
- You Shall Not Pass!: Not counting Kirk who invades you at the exact same spot, she's the last opponent on your way to fight the Bed of Chaos.
- We Hardly Knew Ye: Often killed swiftly by the time you make it to the boss gate. Her backstory's not expanded much beyond being the elder Chaos sister, either.
Bed of Chaos
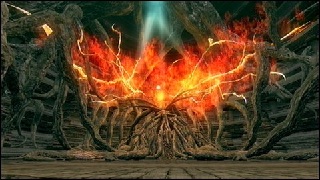
A massive, tree-like abomination that takes its roots at the deepest ends of Lost Izalith. The source of all the demons roaming across Lordran.
- Boss Corridor: There is a long corridor with a slope between the fog gate at the end of Lost Izalith and her arena.
- Botanical Abomination: A tree-like monstrosity whose roots — provided they're not the roots of the Great Hollow — can be seen throughout the Demon Ruins and Lost Izalith, and is the source of all the Chaos Demons. It turns out it had been created by the Witch of Izalith's failed attempt at re-creating the First Fire. Additionally, it seems the two orbs flanking the main body are two of the Witch's daughters, who also got caught in the Bed of Chaos's catastrophic birth.
- Bottomless Pit: 90% of this boss's challenge comes from the fact that it starts destroying the floor under your feet and any stray hit can send you falling in.
- Expy: As a Botanical Abomination made of tree roots that birthed legions of demons and who hides a tiny, pathetic slug thing that used to be a great ruler in its core, it's pretty clearly an updated version of the Old One and True King Allant from Demon's Souls.
- Leitmotif: "Bed of Chaos".
- The Man Behind the Curtain: Reach the core, and you'll find a tiny, twisted creature; the remains of the Witch of Izalith. So much for the dramatic Botanical Abomination…
- Mother of a Thousand Young: Its creation also gave way to all the demons you find across Lordran, as well as fusing two of the Witch of Izalith's daughters with demonic spiders down their waists.
- One-Hit Kill: Its core dies in one hit from anything, even your bare fists.
- Plant Person: The Bed of Chaos is a tree-like abomination with powerful arms and what resembles a head. It's likely what was left of the Witch of Izalith.
- Playing with Fire: Its true form is that of a chaotic flame floating atop the tree-like body, and only appears when cutting down one of the orbs flanking it. Additionally, during the last stretch of the fight, it will start unleashing firestorms and gigantic scythes made of Chaos flames, which makes sense given the boss is the chaotic manifestation of the Witch of Izalith's power over fire.
- Puzzle Boss: Similar to the Dragon God, you do not fight it directly. Instead, you have to destroy two orbs at each extremities of the room in order to pave the way to the monster's core, which you can kill in one hit. It's more complicated than it seems, because you will need to dodge increasingly difficult threats such as the monster's extremely powerful arms and crumbling floor. That said, the orbs do not respawn upon being destroyed, so no progress is lost in the fight if the player dies.
- Sequential Boss: As soon as you cut down one of the orbs, the Bed of Chaos' true form will appear and produce additional scythe-like arms made of fire that will try to dig its way to you, and some parts of the floor will start crumbling down to a Bottomless Pit. Destroying the second orb will cause the boss to start unleashing fire storms as well, making the struggle to reach its core even harder.
- Unexpected Gameplay Change: Introduces puzzle elements and rudimentary platforming into a boss fight, to... mixed results.
- Walking Spoiler: It gets hard to talk about its lore at all without mentioning the Witch of Izalith's failed experiment, which resulted in its birth and devoured her.
- Was Once a Man: The monstrosity known by present day as the Bed of Chaos is what is left of the Witch of Izalith and some of her daughters after her attempt to recreate the First Flame went haywire.
Painted World of Ariamis
Bloated Undead

Hollows with grotesquely bloated heads and bodies, which burst upon death and leave behind an extremely toxic cloud. They also unleash magical fireballs at range, and can spit out their toxins if necessary.
- Action Bomb: They explode upon death, releasing a poisonous cloud of gas.
- Body Horror: Their upper half is covered with a giant, grotesque tumor.
- Deadly Gas: The main thing that makes them so dangerous is that, without a good ranged weapon or melee weapon with decent reach, killing them in melee will immediately envelope you in toxic gas that instantly inflicts Toxic unless your resistance is higher than standard.
- Kill It with Fire: Killing them with a fire-based attack prevents them from releasing their toxins.
- Playing with Fire: There are two versions of them, both of which attack using fire. The melee versions wield torches like normal Hollows, while the Pyromancers attack with fireballs (which actually deal magic damage rather than fire).
- Poisonous Person: They are Hollows who have swollen up with deadly toxins.
Crow Demons

Half-Human Hybrid residents of the Painted World, resembling tall people with crow heads and wings.
- Barbie Doll Anatomy: Have no visible anatomy despite being naked.
- Bird People: Though just like the Man-Serpents, they have bird heads and humanoid bodies.
- Harping on About Harpies: Many of them function like harpies, swooping down from their high nests to attack you with vicious pecks and wing strikes.
- Lightning Bruiser: They have a good deal of health, are fond of rushing into the vicinity quickly, and their wing and peck attacks do a surprising amount of damage that will quickly stack up.
Phalanx

A faintly familiar Miniboss comprising a cluster of deformed spear-wielding blobs gathered around in a giant phalanx formation.
- Luckily, My Shield Will Protect Me: The intact Phalanx is completely shielded from all angles, and the individual creatures all carry shields that necessitate attacking them from behind.
- Mythology Gag: Its name, design, and function are a clear Call-Back to the Phalanx boss of Demon's Souls, though its incarnation here has slightly different tactics.
- Unique Enemy: Only one is encountered in the game, guarding the final courtyard before the bridge to Crossbreed Priscilla. It does respawn, however, making it a popular farming target thanks to its proximity to a bonfire.
Xanthous King Jeremiah

A legendary exile from unknown parts. Invades you in the Painted World of Ariamis. A corpse wearing his armor is found sitting near the exit of the Painted World.
- Fashion-Victim Villain: His clothing set is one of the most bizarre in the game, with the bulbous yellow cloth crown and exposed midsection. In their item description, it is stated that the bright yellow color stings the eyes.
- Meaningful Name: Xanthous means yellow. And what color is his armor again...?
- Mythology Gag: His entire character is an obvious reference to the Old Monk from Demon's Souls. Both were legendary exiles who wore golden robes, and the Xanthous crown is extremely similar to the one worn by the Black Phantom summoned by the Old Monk for his boss fight (although shaped like a bulb rather than a tornado).
- Playing with Fire: He uses Chaos pyromancies when he invades you, and he seems to resist fire damage far more than the average NPC.
- Retcon: Originally just an enigmatic weirdo, Dark Souls III changed the definition of "Xanthous" to refer to the school of mages that study the lost spells of Oolacile, saying that some people try to ape the scholars by mimicing their signature yellow headdress.
Crossbreed Priscilla
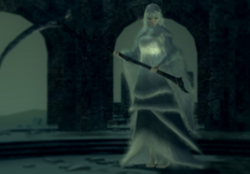
- Voiced by: Clare Corbett
A half-dragon being residing within the Painted World of Ariamis. She was apparently condemned there by the Gods for her power of the "Lifehunt", which they feared could defeat them. Her old doll, found on a new corpse dropped into your former cell in the Undead Asylum, is required to enter the painting. Defeating her is completely optional, as she is docile when you enter the boss arena. She even points you towards the exit, wishing to be left alone.
- Aborted Arc: According to Miyazaki she was originally going to be much more important to the plot, but her role was ultimately replaced with the fire-keepers.
- Bad Powers, Good People: Harmless, anyway. If you cut off her tail (or craft her signature scythe) the resulting weapon bears her Lifehunter ability and demonstrates that the Gods had every reason to be afraid.
- Blatant Lies: "This land is peaceful, its inhabitants kind." Sure, those kind Hollows, crow demons, wheel skeletons and giant rats, not to mention that peaceful undead dragon! Things were probably a good deal less hellish before Gwyn went down to the Kiln and Anor Londo's infrastructure fell to bits, thus leaving Priscilla's painting neglected, and she still hasn't quite caught up to the fact that the place going to pot is the new normal.
- Boss-Arena Idiocy: She turns invisible at the beginning at the fight, and the player would have no way of determining her location... except for all the snow revealing her footprints. Less obvious is the fact that the level exit is in the same location and is a narrow walkway, so the player can just park there and wait for her to approach, which makes staggering her and breaking her cloak much easier.
- Cute Giant: Being 17-18 feet tall doesn't stop her from being adorable.
- Cute Monster Girl: She's basically a giant human with a furry white robe and a tail, making it hard to group her with the other dragons in the game.
- Demoted to Extra: She was originally supposed to be a major character, equivalent to the Maiden in Black or the Emerald Herald. She was reduced to a mere Optional Boss.
- Dragon Ancestry: Priscilla is a half-dragon and, as such, is of giant size and has a dragon tail.
- Ethereal White Dress: Which adds to her mystifying nature.
- Expy: One of Maiden Astraea from Demon's Souls. She even has the same voice actress. She even calls you out on your offensive dickery.
- Fur Is Clothing: Perhaps more literal than some examples. It's pretty hard to tell if that "dress" of hers is just fur of some sort that's gotten rather long, is an actual furry dress, or if different parts are one or the other. If nothing else, the fur of the dress sure matches the color of the fur on her tail, and that presumably isn't just part of the outfit...
- Giant Woman: 17-18 feet tall and gorgeous.
- Glacier Waif: While she isn't exactly small herself, the Lifehunt Scythe is a pretty big weapon for her to wield, and since her version of it is scaled to her proportions, it's absolutely huge compared to your character.
- Glass Cannon: Should you decide to fight her, she has one of the lower health pools, but compensates by way of her powerful, bleed-inflicting scythe as well as turning herself invisible until you're able to stagger her. This can make cutting her tail problematic, as her low health pool and small tail means you might accidentally kill her first.
- Invisibility Cloak: She's able to render herself completely invisible as her opening move, and can only be tracked by her footprints in the snow. The only way to render her visible is to stagger her through various means (a greatbow, throwing knives, etc.).
- Leitmotif: "Crossbreed Priscilla".
- Little Bit Beastly: While the exact extent of her dragon heritage is unknown (we don't even know whether her white robe is clothing or a natural body covering), she's at least visibly just a (very big) pretty girl with a tail, white hair, slit-pupilled eyes and tiny horns on her brow. Averted in the Japanese version where she is called Half-Dragon
- Mystical White Hair: Which helps emphasize the otherwordly vibes that come from her and the Painted World in general.
- Non-Human Humanoid Hybrid: Though her non-dragon half isn't explicitly stated, there are a multitude of hints throughout the series that she's the daughter of a dragon and one of Anor Londo's gods.
- Non-Malicious Monster: Even as you enter the boss room, she does not move at all, and even tells you to exit the world. Only by hitting her will you provoke her into fighting you.
- Optional Boss: She's actually the boss of a world that has literally no relevance to the plot, and even then, she doesn't attack you unless provoked.
- Pretty in Mink: Living in a winter land, she wears a fancy floor-length dress of white fur (if it even is clothing, considering her tail is also covered with the same fur).
- Sinister Scythe: Wields one which is (sort of) appropriate for her size. Her soul can be used in Weapon Ascension to remake it for the player to use.
- Statuesque Stunner: She towers over the player, who comes up to about her knees.
- Whatever Happened to the Mouse?: Priscilla's official fate isn't stated throughout the series. Clues as to what may have happened are sprinkled throughout Dark Souls III and Ashes of Ariandel, but they point in several directions and there are many theories as to what happened to her.
- Thanks to III, ironically for a Souls game, the most likely explanation is that she either never actually encountered a Chosen Undead, or if she did, they took her advice and left, with her leaving the Painted World of her own volition and occasionally teaching others how to use her Lifehunt ability before passing away peacefully and fading into obscurity, with Aldrich only being able to gain her ability by consuming Gwyndolin. It's oddly one of the few "wholesome" endings for a character in a Souls game.
- Another theory is that, assuming Priscilla doesn't age, is that she was destroyed along with Ariamas' Painted World when it began to rot away. While it's never outright stated, it's heavily implied that Ariamas' painting no longer exists and that would be her fate if she stayed.
- The other possibility is that Priscilla eventually left the Painted World and encountered Gwyndolin. What their relationship could have been is pure speculation, but it's known that Gwyndolin does indeed know of her existence. The description of the Lifehunt Scythe miracle mentions a "young, pale girl in hiding." This could refer to Priscilla or Yorshka, the other Crossbreed, but the latter doesn't have the Lifehunt ability.
- Ye Olde Butcherede Englishe: How she speaks.