Beware of spoilers, especially in the boss folders
List of characters in Crypt of the NecroDancer.
For character tropes from Cadence of Hyrule, see here.
Playable Characters
Cadence
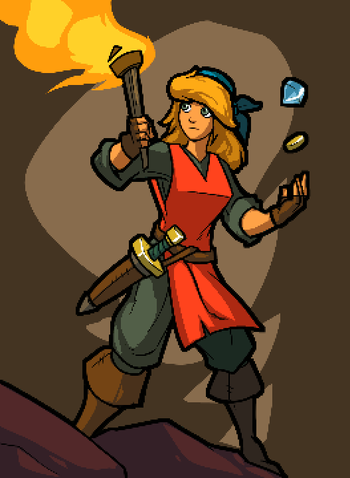
The main protagonist of the game, she has her heart stolen by the mysterious NecroDancer after infiltrating his crypt; and is now forced to venture deeper into the crypt to figure out what's going on.
- Action Girl: But of course.
- Badasses Wear Bandanas: She wears a blue bandana and she's not afraid to get her hands dirty in all acceptions of the term.
- Daddy's Girl: Her reason for going on her quest is to find her Disappeared Dad.
- Decoy Protagonist: She’s the first playable character and presented as the main protagonist but her story ends with questions that Melody and Aria’s story answers.
- Jack of All Stats: Her gameplay contains no special gimmick and is the most rounded of characters. She also has no weapon limitations, beyond what she finds. Her default soundtrack counts as well, as it gives a foretaste of various musical genres while other soundtracks go deeper into them.
- Organ Theft: She had her heart stolen by the NecroDancer at the beginning of the game, and despite this, she's still alive and can still be able to feel her heart's pulse. She regains her heart back when she defeats the NecroDancer, along with Dorian.
Melody
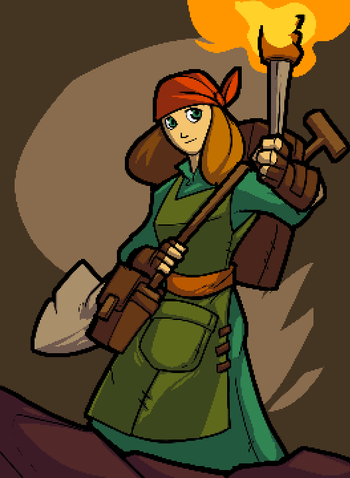
Cadence's mother. She died from illness years ago while Cadence was still young. Melody is unlocked after you complete Cadence's story.
- Back from the Dead: Melody died as a result of the plague. Dorian brings her back to life with the Golden Lute, but it turns out that there's a catch: in order to stay alive, she must keep playing the Lute. And the more she plays, the more it robs her of her humanity and thus bringing her closer to being just like the NecroDancer. Fortunately, she's determined to end the Lute's curse before that can happen, and by the end of Aria's story, she's freed from the curse and remains alive with her family.
- Badasses Wear Bandanas: She wears an orange one is able to damage enemies only by playing the Golden Lute and moving around.
- Electro House: Her default soundtrack is entirely composed of EDM/dubstep music by A_Rival.
- Fragile Speedster: Melody starts out with two hearts, instead of Cadence's three, so there's a greater risk of dying, especially before you get defensive and regenerative items. However, the Golden Lute damages all nearby enemies whenever Melody moves, so she doesn't need to pause to attack enemies, allowing her to clear entire rooms without having to stop. But its attack power is very low and can't be improved, and Melody can only damage enemies when she moves (barring bombs and spells), meaning that Melody's screwed if she gets surrounded or otherwise immobilized.
- Missing Mom: Cadence's flashbacks reveal that Melody had died from illness, prompting Dorian to find the Golden Lute and resulting in his two-year disappearance. She gets revived by the Golden Lute, but with a price.
- Musical Assassin: Melody's weapon is the Golden Lute, which can damage enemies around her when she moves adjacent to them.
- Sliding Scale of Gameplay and Story Integration: As a result of being brought back to life by the Golden Lute and being forced to play it to stay alive, if you switch the Lute with any other weapon using shrines, Melody will die instantly.
Aria
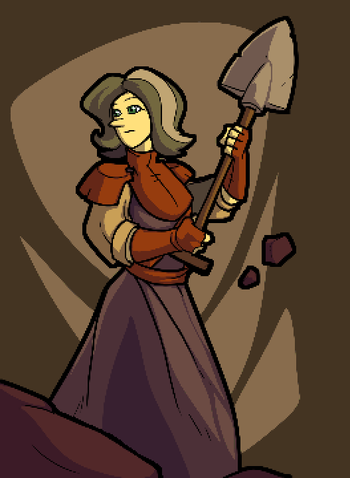
Cadence's grandmother. Aria disappeared years ago and never came back. Aria is unlocked after you complete Melody's story. Her gimmick is that she only has half a heart of health at all times, and missing a beat will count as damage, essentially making her challenge equivalent to a flawless run.
- The Atoner: She seeks to make amends for bringing the Golden Lute and its curse into her village by destroying it.
- Autobots, Rock Out!: Her default soundtrack is entirely composed of rock music by FamilyJules.
- Back from the Dead: Aria comes back to life by the end of Melody's story and decides to destroy the Golden Lute in her place. But because she's already frail, when she finishes the job, she's the only character to be Killed Off for Real.
- Devious Daggers: Her default weapon is a dagger. Unlike the other characters, though, she is limited to only using the dagger, and attempting to switch it with other weapons using shrines will result in death by cowardice.
- Gag Nose: Aria's distinguishing feature is her long nose that's reminiscent to Pinocchio's. It's barely noticeable in her sprite.
- Glass Cannon: Equipping the Ring of Might, Boots of Strength, Strength Charm, Karate Gi, and Glass Jaw will turn her into this. The Karate Gi and Glass Jaw would make any character this, but since Aria's a One-Hit-Point Wonder anyways...
- Go Out with a Smile: After finally destroying the Golden Lute and breaking the curse, she's seen slumping to the floor with a smile.Aria: Finally, I have made amends. Everything comes to an end, my daughter. But for you and your family... not today.
- Heroic Sacrifice: Granted, she was already wounded and frail to begin with, but she still manages to sacrifice herself and destroys the Golden Lute to save her family.
- Killed Off for Real: She dies for good after destroying the Golden Lute and breaking the curse.
- Never Mess with Granny: She's Cadence's grandmother and is determined to destroy the Golden Lute by going through the Crypt just like her daughter and granddaughter. She doesn't even let the fact that she's the most frail playable character in the game slow her down.
- One-Hit-Point Wonder: Aria only has half a heart, so any enemy can kill her with just one hit, including missing a beat. Fortunately, she starts off with a potion that revives her when killed, so she has at least two chances to make it through the crypt. With the right equipmentnote , it's possible to get her up to an eight hit point wonder.
Dorian

Cadence's father, who went on an adventure two years ago and disappeared. Dorian is unlocked after you defeat Dead Ringer in Cadence's story.
- Assist Character: He assists Cadence in her battle against the NecroDancer.
- Chiptune: If Amplified is installed, his default soundtrack is retro-game/EDM music by Chipzel.
- Cursed with Awesome: His gameplay gimmick is that he has the cursed Boots of Leaping, which allows him to leap two spaces ahead on each beat. Unfortunately subverted, because if you toggle the boots off and start moving normally, Dorian will take half a heart of damage with each step.
- Disappeared Dad: Dorian had been gone for two years trying to find the Golden Lute, leaving Cadence to live with her uncle Eli. Cadence later finds out that he's alive, but has been Brainwashed and Crazy by the NecroDancer into the Dead Ringer.
- Lightning Bruiser: Can leap fast, deal double damage, and takes less damage from enemies because of his own armor called Dorian's Platemail.
Bard
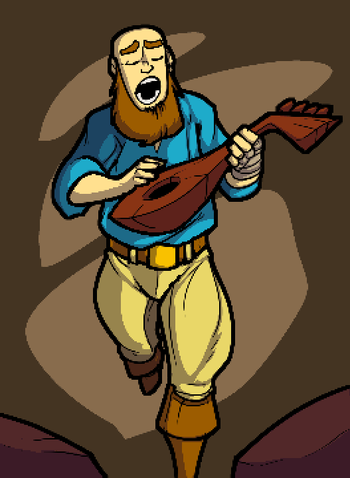
Basically the easy mode of the game, he's the only character who doesn't have to move to the NecroDancer's beat. Bard is available at the start of the game, and does not need to be unlocked.
- Electronic Music: His soundtrack is entirely composed of 1980s-style synthwave music by Girlfriend Records.
- Foreshadowing: On closer look, he resembles the NecroDancer shown in the opening.
- From Nobody to Nightmare: He was just a simple bard who was struggling to be discovered for his talent, until he randomly stumbled onto the Golden Lute in his travels. Once he got his hands on it and started playing, the Lute began chipping away at his humanity and eventually turned him into the NecroDancer.
- No Name Given: Averted. Melody and Aria's stories reveal that his name was Octavian.
- Sliding Scale of Gameplay and Story Integration: He is the only character who doesn't have to move to the beat of the music. That is because he is the NecroDancer, and playing as him means the NecroDancer hasn't forced his magic over the dungeon yet.
- Walking Spoiler: As a playable character, no. But the backstory is another matter entirely.
- Weak, but Skilled: He starts with 2 Heart Containers compared to Cadence's 3 (at least on All Zones runs). But not being restricted to the beat means that you have all the time you need to explore a floor or think your way out of a sticky situation.
Uncle Eli
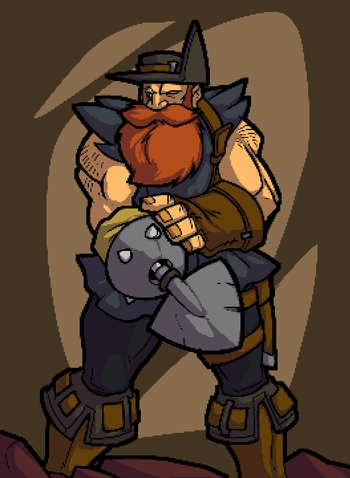
Cadence's paternal uncle, who tried to dissuade both Dorian and Cadence from going on their adventures. He's the only member of the family to not get involved with the main plot of the game and is, instead, an extra playable character where his gameplay gimmick is having an infinite supply of bombs. Eli is unlocked after you clear Zone 1.
- Ambidextrous Sprite: Suffers from this because of his right shovel hand, which can swap to his left arm when he turns around.
- Chiptune: His default soundtrack is entirely composed of freestyle retro-game music by Jake "Virt" Kaufman.
- Handicapped Badass: Has a shovel for a hand, but can still blow enemies to smithereens.
- Mighty Glacier: Eli's bombs can deal four hearts of damage, but take three beats to detonate once deployed. A blast helm can help alleviate this by making the bombs explode instantly and also turn him into a walking Action Bomb.
- Only Sane Man: He tried to dissuade Dorian and later Cadence from going to the crypt, and is the only member of the family to not be affected by the NecroDancer and the Golden Lute, at least story-wise.
- Throw Down the Bomblet: Eli possesses no weapons to attack directly (and trying to give him one results in death by cowardice), but instead has an infinite supply of bombs and the ability to kick them a few spaces ahead of him at his enemies. If Amplified is installed, his weapon slot is filled by his hand shovel, which pushes an enemy back one space but still can't deal damage.
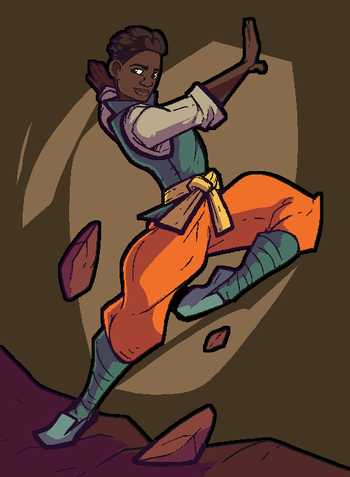
Dove

A mysterious woman who is all about love and peace. Her gameplay gimmick is a Pacifist Run where she must clear dungeons without harming enemies. Dove is unlocked after you clear Zone 2.
- Actual Pacifist: She cannot directly harm enemies. Period. Her weapon is a flower that just confuses enemies, and her bombs teleport them away.
- Animal Motifs: To doves, obviously, since they represent peace.
- Head Pet: Has an actual dove on her head.
- Improbable Weapon User: Her weapon is a flower which only confuses enemies. Justified since her gimmick is not killing enemies, and attempting to switch it with more lethal weapons using shrines will result in death by cowardice.
- Pacifist Run: Her entire gameplay is clearing the dungeons without killing enemies. Because of this, she is given the strongest shovel to dig through all types of wallsnote and doesn't need to fight minibosses and bosses.
- Stone Wall: Give her strong enough armor, and you can turn her into this.
- Squishy Wizard: Dove does not have any offensive capabilities, but she does have access to the freeze spell, the bomb spell, the scroll of fear, and the heal spell; the former three of which can help keep enemies at bay.
- Thou Shall Not Kill: She cannot kill enemies, and even her bombs just teleport them away to another location. If an enemy dies from a spike trap, she'll respond with a cry of pity.
Monk
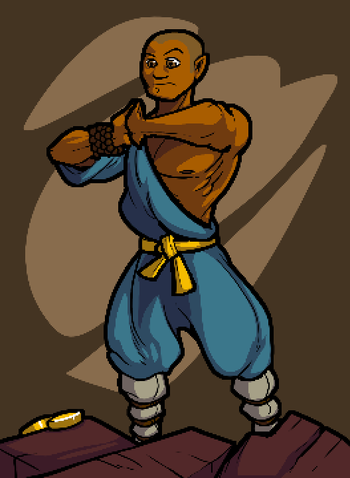
A mysterious monk who goes by the Vow of Poverty and submits himself to deadly penance if he touches gold, which is his gameplay gimmick. Monk is unlocked after you clear Zone 3.
- Cast from Hit Points: Monk starts off with the Blood Shovel, which allows him to dig through stronger walls at the expense of half a heart of damage. However, unlike other characters (like Aria and Dove), it isn't a restriction, and you can freely switch it with other shovels without the death by cowardice penalty.
- Death by Materialism: He takes it far too literally — due to his "Vow of Poverty", if he so much as touches gold, he dies.
- No Name Given: He is only ever referred to as "Monk".
- No Saving Throw: Dying to the Vow of Poverty is special in that it completely ignores any potion you might have, which would ordinarily save a character's life if they die.
- The Voiceless: Monk has no voice clips and is completely silent, though there is no explanation as to why he's like this. Whether it's because he does not want to speak, is actually mute, or there was no available voice actor at the time he was being developed is still up in the air.
Bolt

A spear-wielding hunter figure whose gameplay gimmick is making the tempo beat twice as fast. Bolt is unlocked after you clear Zone 4 as Monk.
- Difficulty by Acceleration: When playing as Bolt, the tempo is twice as fast with twice as many beats to input, so you need to have extremely fast reflexes in order to attain the standards of play of any other character. The enemies also move at double speed, and because of the increased chances of messing up, Bolt starts out with a spear instead of a dagger to give them an advantage.
- Fragile Speedster: Bolt can move fast with the increased tempo, but the catch is that the enemies also move at double speed and Bolt doesn't start out with any armor. However, if you give them the right equipment, then you can turn them from this into a Lightning Bruiser.
- Meaningful Name: Bolt's name is likely a Shout-Out to the Real Life Olympic athlete Usain Bolt
 , who is the current record holder of being the fastest runner on Earth.
Coda

The final character of the base game. Coda is a goblin-like creature whose sole purpose for being playable is to provide the player with the toughest challenge yet. Coda is unlocked after you complete All-Characters Mode.
- Harder Than Hard: Playing as Coda is essentially playing as Aria, Bolt, and Monk combined. She's a One-Hit-Point Wonder who can only use a dagger to attack, dies upon missing a beat, dies upon touching gold, and the music tempo has twice the amount of beats to move around to. She's so difficult to play as that both the "All Characters" modes specifically exclude her (the first one is even actually named "All Characters (Except Coda)").
- Meaningful Name: A coda is the final passage of any musical work, and Coda is the last character to be unlocked. "Coda" is also the Italian word for "tail", as in what she uses to wield her dagger.
- Prehensile Tail: She holds her dagger in the coiled tip of her long tail.
- Samus Is a Girl: Not immediately obvious at first gameplay-wise, but according to her character's page on the game's wiki, Coda is female.
Amplified Playable Characters
Nocturna

The main protagonist of the DLC prequel Crypt of the NecroDancer: Amplified.
- Animesque: Her artwork design has more notable anime influence than the rest of the characters. Namely her big eyes, face, and hair.
- Cool Sword: She starts off with a cutlass which can hit a target from two tiles away like the Spear, but is also capable of parrying enemy attacks.
- DLC: The new heroine of Crypt of the NecroDancer: Amplified.
- Downer Ending: After defeating the Conductor, Nocturna almost destroys the Golden Lute, but is enticed by the potential to become human again, and flies off with it. Considering Amplified is a prequel and she isn't mentioned anywhere in the base game, she likely failed in her attempts and led to the Lute falling into the hands of Octavian, and all the unhappiness that happened afterwards. Worse, considering the Golden Lute's real nature, she likely ended up another victim to it.
- Turns into Belated Happy Ending, since in the direct sequel Rift of the Necrodancer, she is shown to be alive and is listed as one of Cadence's friends.
- Genre Roulette: Her default soundtrack is composed of diverse themes by various artists from OverClocked ReMix.
- I Just Want to Be Normal: Turned against her will and deeply unhappy about being a vampire, but unable to do anything about it. This unfortunately leads her to not destroy the Golden Lute when she had the opportunity when she's enticed by its potential to become human again. It likely did not end well for her, considering the Golden Lute's real nature.
- Our Vampires Are Different: She has blue skin and pink hair, and has bat wings even out of bat form; these are shown to be universal for all other members of her clan. Early cutscenes are ambiguous about whether she's really a vampire, but she explicitly uses the term at one point.
- Red Eyes, Take Warning: In cutscenes, vampires are shown to be berserk when their eyes turn red. Nocturna has this happen when she smashes the Conductor's equipment after defeating her.
- The Undead: Unlike most of the characters, however, she was already dead prior to entering the Necrodancer's dungeon.
- Voluntary Shapeshifter: Nocturna is able to transform into a bat form which gives her flight over hazards, higher attack power, and the blood weapons' benefits of healing after ten kills. However, changing back to her normal form is always treated as blood magic, costing half a heartnote . The transformation even triggers automatically if Nocturna is down to her last heart.
- Was Once a Man: She was originally a normal woman until she was turned.
Diamond
A character who can use key combinations to move diagonally. Diamond is unlocked after beating Area 5.
- Damn You, Muscle Memory!: Because Diamond uses the ordinary buttons/key combinations for bombs and items to move diagonally, those actions have different inputs for him only.
- Denial of Diagonal Attack: Thoroughly averted. Diamond, unlike other characters, can move and attack in the four diagonal directions as well as the four cardinal ones. This comes at the cost of some things being removed from his item pool, including all of the spells (outside of Scrolls and Tomes), many weapons (such as Broadswords, Crossbows, and the two guns), and things that can be toggled (such as the Boots of Leaping, Boots of Lunging). He also doesn't have the ability to throw Daggers or Spears. However, the versatility of being able to utilize the diagonal angles allows Diamond to be more effective at a base level.
- Punny Name: A Diamond is a shape made up of diagonal lines, usually at a half-right angle from a square ◇ thus the character Diamond can also move diagonally at half angles to the usual directions player characters have to go.
Mary
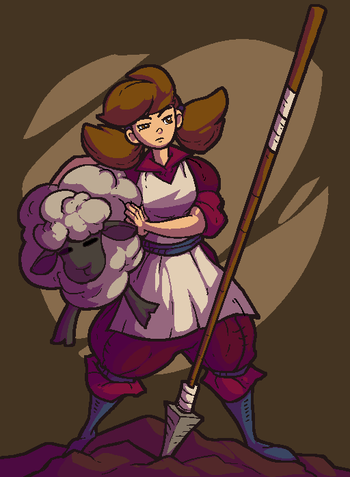
A character who needs to protect a lamb at all costs. If the lamb dies, she dies.
- Berserk Button: For God's sakes, don't go near her lamb. Even people she greets in the lobby can press the button somehow. note
- Escort Mission: She needs to escort her lamb through the dungeon and protect it.
- Meaningful Name: In reference to the well-known children's lullaby "Mary Had a Little Lamb", she has a lamb following her and she must protect it from enemies.
- Nice Girl: When the lamb is not in danger. She has extremely enthusiastic, friendly greetings for all the shopkeepers.
- One-Hit-Point Wonder: The lamb dies in one hit, meaning it's always better for Mary to take whatever attack than for the lamb to.
- Stealth Pun: A lamb introduced in the Amplified DLC? Why, it's an electric sheep!
Tempo

Can kill enemies in one hit, but needs to kill at least one enemy every 16 beats or he dies instantly.
- Aggressive Play Incentive: Enforced with Tempo. He can One-Hit Kill any enemy, but he dies if he ever goes 16 steps without killing anything, picking up an item, or eating food (a limited resource).
- Early-Bird Cameo: He might be the zombie the Conductor is operating on in one of Nocturna's cinematics.
- Frankenstein's Monster: Has the look of one, including stitched-together skin and metal bolts on his head.
- Life Drain: Both in a literal and figurative sense. Tempo starts out with a Blood Dagger, which heals half a heart every ten kills, but killing any enemy regardless of what weapon he's using will reset his timer back to 16 beats and prevent a time-out death.
- One-Hit Kill: He can kill all enemies instantly. He needs it.
- Timed Mission: Will die in 16 beats. Killing enemies resets the timer.
Reaper

The carrier of souls, she gathers the immortal essence of enemies she slays and surrounds herself with them. The army of souls she gathers can attack enemies but also only have one health apiece themselves. The one caveat is that the enemies must be able to drop gold to spawn a soul.
- Jack of All Stats: Plays like Cadence save for the gimmick. She can use any item available without restriction.
- Psychopomp: Literally the Grim Reaper.
- Red Eyes, Take Warning: An inversion; has red eyes, and is a deadly and versatile threat to enemies.
- Samus Is a Girl: Like Coda, this isn't obvious at first sight (as the pixels can't show as much details as the picture), but Reaper's character page states that she's a female.
- Version-Exclusive Content: Was only available on the Nintendo Switch Edition, until an update added her to PC.
- Your Soul Is Mine!: Does this to slain enemies, adding to her army. Each has one health and deals one heart of damage. However, this only works for enemies that can drop gold.
Synchrony DLC characters
Klarinetta

Wields a sword so big, it occupies a different spot from her. Klarinetta can swing her sword to change its position and attack all enemies between its original and new spot.
- BFS: Weilds one so large, it's in a separate space. There's an achievement for killing four enemies at once with it.
- Denial of Diagonal Attack: The only aversion other than Diamond, although she can't move diagonally, instead using key combos to swing her sword.
- Punny Name: Pronounced similarly to "clarinet", a woodwind instrument.
- Some Dexterity Required: She needs to use key combos just to attack.
Chaunter

A ghost who is extremely weak, but can possess its enemies to gain their powers.
- Animate Inanimate Object: Subtle, but Chaunter is a possessed set of bagpipes.
- Black Speech: Its voice sound like a low-pitched gurgle.
- Blessed with Suck: Chaunter inherits the limitations of whatever it possesses. For example, a possessed skeleton must wait one beat after attacking, and can only move in one direction if it loses its head. Many forms also can't use weapons or benefit from other equipment. And you take damage every so often while possessing, so you'll be lucky to keep the same form for more than one floor.
- Contractual Boss Immunity: Chaunter can't possess bosses. Their minions are fair game, though.
- Demonic Possession: Chaunter's main weapon. While in ghost form it can possess an enemy and use its powers, but only temporarily.
- Denial of Diagonal Attack: Averted, if it possesses an enemy that can attack diagonally.
- One-Hit-Point Wonder: Downplayed. Like Aria, it can't gain any more hearts for its base form, but it can possess enemies and inherit their health.
- Our Ghosts Are Different
- Power Floats: The only playable character that can float above terrain without the Boots of Levitation, although this doesn't extend to most possessed enemies.
- Punny Name: A double example: a chanter is part of a bagpipe, and "chanter" is also a French word, meaning "to sing", which is combined with the word haunter, accurately describing its playstyle.
Suzu

Wields the Lance of Courage, making her dash until she hits a wall whenever she kills an enemy. She is invincible while dashing and kills all enemies in her way instantly.
- Dash Attack: Every time she kills an enemy. While it can kill many enemies at once, it can also put you in a bad position if you're not careful where you dash.
- Flash Step: The charge is instantaneous, similar to Dead Ringer's.
- Oni: She resembles one.
- Meaningful Name: A Suzu is a hollow Japanese Shinto Bell, linking her resemblance to an Oni.
- Vocal Dissonance: She's woman in an Oni mask and wields a powerful lance, but she has a voice as high-pitched as Dove's.
Hatsune Miku
A twin-tailed Virtual Singer with cyan-green hair. Miku can move diagonally, but takes damage when missing a beat and cannot possess a Shovel or find weapons. She is instead armed with two unique abilities: a Leek, which can attack diagonally, dashes through all enemies in a straight line on hit, deals exponentially-stacking double damage with each consecutive hit, and digs walls on successful dash, and Sing Spell, a Bomb-type ability that Captivates enemies it hits, causing them to heal Miku instead of inflicting damage before dying.
- Barrier-Busting Blow: The only way she can dig is if she ends her attack on a spot where a wall would be. As a tradeoff she can dig through any destructible wall this way.
- Chain Lethality Enabler: The main advantage of her Leek is it deals exponentially increased damage for every successive hit. A player skilled enough at chaining combos can mow through enemies, even bosses.
- Dash Attack: Attacking with her Leek causes her to dash through to the other side of the enemy. This also works through a line of enemies no matter how long.
- Edible Bludgeon: Her trademark Leek, which is also the only weapon she's capable of wielding.
- Guest Fighter: She originates from the Vocaloid music program, and is a fully-playable character with her own strengths and drawbacks.
- Image Song: Playing as her replaces the games soundtrack with songs she's sung.
- Kicking Ass in All Her Finery: Armors on her will become one of the many iconic costumes she's worn over her career.
- Magic Music: Instead of a bomb she gets a Sing spell. It functions identically except enemies caught in the radius become charmed and self-destruct to heal when in a position to attack. It also replenishes for every four-chain combo.
Monsters
Enemies

- Giant Mook: Sometimes, you'll run into giant versions of regular enemies that have more health and attack power, but are otherwise still the same enemies with their usual patterns. When you kill them, they'll either drop a large sum of gold or a Scroll of Gigantism, which will make you grow giant for a short time.
- Graphics-Induced Super-Deformed: Compare the enemies' artwork in the bestiary to their sprites.
Zone 1
Green, Blue & Orange Slimes

Slimes are basic enemies found only in Zone 1. They move aimlessly and with limited mobility.
- The Goomba: The Green Slimes are the first enemies you'll encounter in Zone 1 and are the easiest to kill. They only stay in one place jumping to the beat and will never really hurt you, even if you threw your weapon away and bumped them. In fact, the Green Slimes are so passive and harmless that there's actually an achievement for getting killed by one.
- Despite being, as the Achievement says, "Mostly Harmless", the passive Green Slime will quickly turn out to be a Killer Rabbit if you do find a way to make it attack you, dealing a whopping 25 hearts of damage in one hit.
Skeletons, Yellow Skeletons, & Black Skeletons

Skeletons are the most common enemy in the crypt, appearing as early as Zone 1 and with stronger variants in later zones. They move towards the player every 2 beats. Yellow and Black Skeletons lose their head when their health is reduced to one heart, running away every beat in a panic.
- Dem Bones: The Skeletons are the most common type of enemy found in all zones, and come in many different variations. Ranging from carrying shields, riding on horseback, and even being spell casters.
Bats

Bats are common enemies found in all zones, as early as Zone 1. They fly and move at random every 2 beats (every beat for Red Bats).
- Bat Out of Hell: The bats are distinct in that they do not have a predictable pattern. They instead move in random directions every two beats or one beat for the black and red variety, which makes approaching them very tricky because you don't know where they'll move next.
- Confusion Fu: They weaponize their unpredictable nature.
Monkeys & White Monkeys

Monkeys move every beat, latching onto the player to hold them still instead of attacking. The Standard and White variants are only encountered in Zone 1.
- Personal Space Invader: Rather than harming you directly, they'll latch onto you, preventing you from moving until you can kill them.
Ghosts

Ghosts are enemies exclusive to Zone 1. They follow the player through the floor persistantly, stopping in place and turning intangible if the player moves towards them.
- Can't Move While Being Watched: Their main gimmick. As long as you look at them, they cannot move. However, they also cannot be killed. You have to lure one along for a few beats and then strike as you turn around.
Zombies

Seemingly oblivious to everything around them, Zombies move back and forth, and only attack the player if you are in their way. Zombies only appear in Zone 1 and during the King Conga fight (as Zombie Conga Lines).
Wraiths

Mysterious spirits that spawn after a set time and chase the player down. They always spawn an even amount of tiles away from the player.
- Fragile Speedster: They can move every beat, a rarity for Zone 1 monsters, allowing them to hone in you very quickly. Thankfully, they have only a single heart.
- Super-Persistent Predator: Unique in that they spawn alerted, and begin making a beeline to you right away. Once alerted, they never go away until killed, since they are immune to most traps and hazards.
Zone 2
Armadillos & Yellow Armadillos

Armadillos are stationary enemies found in Zone 2. If a player lines up with them, they will barrel towards them into a ball. In this state, they move every beat and brush off attacks, but cannot change directions until they hit something, which will stun them for a bit.
Armored Skeletons, Yellow Armored Skeletons & Black Armored Skeletons

Skeletons found in Zone 2 sport a shield that protects them from frontal attacks. Armored Skeletons lose their shield if they block an attack that could one shot them or if they lose their head.
- Luckily, My Shield Will Protect Me: They hold a shield which protects them from frontal attacks, forcing you to take a more tricky approach to kill them.
- Weak, but Skilled: While they move only every two beats and are not too powerful, their shield still makes them dangerous and you can easily die on one of them if you're too frontal or start to panic.
Clones

Clones are tricky enemies encountered only in Zone 2. They mirror the closest player's movements, attacking if they bump into someone. They take a similar appearance to the player's character.
Golems & Dark Golems

Slower than average, Golems are Zone 2 enemies that chase the player and only move once every 4 beats. This is mitigated by their strength and durability.
- Mighty Glacier: They move only every four beats, but they hit extremely hard and have a large life pool (5 hearts for the normal golem and 7 for the Dark).
Moles

Moles are Zone 2 exclusive enemies that stay burrowed underground unless ready to attack, usually right next to the player. They chase the player and move every beat, taking a beat to dig in or out of a ground.
- Fast Tunnelling: They tunnel every beat, making them as fast as your character can move.
- Worm Sign: They leave visible dirt when they're underground.
Mushrooms & Purple Mushrooms

Mushrooms are stationary enemies found in Zone 2. They cannot move nor be moved. Every so often, they release spores on the 8 tiles surrounding them (every 4 beat for normal Mushrooms, every 3 beats for purple ones).
Skeleton Mages, Yellow Skeleton Mages & Black Skeleton Mages

Skeleton Mages are upgraded skeletons encountered in Zone 2. They move every 2 beat, but will instead bring the player closer with a wind spell if they are 1 tile out of reach. Unlike regular skeletons, they won't lose their head when their health gets low.
Tar Monsters

Tar Monsters hide in the tar pits of Zone 2. If the player gets close, they emerge out to grab and drag them to the nearest tar pit to drown them. They can't be attacked right after appearing.
Wights

Wights are upgraded Wraiths found only in Zone 2. They chase the player every beat and phase through walls to get to them. They always spawn an odd number of tiles away.
Fake Walls

Fake Walls are mimics hiding in plain sight as mundane dirt walls in Zone 2. When approached, they'll reveal themselves and chase the player cardinally every beat. They can't be hurt by normal attacks before or right after revealing themselves.
- He Was Right There All Along: They hide themselves into normal walls and the only way to notice them is to pay attention to their Mickey Mousing.
- Underground Monkey: Starting from Zone 3, there are Golden Fake Walls in the Merchant's shop who can move in diagonals.
Zone 3
Fire & Ice Slimes

Upgraded variants of Slimes only found in Zone 3, in their respective Hot/Cold biome. They move every beat, jumping around in a diamond shape. They rotate either clockwise (Ice Slime) or counterclockwise (Fire Slime). On death, they leave a patch of hot coals or ice respectively.
Fire & Ice Beetles

Beetles are shielded enemies that appear only in Zone 3, in their respective hot/cold biome. They have a shell that blocks attacks and leaves hot coals/ice in a plus shape when blocking attacks. Beetles lose their shell when right next to the player, leaving a patch of hot coals/ice underneath themselves and turning vulnerable.
Fire & Ice Elementals

Fire and Ice Elementals are slow enemies that appear in their respective hot/cold biome in Zone 3. They chase the player from afar, move every 3 beat and constantly leave a trail of hot coals/ice underneath themselves.
Hellhounds

Hellhounds are found only in the Hot biome of Zone 3. They're one of the few enemies that can move cardinally and diagonally, chasing the player every two beat. On death, they leave a patch of hot coals.
Yetis

Yetis are slow enemies found in Zone 3's cold biome. Although they can only move every 4 beats, every time they move onto a new tile they clap their hands, hurling harmful snow all around themselves. On death, they leave a patch of ice.
Goblins & Gray Goblins

Goblins are Zone 3 exclusive enemies that move every beat. They chase down the player if they moved away, but will instead flee when if the player approached them, unless they moved right next to a Goblin (which will directly attack). Although they're frail, they deal a hefty amount of damage.
- Desperation Attack: Cornering them is a really bad strategy as they will attack you with all their strength.
- Glass Cannon: Goblins go in one hit, but deal great damage when they attack (2 for Purples and 3 for Grays).
- Obfuscating Stupidity: They dance like nothing when you face them, but if you turn around, they start to attack.
Shove Monsters & Gray Shove Monsters

Encountered in Zone 3, Shove Monsters can move every beat. They do not attack players directly but instead shoves them away, taking their spot. If the player can't be pushed away because walls or other enemies are blocking them, they'll be hurt by this shove.
Skeleton Knights, Yellow Skeleton Knights & Black Skeleton Knights

Skeletons encountered in Zone 3 now ride a ghostly horse, which allows them to move every beat and fly over traps. Upon getting hurt, they lose their steed and degrade into an Armored Skeleton of the same color.
- Mounted Mook: Skeleton Knights ride atop of ghost horses giving them an advantage of moving every single beat. Taking out the horses will bring down the Skeleton Knights and reduce their mobility to only every two beats instead, with only their shields for defense.
Ghasts

Ghasts are upgraded variants of Wraiths found exclusively in Zone 3. They appear a set distance away from players and chase them every beat. They can phase through walls and will evade the first attack by teleporting right behind the player.
Coal & Ice Cauldron Mimics

Mimics that hides in plain sight as cauldrons in Zone 3, as their name imply. When approached, they will reveal themselves and chase after the player every beat. They cannot be hurt prior or right after revealing themselves. On death, they leave a patch of hot coals/ice respectively.
Zone 4
Goblin Sentries

Goblin Sentries are common enemies found in Zone 4. They flee from players, moving one tile away every beat. If they bump into a crypt dirt or cobblestone wall, they'll dig it and take a nap afterwards. This opens pathways for other enemies to chase the player.
Goblin Bombers

Exclusive to Zone 4, Goblin Bombers chase down the player, moving diagonally every 2 beat. If the player is right next to them when they move, they'll instead detonate the bomb on their back to hurt the player. If otherwise killed, they'll leave a lit bomb that'll explode shortly after.
Green Monkeys

Upgraded Monkeys encountered in Zone 4. Green Monkeys won't hold the player in place, but instead reverse their controls as long as they're attached.
Magic Monkeys

Another variant of Monkey found in Zone 4. Magic Monkeys teleport the player away randomly right after grabbing them.
Black Bats

Black Bats are a variant of Red Bats encountered solely in Zone 4. They move randomly every beat, but if they can attack the player, they always do so.
Liches, Red Liches & Black Liches

Liches are upgraded Skeleton Mages in Zone 4. They behave like mages, except their spell is different. If the player is 1 tile out of reach, they will cast a confusion spell on them, inverting their controls for 4 beats.
Apprentice Blademasters & Blademasters

Blademasters are common enemies found in Zone 4. They will effortlessly parry any normal attack thrown at them. If the player they attacked them did so right next to them, they'll jump back then lunge forward the next beat, being vulnerable to attacks on the following beat.
- Counter-Attack: Most melee attacks will cause them to take no damage, step back, and lunge on the next beat. If they land the lunge, they deal double damage.
- Weak, but Skilled: They have a measly 1/2 health, and deal only .5/1 damage, but their Counter-Attack can grant them both defensive and offensive utility.
Warlocks & Neon Warlocks

Common enemies in Zone 4, Warlock often accompany Blademasters and Liches. When killed by a player, they'll instantly swap their position with that player's, potentially teleporting them into danger.
Harpies

Harpies are swift enemies found in Zone 4. They can move every two beat either diagonally or cardinally. In the latter case, they leap up to 3 tiles away in any direction towards the player, quickly closing the gap between them. They can leap over other enemies, but not over walls.
Orange Armadillos

Upgraded Armadillos encountered exclusively in Zone 4. They can still charge cardinally, but can also charge diagonally.
Ooze Golems

A variant of Golems, found only in Zone 4. When hurt by a player, they leave a patch of ooze under them (only once if Amplified is active). Players standing on Ooze without protection are shrunk, removing their ability to attack or dig and taking double damage.
Gargoyles

Gargoyles dot the heart of the Crypt in Zone 4. They come in several variants they can be identified by their appearance:
- Inert or "Crate" Gargoyles (Small wings, no tail): Act like crates, completely harmless and can be destroyed by dealing 3 hearts of damage at once. Some look like statues of the Necrodancer instead.
- "Mimic" Gargoyles (Large wings, held close): Act like other kinds of Mimic, revealing themselves if the player comes close and chasing them every beat afterwards.
- "Wind" Gargoyles (Large wings, spread out): Casts a wind spell that pushes players away if they try to come next to them. They can't be hurt by normal means.
- "Proximity" Gargoyles (No wings, pointy tail): If a player comes next to them cardinally, the Gargoyle will trigger and explode on the next beat. They can't be hurt normally, but can be pushed around harmlessly, even right after triggering them.
- "Volatile" Gargoyles (Small wings, pointy tail): Will instantly explode if hurt. Not normally targeted by weapons.
Ghouls

A rare, souped up variant of the Wraith, found exclusively in Zone 4. Ghouls spawns a distance away from players, can move every beat, in any directions, even through walls. They will always avoid the first attack thrown at them, teleporting 90° clockwise around the player (e.g: if the player attacked them by attacking "up", the Ghoul will appear on their right) including in diagonal if necessary. As they do so, they project clones all around the player to confuse them further.
Spiders

Spiders crawl at the top of the walls on Zone 4, moving every 2 beat. If primed to move and a Player is next to them, they'll jump down on them to attack and die. If the wall under them is dug out, the spider will instead move only diagonally every beat.
Pixies

Pixies are mostly harmless enemies that appear in Zone 4. They chase down the player, moving every beat. If they come in contact with a player, they heal them back for 1 heart. If they're hurt however... they'll instantly explode.
Zone 5
Electric Zombies

Electric Zombies are Zone 5 exclusive Zombies that charge up on nodes. They spawn on conduits and follow them along, turning back if they reach a node. When charged, Electric Zombies move every beat and are impervious to normal damage, being merely knocked back. They can be hurt by electric damage from a charged attack (when standing on a conduit). If knocked off a conduit, they can be hurt normally and behave like Zombies.
Water Balls

Water Balls are fast moving enemies found in Zone 5. They can move in any direction every beat. If they reach the player, they simply leave a pit of water on their position. When killed, they also leave water behind.
Devils & Green Devils

Devils spawn in Zone 5, inside an eggshell. They can move diagonally and cardinally every 3 beats. If they're hurt, they'll be knocked back and lose their shell. They move every beat afterwards.
Orcs, Red Orcs & Purple Orcs

Orcs are quick enemies found in Zone 5. They have a shield and move every beat towards the player. Their shield protects them from frontal attacks and can't be destroyed, however Orcs need to stay in place to turn.
Green & Pink Evil Eyes

Evil Eyes are flying enemies encountered in Zone 5. They stay stationary until a player lines up cardinally with them up to 3 tiles away. If one does, they'll ready themselves and ram 3 tiles into that direction on the next beat, hurting the player if they're in the way.
Green & Gold Gorgons

Gorgons move quickly towards the player in cardinal directions. If they get to the player, they will petrify them for a moment, turning into a statue in the process. Gorgons also turn into indestructible statues as they die. Golden Gorgons instead turn into golden statues that need to be hit 3 times (regardless of damage) to be destroyed, always dropping 30 gold coins.
Purple, Red & Gold Electric Mages

Upgraded variant of Skeleton Mages found in Zone 5, Electric Mages behave indentically to them. If the player lines up cardinally with them, they'll cast a lighting orb spell towards the player, regardless of distance. The lighting orb moves in one direction every beat, can't be attacked and hurts the player as much as its corresponding Electric Mage would.
White, Yellow & Black Skulls

Skulls are a Skeleton equivalent found in Zone 5. They die in one hit, but will always spawn 3 Skeletons of the same color when they die. One Skeleton spawn on the Skull's last position while the 2 others spawn perpendicular to the attack's direction, destroying walls in the way if necessary. The Skeletons spawn ready to attack.
Cursed Wraiths

The Zone 5 variant of the Wraith. Cursed Wraiths spawn an even amount of tiles away from the player, moves cardinally every beat (without phasing through walls nor dodging attacks). If they make contact with the players, they instantly turn all that player's filled heart containers into cursed heart containers, that disappear when emptied, and remove empty heart containers.
All Zones
Chest Mimics, Locked Chest Mimics & White Chest Mimics
- Chest Monster: They look like normal chests, except they come to life and attack you if you attempt to open them.
Green Bats
- Palette Swap: Appearance-wise, they're just bats that are green.
- Underground Monkey: They're green versions of standard bats. Unlike the standard ones, they move every beat instead of every two beats, and they can move in any cardinal or diagonal direction rather than only in cardinal directions.
Shop Wall Mimics
Crate Mimics
Barrel Mimics
Shrine Mimics
Purple Slimes
Mini-Bosses

Green, Red, Blue & Earth Dragons
- An Ice Person: Blue Dragons have ice breath that will freeze you in place.
- Playing with Fire: Standing horizontally to a Red Dragon will have it shoot a fireball at you.
Minotaurs & Gray Minotaurs
- Bullfight Boss: Once they see you on the same line or column, they sprint on it until they hit a wall.
- Dumb Muscle: Like said before, once they start their sprint, they can't stop until they hit a wall and get confused for two beats.
- Lightning Bruiser: They move as fast as a player character, hit hard and have a decent life pool, nonetheless.
Nightmares & Blood Nightmares
- Hellish Horse: They take the form of horses that spread darkness wherever they roam.
Banshees & Green Banshees
- Make Some Noise: Hit them, and they'll deafen you, muting the music and forcing you to rely visually on the beat counter.
The Mommies
- Mook Maker: They spawn smaller enemies for you to deal with as they pursue you.
- Mummy: They're covered in bandages and are very slow, moving on every fourth beat.
Ogres
- Carry a Big Stick: They carry clubs that they will raise on one beat if you are a few squares away from them in a cardinal direction, followed by smashing it down on the next beat for a ton of damage.
Metrognomes & Green Metrognomes
- "Get Back Here!" Boss: They warp away to the stairs when you hit them.
Bosses
- Flunky Boss:
- King Conga has... well, a Conga line composed of zone-specific enemies you have to defeat before the king finally stands up and fights.
- In addition to the zone-specific enemies at the start of the battle, Death Metal will summon shielded Skeletons to attack you once he loses his shield.
- Deep Blues is a downplayed example considering the whole chess army is the boss, and the king waits for his army to be killed to attack. However, the Queen(s) will always attack alongside the other pieces.
- Coral Riff is a subversion on paper, but a straight example on gameplay, as his head is his weak point: while the whole orchestra is his body, he attacks you with his tentacle instruments, then will move his head and make the rest of his tentacles move once you destroy enough of them.
- While Fortissimole's skeleton audience never attacks and while he won't go for you before he sees you, he can still spawn other Mooks to attack, including when he gets his hands dirty.
- Giant Space Flea from Nowhere: Unlike the Final Bosses, they don't have any backstory, only being challenges for the player at the end of a Zone.
King Conga

A gorilla who sits on his throne and plays his bongos as he sends his Conga Line army to attack you. His song is unique in that it comes with a long pause every seven beats.
- Battle Theme Music: Konga Conga Kappa.
- Boss Warning Siren: A non-audio version, but the principle is the same. When you're about to enter King Conga's room, a display of text will appear and spell "Warning! Conga line in progress!"
- Damn You, Muscle Memory!: Learning to keep the beat all over again can be really hard, but in principle, the game plays exactly the same way as with any other default character. However, King Conga is a special case of this: whereas most characters move 7 beats and drop the 8th, Bolt moves 13 beats, drops the 14th, plays the 15th, and drops the 16th.
- Interface Screw: His song comes with a long pause every seven beats. If you're not mindful of this change and fall into the no-beat trap, King Conga will get off his throne and rush you while you're still occupied with his Conga Line army. Attacking him in this state will only send him back to the throne with no damage.
- Killer Gorilla: A giant gorilla who charges after you if you miss a beat or take out his conga line.
- King Mook: Of the Monkey enemies, even though he doesn't grope your head like they do.
- Punny Name: His name is essentially conga and King Kong combined.
Death Metal

A Grim Reaper with a love for metal music. His song comes with the fastest tempo in the game, making the battle against him very hectic and fast-paced.
- Autobots, Rock Out!: It's his signature theme, though only Danny B's and FamilyJules' (who also plays on Danny B's track) versions put emphasis on the "rock" part. The rest of the other versions are just EDM, synthwave, and chiptune remixes.
- Battle Theme Music: Metalmancy.
- Grim Reaper: Obviously.
- King Mook: Of the Skeleton enemies: like them, he only moves every two beats and holds a shield until you hit him multiple times.
- Luckily, My Shield Will Protect Me: In the first phase of his battle, Death Metal carries a shield that protects him from up-front attacks, so the only way to attack him is either from the side or from behind. If you attack the shield, bats will spawn into the arena. He will drop the shield once he loses his first three hearts.
- Playing with Fire: When Death Metal is down to his last two hearts, he'll start shooting horizontal fireballs in your direction.
- Punny Name: His name is a combination of Death itself and the style of hardcore metal music of the same name.
- Sinister Scythe: One that doubles as a microphone stand.
Deep Blues

An army of chess pieces composed of the King, Queen, Knights, Bishops, Rooks, and Pawns. The battle against them is essentially one big game of chess.
- Battle Theme Music: Knight to C-Sharp.
- Punny Name: The name is a reference to the rhythm & blues music genre, as well as the Deep Blue chess computer.
- Shielded Core Boss: Like in a real game of chess, the King is the only piece you have to kill in order to win the fight. All the other pieces are just obstacles that protect him and get in your way, and the King himself will not attack until all of the other pieces are killed. However, if you have a throwable weapon along with power-boosting equipment, or a Rifle in hand, then you can easily kill the King before the battle even starts and be done with it in a flash.
Coral Riff

An octopus that will attempt to attack you from the watery depths with his tentacles.
- Battle Theme Music: Deep Sea Bass, which is a Boss Remix of the Lobby theme.
- Making a Splash: Coral Riff's tentacles will leave behind puddles of water that will hinder your movement, and when the head starts moving, he'll move while spraying water around him and leave a trail of water behind.
- Punny Name: Coral Riff is a combination of "coral reef" and "guitar riff", and coral is often associated with polyps, which octopi are related to. In addition, Coral Riff's alternative name is Octoboss, which is a portmanteau of octopus, boss, and octobass, a type of string instrument with a really deep sound.
- Tentacled Terror: Coral Riff is an octopus with a bass guitar for a head, and all of his tentacles are playing four types of intruments: the drums, the synth keyboard, the horn, and the violin.
- Variable Mix: Taking out his tentacles will also take out the corresponding instruments playing in the BGM until all that's left is the bass guitar playing. All of the instruments will resume playing again once the head starts making his move. This is only noticeable in Danny B's BGM, though.
- Visual Pun: His head is based on a red Rickenbacker bass, a model some musicians consider to be cursed.
Fortissimole

An additional boss added in the Amplified DLC, Fortissimole is an antromorphic rapping mole who performs a concert to a horde of dancing skeletons.
- Battle Theme Music: Notorious D.I.G., a hip-hop piece rapped by the mole himself.
- Dishing Out Dirt: Being a mole, he can dig underground and attack from beneath the player character.
- Fast Tunnelling: Like the mole enemies, he tunnels every beat, making him as fast as your character.
- Greed: His lyrics state he is ravenous for gold.
- King Mook: Of the mole enemies: like them, he digs under the ground to be invincible, then jumps out of the ground to attack.
- Large Ham: He has an ego just about as big as any other well-known rapper.
- Mama's Boy: Implied in his theme song:"I will crush those who oppose me
Just like mummy told me" - Mole Men: Part of his namesake, as he is a giant version of the normal mole enemies found in Zone 2.
- Punny Name: His name is a portmanteau of "fortissimo" and "mole" and his theme name is a reference to the famous rapper The Notorious B.I.G., since he is a giant rapping mole. He is also wearing a fortress.
- Shielded Core Boss: Fortissimole is surrounded by a swarm of skeleton enemies that act as his groupies in front of his stage. He stays out of the way until some of the enemies are eliminated for him to make a beeline to the player, as his boss fight somewhat mimics the first phase of the NecroDancer battle.
- Variable Mix: Defeating Fortissimole will take out his vocals from his theme entirely, leaving behind only the instrumentals.
Final Bosses
- Flunky Boss:
- Dead Ringer can invoke Mooks every time he makes the bell toll.
- The NecroDancer will constantly summon enemies and minibosses throughout the battle.
- During the Golden Lute battle, two Mook Makers will spawn Skeletons during the battle, and when the Lute itself takes enough damage, it'll start summoning Dragons for you to fight.
- Frankesteinway also has two Mook Makers and spawns a miniboss every time you drain him a full health bar.
- The Conductor having created many instruments similar to the Lute, she can summon as much enemies as she wants.
Dead Ringer

The penultimate boss of Cadence's story, Dead Ringer is an armored foe who guards the NecroDancer's lair.
- Battle Theme Music: For Whom the Knell Tolls.
- Boss Rush: In a sense. Each of the bells you or Dead Ringer rings will spawn a miniboss for you to face: a Green Dragon, a Minotaur, a Nightmare, and an Ogre. You can avert this, however, if you lure Dead Ringer into ramming the bells, which will destroy them completely without spawning a miniboss.
- Brainwashed and Crazy: Dorian was actually put under a spell by the NecroDancer. As the Dead Ringer, he didn't recognize his own daughter until Cadence tricked him into charging into a gong and breaking his helmet, thus breaking the spell.
- Bullfight Boss: Without the Dagger of Phasing, you can only hurt him by tricking him into crashing into the gong.
- Evil Laugh: Breaks into one at the beginning of the fight.
- Flash Step: Once all the bells have been rung, Dead Ringer's charge attack will be upgraded into this and he will zoom across the room at great speeds. You only have a single beat to react in time and move out of the way to avoid the attack.
- For Doom the Bell Tolls: It's the entire theme of his fight, both in a figurative sense (the music) and a literal sense (actual bells placed around the room which he rings to spawn minibosses).
- Luke, I Am Your Father: When Cadence defeats him, the bell helmet hiding Dead Ringer's face breaks and reveals that he's actually Dorian, Cadence's father.Cadence: "Dad?"
Dorian: "Cadence, I'm sorry. I was under his spell." - Nigh-Invulnerability: Dead Ringer is invincible to all kinds of weapons, including bombs and spells, and can only be harmed by tricking him into ramming the gong. Only the Dagger of Phasing (or dealing 10 or more damage at once) is capable of piercing through his armor and damaging him directly.
- When All You Have Is a Hammer…: Although Dead Ringer looks invincible from any normal damage, it is also possible to damage him with high enough (10 or more) damage in a single hit.
The NecroDancer

The titular primary antagonist of the game, and the Final Boss of Cadence's story. The NecroDancer is a mysterious figure who amasses an undead army and casts a musical curse on those who are unfortunate enough to enter his crypt and seek out his treasure; the Golden Lute.
- Action Bomb: One of his attacks has him generate a blast wave on where he's standing and then teleport to another point of the room. The blast covers more spaces than your standard bombs and it instantly kills any enemy caught in it, even minibosses.
- Back from the Dead: He's been dead at least twice over the course of the story. The first time he died was when he became so addicted to playing the Golden Lute that he simply perished from a severe lack of sleep. He is then revived by Aria a century later, who wanted to ask for his assistance in destroying the Lute, and he attacked Aria while her guard was down. He dies again when he's killed by the combined efforts of Cadence and Dorian, and later, Melody revives him in order to get answers. By the end of Melody's story, Aria, who's been brought back to life, grabs the NecroDancer and throws him down a pit, which seems to be his more permanent death this time around.
- Battle Theme Music: Momentum Mori and Last Dance.
- Big Bad: He is the main enemy of Cadence's entire family, because he has meddled in their business in one way or another. Be it stealing Cadence's heart, brainwashing Dorian to be his servant, backstabbing Aria when she asked for his assistance to destroy the Lute, or attacking Melody to take the Lute back for himself, he's an all-around bad guy.
- Final Boss: Of Cadence's story and Melody's story as well.
- An Ice Person: He can generate ice blasts to immobilize you for a couple of beats and leave you vulnerable to his mooks.
- Karmic Death: The NecroDancer meets his final demise by the hands of Aria, the person he killed many years ago, when he attacked her to take the Golden Lute back.
- Magic Music: His curse affects the entire crypt and makes everyone in it, including his own mooks, move to the beat of the music. Only the Bard is unaffected by his curse, but that's because he is the NecroDancer before he found the Golden Lute.
- Mook Maker: As the user of the Golden Lute, he can create as many enemies as he wants and even reanimate them.
- Nigh-Invulnerability: The NecroDancer is invincible to all attacks, even the Dagger of Phasing. He can only be harmed with the Golden Lute, which becomes available once you've brought him down from his stage. In Melody's story, when the NecroDancer is down to his last heart, he'll protect himself with a special shield that makes him invulnerable to even the Lute, and the only way to finish him off is to push him towards a lava pit.
- Punny Name: An obvious portmanteau of "necromancer" and "dancer".
- Puzzle Boss: The first phase of his fight has you maneuver Cadence and Dorian to press switches in order to bring the NecroDancer down from his stage. Two of the switches must be activated simultaneously by both characters.
- Throw Down the Bomblet: In Melody's story, the NecroDancer resorts to throwing bombs in her direction instead of using his own attacks. Possibly justified since he no longer has the Golden Lute, which is the primary source of his powers.
- Time-Limit Boss: Melody's version of the battle is timed, with the beat getting faster and the walls of the room closing in on each other over time. If you don't defeat the NecroDancer before the song ends, the walls will crush Melody and kill her instantly.
The Golden Lute

As Aria attempts to destroy the Golden Lute, it suddenly comes to life to defend itself!
- Attack Its Weak Point: The Golden Lute's weak point is its head, and attacking it does one heart of damage to it regardless if you've already picked up some power-boosting equipment earlier. And every time you attack its head, the Lute will become confused and it'll start moving more erratically. If you manage to attack its head again while it's confused using a special trick, then you'll do three hearts of damage to the Lute.
- Artifact of Doom: This instrument is behind the game's entire plot.
- Autobots, Rock Out!: Its default theme is a metal track, as well as Family Jules' cover. The only exception* is RoboRob's EDM remix for OverClocked ReMix.
- Battle Theme Music: Absolutetion, which is a Boss Remix of Zone 1-1's theme.
- The Corruption: Those who play the Lute end up having their humanity drained away from them. The NecroDancer was an unfortunate victim of this.
- Greater-Scope Villain: Alongside Cadence's family risking their lives to find it, it also led to Octavian's corruption, making it indirectly responsible for his actions as the NecroDancer.
- Interface Screw: When the Lute takes enough damage, it'll cast an area-wide confusion spell which will temporarily reverse your controls for twelve beats, much like a confusion trap and a Lich's spell.
- Interface Spoiler: When you beat Cadence's story, a small hint of the boss' existence comes in the Dancing Mook Credits where it is shown as a black silhouette with its name displayed as only question marks. It's only when you beat Aria's story that it'll show up as a fully-revealed boss.
- Our Dragons Are Different: The Lute takes on the form of a golden-yellow dragon with a snake-like figure and insectoid forelimbs, attacking Aria when she was about to destroy it.
- Playing with Fire: If you're horizontal from the Lute's head, it'll shoot a fireball at you. In addition, there are statues placed on top of the walls that will periodically shoot fireballs one-by-one, starting from your side of the room. When the Lute takes enough damage, it'll make the statues go berserk with a barrage of fireballs each beat.
- Punny Name:
- The Lute itself is a reference to "Gold and Loot", the typical rewards that adventurers seek in dungeons.
- Its Battle Theme Music's name is "Absolutetion", and FamilyJules' remix is called "Resolute".
- The Reveal: You find out that the Golden Lute is not as good as the cast thought it was in Melody's story, but the reveal that the Lute is actually a living entity not only surprises Aria, but it also surprises the boss announcer, who goes on and says "The Golden Lute?" when the battle starts.
- Unholy Holy Sword: The Golden Lute contains special powers of curing diseases and reviving the dead, which sounds like a miracle on paper, but the truth is that those powers come with a price essentially equivalent to making a deal with the devil... as Melody and likely Aria found out the hard way. In exchange for the "miracles", the Lute wants its user to keep playing it until it saps every last piece of humanity out of them, which is exactly what happened with Octavian — aka the NecroDancer.
- Walking Spoiler: While the cutscenes refer it many times, its mysteries made it necessary to put a "spoilers unmarked" alert.
Frankensteinway

The next-to-final boss in Nocturna's story.
- An Arm and a Leg: Gradually loses both of its arms as it takes damage.
- Damage-Sponge Boss: Frankensteinway has ten hearts, which is one more than even Death Metal and the Shopkeeper. However, what puts it into this territory is that it has four phases with ten hearts each, totalling out at a whopping 40 hearts to deal with.
- Dash Attack: In the final phase, Frankensteinway will dash across the room, destroying anything in its way. The move is telegraphed by the floor tiles turning yellow a few beats before the attack.
- Deflector Shields: Gains a shield after each phase, which must be deactivated.
- The Dragon: Needs to be defeated before you can fight The Conductor.
- Frankenstein's Monster: It's in its name.
- Punny Name: Frankenstein and Steinway, a piano manufacturer. Fittingly enough, it's a Frankenstein's Monster with a piano for a body.
- Shock and Awe: Frankensteinway electrifies the floor tiles in a coordinated pattern, and later sends shockwaves coming down from the north side of the room.
The Conductor

The final boss in Nocturna's story. She is responsible for creating the Crypt, and attempts to replicate the Golden Lute.
- Curtains Match the Windows: Shining gold hair and shining gold eyes. They match the Golden Lute, as well as her electricity.
- Cyborg: Her hand is an electrical plug, and her lower body is a mass of wires. It's difficult to tell where the wires begin, though, as she can clearly be seen to have two separate pant legs in her cutscenes, each with a bundle of wires coming out.
- Greater-Scope Villain: She is responsible for the creation of the Crypt, and by extension, the entire story involving the NecroDancer and Cadence's family.
- Mad Scientist: Nocturna refers to her as such. Demonstrated with her attempts to replicate the Golden Lute.
- Mook Maker: REANIMATE! She constantly summons enemies during her battle. You need to attack these enemies to drain the batteries in the second phase of her fight.
- Ominous Pipe Organ: Downplayed in her battle music, which does include an organ, but not prominently. Played straight with her arena, which includes organ pipes in its decoration.
- Punny Name: "The Conductor" can refer to both somebody who leads an orchestra, and to a substance that conducts electricity, reflecting how she wishes to use music and electricity to reanimate the dead.
- Puzzle Boss: The first phase requires you to destroy four golden instruments by walking along their wires to disable their shields. The second phase requires you to destroy batteries by attacking enemies while standing on their wires, draining their power with each attack.
- Shock and Awe
- Supernatural Gold Eyes/Glowing Eyes of Doom
- Tactical Suicide Boss: She would be invincible if she didn't create enemies that could drain her electricity when attacked.
- Weaksauce Weakness: Her batteries are especially weak to water. If you kill a Water Ball enemy on top of an electric wire, the corresponding battery will be destroyed instantly.
Other Characters
Freddie Merchantry, the Singing Shopkeeper

A merchant who's brave enough to set up shop in the crypt and graces the player with his glorious singing. He usually sells three random items to Cadence and two for the other characters. He's an otherwise nice guy, but should you attack him first...
- Beware the Nice Ones: The shopkeeper is one of the friendliest shopkeepers in the roguelike genre. You can shoplift and destroy his store and he won't even be fazed. However, if you attack him directly (with a fireball spell or a bomb), he'll quickly turn from your best friend to the toughest enemy in the game, with nine hearts of health, diagonal movement, being able to move every beat, and having attack power that would make even bosses weep. Killing him grants you the powerful Crown of Greed (doubles gold dropped from all sources, at the price of losing gold every beat), but because there's only one shopkeeper in the dungeon, you lose access to all shops for the rest of the run.
- Big Fun: The Shopkeeper doesn't seem to mind if his shop becomes overrun by enemies just as long as he keeps singing with the music and enjoying it.
- Creator Cameo: In Amplified, there's an option to give the Shopkeeper a skin of YouTuber Nicolas Daoust, who provides his own real vocals over the Shopkeeper's synthetic vocals.
- Lightning Bruiser: Once provoked, he'll pursue you and move every single beat, even diagonally. He has high health and high attack, so if you're not careful, he'll put your lights out just like that. Attacking him directly isn't an option unless he's down to his last heart because he doesn't teleport like other bosses and will hit you if you do so.
- Punny Name: "Freddie Merchantry'', and his ghost's name is "Phantom of the Shopera."
- Superboss: In a sense. Attacking the Shopkeeper with a bomb or fire spell will cause him to start charging after you. He has nine hearts of health and absurdly high attack power, but managing to kill him will reward you with the Crown of Greed, which doubles your gold drops and is needed for high score runs.
Hidden Shopkeepers
- Color-Coded for Your Convenience: The Blood, Glass, and Health Shopkeepers look identical to the original Shopkeeper, but aside from the fact that they can't sing, they're also distinguished by different colors so you can easily tell them apart. The Blood Shopkeeper is red, the Glass Shopkeeper is green, and the Health Shopkeeper is blue.
- Helpful Mook: The Shriner looks like an armadillo enemy but with a cart strapped onto it.
- Video Game Cruelty Potential: You also have the option to kill those shopkeepers and take their belongings much like the original Shopkeeper.
- Video Game Cruelty Punishment: With the exception of the Conjurer, all the other shopkeepers will put up some form of resistance when you attack them with a bomb or fire spell. The Blood Shopkeeper, Glass Shopkeeper, and the Transmogrifier will act in a similar way to the original shopkeeper and start charging after you, the Pawnbroker will fill the room with tar to hinder your movement as he attacks, and the Health Shopkeeper and the Shriner will leave behind traps for you to deal with when you kill them. The former will drop two bombs around you that will explode in one beat, and the latter will have you deal with three Dragons.