Main Characters (Sekiro / Wolf) | Secondary Characters | Enemies and Bosses | Manga Characters
Warning: unmarked spoilers ahead.
Ashina Clan

''Ashigaru''![]() dedicated to serving their homeland, these warriors make up the bulk of the Ashina clan's forces. Mostly found patrolling the Ashina stronghold, their sheer numbers make them a threat despite their individual frailty.
dedicated to serving their homeland, these warriors make up the bulk of the Ashina clan's forces. Mostly found patrolling the Ashina stronghold, their sheer numbers make them a threat despite their individual frailty.
- Alas, Poor Villain: Many soldiers lay around during the Interior Ministry's final assault on Ashina Castle either dead, gravely wounded, or breaking down in complete emotional defeat. It's quite a sorry sight to see.
- Bottomless Magazines: Averted for the musketmen; they can only fire their guns once before having to reload.
- Elite Mook: The swordsmen wearing conical jingasa helmets assume ''hassou'' stances
 and are marginally tougher than the other ashigaru.
 - Gameplay and Story Integration: Players are told throughout the game that the Ashina military doesn't stand a chance against the armies of the Interior Ministry. When the invasion finally arrives in the last act of the game, they get decimated by their far more disciplined and better-equipped foes.
- The Goomba: The first, most basic enemy you'll face. The ones without hats won't even try to deflect your attacks, instead flailing their swords wildly.
- Long-Range Fighter: Matchlock soldiers like to take potshots at Wolf from afar, often perched on watchtowers and other vantage points. However, they have the worst health and posture out of all the ashigaru, and don't last very long once you manage to close in for the kill.
- Martial Arts Headband: The spear-wielding ones wear a white headband.
- Mooks: They represent the most common and weak type of foes found in the game, as Wolf will be spending a lot of time roaming the Ashina stronghold from beginning to end. But of course, FromSoft being FromSoft, they are no mere Goombas, capable of quickly decimating unprepared players.
- Pistol-Whipping: Matchlock ashigaru do not have any melee weapons, but will attempt to hit Wolf with the stock of their gun if he gets too close.
- Punch-Clock Villain: Eavesdropping in on their conversations show that these soldiers are just ordinary men who are suffering from the ongoing war in Ashina like anyone else, clearly aware of their lack of manpower and need for drastic measures to close the gap.
- Screw This, I'm Outta Here: During both invasions of Ashina by the Interior Ministry, a few ashigaru can be seen running away or cowering in a corner.
- Banging Pots and Pans: If one spots you, he'll start banging on his gong to alert everyone else around him.
- Evil Minions: While not particularly "evil", they fit the bill in that they are clearly not intended to fight; they only attack if Wolf absolutely insists on standing right next to them, and even then, their only means of self-defense is to weakly swing and poke their stick around.
- Goomba Stomp: They are always vulnerable to a jumping Deathblow, even if they are aware of you.
- Palette Swap: Once the Interior Ministry invades Ashina Castle, a Sentry wearing the colors of the Ministry's Red Guard can be found keeping watch around Shigekichi's location.
- Patrolling Mook: Their actual mobility is nearly nonexistent, but they fill the role in terms of being living alarm systems.

- Bandage Mummy: To a certain extent; their limbs are almost completely wrapped up in bandages.
- Bodyguarding a Badass: In addition to the shinobi littering the rooftops, three are stationed at the concealed corridor leading upstairs to Isshin Ashina's watchtower.
- Combat Parkour: As shinobi, the Nightjars are some of the few enemies agile enough to perform evasive maneuvers and even pursue Wolf across the roofs of Ashina Castle.
- Double Weapon: Nightjar kama are bladed on both ends, with the "front" blade being bigger than the "back" one.
- Dual Wielding: The shuriken-using Nightjars wield two of them at once.
- Dynamic Entry: When you suddenly hear an increasingly loud "WoooooOOOOOOH!", beware. That's the sound of a Nightjar a second away from dive-bombing the living hell out of you, dealing heavy damage upon impact.
- Enemy Civil War: During the final invasion of Ashina, the Black-Feathered Nightjars can be seen fighting their now red-eyed brethren who have gone mad with rage after presumably consuming Rejuvenating Sediment.
- Flaming Sword: The Nightjars wearing black cloaks can use gunpowder to light their kama on fire, inflicting the "Burn" status effect.
- Flechette Storm: If Wolf is standing too far away from them, the shuriken-wielding Nightjars will fling their weapons at curved trajectories. And given that they are often stationed in groups, expect a lot of shuriken to come your way.
- Fragile Speedster: Fast on their feet and capable of dishing out attacks in rapid succession, but their vitality and posture leave them at odds in a one-on-one fight.
- The Guards Must Be Crazy:
- Averted; these foes have very good perceptive vision, easily detecting Wolf from several rooftops away and sniping him with shuriken if they don't chase him down. It is recommended to eat a Gachiin's Sugar to reduce the hassle of facing multiple Nightjars at once.
- Played straight during the first Ministry assault, where you can discover that most of the Nightjar garrison has been lured to the wrong part of the castle (past the Old Grave idol, around where the broken bridge is). You even can eavesdrop on a dwarf assassin who gloats about how easy it was to make the Nightjars take the bait.
- Kite Riding: Some of the Nightjars ride great kites anchored to the roof of Ashina Castle, where they can easily spot Wolf and drop crashing into him.
- Mask Power: They wear tengu masks and are among the most skilled warriors on the side of the Ashina Clan.
- Meaningful Name: Real Life nightjars are a species of nocturnal birds; these shinobi cover themselves with cloaks made of feathers while wearing a beaked mask.
- Praetorian Guard: Unlike their brethren, the three Nightjars that guard Isshin's watchtower wear grey masks and are covered in white feathers, implying they are a specific unit dedicated to his protection.
- Sinister Scythe: Some Nightjars wield a double-bladed kama.
- Stock Ninja Weaponry: Some Nightjar ninjas wield giant shuriken that fall just shy of being Fuuma Shuriken, using them for both melee and ranged attacks; when throwing their shuriken, they can even curve the trajectories to hit Wolf from behind cover.
- Suicide Attack: When alerted, the Nightjar guarding the entrance to the Upper Tower's Antechamber will light the bombs strapped to him and charge right at Wolf. Some of the Nightjars lured away from the castle during the first Ministry invasion will exhibit this behavior too.
- Weapon Twirling: The kama-wielders have a particular fondness for spinning their weapons at ludicrously high speeds, which allows them to quickly do a lot of damage to Wolf, but also leaves their Posture vulnerable to deflection spamming.

Skilled samurai swordsmen patrolling the inside of Ashina Castle.
- Elite Mook: A definite cut above the Ashina ashigaru. Fighting one requires full attention; dealing with two is just asking to waste a Resurrection Point.
- Glass Cannon: They don't wear any armor and are not especially large, leading to them having a modest Vitality pool, and they hardly dodge. However, since they are all Master Swordsmen, they are highly skilled at deflecting sword strikes, require careful attention to break their guard, and will absolutely wreck Wolf with only a few well-placed hits.
- Martial Arts Headband: The elderly variant wears a white hachi-gane with a metal plate protecting his forehead.
- Master Swordsman: They are skilled in the Ashina sword style. Their quick and highly damaging slashes and thrusts can pose a great problem to Wolf, especially as he's fighting them indoors where he has little space to maneuver around.
- Old Soldier: A few of the Fencers have become quite gray-haired and thus lack their younger counterparts' ability to quickly restore Posture, but in exchange have an expanded moveset thanks to their superior swordsmanship.
- Rare Random Drop: They're notable for being the only enemy that drops Divine Confetti. The drop rate is quite low, but this is partially alleviated by the availability of easy ways to raise drop rates and the fact that there's a number of them near the Ashina Castle's Upper Tower - Antechamber Idol that can be easily stealth-killed.

Old nuns that wander the main tower of Ashina Castle.
- Evil Minions: It's a stretch to call them anything close to "evil", but they fit the bill in terms of being loyal subjects of the main antagonist who nonetheless are completely incapable of fighting back.
- Palette Swap: Among the residents of the Sunken Valley gun fort is a single elderly clanswoman who has the exact same behaviors as the Old Maids, even if she's a Bandage Mummy who's dressed in rags and wearing a straw hat and coat.
- Patrolling Mook: While they don't seem to be actively keeping an eye out for intruders, their audible panic upon spotting Wolf will alert any nearby enemies to his presence. Compared to the Sentries, they're more mobile and a lot quicker to raise the alarm but are even more defenseless.
- Unique Enemy: There are only two of them in the entire game, with both appearing only on a single floor in the Upper Tower.
- Video Game Cruelty Potential: Their only reaction upon seeing Wolf is to scream and then cower away whimpering, but even if you've already killed all the other enemies in the vicinity, there's nothing stopping you from ruthlessly murdering them anyways. In fact, if you've unlocked at least one of the "Breath of Life" latent skills, you'll recover Vitality by Deathblowing them just like any other enemy.

A samurai encountered in the prologue that guards the path to Ashina Castle and is thus blocking the way towards the secret passage Wolf and Kuro plan to use.
- Badass Family: Is implied to be related to Tenzen Yamauchi and Shikibu Toshikatsu Yamauchi.
- BFS: Like the samurai generals, he wields a massive odachi.
- Degraded Boss: A non-boss samurai who looks just like him appears on the Ashina Castle bridge leading to the Great Serpent Shrine, conversing with an ashigaru about their dwindling salt supplies. That said, this lookalike is significantly stronger despite only having one Deathblow marker, as he utilizes the much deadlier moveset of the Samurai Generals.
- Mini-Boss: Shigenori is the first non-mook enemy that Wolf will fight, although he is still very easy compared to the standards of later mini-bosses.
- Warm-Up Boss: As he is fought during the tutorial level, he's mostly here to present how mini-bosses need to be fought through deflecting their attacks rather than just damaging them. As a result, he is laughably simple to defeat.
The main commanders of the Ashina military, each general is a master swordsman covered in thick armor and wielding a massive odachi. Three of them are encountered as mini-bosses; General Naomori Kawarada guards the furthest most gate of the Ashina Outskirts, General Tenzen Yamauchi is stationed in the courtyard right before the broken bridge leading to Ashina Castle, and General Kuranosuke Matsumoto guards the front entrance of Ashina Castle's Upper Tower.
- Badass Normal: Just ordinary men with no special abilities who are nonetheless some of Ashina's toughest warriors. Naomori, in particular, tends to be the first big wall for many new players.
- Badass Family: Tenzen is implied to be related to Shigenori Yamauchi and Shikibu Toshikatsu Yamauchi.
- BFS: They each wield an odachi nearly the same length as the height of their body.
- Cool Helmet: Their helmets are adorned with bull-like horns.
- Cool Mask: They all wear a typical menpō.
- Degraded Boss: Samurai Elite Mooks who look just like Naomori and have the expanded moveset of Tenzen/Kuranosuke start showing up to help defend Ashina Castle once the Interior Ministry relaunch their attack; one can be found during the initial infiltration being ambushed by a Long Shadow on the bridge leading to the Great Serpent Shrine, while three appear during the Ministry's final assault (one near the base of the main stairway dueling a Red Guard commander, one in the front alleyways dueling a flamethrower-wielding Red Guard, and one more in the Ashina Reservoir accompanying Shume Masaji Oniwa).
- Flunky Boss:
- Tenzen is surrounded by a handful of soldiers, who will lend him assistance and gang up on Wolf if he doesn't dispatch them first.
- Kuranosuke is accompanied by four matchlock-wielding ashigaru, who represent a significant danger should Wolf not take them out first.
- Grapple Move: Their grab attack is them lifting Wolf by his face high into the air before slamming him hard into the ground.
- Mini-Boss: All three of the named generals can be skipped, though the player will get some benefits for beating them.
- Palette Swap: Tenzen and Kuranosuke get snazzy red jinbaori and a few extra combat moves, but are otherwise identical to Naomori and the generic generals.
- Recurring Boss: The most reused boss type, even without counting the Degraded Boss versions.
- Rousing Speech: Kuranosuke is unique among the generals in that he's characterized a bit, as he can be found giving some of his men a speech to raise their spirits for the coming battle.Kuranosuke Matsumoto: I'm sure you are all aware already. This coming battle will determine the fate of all Ashina. We go now to risk our lives for Lord Isshin and for the people of Ashina. We are Ashina... we are unbreakable!All: Yaaargh! For Ashina!
- Wake-Up Call Boss: Naomori is the first major enemy in the game with more than one Deathblow Marker, a lengthy Posture bar, and Perilous Attacks, meaning that for many players, his fight is their first major indication that they'll need to do more than just mindlessly hack and slash to achieve victory. He also secretly teaches the players that art of performing stealth Deathblows with his positioning to effectively halve the work you need to do for minibosses.

Humongous monster-like men, characterized by their great size, savage appearance and demeanor, as well as their red eyes. Found bound in chains, they will free themselves at the sight of the player and begin to attack.
- Ambiguously Human: His name suggests he is literally an oni or Half-Human Hybrids thereof. However, the Second Prayer Necklace calls him a man and seems to imply "ogre" is just a figure of speech applied because of his tremendous size. His red eyes and aversion to fire indicate that he's likely the result of one of Doujun's immoral experiment, with the original Japanese text noting that he was originally imprisoned in the Abandoned Dungeon. His blonde hair and pinkish skin (called out in the Second Prayer Necklace description as unusual) may also indicate he was a European.
- Degraded Boss: A third Ogre is seen near the tail-end of the game at Ashina Outskirts with Ministry troops, but it isn't considered a boss, as it only requires one Deathblow to kill.
- Easy Level Trick: It's actually possible to pull a stealth Deathblow on the first two Ogres; simply get the hell out of dodge until you lose aggro on them and then sneak up on them. Additionally, the first Ogre can be cheesed by simply standing up on the wall where the two ashigaru talk about how the Ogre is weak to fire.
- Kill It with Fire: Eavesdropping on the soldiers stationed away from the Ogre reveals the creature is vulnerable to fire.
- Mini-Boss: The two Ashina-controlled Chained Ogres require the typical two Deathblows to defeat. In particular, the one chained up in Ashina Outskirts is one of the first mini-bosses which must be defeated in order to progress through the game, but the player isn't forced to commit to the fight like a full-on Boss Fight. For its part, the Ogre who appears on the ground floor of Ashina Castle after the Interior Ministry's first assault is fully optional, as players are free to run past it even if it's been aggro'd.
- New Skill as Reward: Defeating both Chained Ogre mini-bosses will reward Wolf with the passive skills Shinobi Medicine Rank 1 and 3, increasing the effectiveness of his healing items.
- Red Eyes, Take Warning: Its eyes glow red, which, as an eavesdrop near the first Ogre hints, indicates it's Weak to Fire.
- Wake-Up Call Boss: Unless players have acquired the Shinobi Firecrackers or Flame Vent for the Shinobi Prosthetic, it's better to have learned the fundamentals of deflecting and how to appropriately dodge Perilous Attacks; those uncomfortable with those mechanics will be met with the Ogre more than happy to break the guard of, toss, and dropkick players to their death. This particularly comes into play against the second Ogre, since the room it's in doesn't have much elbow room.
- Wrestler in All of Us: One of the Ogre's attacks is an unblockable Grapple Move leading into a powerbomb. It may also perform a missile drop kick and the occasional elbow drop.
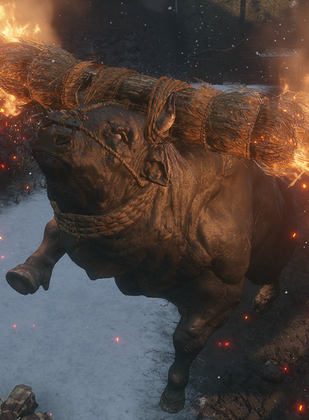
A great bull with a burning bundle of hay tied to his head. When Wolf approaches the heart of Ashina Castle, the guards decide to sic the poor beast on him.
- Achilles' Heel: The beast's thick hide protects it so Wolf can only deal Scratch Damage unless he attacks its head directly. Of course, doing so is a risky maneuver since it always attacks using its head, so the player must be careful to avoid overextending and ready to guard themselves at a moment's notice when it starts attacking again.
- Like all animals, it's easily startled by Shinobi Firecrackers, which cause him to rear and lets Wolf get a few free hits in.
- Animals Not to Scale: This bull is huge, easily rivaling the size of a small elephant.
- The Berserker: When he gets going, he doesn't distinguish between friend or foe, charging whatever he can find. Any soldiers still in its arena when it breaks out don't tend to last long into the battle.
- Blocking Stops All Damage: Despite being a Lightning Bruiser that can build up the Burn status with his rapid and hard-hitting charges, he can never actually perform a "Perilous Attack", meaning Wolf can choose to simply stand his ground and block everything the bull throws at him.
- Bullfight Boss: With the additional caveat that he almost never actually stops charging. Deconstructed somewhat because the bull can accidentally knock himself out by blindly charging in a wall.
- Dynamic Entry: He bursts out of his pen with so much force it virtually explodes, trampling the unfortunate soldiers guarding it.
- Man on Fire: Someone took a huge bull, attached a huge bundle of hay to his head, and lit both ends on fire to make him panic and trample anything in his path.
- New Skill as Reward: Putting this bull out of his misery will earn you the latent skill Shinobi Medicine Rank 2, which stacks with other passive skills to make your medicinal items more effective.
- Non-Malicious Monster: The only reason why the bull is so aggressive is because he's panicking from the flaming hay bundle tied to his head.
- Shout-Out: To the Jidaigeki film 13 Assassins, which had an entire herd of stampeding bulls caught in a similar fiery predicament.
- Wreaking Havok: The wooden structures in his arena will be smashed to pieces by his rampage.
Only Ashina's best and most loyal samurai are awarded the lance. However, though the Seven were pivotal in Isshin's coup, only a few of them remain by the start of the game; Shikibu Toshikatsu Yamauchi guards the Moon-view Tower after Kuro is recaptured by Genichiro, while Shume Masaji Oniwa appears in Ashina Reservoir during the Interior Ministry's final assault, loyally awaiting Genichiro's return.
- Artificial Stupidity: Toshikatsu can be cheesed by exploiting this. He's fought in front of the same building where you had to sneak around back to find Kuro in the tutorial. If you head back there again, he will follow you down to the lower level and can't climb back out. From there, jump attack him from above, grapple back out before he can counterattack, rinse and repeat.
- Asskicking Leads to Leadership: "Shikibu" and "Shume" are actually high-ranking court titles (roughly "Minister of Ceremonial Affairs" and "Administrator of the Stables" respectively) that Toshikatsu Yamauchi and Masaji Oniwa received for their prowess in battle.
- Badass Family: Toshikatsu is presumably related to Tenzen Yamauchi and Shigenori Yamauchi. The same applies to Masaji, whose shared surname with Gyoubu Masataka Oniwa also implies they're related in some regard.
- Badass Normal: Despite being mortal men with no supernatural abilities, their sheer skill makes them among the greatest warriors found in Ashina.
- BFS: A big freakin' spear, in this case. Their weapons are more than twice as long as they are tall (and neither of them are short men, to begin with), and yet they wield them with expert finesse.
- Cool Helmet: They wear a helmet with a distinct ring-shaped crest◊ that marks them as members of the Seven Ashina Spears.
- Cool Mask: They wear a light golden menpō.
- Dual Boss: Masaji is accompanied by an armored samurai general, making an arduous fight even more difficult, unless one uses stealth to backstab said samurai (especially if one then opts to use the Puppeteer technique in order to force Masaji to be on the receiving end of a 2v1). Another workaround is to lure them to a nearby ashigaru sitting down, backstab the ashigaru and use Bloodsmoke ninjutsu, then backstab the samurai while he's blinded.
- Easy Level Trick: If you jump-kick them when they're beginning to execute a Perilous attack, they will continue to attempt it until they can follow the whole thing through. This makes it possible to completely deplete their Posture with a "juggle" of repeatedly jump-kicking them in the face and slashing them while still in the air.
- Last of His Kind: By the time you run into him, Masaji is implied to be the last of the Seven Spears.
- Leitmotif: Both Toshikatsu and Masaji share a unique variation of the "Strength and Discipline" theme that plays whenever a miniboss is fought, and they are the only ones who possess this distinction.
- Mighty Glacier: Their attacks may all have rather lengthy wind-ups, but these spearmen hit like a truck and it will usually take quite a few blows to make any real dent in their health.
- Mini-Boss: They both have two lives instead of just one.
- No-Sell: Downplayed. Most enemies will leave themselves wide open to a counter-attack if their thrust is Mikiri Countered, but if you use the Counter against one of the Seven Ashina Spears, he'll just push you away and follow up with his own counterattack. If you deflect that counterattack, however, he'll be knocked off-balance and allow you to get in some free hits.
- One-Man Army: Masaji is implied to have single-handedly slaughtered dozens of Red Guard soldiers. Alert him to your presence and he'll show you exactly how.
- Rule of Seven: An elite unit known as the Seven Ashina Spears, whose spears were gifts from Isshin Ashina himself. You only fight two (possibly three if Masataka is also a member) during the game, as it's implied by the Final Prayer Necklace that the rest have already fallen in battle, likely during the Ministry's previous assaults.
- Wake-Up Call Boss: Unlike Shinobi Hunter Enshin, don't expect these guys to go down easily just because you have the Mikiri Counter.
- Weapon Twirling: One of their more devastating sweep attacks is telegraphed by them twirling their spear over their head several times.

Samurai swordmasters whose advanced age belies their terrifying skill, though only two are encountered in the entire game. Jinsuke Saze can be found resting in the dojo inside Ashina Castle's Upper Tower, waiting to duel any intruder. Ujinari Mizuo will appear sitting beneath Isshin's room during the Interior Ministry's final assault; picking a fight with him will reveal that he has become red-eyed.
- Achilles' Heel: Setting Ujinari Mizuo on fire will cause him to cower, due to a quirk of having red eyes, allowing you to get several free hits on him. In fact, even just spinning the Suzaku's Lotus Umbrella will create enough flames to trigger his fear response.
- Death or Glory Attack: What their quickdraw attacks amount to. Getting struck by them just a few times will chew through your health in seconds, but successfully deflecting them even a couple of times will likewise eat through the elites' posture just as quickly.
- Easy Level Trick: Several. They take a lot of damage from the upgraded Loaded Spear. Hit them with it, dodge back to avoid their attack, repeat until dead. They're also among the few bosses the Sabimaru works on. For those who just can't seem to get the deflect timings down, the Loaded Umbrella's parry window when unsheathing is large enough to deflect both of their iaijutsu slashes simultaneously.
- Specific to Mizuo, the Great Feather Mist Raven can allow the player to avoid his attacks by teleporting behind him while leaving behind feathers that catch aflame, setting him on fire, which terrifies him and opens a window for easy attacking. His AI can also be exploited to get a free deathblow by aggroing him and then running away and hiding until he deaggros, at which point he can be snuck up on to get a stealth deathblow.
- If you're careful, Mizuo's fight can be trivialized almost entirely by luring the Lone Shadows inside the castle to his area and getting them to aggro him. They'll overwhelm him with sheer numbers and all Wolf has to do is hang back until his posture is broken, then run in to deathblow him and repeat the process once more.
- Fragile Speedster: Their attacking speed is very fast, able to kill a player the instant they revive if they are not prepared, but they cannot take a lot of damage either, which makes sense as they only wear plain kimonos.
- Glass Cannon: Their iaijutsu strikes deal a huge amount of damage, but they also easily take a lot of damage compared to other minibosses. Justified since they only wear kimonos. Their Posture bar also fills up very quickly if their attacks are deflected.
- Iaijutsu Practitioner: Jinsuke Saze and Ujinari Mizuo are somewhat unique in that they tend to keep their swords sheathed until they can perform quick and devastating slashes, re-sheathing and taking the drawing pose again when they're done in little more than a blink of the eye. However, their scabbard will flash the moment before they draw their sword, allowing the player to get ready to dodge or deflect.
- King Mook: They dress similarly to the Fencers, but are much more advanced in terms of combat technique; while the Fencers use basic versions of the Ashina technique focused on powerful overhand strikes, the Elites use the master version that favors the two-stroke diagonal cross-cut Iaijutsu maneuver.
- Master Swordsman: In terms of pure technique, they are the greatest swordsmen in Ashina outside of Isshin himself.
- Mini-Boss: Require the requisite two Deathblows to kill, but are completely optional, though killing Jinsuke will open up the safest path to Genichiro's location.
- New Skill as Reward: The wall scroll in Jinsuke's room can be examined after the fight to learn Lightning Reversal.
- Old Soldier: They are aging men wearing no armor, but their sheer skill with the sword is great enough to pose a threat to Wolf.
- Red Eyes, Take Warning: Ujinari Mizuo has red eyes, which makes him more powerful than Jinsuke due to a power boost, but also incredibly vulnerable to fire.


An Ashina Samurai on horseback guarding the gates leading into Ashina Castle. Previously a bandit, after he was defeated in combat against Isshin years ago, the latter was so impressed with Masataka's bravery that he recruited him into the Ashina Clan, where he eventually became the clan's Minister of Justice and received the title of "Gyoubu![]() ".
".
- Alas, Poor Villain: His death is treated somberly, as he uses his dying words to apologize to Genichiro for failing to protect the castle while his horse nuzzles him as if to say Please Wake Up. Wolf even says "Forgive me" as he lands the death blow.
- Animals Not to Scale: His warhorse Onikage is an example of the game's collection of larger-than-life animals. It is such a colossus that the top of Wolf's head can barely reach its elbow.
- Badass Boast: He's got a lot of 'em.
- "MY NAME IS GYOUBU MASATAKA ONIWA! AS I BREATHE, YOU WILL NOT PASS THE CASTLE GATE!"
- "BOY, LET ME SHOW YOU THE WRATH OF A MAN WHO STOOD WITH THE ASHINA WHEN THEY TOOK THIS COUNTRY!"
- "YOU WILL NOT TAKE THIS GYOUBU'S HEAD!"
- "OH HO, STILL STANDING? THEN I WILL STRIKE YOU AS MANY TIMES AS IT TAKES!"
- Badass Cape: It flutters out dramatically behind him as he charges forward on his horse, making him look all the more imposing. It also appears to be stained with blood.
- Badass Family: Their surnames would seem to imply that he and Shume Masaji Oniwa are related.
- BFS: Is implied to be a member of the Seven Ashina Spears, as it's stated that Isshin Ashina "awarded the lance to none but his most loyal samurai", who each received a massive yari for their bravery in the Ashina coup. Gyoubu's spear just happens to be especially unique, as it had once been General Tamura's yari before Isshin obtained it as a war trophy.
- Blood Knight: He's very enthusiastic in battle. Deconstructed by the Old Nun after his death, as she pitied him for being unable to realize what the ultimate consequences of his bloodlust would have been. It's hinted that she saw him getting closer and closer to becoming a Shura.
- Cool Helmet: As befits a samurai general, especially on horseback. His helmet has a couple of large antlers, one of which has been broken off. This part can later be repurposed into a useful Shinobi Tool, the Loaded Spear.
- Cool Horse: He rides an armored warhorse named Onikage (literally meaning "demon shadow"). note
- Corpse Land: The field outside the castle gate where you fight him is the site of a recent battle, with corpses, weapons, and broken banners strewn about.
- Defeat Means Friendship: He used to be a bandit, but made a big enough impression that Isshin took him into his clan after defeating him.
- Gate Guardian: He must be defeated to access Ashina Castle.
- Impossibly Graceful Giant: Gyoubu and his horse Onikage make for an overwhelmingly mammoth horse-and-rider duo, further compounded by the heavy armor donned by both of them. Not only can Gyoubu stand on the saddle while Onikage lugs all that weight around with ease, but they have an attack where the horse successively hops higher and higher into the air as its rider continuously slams his spear down.
- Incoming Ham: In the Japanese voice-acting, while hammy, his introduction isn't much hammier than any of the other enemies. In the English voice acting, he comes off like his indoor voice was lost in a tragic sparring accident.Gyoubu: "MY NAAAAAAAME!!! IS GYOUBU MASATAKA ONIWA!"
- Large Ham: Masataka loudly announces himself at the beginning of the combat, then keeps reciting his deeds and throwing disses at Wolf in a grandiose fashion.
- Logical Weakness: He may be a badass rider, but his horse is still afraid of loud noises like most Real Life animals, making the Shinobi Firecrackers an effective weapon against him.
- My Name Is Inigo Montoya: Masataka loudly announces who he is upon his introduction, before boasting of how he will stop you from entering the castle gate.
- No Indoor Voice: All of his lines are loud, and his introduction has him screaming his name and a challenge at Wolf. See Incoming Ham.
- No Kill like Overkill: Wolf finishes him off with a very thorough stabbing.
- One-Handed Zweihänder: Practically a necessity for Masataka since he keeps one hand on his horse's reins almost all the time, but that doesn't excuse him from brandishing his gargantuan spear as easily as if it were a paintbrush.
- One-Man Army: You fight him in the middle of a large battlefield littered with corpses, and it's implied that most of it is his handiwork.
- Rearing Horse: Popping the Shinobi Firecrackers near the horse causes it to rear, leaving Masataka vulnerable for a couple of seconds as his balance is thrown off.
- Red Baron: Eavesdropping on two Ashina soldiers reveals he goes by the epitaph "Gyoubu the Demon".
- Reformed Criminal: His remnant indicates that he was a bandit leader but turned a new leaf as a general for the Ashina.
- Undying Loyalty: To the Ashina Clan in general and Genichiro in particular. His dying words are to apologize to Genichiro for failing his mission.
- Warm-Up Boss: Unless the player fought Lady Butterfly first, Masataka is the first major boss Wolf encounters... and one of the easiest, even without his crippling weakness to the Firecracker. There are plenty of opportunities to grapple onto his helmet, letting the shinobi simultaneously avoid his more dangerous moves and score some free hits, and Masataka's swings have big telegraphs that make them easier to parry. A player can even hold the deflect button without worrying as much about Wolf's posture breaking, as most of Masataka's attack windups take too long to capitalize on the stumble.
- Whip Sword: Well, whip-spear in this case. Masataka has attached his spear to his arm, and thanks to the rope he can sweep over a large area around him, taking by surprise anyone who strays too far from him.
- You Shall Not Pass!: Masataka is the guardian of Ashina Castle's gates, and indeed, he makes it clear Wolf won't break into the castle proper without having to kill him.
Monstrous Humans
- Ambiguously Human: There's nothing unambiguously inhuman about them, but their enormous size and strength, dim-wittedness, and odd, baby-like faces imply they're mutated in some way.
- Batter Up!: When you get their health down to half, the kanabō-wielding ones will try to wind up for an extra large swing, bearing a comically-exaggerated resemblance to a baseball batter. If they whiff, they will expose their backsides and stagger for easy posture damage.
- Carry a Big Stick: Are commonly found wielding ''kanabō'' war clubs.
- Death or Glory Attack: All Taro Troop variants will unleash a particularly devastating attack (or attack sequence) when you've angered them enough. If they miss, they will be vulnerable to counterattacks for a significant amount of time, and their posture gauge will fill up to the point where you'll only need a few hits at most to Deathblow them; get hit, and you'll be equally fucked.
- Dumb Muscle: They're bigger than bears, they hit like trucks, and they have the minds of toddlers.
- Fan Disservice: Did Bloodborne's Chalice Dungeons leave you wanting even more naked ogre ass? This game's got you covered.
- Giant Mook: They are tall and very strong enemies, but are otherwise unremarkable.
- Gonk: They are... not pleasant to look at, to say the least. Indeed, a fat hairy slob in fundoshi is not the most attractive thing in Ashina.
- Heavily Armored Mook: Some Taro Troops sport a thick plate of armor covering their chest and stomach, making it difficult to hurt them from the front unless Wolf uses the Loaded Spear to strip the armor off.
- Improbable Weapon User: Some of them swing around a giant bell as an Epic Flail. They have a grab attack where they bring the bell down and trap Wolf inside of it, which presumably damages him due to the Sensory Abuse of being inside a bell as it rings.
- Kryptonite Factor: Like their fellow monks, the Taro Troops of Senpou Temple can be instantly eliminated if you use Divine Abduction to spirit them away.
- Manchild: They are all simpleminded and have baby-ish faces. While they do try to kill you, they still show a lot of innocent childlike qualities, like breaking down and crying when you break their precious shield or showing affection for dogs or curiosity towards sleeping monkeys.
- Mighty Glacier: They're sturdy fellows who hit hard and surprisingly quickly, but Wolf can easily run circles around them.
- Palette Swap:
- The big brutes working for Senpou Temple are identified by their shaved heads and topless monk attire. Also, they actually wear pants.
- The ones affiliated with the bandits wear a head guard.
- Taro Troops mutated by the waters in Mibu Village sport pallid, corpse-like blue skin, warts, and Blank White Eyes.
- Shield-Bearing Mook: Some are armed with a giant wooden board used as both a shield and a ram.
- Theme Naming: The only one named in-game is Kotaro, but seeing as how they are the Taro Troop, all of their names probably contain "taro".
- Trademark Favorite Food: Taro Persimmons. They are practically raised on these, so they also know when to pick them when they are perfectly ripe. It's possible that these persimmons have something to do with their strange size and appearance if the shared name is any indication.
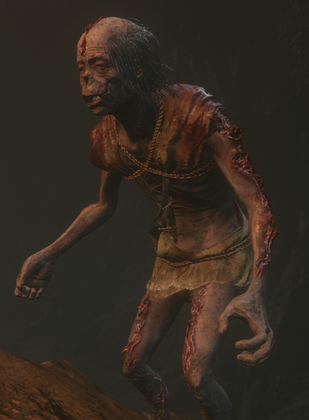
The hapless victims of Doujun. They are flawed attempts at replicating the near-immortality provided by the Rejuvenating Waters, as they must be killed twice before they die for real (but do not require the Mortal Blade to finish off).
- Achilles' Heel: Test Subjects are Weak to Fire, and blasting them with the Flame Vent not only fills up their Posture gauge for an easy Deathblow but also prevents them from getting back on their feet again when killed once.
- Back from the Dead: They can revive once after being dealt a Deathblow.
- Body Horror: They look like emaciated ghouls with deformed faces.
- Fire Keeps It Dead: Killing them with fire keeps them from getting back up again.
- Red Eyes, Take Warning: They have become red-eyed because of Doujun's experiments.
- Stone Wall: Sort of. While they can only move at a slug's pace and don't possess particularly impressive Vitality, they have surprisingly sturdy Posture considering their frail figures, capable of shrugging off even the heavy Loaded Axe without staggering a single bit. While you can still knock them back with some attacks, they don't seem to feel pain at all.
- Technically-Living Zombie: As revealed in Sekiro Side Story: Hanbei the Undying, they're the result of Doujun dosing living people with his attempts at mass-producing the Rejuvenating Waters, which causes the subjects to lose their minds. They otherwise fit the bill of the stereotypical zombie to a T, being shambling, incoherent, mutilated wretches who seek to kill anyone who is not like them. They can even grab Wolf and sink their teeth into him with gusto that would do anything from The Walking Dead proud.
- Personal Space Invader: Their main method of attack is to lunge at Wolf in an attempt to latch onto him, biting into his neck and dealing health and posture damage.
- Zombie Gait: They move slowly and awkwardly, stumbling forward with arms outstretched in front of them.

The odd residents of Mibu Village, who have been transformed by the lake tainted by the Fountainhead waters.
- Clown-Car Grave: Villagers will crawl back out of the ground after they are killed. Some of them even try to grab your feet as they emerge.
- Expy: They are the fishmen villagers from Bloodborne's Fishing Hamlet in all but name and progressive level of mutation; being gurgling, blue-skinned, relatively hapless folk of an isolated village infected by a mysterious outside source.
- Giant Animal Worship: The shreds of snake skin found in their village imply that, like the Sunken Valley Clan, they also worship the Great Serpents.
- Giant Mook: Include a number of Taro Troops among their ranks.
- Improvised Weapon: As they're basically mutated peasants, their weapons comprise of farming and fishing tools, repurposed wooden planks, makeshift bamboo spears, and stones picked off the ground.
- Our Zombies Are Different: Ghoul-like creatures who come back from the dead.
- Piñata Enemy: They don't give out too much experience points or money, but they're easy to kill by the dozens and often drop Mibu balloons, which themselves boost drop rates for everything else, so grinding on them for a little bit is one way to approach them.
- Respawning Enemies: Villagers will respawn about three times or so before they're completely dead. Given how many of them there are, it's generally best to stay above ground and navigate the village by jumping from hut to hut unnoticed.
- Stealthy Mook: Mibu Village is littered with odd-looking markers, each consisting of three bamboo rods weighed down by a single stone. Walk into one, and a villager will pop out of the ground and hold you in place so their buddies can easily kill you.
- Throw Down the Bomblet: Some villagers throw projectiles that inflict Terror.
- Was Once a Man: As Basket-wearer Shosuke attests, they were once ordinary people who turned into monsters after drinking the polluted waters of their river.

Madmen who seek to mimic centipedes as closely as possible, found in both Senpou Temple and the depths of the Gun Fort in Sunken Valley.
- Bandage Mummy: They are usually found almost completely covered in bandages, except for the ones accompanying Sen'un.
- Body Horror: They have metal prongs sticking out all over their bodies to mimic a centipede's appendages.
- Expy: Of Voldo. Not only is their combat style very similar, their vocalizations and even appearances are, as well.
- Glass Cannon: They can do a lot of damage quite quickly, but have very low health and posture, to the point where simply jumping in the air will allow Wolf to instantly Deathblow them no matter what.
- Goomba Stomp: Like most enemies who crawl on all fours, Wolf can instantly kill them by doing a jumping Deathblow.
- Kill It with Fire: They can toss what seem to be small firebombs.
- Malevolent Mutilation: The metal prongs seem to have been surgically inserted into their bodies not just deliberately, but quite possibly willingly.
- Wolverine Claws: Have metal claws attached to their hands and feet.

Chieftains of the Centipedes, referred to "Long-arms" thanks to their long talon-like weapons. Two of them can be encountered and fought; Giraffe lives within the depths of the Gun Fort at the Sunken Valley, and Sen'un resides in one of the halls of Senpou Temple.
- Achilles' Heel: Using a Gokan's Sugar will turn them into a total joke, as it will allow Wolf to deflect their near-constant blows to fill their Posture bar rapidly with little risk of overloading his own Posture.
- Attack! Attack! Attack!: Their strategy is to slash you again and again and again in rapid succession with only the smallest of breaks in between to allow you to counterattack. Fortunately, you hardly need to counterattack; just deflecting the centipedes' long combos will break their posture in record time.
- Bandage Mummy: Both Long-arms are covered in bandages.
- Becoming the Mask: They are vulnerable to being spooked by the Shinobi Firecracker prosthetic tool, and while most enemies can be briefly stunned by it, it seems to have an effect on them more akin to that of beasts than that of people. This demonstrates how much they have lost their humanity by trying to become as centipedes.
- Body Horror: These creatures walk on all fours with limbs outstretched like a centipede, with bandages wrapped all-around their bodies. They even have metal prongs on their bodies to mimic a centipede's appendages.
- Death or Glory Attack: The Long-arms' main attack is a flurry of slashes that can cut through your vitality in a second but, if deflected, will leave their Posture bar almost maxed out.
- Expy: As with their smaller versions, of Voldo.
- Flunky Boss: Sen'un is surrounded by a handful of regular Centipedes, which given the closed room he is in makes his fight even more dangerous as Wolf runs the risk of being ganged upon.
- Glass Cannon: Thanks to their aggressive Attack! Attack! Attack! pattern, a player skilled at deflecting their attacks will be able to build up their Posture gauge faster than any other boss in the game, which means they can be dealt a Deathblow very quickly.
- Kill It with Fire: Like the regular Centipedes, the Long-arms can toss firebombs if you try to play keep-away with them.
- King Mook: They look exactly like regular Centipedes, just a lot bigger. They fight nearly the same way, too.
- Nightmare Face: Sheesh...
- Non-Indicative Name: A guy named Giraffe is probably the last person you'd expect to try and turn himself into a centipede.
- Slasher Smile: A closer inspection behind their facial bandages reveal a winning combination of Fish Eyes and a permanent rictus grin.
- Wolverine Claws: The metal talons on their hands are even longer than those of their subordinates (hence the title "Long-arm"). Beware, as one of their moves is to wildly claw at Wolf repeatedly, making over a dozen strikes that can easily fill his posture gauge.
Beasts

Lizards living in the nooks and crannies of Ashina. If Wolf disturbs them, they will spit poison at him.
- Breath Weapon: Their main defense is a spit attack.
- Goomba Stomp: Wolf can always perform a death blow by jumping above them, even if they have full health and are aware of his presence.
- Palette Swap: The ones residing at the Fountainhead Palace are bluish instead of green, and their spit attack deals direct damage instead of poison. Otherwise, they are basically identical.
- Poisonous Person: The spit attack of the common green type does not deal direct damage, but will build up the "Poison" status effect. Additionally, using the Bloodsmoke Ninjutsu on them will create a poison green mist, implying that their blood is poisonous too.
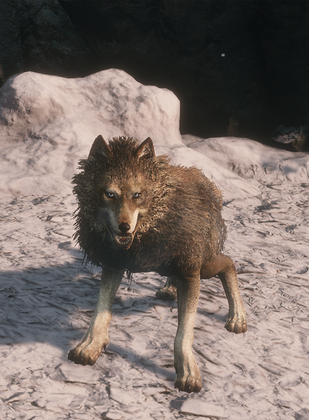
Guard dogs used by the various factions across the game. They are fragile but are able to sniff out Wolf.
- Angry Guard Dog: They usually accompany their masters and are generally put in strategic places where they can easily spot intruders. Their nose allows them to detect Wolf no matter how much he's mastered the Shinobi Arts.
- Brown Note: The sound of the Finger Whistle drives them into a blind frenzy, instantly aggro-ing them into attacking even their owners. It's an easy way to dispatch them while also chipping away at nearby enemies' health bars.
- Fragile Speedster: They are fast, but it usually doesn't take much more than a single shuriken to put them down.
- Martial Arts Headband: Amusingly, the shinobi variant that accompanies the Lone Shadows are identified by the spiffy ninja headbands they wear.
- Shock and Awe: Some Fountainhead Palace dogs can fire electricity from a distance, though this can be turned against them for an instant kill.
- Underground Monkey: Hounds at the Fountainhead Palace function similarly to the mundane variants, but have scraggly blue fur, sharklike teeth, and mutated faces reminiscent of goldfish. Those that wear magatama necklaces can even shoot lightning bolts.
- Why Isn't It Attacking?: Unlike the other variants, shinobi hounds are shockingly patient, maintaining a set distance away from Wolf until they can exploit an opening. A player will more likely just chase them down because it is useless to bait for an attack.

Man-sized roosters roaming the lands of Ashina. Many of them strut around free-range, their original coops having been ruined by war.
- Animals Not to Scale: They're bigger than ponies. No wonder the world of Sekiro is populated by so many goliaths! These overgrown fowl seem to have been inspired by the yokai called the Basan (波山), minus the ghost-fire spewing from its beak.
- Cocky Rooster: They are extremely aggressive towards Wolf, and it's implied that they were originally bred for cockfighting.
- Patrolling Mook: Sort of; they become extremely noisy if they spot you, which will tend to alert other nearby foes to your presence.
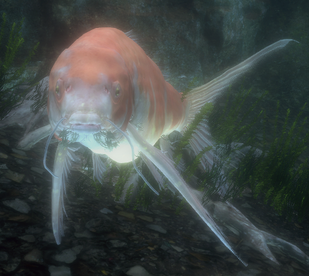
Harmless carps that can be encountered in various bodies of water in Ashina. They drop the Carp Scales item.
- Anti-Frustration Features: Like Crystal Lizards, they'll disappear if you don't kill them quickly enough...but unlike Crystal Lizards, they'll reappear after a few moments.
- Expy: Of the Crystal Lizards, being non-respawning enemies that drop valuable items upon death.
- Metal Slime: Their sole purpose is to run away from Wolf if he gets close, and drop Carp Scales upon death, which is required for trading with either Pot Noble.
- Unique Enemy: A single carp found in the Mibu Village lake has glowing red eyes and slightly darker coloration. It does not drop a scale upon death, but its eyeballs are needed to progress Doujun's sidequest.
- Was Once a Man: They are implied to have once been humans who attempted to become a Great Colored Carp, if the item description for the Red Carp Eyes and either Pot Noble's transformation into carp via feeding the Great Colored Carp with Truly Precious Bait are any indication.

Aggressive fish usually found accompanying Treasure Carps.
- Fragile Speedster: They swim fast, but will die to a single sword swing.
These crickets are mostly found in Senpou Temple, where they are spawned by the Infested Seekers. However, some can also be found in the Abandoned Dungeon.
- Big Creepy-Crawlies: They are giant crickets. That said, the ones in Senpou Temple aren't hostile unless Wolf's been barfed on by an Infested Seeker.
- Interface Screw: They're extremely weak and most of them aren't even hostile, but if faced with a group of them accompanying other enemies, they can easily annoy you to death as you keep accidentally locking onto them instead of the enemy you want.
Wild Japanese macaques roaming the wilderness of Ashina.
- Animals Not to Scale: Real life Japanese macaques are only about two feet tall. These are as big as baboons or chimpanzees.
- Boss in Mook Clothing: The Elder Monkeys (i.e. the white macaques) are some of the toughest non-boss enemies in the game, being exceptionally skilled with their dual katanas.
- Brown Note: Blowing the Finger Whistle will enrage the monkeys, more often than not resulting in the critters tearing each other apart for an easy Total Party Kill.
- Dual Wielding: One particular variant wields two katana, and is quite dangerous to fight against.
- Gargle Blaster: Monkey Booze, made by monkeys stuffing fruits into tree hollows and hoping for the best. It is unbearably strong stuff, burning the throats of even the heaviest drinkers. Interestingly, another name this alcohol goes by is "Shura's Wine".
- Glass Cannon: Plenty of attack and speed, but in close combat they'll go down fast. Except for the white Elder Monkeys, that is.
- Maniac Monkeys: Highly territorial and aggressive towards intruders, but also intelligent enough to wield swords and even fire guns.
- Partially Civilized Animal: They have swords. They have helmets. They have guns! They're learning how to make alcohol! The white monkeys are dual wielding katanas and wearing loincloths.
- Pistol-Whipping: The gun-armed monkeys will sometimes swing their weapon at you if you get too close. In particular, they have a heavy overhead swing that results in their gun exploding upon impact.
- Poisonous Person: The monkeys living at the bottom of the valley can inflict poison with their swipes.
- Silly Simian: FromSoft is definitely aware of how inherently amusing the idea of a gun-wielding monkey wearing a helmet is.
- Throwing Your Sword Always Works: Perhaps fittingly, the sword-wielding monkeys will occasionally just throw their sword at you.
- Zerg Rush: They are found in groups, and while they aren't particularly strong by themselves, they can easily swarm and stunlock you to death if you're not careful.

A monstrous Japanese macaquenote that Wolf can fight at the bottom of the Sunken Valley. He guards the way to the Lotus of the Palace.
Wolf can again fight the now-Headless Ape in the Ashina Depths, this time with its mate.
- Animalistic Abomination: His immortality-inducing centipede infestation makes the Guardian Ape this, as it can survive things that should by all rights have killed it. This becomes even more pronounced after the monkey is decapitated, as not only can he still survive without a head, but he's now capable of unleashing a scream that can inflict fatal Terror on any and all who hear it, showing there's something now fundamentally wrong and unearthly about the Guardian Ape.
- Attack Its Weak Point: After parrying his post-decapitation overhead attacks, Wolf can use the opening to yank on the Ape's immortality centipede with the Loaded Spear, dealing massive health and Posture damage.
- Attack of the 50-Foot Whatever: Fifty-foot immortal macaque in this case.
- "Blind Idiot" Translation: While the official English translation rendered "猿" (saru) as "ape" (which is a legitimate usage in modern Japanese), the term during the Sengoku period would have been more commonly used to mean "monkey" (specifically the Japanese macaque). In fact, the Guardian Ape has a small tail similar to those of actual Japanese macaques, while apes by definition are tailless.
- Body Horror: Besides the deep bloody gash that runs lengthwise up his skull, there is a large fungal growth sprouting from the base of his neck.
- Clipped-Wing Angel: His headless form is intimidating but far less aggressive and accurate than his first phase — his sword swings are wild, clumsy, often miss Wolf completely, and leave him terribly vulnerable if they're parried. His deadliest attack is a deafening scream that causes rapid Terror buildup if Wolf doesn't back off from it immediately, but even that is easy to avoid due to its large telegraph beforehand, and the Loaded Umbrella negates it completely.
- Confusion Fu: Both phases have no set attack patterns. The Guardian Ape fights like a child throwing a temper tantrum, just pounding at you at random intervals. The Headless Ape, on the other hand, wields his sword as if he's drunk, weaving his sword side to side like a sewing needle all the time.
- Coup de Grâce: If the player is not paying attention after the second battle, they won't notice the Headless Ape's body twitching, with the centipede dangling from his neck. The player must strike the Centipede after the battle is over to finish the Ape off, indicated by the message "Immortality Severed."
- Cutscene Incompetence: Even if you obtained the Mortal Blade before fighting the Guardian Ape, Wolf will stab the centipede with Kusabimaru instead, to keep the player from skipping the rematch in the Ashina Depths.
- Didn't Need Those Anyway!: Decapitation is normally pretty terminal. Not to this monkey.
- Dual Boss: After defeating him the first time, he will move to the Ashina Depths, where he can be fought again. After depleting his first health bar, he calls in his current mate for backup.
- Dung Fu: Don't let your awareness slip when standing too far from the Ape, as one of his attacks is to throw his giant poop at Wolf, which can inflict Poison.
- Easy Level Trick: Any version of the Loaded Umbrella will completely negate his devastating roar attack. Additionally, a particularly bold player can even let the shield down a second before the Ape finishes screaming in order to wail on him while he finishes the animation; Wolf will still take some damage, but at least his Terror gauge won't build up completely.
- Exact Words: Beheading him gets you the standard "Shinobi Execution" message...but since he's got a centipede inside of him, he reanimates himself. You did kill him, he's just getting back up for round two. Actually removing and killing the centipede gets you "Immortality Severed," and then he stays down for real.
- Expy:
- Of the zombified ape from FromSoftware's obscure Kuon.
- It also serves as one for the Bloodletting Beast from Bloodborne. Like that monster, the Guardian Ape is a large beast with a massive wound that by all rights should be fatal, it's later shown that even losing its head doesn't kill it, and its body is housing a massive centipede.
- Fartillery: One of his moves is to fart while running away, creating a poisonous cloud.
- Foreshadowing:
- When asked about Immortal Severance, Isshin will mention that those who are infested can survive even decapitation unless one has the Mortal Blade.
- The Ape's still alive even though he has a sword in his neck.
- Upon defeating the Guardian Ape, another cry's echo can be heard. It foreshadows the rematch and appearance of a second Ape. The white flower's description mentions the Ape was cultivating it to give it to his mate. Uh oh.
- Notes suggest that his watering hole has been tainted by the water spilled over from the Fountainhead Palace, further indicated by the presence of Precious Bait and palace rubble near the waterfall. Sure enough, this spot will be where the Great Colored Carp's carcass can be found after you poison it. Like the water that made its way to the Guardian Ape, this fish has tumbled a long, long way down.
- Grapple Move: Has both a sweeping grab where he drags Wolf across the ground before tossing him and a jumping grab where he spikes Wolf into the ground.
- Humiliation Conga: Goes through something akin to this over the course of the game. First, the ape gets its head cut off by Wolf by the very blade that's been lodged in its neck for some time. Then when it gets up, still alive but now needing to carry its head, Wolf defeats it again and goes on to take the flower the Guardian Ape had been cultivating in the hope of attracting a new mate. Despite being deformed and losing the flower, it still manages to find a mate...only for Sekiro to come by and kill her. He then defeats the ape a third time, reducing it to a still living but barely functioning lump of flesh before slaying the centipede and killing the monkey with it for good.
- Impaled with Extreme Prejudice: He's got a BFS stuck in his neck. Wolf will eventually twist it to decapitate the Guardian Ape as a Deathblow, but then he revives and takes the sword to swing it at the shinobi.
- Immortality: He's infested much like the monks in Senpou Temple and survives Wolf cutting off his head and even ripping out his centipede parasite. Wolf can kill the centipede — and the Ape with it — for good with the Mortal Blade after his second boss fight.
- "Instant Death" Radius: During his second phase, he will occasionally place his head over his neck stump and let out a bloodcurdling scream. If players are close to him when he screams, it'll take chunks of Wolf's Hit Points and slowly build up the "Terror" status effect; once full, it turns into a One-Hit Kill.
- Killer Gorilla: Though not technically an ape in the zoological sense, he's still a massive primate (about three times as tall as Wolf) who's incredibly hostile to anyone he sees as an intruder.
- Kill It with Fire: Like all animals, the Guardian Ape will fall into a panic whenever his fur is set alight. Once he is beheaded and becomes the Headless Ape, however, the creature is not nearly as bothered by flame.
- Killed Off for Real: Wolf closes their second battle by severing the Ape's Immortality with the Mortal Blade.
- Large and in Charge: Prequel manga Sekiro Side Story: Hanbei the Undying seems to imply that he's the leader of the Valley Monkeys.
- Lightning Bruiser: Is deceptively quick for its enormous size and hits like a truck.
- Locked into Strangeness: Despite the immortality centipede supernaturally extending his life, the Ape's fur is white with age.
- Lodged-Blade Recycling: After Wolf beheads him with the sword that's been stuck in his neck, the now-headless Ape proceeds to wield said sword for himself.
- Losing Your Head: Wolf seemingly defeats the Ape for good upon decapitation, but then he gets back up.
- Marionette Motion: After losing its head, it starts moving as if it has no center of gravity. It runs without supporting its upper body with its arms, sways back and forth while swinging its sword as if the sword is moving on its own, launches itself into the sky, slides on its belly, and looks like its being awkwardly lifted up by its sword while preparing for an overhead slash.
- Mighty Roar: This is the Guardian Ape's most dangerous attack, which he performs after losing his head. Putting his head back on his neck for a moment, the Guardian Ape then roars, which not only causes damage and knock-back in a wide radius around him, but builds up the Terror status effect so quickly that Wolf will die if he doesn't escape the area of effect in time.
- No-Sell: The Ape and his mate are not affected by the sound of the Finger Whistle, so Wolf cannot just sic one against the other during the rematch.
- Non-Indicative Name: Not just regarding the "Blind Idiot" Translation above, but also about the "Guardian" part of the Ape's name; with the title of Guardian, one would likely expect it to have some reverence or direct employment from outside forces as the holder of the Lotus of the Palace. However, it becomes apparent from item descriptions that the Ape is acting entirely on its own independence, not to mention just following a natural mating ritual. It contrasts with the formal implication of "Guardian".
- Off with His Head!: The first phase of his first fight ends with Wolf using the sword embedded in his neck to decapitate him. Though thanks to his Immortality he gets right back up a few moments after.
- Palette Swap: The Headless Ape's mate is basically a brown Guardian Ape with a smaller moveset.
- The Pig-Pen: Two of his moves are based around pooping and farting on you, and he looks to be covered in filth and partially healed wounds.
- Recurring Boss: The Ape must be fought twice in order to put him down for good.
- Recurring Element: The rematch with the mate joining is the closest equivalent to the Dual Boss battles such as Ornstein & Smough and Watcher and Defender. Fortunately, they're not as difficult to compensate for the fact that Sekiro is a single player game.
- Skippable Boss: It's possible to avoid the rematch against the Headless Ape entirely simply by going down the Hidden Forest/Mibu Village path before beating him the first time, since the boss room will be empty. Then, once the Ape moves to that room, you can just fast travel to one of the Sculptor's Idols beyond it (assuming you've activated at least one of them).
- Sliding Scale of Undead Regeneration: Though he can survive Wolf cutting his head off, he's unable to actually attach it back on.
- Unskilled, but Strong: He still has his natural simian strength when he starts wielding the sword, but his swings are clumsy, erratic, and oftentimes very slow.
- Victory Fakeout:
- In the first phase of his first fight, the Ape is only shown with one Deathblow marker, the "Shinobi Execution" overlay will appear upon his decapitation, and his body even lays still for several seconds after being beheaded. He gets up again.
- This also somewhat applies to the end of his second fight. When initially defeated, the "Shinobi Execution" overlay will once again appear, and you'll receive a Memory and two(!) Prayer Beads for your efforts. However, you'll then need to use the Mortal Blade on the centipede sticking out of his neck to kill him for good, which will net you the Bestowal Ninjutsu and the "Immortality Severed" overlay.
- Who Wants to Live Forever?: The remnants of both fights state the Ape had a mate once upon a time, but his infestation from drinking the Fountainhead waters caused him to outlive her, and he has grown painfully lonely over the years of seeking another. The bones of the Ape's mate can be found in a cave above his den. The Ape finds another mate by the time of your rematch in the Ashina Depths but dies before anything can come of it.
- The Worf Effect: Invokes this on the Sunken Valley gunners, as he apparently demolishes their settlement in the Poison Pool sometime after your first battle against him.

A giant snake lurking in the lower heights of the Sunken Valley beneath Ashina Castle. It will attack Wolf when he trespasses on its territory.
- Expy: Of the Ancient Wyvern from Dark Souls III - a boss fight where it's unfeasible to defeat it by conventional means; instead, an attack from a overhead drop will be a guaranteed One-Hit Kill.
- Eye Scream: In order to get to the Ashina Castle Gate, Wolf will have to lure the snake into close proximity in order to drive his katana into its left eye, momentarily neutralizing it while it writhes in pain.
- It's Personal: After you drive your sword into its eye, the Great Serpent seems to develop a grudge towards you and will personally target you in the Sunken Valley Passage.
- MacGuffin Guardian: The two "fruits" as described by the cryptic old lady seen praying around Ashina are actually referring to the persimmon-shaped hearts of these giant beasts. The "fresh" one will require getting the drop on the giant snake. The "dried" one is stored in an underground temple where it is guarded by yet another serpent.
- Physical God: The descriptions of the "Serpent Viscera" items indicate that the Great Serpent is considered a god of the land and worshipped by many of Ashina's inhabitants. They even sacrifice themselves to the snake by getting into a palanquin and letting the snake eat them, which is possibly related to the "Marriage Ceremony" needed to access the Divine Realm. The fact that letting the Great Serpent swallow you will transport you to a certain cave suggests that there might actually be something to this whole "marrying the serpent" thing.
- Snakes Are Sinister: An utterly gargantuan snake that harasses Wolf at multiple points in the story. As it turns out, there's at least two of them.
- Swallowed Whole: If Wolf fails a particular quick-time event, he can end up being swallowed by the Great Serpent, which will then deposit him in the cave where the other Great Serpent is lurking.
Brigands and Mercenaries

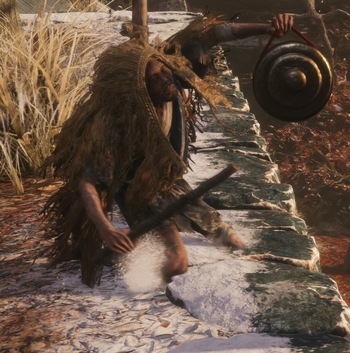
Groups of brigands and vagabonds, they comprise the bulk of the force that sacked the Hirata Estate three years ago.
- The Alcoholic: Some of the bandits are too drunk to notice Wolf, even if he's spotted by others.
- Arrows on Fire: Some bandits will fire flaming arrows.
- Bow and Sword in Accord: The bowmen will pull out a katana in close combat.
- Combat Pragmatist: A few of them will kick dirt at you.
- Even Evil Has Standards: Eavesdropping on the bandits reveals that they draw the line at looting a Buddhist shrine. However, this could just be because they're afraid of incurring Lord Buddha's wrath rather than genuine respect.
- Fundoshi: The only clothing they wear (outside of whatever armor they've managed to loot) is a fundoshi covering their privates.
- Giant Mook: They have some Taro Troops among their ranks.
- A Handful for an Eye: Some bandits will kick mud into Wolf's face, temporarily stunning him while they then proceed to land cheap hits.
- Hired Guns: It's implied in the Second Memory that those attacking the Hirata Estate are actually mercenaries working for the Interior Ministry. Additionally, a few of them can be found helping to guard Senpou Temple, having been presumably hired by the monks as extra muscle.
- Kill It with Fire: Some bandits brandish a torch in addition to their sword; they act primarily as lookouts, but can also inflict the "Burn" status abnormality.
- Poisoned Weapons: A handful of them have poison arrows.
- Rape, Pillage, and Burn: By the time Wolf arrives at Hirata Estate, the location's become a blazing inferno, and the inhabitants both within and in the outlying village have largely been murdered. In fact, some of the bandits are even wearing looted armor that still have the Hirata mon emblazoned on them.
- Shield-Bearing Mook: Some of the bandits have a thick wooden shield, which actually is effective and prevents Wolf from attacking them frontally. Thus Wolf should either bait them into an attack first, assassinate them, or use the Loaded Axe to break the shield.
- Unskilled, but Strong: Some bandits are armed with an axe; they hit harder than the rest of their brethren, but have even less finesse to their attacks.

Skilled sōhei![]() from Misen Temple who specialize in skewering shinobi with their long spears. One of them, Enshin of Misen, is a mini-boss present among the bandits guarding the way to the Hirata Estate's manor.
from Misen Temple who specialize in skewering shinobi with their long spears. One of them, Enshin of Misen, is a mini-boss present among the bandits guarding the way to the Hirata Estate's manor.
- Degraded Boss: Players will likely not encounter any "regular" shinobi hunters until after they've already beat Enshin.
- Elite Mook: Even a lone shinobi hunter should be approached with care.
- Hired Guns: Given their presence among both Ashina and Ministry-affiliated forces, it's strongly implied that they've been hiring out their services to whoever has the money to pay them, with the one in Ashina Castle explicitly shown to be a mercenary.
- In the Hood: Enshin wears a distinctive white hood, a part of which covers his right eye, functioning as an Eyepatch of Power as well.
- Mini-Boss: Enshin has two Deathblow markers and needs to be defeated to access the real boss of the Hirata Estate, but the player isn't forced to fight him upon reaching him and he can be dealt a stealth Deathblow to remove one of his lives before the battle even starts.
- Only in It for the Money: Eavesdropping on the Ashina Castle shinobi hunter will make it clear that he has no stake in the Ashina cause besides his pay.
- Screw This, I'm Outta Here: During the Interior Ministry's final assault on Ashina Castle, eavesdropping on the shinobi hunter there will reveal that he's been getting ready to make his escape and abandon his employers to their fate. He does apologize for it during his prayer, but then states that "nobody would put their life on the line for free".
- Skill Gate: As likely the first spear user you'll encounter, Enshin will significantly test how well the player can fare against enemies with frequent thrust attacks. In particular, at least part of his purpose is to encourage players to acquire the Mikiri Counter; while it's possible to simply deflect thrust attacks, the timing has to be much more precise than the Mikiri Counter's. Unless you're skilled enough to beat Enshin using only deflects, he will gladly turn you into a fresh shinobi kebab with ease. Many, many, many times.
- Unique Enemy: Outside of the Hirata Estate memories, there is only one of them in the entire game, stationed near the Old Grave in Ashina Castle. Even within the memories, there are only two of them besides Enshin, both of whom have unique models; in the first memory, they can be found together near the end of the path leading to the Main Hall of the Hirata Estate, while in the second, they're shown to have made their way to the Main Hall itself.
- Warrior Monk: They may be ruthless mercenaries, but they can still occasionally be found chanting Buddhist mantras. In fact, they're from the same temple that makes Gokan's Sugar.

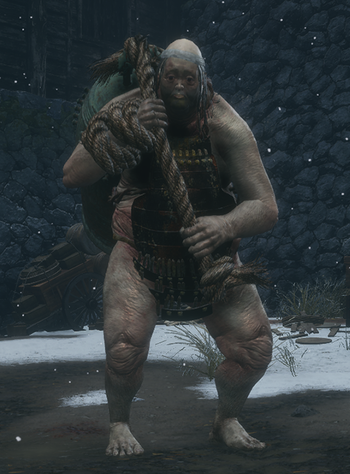
A towering bandit leading the assault on the Hirata Estate. Wolf can find him resting in a courtyard of the Estate and fight him.
- The Alcoholic: According to the Seventh Prayer Necklace, Juzou turned into this upon taking his first sip of sake, leading to a downward spiral from an esteemed sumo wrestler into an infamous and scorned bandit. He drinks sake even in the midst of battle, drops Unrefined Sake when killed, and his few lines indicate that he considers booze to be a major motivation.
- All There in the Manual: The strategy guide reveals that he and his Palette Swap variants belong to an enemy archetype labeled "Shura Samurai".
- BFS: Wields an oversized odachi as big as he is tall.
- Even Evil Has Standards: For all his banditry, Juzou doesn't like The Owl one bit, seeing him as a scheming bastard.
- Fat Bastard: Has got a noticeable gut on top of being so tall.
- Flunky Boss: He is surrounded by a handful of other bandits who will fight beside him. And his second fight has him accompanied by a Ministry Lone Shadow as well.
- Grapple Move: If he manages to catch Wolf in his grab, Juzou will proceed to slam the shinobi into the ground and then stomp on his back for good measure.
- Hidden Depths: Not only was he a prestigious sumo wrestler in the past, he's apparently a mercenary for the Interior Ministry and was hired to attack the Hirata Estates on their behalf; he is even seen casually chatting with one of their shinobi in the second Hirata Estates memory.
- Kevlard: Despite wearing no armor, he is very resistant to damage thanks to his dense fat and muscle tissue.
- Large and in Charge: He's the leader of the bandits who attacked the Hirata estate, and about eight feet tall with girth to match.
- Mighty Glacier: Although relatively fast for his size, most of his attacks require a sizeable wind-up, giving the players opportunity to prepare and time their deflects correctly. Experienced players will find him to be very slow compared to later-game bosses.
- Poisonous Person: Will often coat his BFS with poison that will inflict the status effect. He may also breathe poison from his mouth.
- Recurring Boss: The second memory of Hirata Estates features a rematch against him.
- Stout Strength: Don't let his paunch fool you, he has the strength needed to carry that weight plus swing his odachi around. He incorporates his great bulk into his combat technique, lowering his center of mass and throwing his weight into palm strikes to send his opponents flying. According to the Seventh Prayer Necklace, he used to be a champion sumo wrestler.
- Unskilled, but Strong: Juzou may have more than enough strength and toughness to pose a real threat to any trained samurai or shinobi, but he isn't a real swordsman; his attacks tend to leave his guard wide open, and he has little skill in deflecting or dodging projectiles. As such, even the weakest shuriken grade can chip his health down for size.
- Wake-Up Call Boss: Most mid-bosses players run into aren't all that difficult to handle with dodging and chipping away at their Posture gauge. Juzou? Even if his flunkies are taken care of first, half of his life is eliminated via a stealthy Deathblow, and players enlist the help of a friendly Non-Player Character, he can still pose a major challenge to most, as he strikes hard and fast, breathes large plumes of poison, and can turn his BFS into a poison blade. Putting him down quickly pretty much demands players get the timing of deflections correctly and knowing when to evade when his poisonous breath is released. Furthermore, the allied NPC isn't necessarily all that helpful, as Juzou will annihilate him in short order regardless of most strategies unless players can force Juzou to keep his attention on themselves instead.
- Walking Shirtless Scene: He goes around bare-chested.
- Weapon Across the Shoulder: Juzou has the habit of resting his odachi over his shoulders.

A bandit seeing camping in the middle of the Ashina Depths with a band of pet monkeys. He will attack Wolf on sight.
- The Alcoholic: Pauses every now and then to take a swig of sake, giving the player a good opportunity to hit him.
- Easy Level Trick: After you kill his monkeys and stealth off one lifebar, just jump up to the ledge where he can't reach you, wait for him to drink, then run down, hit him two or three times and run back to safety. Boring, but effective. Alternatively, using the Bone Finger Whistle will cause the monkeys surrounding him to go berserk, attacking him before you even have to engage.
- Flunky Boss: Has a pack of trained monkeys wielding swords and guns backing him up.
- Weapon Across the Shoulder: Tokujiro has the habit of resting his odachi over his shoulders.
- You ALL Look Familiar: He's completely identical in both appearance and fighting style to Juzou the Drunkard. As such, all of the gameplay tropes in Juzou's section apply to Tokujiro too, unless noted otherwise.

An elderly kunoichi and one of Wolf's teachers, she is revealed to be allied with the bandits attacking the Hirata Estate. Wolf confronts her in the secret temple of the Estate.
- Achilles' Heel: She spends a lot of time in the air, making her a prime target for shurikens which will cancel some of her most dangerous attacks, deal bonus posture damage and open her up to a slash or two to chip her health away.
- Actually a Doombot: Lady Butterfly seems an easy enough boss as she initially appears to only have one health bar. But after defeating her, it's revealed it was only an illusion, forcing Wolf to fight her again for real.
- Animal Motif: The butterfly - it's in her name and she also can summon butterflies of light as homing projectiles. She's also very light on her feet, performing several jumps and darting movements, and often remains in the air above Wolf with wires. The fact it technically takes only one Deathblow to take her down is pretty reminiscent of a butterfly's fragility but at the same time there are some pretty poisonous butterflies out there, reflective of how the elderly looking Lady Butterfly is in fact extremely deadly.
- Badass Fingersnap: She makes multiple kunai appear in her hands at the same time she snaps her fingers, the snap itself creating a light shockwave. The fingersnap is the trigger for her illusion attack.
- Braids of Action: She has a long braided ponytail.
- Cryptically Unhelpful Answer: When Wolf asks her "Why?" (presumably why did she betray him/Lord Kuro), she simply responds "Why, indeed? You'll die if you doubt yourself, boy."
- Dark Action Girl: An aged, but skilled and traitorous Kunoichi who can wipe the floor with Wolf.
- Devious Daggers: Befitting a turncoat kunoichi, her primary weapons are kunai, and she is equally adept at swinging them in melee and throwing a volley of them from the safety of her strings.
- Die or Fly: Her stated training method was to make Wolf apply his lessons in combat directly, implying she threw him in the face of danger to push him into mastering her techniques quickly.
- The Dragon: Seems to be this to the Owl; it's implied that they both collaborated with the Interior Ministry to raze Hirata Estate to the ground, all so they could claim Kuro's blood.
- Dub Name Change: Her original Japanese name of まぼろしお蝶 (Maboroshi Ochō) would be more accurately translated as "Phantom Butterfly".
- Easy Level Trick:
- She's very vulnerable to the Nightjar Slash art. Simply spamming it nonstop will quickly end her first phase, and helps immensely in the second, though more careful timing is required and she will sometimes break out of it.
- She is also very vulnerable to High Monk, which will negate her sweep attack while dealing massive posture damage and stunlock her, hitting fast enough to prevent counterattacks. The only catch is that you probably won't have the technique unlocked by the time you face her unless you're on New Game Plus.
- A strategy consisting of alternating attacks and side-dodges will effectively stun-lock her, making the fight significantly easier; after you attack, she immediately goes for a short-range hit that will miss your dodge, but leaves her wide open for another attack. While this is more difficult in the second phase due to her illusions and butterflies, it's still a relatively easy strategy to employ that allows her to be defeated by players not yet used to deflecting.
- Evil Old Folks: An elderly kunoichi involved in Owl's conspiracy to rule Japan.
- Face–Heel Turn: Formerly one of the mentors whom Wolf studied under when he was a child, she readily prepares to kill him for standing in the way of her business.
- Flechette Storm: Kunai are her specialty; she'll be tossing a lot of them at you as she hops between wires.
- Foreshadowing: The first Ashina-affiliated shinobi to be revealed as a straight-up traitor, but not the last. Additionally, her illusionary powers hint that what Wolf saw in Hirata Estate might not have been quite the truth.
- Fragile Speedster: She only has one "true" Deathblow counter and a posture bar that is relatively easy to fill. Good luck trying to actually land a hit on her between the wire-hopping, kunai spam, and flurries of melee attacks.
- Graceful Loser: Her last words once defeated by Wolf is to praise him one last time.Lady Butterfly: You've... gotten stronger... Wolf ...
- Grapple Move: Has a Perilous Attack where she'll leap off a wire right at Wolf. If it connects, she'll grab Wolf's neck between her legs, flip him into the ground, and then stab him in the back.
- Hey, You!: Lady Butterfly usually addresses Wolf by roundabout titles such as "son of Owl", or "boy", and it is only when Wolf bests her that she deigns to call him by his official shinobi name.
- Hidden Depths: Dialogues triggered by giving the Dragonspring Sake to Isshin and Emma imply that Lady Butterfly had a Hard-Drinking Party Girl streak to her.
- Kick Chick: If she isn't attacking with her kunai, then she's busy burying the sole of her feet in Wolf's face. Expect her to perform dozens of wheel kicks and a stomp/axe kick.
- Kick the Dog: Insults you for dying to her. If she's your first boss and you've not yet gotten a handle on deflecting attacks or reading her moves, expect to get insulted a lot...Lady Butterfly: ...Still just a puppy...
- Knows the Ropes: Lady Butterfly's arena is full of nearly invisible strings she can walk on and retreat to in order to gain a vantage point. Wolf can knock her down from said strings by launching shurikens at her, but only when she's in the middle of a jump between them: if she's perched on a string, she'll just swat them away.
- Let's Dance: She says the following just before fighting Wolf.Lady Butterfly: Now then, son of Owl. Shall we dance?
- Light 'em Up: She will summon butterflies of light that have homing capability after each of her attacks in phase two of her fight, further denying Wolf safe opportunity to retaliate against her. She will also dismiss her ghostly illusions to create massive numbers of butterflies of light which will then home in on Wolf for massive damage if he don't outrun or dodge them. Later, Wolf himself can acquire and use her Phantom Kunai, which leave a unique sound and create butterflies made of light in their trail that attack the enemy.
- Master of Illusion: In addition to her sheer fighting skills, she is able to hypnotize people through illusions. During her second phase, she can summon ghostly illusions to attack Wolf.
- Mundane Utility: If you give Dragonspring Sake to Isshin, he'll tell you that every time he got his hands on some Dragonspring in the past, everybody he knew would be lining up for a taste, including "someone" who would use illusion techniques to try and steal it from him.
- Never Mess with Granny: She looks positively old, but is still a master shinobi with all the prowess it entails, being capable of gracefully walking on hair-thin strings as well as fighting Wolf head-on.
- Old Master: Despite her age and relative fragility, she is still one of the deadliest humans in all of Ashina.
- Parental Substitute: When one remembers that the abusive and Evil Teacher Owl was Wolf's adoptive father and considering that Lady Butterfly also oversaw Wolf's Training from Hell, then she could almost be considered Wolf's foster mother.
- Skippable Boss: Because the Hirata Estates are entirely optional, it's possible to not fight Lady Butterfly at all, though for your trouble you receive a Sakura Droplet to get an additional resurrection. Fighting her is also required for the Purification ending.
- Wake-Up Call Boss: Lady Butterfly hits fast, frequently, and seemingly unpredictably at first, with Perilous Attack sweeps, a Grapple Move, and an ability to summon illusions in the second phase to further complicate fighting her. While ultimately fairly frail, which is not helped by her leaving large windows after most of her attacks that allow you to land easy hits to weaken her posture recovery, she is a massive hurdle for early players and, unlike Enshin or Juzou, you cannot eliminate her first life through a stealth deathblow.
- Wild Card: She drops the Sakura Droplet upon being defeated, strongly suggesting that she was in the process of forming an Immortal Oath before Wolf intervened. If this was not a part of Owl's scheme, then she had in fact betrayed the old shinobi to have the Divine Heir all to herself, hence why Owl would implicitly order Wolf to deal with Kuro's captor.
Senpou Temple

These assassins are stout and agile dwarves who do the dirty work for the monks of Senpou Temple. However, some are later seen working for the Interior Ministry.
- Achilles' Heel: The Loaded Axe prosthetic tool can easily power through the reinforced hat-shield of the elite ones and often leaves them open for a Deathblow with a single cleave.
- All There in the Manual: Though they have no specific label in the game itself, the official strategy guide refers to them simply as "Assassins".
- Ambiguously Human: It's not quite clear what they are, whether simply malformed humans or something else. Blackhat Badger being one of them would imply that they're probably human, but it's hard to say for sure.
- The Computer Is a Lying Bastard: Oddly, their grab attack is actually deflectable, despite it not involving any sort of weapon.
- Depraved Dwarf: They do the dirty work for the monks' experiments on immortality; going by Blackhat Badger's testimony, they even participated in child kidnapping.
- Devious Daggers: These guys are sneaky killers who favor knives for both melee and range.
- Exposed to the Elements: They seem to run around just fine in Ashina's snowy landscapes and high mountaintops despite not wearing much more than a tunic and a loincloth.
- Expy: They're quite similar to the Thralls from Dark Souls 3, both in their short stature and skittish movements.
- Fan Disservice: Whenever one dies face-down, the player is treated to a view of their gray misshapen ass.
- Fragile Speedster: They're among the game's more agile foes, being just as capable of jumping across rooftops as Wolf despite their size, but can only take a few hits before going down.
- Gonk: The best way to describe them is that they resemble hairless Tanuki statues, but with flabby skin, beady eyes, and an overly-wide jaw.
- Luckily, My Shield Will Protect Me: Some Assassins wear a wide conical wooden jingasa that doubles as a shield to protect them from forward strikes.
- Mini Mook: By virtue of being dwarves. Even individually, they're some of the more skilled mooks in the game, but the real danger comes when they're in a group, as they will unhesitatingly gang up on Wolf from all directions.
- Neck Snap: One of their Perilous Attacks is a Grapple Move where they attempt to break Wolf's neck by snapping his head back as far as possible.
- Ninja: They may be tiny and ugly, but they very much fit the bill, being agile and stealthy Japanese assassins with a few dirty tricks up their (usually non-existent) sleeves.
- No Name Given: No "official name" is actually given for these assassins in-game; while the Tengu of Ashina calls them "Rats", he actually uses the term to refer to all shinobi and assassins infiltrating the Ashina, including the Interior Ministry's Lone Shadows.
- Poisonous Person: Their throwing knives are laced with poison, and they can leave a trail of noxious gas to inflict the expected status effect.
- Turncoat: These dwarves (and their employers) are ostensibly aligned with the Ashina Clan, but there is a reason why the Tengu of Ashina enlists Wolf to kill any that he finds. The spies dotting the landscape can be found discussing plans to defect to the Interior Ministry. By the time the Ministry lays siege to Ashina Castle, the "Rats" (and likely their employers) have officially switched sides and are wearing Red Guard colors.
- Vocal Dissonance: Given their stature and grunts elicited during battle, one would expect them to speak like scrabbly weasels. Eavesdropped conversations show that they actually possess surprisingly deep vocal chords.

Warrior monks found in the Senpou Temple. They are mostly in the middle of praying or meditating but reveal their strength against intruders.
- All Monks Know Kung-Fu: The monks are adept at martial arts.
- Bald of Evil: Their head is shaved like all Buddhist monks, but they are anything but saintly since they perform horrible experiments to acquire immortality.
- Bare-Fisted Monk: Those unarmed are no less dangerous and fast than the ones wielding staffs, and have no trouble blocking Wolf's sword strikes with their bare hands (though they can only do it a few times before their Posture breaks).
- Became Their Own Antithesis: A Buddhist version. Instead of doing virtuous deeds and being at peace with their impermanence, they commit atrocities in the hope of achieving permanence.
- Charles Atlas Superpower: They can block Sekiro's sword blows with their bare hands, and their punches and elbows do more damage than a large man smashing your face in with a battle axe.
- Expy: They're the closest thing to the Healing Church, an unholy religious group with ulterior motives of ascending themselves via harvesting a divine power, and whose unethical research has turned most of its membership into monsters both figurative and literal.
- Gameplay and Story Integration: While the unarmed monks hit hard, they have low posture and take quite a bit of damage even when blocking, due to not having a weapon to properly deflect blows.
- Glass Cannon: In general. While they will kill you quickly if they land their hits on you, they are completely unarmored and have relatively low Posture, making them very vulnerable to any sort of sustained assault.
- Grapple Move: The unarmed Seekers have a Perilous Attack where they'll knock Wolf off-balance, toss him into the air, and then slam him into the ground.
- The Guards Must Be Crazy: Seekers stationed around the temple are noticeably less perceptive than other enemies in the game, making it easier to pick them off one by one. This might have something to do with them being more focused on chanting mantras than keeping watch.
- The Heretic: As heretical as a group of Buddhist monks could be. They have pretty much completely abandoned the teachings of the Buddha on the impermanence of the self, and kidnap and kill children in the pursuit of immortality.
- Immortality Seeker: As suggested by the name "Seeker", their primary motive is to achieve immortality, no matter the cost.
- In the Hood: Seekers who throw bombs wear distinctive, face-concealing hoods.
- Kryptonite Factor: The prosthetic Divine Abduction instantly kills any of them in one hit by spiriting them away, with No Body Left Behind.
- Light Is Not Good: Dressed like any monk, but are closer towards being Mad Scientists in spite of it.
- Power-Up Food: They will sometimes eat Ako's or Ungo's Sugars to buff themselves, and frequently drop them on death. Item descriptions indicate they're the ones who make them, and sell them across Japan to raise money for their immortality research.
- Status Buff: Like Wolf, they too can use Sugars to boost their fighting capabilities.
- Throw Down the Bomblet: Some Seekers toss feather-adorned grenades, manipulating their trajectories with their psychic powers so they can track their target.
- Warrior Monk: They are adept martial artists who present a significant threat, whether barehanded or wielding a staff.
- Would Hurt a Child: All those striped pinwheels scattered across the Senpou Temple? Each one represents a child killed in their experiments with the Fountainhead waters. The white one Kotaro wants you to find for him represents their single successful guinea pig.
- Body Horror: If you look closely, they all have Creepy Centipedes crawling in and out of their bodies; several of them are even hosts to particularly giant and dangerous centipedes that will pop out of their bodies to attack any intruder that gets too close.
- Double Tap: Wolf must knock them out with a conventional Deathblow, then stab them with the Mortal Blade in order to fully get rid of them.
- Grapple Move: If you get caught in their grab, the centipede will wrap itself around you while the Seeker gives you an embrace of death that restores his Vitality by draining yours.
- Light Is Not Good: They may be Buddhist monks clad in white, but they are rotten to the core both literally and figuratively.
- Mook Maker: Some of them will barf out crickets.
- Mummy: They're essentially a twisted take on the real-life Buddhist practice of self-mummification.
- Resurrective Immortality: No matter how many times you slice and stab them with your starting sword, they will continually resurrect without needing the player to rest at a Sculptor's Idol. Inflicting a deathblow with the Mortal Blade while they're down is the only way to kill them for good.
- Reviving Enemy: Taking them down without using the Mortal Blade will only knock them out of the fight for a few moments before they revive on the spot.
- Zombie Puke Attack: The cricket-spewing monks have a barf attack that only does a little bit of damage, but will aggro any nearby crickets.
- Achilles' Heel: Their constant leaping and acrobatic flips make it difficult to discern their next move, but at the same time Wolf can easily kill their momentum with either a shuriken or a well-placed sword strike while they're in the air. If he has access to the Anti-Air Deathblow, he can even catch them airborne for a quick kill without needing to worry about posture.
- Combat Parkour: Are definitely in the running for "most acrobatic enemy of Sekiro"; they can even use their naginatas to quickly pole vault over you.
- Double Weapon: They wield double-bladed naginatas, of the rarely-seen tsukushi variant (which has the blade attached on the side of the shaft, kinda like a bardiche), and they have more than enough dexterity to make good use of this feature.
- Elite Mooks: The most skilled of the monks in battle, they're arguably some of the most dangerous enemies in all of Ashina.
- Hired Guns: They're implied to actually be Misen Temple sōhei who've been hired by their Senpou counterparts as elite muscle; they all drop Gokan's Sugar upon death, two of them will always drop a big Coin Purse once per playthrough as wellnote , and they cannot be spirited away by Divine Abduction. When their faces are shown (usually during deathblows as they throw their heads back) you can see they share the same model as the Misen shinobi hunters.
- Lightning Bruiser: Move fast, hit hard, and will take some time to kill unless you exploit their weakness to anti-air attacks.
- Malevolent Masked Man: Their wicker hats double as masks.
- Spin Attack: A couple of their charging attacks involve spinning themselves around like a top.
- Spin to Deflect Stuff: This is basically what they'll do if you try to unleash a quick flurry of attacks on them (or fire a Gouging Top at them while they're still on the ground).
- Warrior Monk: They're basically the closest thing the game has to ninja monks.
- Weapon Twirling: During battle, they will be constantly twirling their weapons and spinning themselves around in virtually every direction.

A warrior from distant lands, who guards a bridge leading to the main halls of Senpou Temple. Wolf will have to defeat him to cross the bridge.
- Alas, Poor Villain: Yells his son's name as he falls to his death, underlining how, despite trying to kill you, he's ultimately just a devoted father desperate to save his son's life.
- Anime Accent Absence: Despite being a European, he speaks completely flawless Japanese, even yelling the Japanese pronunciation of his son's name as he falls to his death. He must have been at Senpou for a while. Translation Convention may apply, as in the English-language version of the game he pronounces his son's name the way an english-speaker would.note
- Anti-Villain: He is only associated with the monks of the temple because he wants to save his son Robert. He invites Wolf to put down his sword, but the shinobi has his own duty and they fight more because they must stop each other than because of any animosity.
- Armor of Invincibility: The Warrior's full plate armor protects him extremely well, to the point where Wolf can't even damage his Hit Points or kill him with a Deathblow. He needs to be dispatched in another way.
- Awesome, but Impractical: His thick plate armor counters anything Wolf can throw at him, as most Japanese weapons weren’t made with heavy medieval European plate armor in mind. However it comes at the cost of being extremely heavy, which is a bit of a problem when you’re stationed on a narrow bridge over a ravine.
- Beef Gate: Defeating the Armoured Warrior is obligatory in order to reach the second part of Senpou Temple, as he guards the only bridge leading up there and a fog blocks the way until the Warrior is defeated.
- BFS: This guy who's already a head taller than Wolf fights with a greatsword that's as long as he is tall.
- Boss-Arena Idiocy: It sure is convenient he was assigned to guard a narrow bridge high above a canyon. He even destroys the walls to give you a hint on how to beat him.
- Cool Mask: Despite his European origins, he wears a samurai-style menpō.
- Dead All Along: Not him, but his son Robert. The Senpou Monks killed him using him as a guinea pig for their immortality research. The Armoured Warrior's fight against you was for nothing, and he dies thinking that he has failed his son.
- Disney Villain Death: The only way Wolf can defeat him is to exploit the Armored Warrior's momentum and weight by using a Deathblow to knock him off the bridge, leading to an implied painful fall since the Warrior disappears at the bottom of the valley and the screen shakes when he finally crashes into the ground.
- Fish out of Water: A presumably European knight guarding a remote temple deep in the mountains of Japan.
- Foil: He's the inverse of the FromSoft Recurring Element of a Japanese-inspired character in otherwise Western-inspired settings.
- Genre Refugee: He looks like he somehow wandered away from Dark Souls and ended up lost in Japan.
- Logical Weakness: Heavily armored, comparatively slow-moving target? The Loaded Axe makes quick work of him... subverted that it STILL doesn't work and he needs to be taken down another way. He is THAT well-protected.
- Mighty Glacier: Wearing full plate armor and armed with a greatsword, the Armored Warrior is both tough to break and deals heavy damage. However, most of his attacks are slow as a result.
- Mysterious Past: There's very little information about who he is. All we know is that he's a European explorer who came to Japan in search of a cure for some fatal illness suffered by his son Robert, becoming a guard for Senpou Temple in exchange for the monks' aid.
- No Name Given: We may know that his son is named Robert, but his own name is never revealed.
- No-Sell: First time players may be surprised to see that the Armoured Warrior cannot be killed through a Deathblow; in fact it doesn't even do damage at all.
- Non-Standard Character Design: The only character in the game who wears full plate European-style armor and carries a western greatsword.
- One-Handed Zweihänder: Downplayed, but one of his special moves is to wildly flail the sword at you with one hand.
- Outside-Context Problem: For Wolf, who's trained in handling Shinobi, Samurai, footsoldiers, and even monsters, but has no idea how to deal with a European knight in plate armor. If the monks hadn't set him to guard a narrow bridge, Wolf would have no way or hurting the guy at all.
- Player Nudge: If you land a Deathblow on him but fail to knock him off the bridge, his dialogue hints at the solution to the fight.
- Ringout Boss: Since his HP doesn't deplete thanks to his thick armor, he has to be knocked out of the bridge acting as his battle arena.
- Say My Name: Upon defeat, the Warrior yells his son's name.Armored Warrior: ROBERRRRRRT!!
- Shoot the Shaggy Dog: His quest that took him across continents was for nothing. The monks lied to him and used Robert as another test subject. Unbeknownst to him, even if he had won against you he had already failed to save his son.
- Token White: He's the only European character in the game that can be encountered by Sekiro.
- Too Dumb to Live: If you land three deathblows on him without knocking him off, he'll accuse you of trying to knock him off the bridge, thereby telling you how to beat him for good if you still haven't figured out how to kill him yet.
- Unskilled, but Strong: He's strong enough to destroy the walls around him and shake the ground when he slams it with his sword, but he wields his sword less like a cutting instrument and more like a club.
- You Fool!: After Wolf refuses to put down his sword, the Warrior can only call him a fool.
A quartet of monkeys Wolf meets in the Hall of Illusion. He must defeat them in order to gain an audience with the Divine Child of Rejuvenation.
- Boring, but Practical: The best way to get the seeing and speaking monkeys is to just walk on the other side of the roof they're on and get the drop on them.
- Enemy Summoner: The monkeys can summon simian apparitions that can attack Wolf. While weak, they can build up Terror status with their attacks, forcing the shinobi to be careful while chasing the monkeys.
- "Get Back Here!" Boss: The "fight" isn't about battling the monkeys since they are incapable of directly fighting back. However, they will flee if they notice Wolf and navigate the roofs of the Hall of Illusions better than him, forcing the player to display skill in stealth rather than direct combat.
- Invisibility: There are four screens, but only three monkeys painted on them. It is a tip for Wolf to find the fourth, invisible monkey hidden in the Hall of Illusions.
- Interface Spoiler: Players who are unaware that they need to hunt four monkeys instead of three will likely get the hint once they manage to kill one, and notice the monkeys' collective healthbar dropping by a quarter instead of a third.
- Logical Weakness: The key to taking them down.
- The seeing monkey is a sitting duck should the player corner it in an area without light. Alternatively, you can just walk up behind it since it has poor hearing.
- The hearing monkey can be cornered in the waterfall room where the sound drowns out your footsteps. Also, ringing the large bell while the monkey is in front of it causes it to collapse from excrutiating pain because of sensory overload.
- Because the invisible monkey is always behind Wolf and teleports to his location, it's entirely possible to kill him without tracking him by sound or ringing the bell by randomly attacking the direction the monkey happened to be hiding in (usually while trying to grapple or kill the other monkeys), as the monkey will almost always be within reach of Wolf's weapons. It's not unknown for players to completely fail to realize the fourth monkey's gimmick because they happened to kill it completely by accident.
- Monkey Morality Pose: They are clearly based on the three wise monkeys. Iroinically, they all act inversely to their roles in the proverb. The fourth monkey is unnamed and invisible, since the "Do No Evil" monkey is almost always left out. The original Japanese script have them actually named as "Mizaru, Kikazaru, Iwazaru" (見ざる, 聞かざる, 言わざる) "see not, hear not, speak not". The fourth monkey, though left unnamed in-game, would normally be named Sezaru.
- Non-Malicious Monster: They do trap people and lead them on a wild chase that ends with the victims collapsing in exhaustion, but they are merely protecting the Divine Child from intruders. And aside from the apparitions summoned by them, they never actually lift a finger to harm you. If one is also simply seeking to go there for solace and meditation (such as the monk already in there, or Kotaro if you send him there) they're also perfectly content to leave them alone entirely.
- Partially Civilized Animal: The monkeys behave like Real Life, but wear a kimono and other accessories. It is also said that they willingly protect the Divine Child of Rejuvenation.
- Puzzle Boss: To approach the monkeys, simply crouching and walking is not good enough to escape notice. Wolf must lure the monkeys to an advantageous environment first before he can ambush them.
- Super-Senses: Subverted. The Seeing and Hearing Monkeys are said to have both great sight and hearing respectively, but that's because the former has thick eyeglasses, and the latter wears a dish-shaped neck cone that seems to act as a parabolic microphone.
- With Catlike Tread: A downplayed example. The white-robed monkey's invisibility is decent, requiring Wolf to actually slash the primate to dispel the illusion. However, two hints give away its presence - one, it leaves behind a ghostly trail like the other three monkeys; two, a careful listener will notice another series of footsteps following Wolf wherever he goes.
Sunken Valley Clan

The inhabitants of the gunfort of Sunken Valley, armed with a variety of primitive but powerful firearms. Extremely territorial, they will attack Wolf on sight.
- Bandage Mummy: They are all covered in white bandages, incidentally making them somewhat hard to spot in the snowy Sunken Valley.
- Bayonet Ya: The ones with standard hand cannons have a blade tied to the tip of their firearm to better defend themselves up close.
- BFG: The ones helping to guard the Ashina Stronghold wield literal cannons, as do the ones who appear around the Poison Pool if Shirahagi is defeated.
- Crazy-Prepared: They have resisted invaders for quite some time thanks in large part to their preparedness. They have multiple snipers posted on each side of the valley so that they can support each other's positions, and their fort is littered with firecrackers that will explode if any intruders walk on them, showing that they've even prepared for stealth attacks.
- Cold Sniper: The Sunken Valley clan has a well-earned reputation for ruthlessness, as they will unhesitatingly shoot any stranger that approaches them.
- Evil Versus Evil: It is revealed that the Senpou Assassins have launched an assault on the gun fort, but they are all slaughtered by the time Wolf arrives in the Valley.
- Giant Animal Worship: Item descriptions, naming schemes, and shrines decorated with shed snake skin indicate that these are the people who worship Great Serpents as deities.
- Glass Cannon: The cannon-wielders unsurprisingly inflict heavy damage at range. However, they are somewhat easy to dispatch once Wolf gets up close.
- Long-Range Fighter: The entire clan is made up of redoubtable shooters, most of whom carry firearms that can kill Wolf from dozens of meters away, with their positioning designed to turn the open spaces of the Sunken Valley into a firing gallery. However, they're generally way less dangerous if Wolf manages to engage them in melee.
- Kryptonite Factor: As descendants of the Okami clan, they are weak to the blue rust poison inflicted by the Sabimaru prosthetic.
- Pistol-Whipping: The scatter-shot/cannon-wielders can use their giant firearm as a club to knock away anyone who gets too close. The weight of their weapon makes them Immune to Flinching, so it's best to get that deflect ready for when it happens.
- Shotguns Are Just Better: Most of the bigger clansmen wield a bundle of eight hand cannons tied together that are fired all at once. These bundles are akin to shotguns, being short-ranged weapons with a wide spread that deal devastating damage at close range.
- Shout-Out: They bear a striking resemblance to the Iron Town lepers from Princess Mononoke, being bandaged folk with bundled hay coats who know their way around a gun. Incidentally, they also happened to be led by very tough women.
- Unnecessary Combat Roll: If a scatter-shot-wielder is not at the right distance and/or position to fire on Wolf, they'll usually do a roll towards/away from him before firing.

The Sunken Valley Clan is led by an elite group of female sharpshooters known as the Snake Eyes. Two of them can be encountered and fought; Shirafuji guards the entrance to the gun fort in the Sunken Valley, and Shirahagi keeps watch in the Poison Pool deep beneath Ashina.
- Acquired Poison Immunity: As opposed to others connected by the Okami bloodline, Shirahagi spent long enough in the poisonous muck of the Ashina Depths to have built up a high poison tolerance. She can still be poisoned, but expect it to take a long time for a reaction to trigger.
- Amazon Brigade: The Snake Eyes are women; although their bandages and thick clothes hide their appearance, their gender can be discerned by listening to their grunts and/or reading specific lore descriptions. However, you only get to encounter two in-game.
- Authority Equals Asskicking: Snake Eyes are responsible for leading the Sunken Valley Clan, and unlike the rest of their folk, they are scarily competent at close combat.
- Armor-Piercing Attack: Their unique guns pack enough stopping power to do a generous amount of chip damage to Wolf even when he's holding his sword up. This can be nullfied by either parrying at the right time or just dodging the bullet outright.
- Artificial Stupidity: Shirahagi can be lured into the poison pools and, as long as you can find a way to aggro her without exposing yourself to danger (grappling to the top of one of the Buddha statues will do the trick), she will stand there until her life is completely drained without even attempting to save herself. It will take a very long time and you still need to deal damage in order to Deathblow her, but that's laughably easy compared to a straight on fight with her.
- Bandage Mummy: Both Snake Eyes are covered in bandages, hiding their face and limbs, and making them look creepy.
- Bayonet Ya: Their hand cannons have a blade protruding from the barrel, allowing them to wield their weapon like a dagger-axe in melee.
- Blown Across the Room: The typical end result of them shooting Wolf after catching him in their grab attack.
- The Computer Is a Lying Bastard: Their special grab is such a weird mishmash of what to expect out of Perilous Attacks that a player may never realize it is actually parryable; the wide swing of their gun to draw Wolf in looks like a sweep, but has mid-air tracking to punish for jumping straight upwards. Grapples are, as a rule, supposed to break through blocks, but because the Snake Eyes are using their weapons to do it, it can be deflected.
- Easy Level Trick: Since you probably won't be strong enough to defeat Shirahagi when you first meet her, it's a good thing she can be lured into a poison pool and just stand there while her health drains away. Additionally, it's possible to perform a stealth Deathblow on her provided that you use Gachiin's Sugar/Spiritfall and sneak right behind her.
- Shirafuji on the other hand can be easily poisoned with the Sabimaru and then Deathblowed.
- Expy: Rolewise at least, they're the closest equivalent to the Cathedral Evangelists from Dark Souls III, being strong, but quantity-limited females leading a large amount of males.
- The Gunslinger: The Snake Eyes are extremely skilled with their hand cannons. Not only are they excellent shots, but they like to mix up their melee attacks with sudden point-blank shots.
- Kryptonite Factor: The Okami clan can be crippled by the blue rust poison dripping from the Sabimaru. As their direct descendants, the Snake Eyes are similarly susceptible.
- Mighty Glacier: Hard hitting and tough, but not particularly fast.
- More Deadly Than the Male: Far stronger than the common clansmen that they lead, although this is mitigated by the fact that only two are encountered, while the clansmen are plentiful in numbers.
- No Range Like Point-Blank Range: Snake Eyes like to mix up their gunshots and melee strikes in the same combo. Moreover, their grab attack is them dragging Wolf off-balance and then shooting him in the gut to deal massive damage.
- Pistol-Whipping: When they aren't taking aim at Wolf, they are deftly swinging their guns with enough force to do a surprising amount of posture damage if not parried correctly.
Apparitions
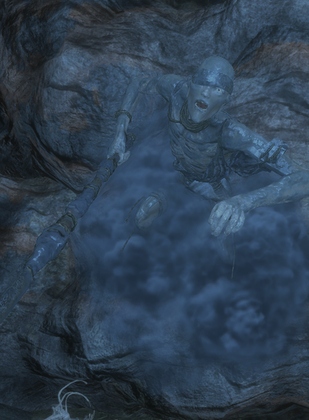
Ghostly figures lurking within Serpent Cave, where the Great Serpents call home. They ambush intruders by creeping out of the rock walls before vanishing back inside.
- Expy: Similar enemies first appeared in the Undead Crypt in Dark Souls II.
- Grapple Move: If they manage to grab Wolf, they'll yank him back right into the walls.
- In the Back: They will only appear while Wolf's back is turned at them.
- Our Ghosts Are Different: Emaciated zombies who can pass through stone and stab at you.
- Stone Wall: They sport a decent amount of Vitality and Posture, requiring several Mikiri Counters and sword slashes to trigger a Deathblow. On the other hand, they can only attack from their specific spawn points, so players can just move beyond their reach.
- Unique Enemy: They only appear in one very specific location, and don't have item descriptions or dialogue that even hint at their existence.
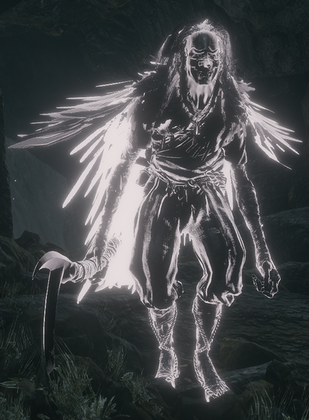
As the sun begins to set on Ashina, lumiscent shades manifest and haunt the land. Born from the grudges of people who have died violent deaths, they appear in front of those who have accrued a great deal of karmic debt.
- Artifact Mook: Mooks that spawn as ghosts tend to appear in odd, isolated areas far from where they originally call home.
- Nice Day, Deadly Night: Their function in-game; loading screen texts indicate that these spirits begin to seek revenge as dusk begins to settle.
- Palette Swap: They're basically just purple translucent versions of various other enemy types, ranging from bandits to Nightjars.
- Remilitarized Zone: Even in places that you've already visited before, Vengeful Spirits can manifest and really play hob with your sense of enemy placement. Their presence can turn an otherwise straightforward fight into a desperate battle for survival, especially since these spirits also tend to be the ghosts of Elite Mooks.
- Stealthy Mook: Aggro'd spirits are completely invisible when chasing down Wolf, only becoming visible when they get close to Wolf.
- Take It to the Bridge: A lone ghost of a Fencer appears on a long and narrow bridge in Mibu Village, making for an incredibly picturesque duel.
- Vengeful Ghost: As indicated by their name and description, they target those with blood on their hands, including Wolf himself.
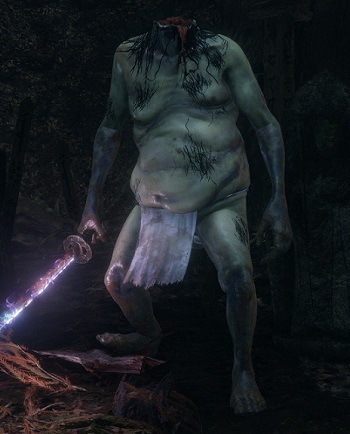
Wailing, headless specters of fallen heroes, now reduced to mindless killers. Five can be found scattered across Ashina.
- Achilles' Heel: They have a few, though the fights are still difficult.
- Aside from Divine Confetti (which is practically required to kill the non-underwater ones), the Phoenix's Lilac Umbrella can block all damage and status buildup that they can throw at you. Meanwhile, they are sitting ducks to the sound of Malcontent.
- The Lazuline Sacred Flame combined with the Living Force skill makes fights with these guys much more manageable. The former is a variant of the Flame Vent that does extra damage to apparitions, and the latter is a Prosthetic Arts skill which briefly applies the effects of the tool to your sword. For the Lazuline Sacred Flame, the effect lasts for 20 seconds (as opposed to 8 seconds for all others). Effectively it's the same as Divine Confetti, but uses spirit emblems instead of limited consumables, and provides an even larger damage boost.
- Ironically given their propensity to Ass Shove you, staying behind them and wailing on them quickly is a viable way to deplete their health while preventing them from getting as many hits in on you, since most of their melee attacks require them to being facing you. Not locking onto them and stunning them with the Malcontent beforehand makes this much easier to pull off.
- Ass Shove: Similar to Kappas in folklore, their grab attack has them shoving their hand up Wolf's backside and ripping out his mythical organ called the "shirikodama". The Headless then follows this attack up by taking the shirikodama (or whatever it was they tore out of Wolf), and shoving it up their own ass.
- Belly Flop Crushing: Straying too far away from a Headless will have them make a sudden leap high into the air, then plummet back down to the ground with the full force of their bloated carcass. It's a bit startling to see, but they're left very exposed to an offensive rush if they miss.
- BFS: They clumsily swing a massive sword in battle.
- Body Horror: They're literally bloated, decapitated corpses brought back to life by sheer malice.
- Brown Note: The heron call emitted from blowing through the Malcontent's Ring will have these specters clutching at their neck stumps in agony.
- The Dreaded: They are feared throughout Ashina. Encounter them, and you'll figure out why.Temple Posting: Turn back if you value your life. You can't behead the headless. Our swords and pikes did nothing.
- Enemy Rising Behind: Occasionally, the Headless will disappear and reappear behind players for a flanking Grapple Move.
- Exactly What It Says on the Tin: This Mini-Boss literally does not have a head.
- Fallen Hero: According to the description of the Spiritfalls they drop upon defeat, they're the ruined form of heroes who once fought for their country.
- Fat Bastard: These hostile spirits are either fat or their corpses have become bloated post-mortem.
- Grapple Move: A very disturbing one, what with the squelching sound effects and Wolf's agonized screaming.
- Guardian Entity: The Headless found at the bottom of the Fountainhead Palace lake is accompanied by an illusory double. According to its corresponding Spiritfall item, the Headless in question had a twin brother who died in utero; now both are fighting side by side to ruin your day.
- Homing Projectile: When far away from you, they may release a volley of fast-moving homing projectiles that will most likely still kill you even if they don't fill your Terror gauge.
- Meaningful Name: The various candies that Wolf can use were named after the heroes these monsters were in life. These names combined with the effects the candies provide presumably embody the quality each of them was best known for: Ako ("attack"), Gokan ("sturdy body"), Gachiin ("moon-hidden"), Ungo ("protection"), and Yashariku ("Yaksha kill"). Upon death, they drop a Spiritfall, which is an infinitely reusable item that provides the same effect as their corresponding candy at the cost of some Spirit Emblems.
- Mighty Glacier: They swing their sword clumsily and slowly, and won't be winning any sprints anytime soon, but inflict major damage and Terror. They make up for this by creating a fog that decreases Wolf's speed.
- Mini-Boss: The three found on land require the requisite two Deathblows to defeat, though the two found underwater only require one. Either way, they're tough but skippable foes who drop unique loot and are gone for good once you defeat them.
- No, I Am Behind You: If they disappear from your sight, chances are they're about to reappear behind you so they can shove a hand up your ass.
- No-Sell:
- It's impossible to sneak up on any of them.
- You can't even make a nick in their healthbars without the means to inflict divine damage.
- On the opposing side, all Wolf has to do to avoid the Headless' grab attack is simply to turn around. These undead beings will teleport behind him to perform the Ass Shove, but instead stand around lamely if there's no ass to shove their hand into. This gives Wolf precious seconds to go on the offensive.
- Status Infliction Attack: If hit by the Headless or one of its attacks are deflected, it inflicts the "Terror" status.
- Sword Beam: Headless found underwater can attack Wolf from afar by concentrating ghostly energy into their swords, then sending it out in waves. And yes, getting hit still fills up the Terror gauge.
- Tragic Monster: They didn't choose to be this way. It's implied that each Headless was created by a particularly brutal and unjust death, and they are at least partially aware of what they've turned into.Description for Gachiin's Spiritfall: "I'm falling to pieces", said the man to himself, drifting deep into the forest.
- Dead Weight: All of them have grotesque, bloated stomachs reminiscent of a severly water-logged corpse.
- Undignified Death: A couple of item descriptions for the Spiritfalls they drop imply that, in order for what were once Ashina's heroes to become the way they are now, they had to have met very unhappy ends.
- Unrealistic Black Hole: Headless that lurk underwater have a grab where they create a black mass in their hand, sucking water and anything else up in an area in front of them. Just like the ones on land, getting caught in the vortex will result in a removed shirikodama.
- Was Once a Man: They used to be heroes who died ignominious deaths. Their restless spirits in turn became the deformed monstrosities you have to fight today.
- You Will Not Evade Me: The Headless emit an aura that forces Wolf to always walk as long as he's close to them, which makes it impossible to dodge their Grapple Move. You can get around this movement restriction by jumping around instead.
- You Can't Kill What's Already Dead: Due to having already lost their head, they cannot be decapitated again, resulting in their Nigh-Invulnerability and their dreadful presence throughout Ashina.

Particular yokai dwelling in the caverns of Ashina. Three of them can be found and fought, the first in the Abandoned Dungeon, the second in the Ashina Depths and the third in the Fountainhead Palace. Wolf can interrupt their rituals, but should beware their powerful magic centered around building up Terror.
- Achilles' Heel: One of the ways they can spam projectiles is by leaping into the air and floating around, making it hard to get another swing at them... or not. With such a long hang time, all Wolf has to do is chase them down and jump to perform an Anti-Air Deathblow, immediately shaving away one lifebar.
- Brown Note: They DO NOT like the sound of Malcontent at all.
- Easy Level Trick: None of their attacks can ever break through the guard provided by the Phoenix's Lilac Umbrella, meaning Sekiro can just turtle the entire fight without a care in the world. They also have one attack (a large jump while they scatter orbs) that puts them high enough to be vulnerable to an Anti-Air Deathblow if Wolf has it unlocked, instantly taking away one of their lifebars.
- Flunky Boss: The Fountainhead Palace Shichimen has a few lightning dogs surrounding its arena, including one overlooking the battlefield from the nearby cliff. If you don't take them out before starting the fight, you may find yourself getting hit in the back by lightning bolts while trying to fight the Shichimen.
- "Get Back Here!" Boss: The Shichimen Warriors' habit of teleporting out of danger makes them particularly tedious to fight. Even worse, this takes up precious time from your Divine Confetti buff.
- Giant Space Flea Out Of Nowhere: They come off as nasty surprises for first-time players due to their bizarre character design and Terror orb spam. There's no lore describing their backstory, they're irrelevant to the plot, no other characters even acknowledge their existence, and fighting them is 100% optional, meaning you're free to completely ignore them if you so desire.
- Kryptonite Factor: While it is actually quite possible to take them down without any aid, Divine Confetti is still required to reliably hurt them. They can also be stunned by Malcontent's tune.
- Magic Missile Storm: If you let them, they will be able to conjure dozens of balls of foul magic that target Wolf, eventually building up his Terror status and killing him instantly.
- Meaningful Name: Shichimen means "seven faces". Closer looks upon their heads reveal they have seven faces.
- Mini-Boss: You fight them three times throughout the game, with each fight being completely skippable; first at the Abandoned Dungeon, then at the Ashina Depths after the second fight with the Guardian Ape, and ultimately at the Fountainhead Palace. Like most other mini-bosses, they each require two Deathblows to defeat.
- Outside-Context Problem: While the other optional bosses, the Headless, are said to be heroes of Ashina who died violent, unfair deaths, the Shichimen Warriors have no stated reason for why they're in Ashina or doing what they're doing, or even what they are.
- Recurring Element: They are the latest iteration of the recurring, teleporting, long-range combat bosses of the Soulsborne series, preceded by the Crystal Sages, Darklurker and Pinwheel from Dark Souls, and the Fool's Idol from Demon's Souls.
- Soul Power: They appear not to be simply the vengeful spirits in question, but seperate entities harnessing the spirits of those who died violent ends as a sort of resource. One appears in the depths, right on top of a mass burial, performing a ritual to coax spirits out of the grave. Another moves into the Guardian Ape's den after its defeat, presumably attracted by the souls of the ape and its victims, including the rogue shinobi Kingfisher. The third one is more ambiguous, but presumably the palace has seen its fair share of death through the ages. They utilise these souls' thirst for vengeance in combat.
- Squishy Wizard: Their screaming spirit bombs are intimidating and stack up the Terror gauge like nobody's business, but they don't have much in terms of defensive capabilites. At most, they will swipe their staves in a two-hit, easy-to-parry combo before teleporting away to gain some distance.
- Status Infliction Attack: Their magic projectiles inflict Wolf with the Terror status.
- Technicolor Magic: Their magic projectiles are all purple.
- Teleport Spam: They will occasionally teleport far away from players to use one of their long-ranged attacks.
- Wave-Motion Gun: One of their attacks is them firing a beam of violet magic, which both deals damage and builds up Terror. Like most projectiles in the game, it can be blocked or parried.

A mysterious woman plucking a shamisen deep within Mibu Village. She cries out for Lord Sakuza, whose name has been lost to antiquity. She's actually a ghost, and a vicious swordswoman besides.
- Achilles' Heel: Has an extreme vulnerability to the Sabimaru, as even just her initial reaction to being poisoned will make her unable to defend herself for an extended period of time.
- Ambiguously Related:
- In the original Japanese, she refers to Jinzaemon Kumano as "あの子" (ano ko, "that child"), which often takes on a parental sense when used to refer to an adult male. Taken in consideration with the rather tender way she apparently treats him when they finally meet, the description of Jinzo's Jizo Statue, and how Jinzaemon's the only one who can hear her playing even from miles away, there seems to be some sort of familial connection hinted between the two.
- She vomits profusely after being struck enough times by the Sabimaru, much like how the Okami Warriors and the people of the Sunken Valley double over when they succumb to blue rust. She fits the bill in other aspects as well, being another wickedly strong Dance Battler who just happens to be a woman. Unlike the listed examples though, there is no explicit lore to point out her lineage.
- Dance Battler: She attacks using fluid twirls, leaps and pirouettes whose erratic timing can easily catch you off-guard.
- Easy Level Trick: If you lure her to either the far end of the nearby bridge or where Jinzaemon is located if you've been doing his sidequest, she can't do anything but stand and take all the attacks you dish out. Unfortunately, this causes her to not drop a prayer bead.
- "Get Back Here!" Boss: One of the reasons she is so difficult is due to how much she evades your attacks and counters.
- Hair-Trigger Temper: Like the Yūrei of Japanese folklore, this spurned woman turns hostile no matter what you do thanks to her overwhelming resentment. Even if you say nothing and try to pass her by, she gets pissed off and attacks you for ignoring her.
- Intangibility: When she retreats, she can make swords pass harmlessly through her. This makes it pointless to chase after her.
- Kryptonite Factor: O'Rin is classified as an apparition, which makes her weak to Divine Confetti as well as the prosthetics Malcontent and Lazulite Sacred Flame. She also can be poisoned by the Sabimaru and reacts just as violently to blue rust as those of Okami lineage, suggesting a connection between the two.
- Lightning Bruiser: Wickedly fast and hits like a freight train despite her thin frame. Even just blocking her attacks will rapidly increase Wolf's posture bar to dangerously high levels.
- Morton's Fork: You are given multiple options when you talk to her. You can ask why she is crying, to which she'll respond that she doesn't know where Lord Sakuza is and ask if you've seen him. If you say you don't know where he is either, she'll accuse you of lying and attack you. If you say nothing, she'll accuse you of hiding him from her and attack you. If you try to Take a Third Option and just walk past her without talking to her, she'll get mad at you for ignoring her and attack you. You can, however, bypass her without a fight by swimming upriver and grappling up onto the bridge just past her.
- Mysterious Past: Who is Lord Sakuza, what happened between him and O'Rin, and what connection does Jinzaemon have to all of this? The game provides no concrete answers.
- New Skill as Reward: While it's possible to avoid her fight, the rewards you get for defeating her are well worth it. On top of a Prayer Bead, she gives the skill Breath of Life: Shadow; as a passive skill that both allows you to recover health on Deathblows and stacks with the learnable Light version, it is considered an incredible boon for the rest of your playthroughs.
- Our Ghosts Are Different: She's a ghost that haunts Mibu Village in search for her love, Lord Sakuza. She also wields a sword and will eventually attack Wolf.
- Pet the Dog: Zigzagged to Jinzaemon - if he successfully makes his way to O'Rin, upon players defeating her, she appears before him and plays him a lullaby before he dies. Of course, the only reason he died is because he went through several different flavours of hell in order to get to her, so it's really the least she could do.
- Senseless Violins: Given that this phantom is not initially holding a weapon, players won't be clued into her violent nature at first. She actually keeps her sword sheathed inside her shamisen until she starts flying into a rage.
- Stringy-Haired Ghost Girl: While her hair is just barely visible to see, O'Rin fits the profile quite nicely. Being spurned by Sakuza has left her with enough lingering sadness and resentment to come back from the dead as a vengeful specter.
- Villain of Another Story: She has all the markings of an Onryō and has been living a cursed existence for some time. However, the details of her past are nebulous and she doesn't have any connection with the current events of the plot; she's just a threat that gets in Sekiro's way and has to be put down. And it's only through Jinzaemon's arrival that O'Rin is able to finally pass on with some measure of peace.
- Yandere: Her attachment to Lord Sakuza has kept her lingering in the world, and she attacks nearly everyone she meets when they fail to tell her where he's gone.
The Interior Ministry
- All Your Base Are Belong to Us: They are foreshadowed on several occasions and in the last third of the game, they launch an assault on Ashina Castle, slaughtering the garrison and effectively replacing the Ashina army as standard enemies.
- Always a Bigger Fish: The Ashina military is ludicrously outmatched by the superior forces of the Interior Ministry, to the point where soldiers are desperate enough to ask Wolf for help. If he so chooses, Wolf can indeed fulfill this role by heading for the Ministry's base of operations in Ashina.
- Badass Normal: The bulk of their forces. While the Ashina military tries to employ all manner of magical and mystical powers to bolster their forces, the Interior Ministry completely dominates them with ordinary soldiers that are just better trained and better equipped.
- The Chessmaster: While no single person is ever identified as directing the Ministry's actions, it's clear they've been planning their conquest of Ashina for quite some time. Three years prior to the main story they collaborated with Juzou the Drunkard and the Owl to wipe out the Hirata clan, disguising their attack as a simple bandit raid so that it wouldn't be traced back to them. Later they are shown using underhanded tactics to gradually undermine the defenses at Ashina Castle prior to the main assault; namely by infiltrating small numbers of Lone Shadows and Red Guards through the moat so they can ambush the unprepared castle garrison, and using a false signal to lure the Nightjar guards away so they couldn't see the main attack coming.
- Curbstomp Battle: They completely bulldoze the Ashina clan's forces during their invasion, only suffering significant casualties when faced against Wolf, Lord Isshin, or the Demon of Hatred. Even their previous, unsuccessful assault seems to have been extremely costly for Ashina, as their fortifications are in ruins and the battlefield outside Ashina Castle Gate seems to have about five dead Ashina troops for every dead Red Guard.
- The Dreaded: Their encroaching presence is talked about with a lot of fear. When they do show up, Ashina ashigaru generally flee in terror from them.
- Early-Bird Cameo: A few of their Lone Shadow shinobi can be fought before their invasion begins; besides the Longswordsman in Ashina Reservoir, a standard Lone Shadow can be found guarding the 3-story pagoda in the first Hirata Estate memory, and a white-hooded one can be found seemingly investigating Mibu Village.
- False Flag Operation: Juzou's raid on Hirata Estate was in fact sponsored and overseen by them. They made it look like a simple bandit raid so they could take out one of the Ashina clan's primary supporters without restarting hostilities too early.
- Greater-Scope Villain: The Interior Ministry's drive to reconquer Ashina is what drove Genichiro to kidnap Kuro.
- Kick the Dog: They apparently don't have much regard for collateral damage. Ministry soldiers kill Anayama and Kotaro for no reason, and Blackhat Badger claims to have seen Red Guard soldiers going out of their way to attack children during the final assault. They also kill wounded and surrendering Ashina troops who pose no threat to them.
- Muggles Do It Better: By far the most effective enemy force in the game, yet aside from a few superhuman elites who function as mini-bosses, they don't bother to use much fantastical gear. They simply have a very well-trained and coordinated army packing lots of guns.
- Ominous Mundanity: "Interior Ministry" is a rather banal name for such a dangerous organization.
- Small Role, Big Impact: Aside from some minibosses fought over the course of the game, the Ministry's forces are only referred to by their collective whole without any field commander identified*, and no high-ranking member of the Shogunate is ever referred to by name. Nevertheless, the Ministry's forces are to blame for Genichiro resorting to desperate measures as they bring war and death into the Ashina region.
- The Unfought: Although you can face some of their forces in battle, it is likely that they have far more high-ranking generals and individuals amongst their troops. You never meet their most powerful generals.
- What Happened to the Mouse?: None of the endings make mention of what happens to their forces in Ashina, but considering the historical context, one can logically assume that they win the war.
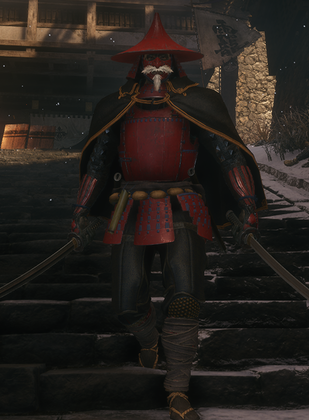
Comprising of some of the finest soldiers in all of Japan, the Red Guard act as the spearhead of the Interior Ministry's invasion of Ashina.
- Ash Face: A non-comedic and somewhat more realistic example; their faces are covered in soot due to their heavy usage of fire-based weapons.
- Badass Army: They're an entire army of Dual Wielding master swordsmen led by exceptionally powerful samurai commanders, backed up by troops carrying flamethrowers and rocket launchers. As soon as they attack in force the Ashina's forces are completely crushed.
- Badass Cape: The masked swordsmen can also be distinguished by their short black capes with gold trim.
- BFG: Their gunmen wield unusually long hiya zutsu matchlocks that fire bo-hiya rockets. And that's not even getting into the elites wielding flamethrower cannons.
- Boss in Mook Clothing: Their elite swordsmen (the ones with the dome-shaped helmets) are exceptionally powerful warriors, being able to deal massive damage both up close and from range with their rocket launchers, and possessing very high health pools and posture bars. Not even the Ashina Generals are usually a match for them. Somewhat justified in that they're implied to be the invasion force's samurai officers.
- Color-Coded for Your Convenience: Unsurprisingly, considering their name, red is the predominant color among their forces, visible on their banners and armor.
- Dash Attack: The elite swordsmen generally move rather ponderously, but they can do a shoulder charge capable of propelling themselves several meters forward in the blink of an eye.
- Dual Wielding: All Red Guard troops (with the exception of the flamethrower-wielding ones) wield two swords as their melee weapons (the masked ones wield kodachi, while the others use long uchigatana).
- Elite Mooks:
- They are the last "standard" mooks Wolf fights in the game and the strongest. During the endgame invasion, they will curbstomp any Ashina they're fighting against if Wolf doesn't step in. Justified, as the Red Guard are an elite force equipped with the best armor and weaponry the Shogunate can provide.
- As perhaps expected, the Red Guard's own elites are the strongest of the Ministry's non-shinobi forces; they're even bigger, stronger, and tougher than the other Red Guard troops.
- Evil Is Bigger: Even their basic ashigaru are considerably taller than their Ashina counterparts.
- Fire-Breathing Weapon: They have flamethrowers and even their standard gunmen fire flaming rockets.
- Malevolent Masked Men: The black-caped swordsmen wear a red menpō decorated with a white mustache and goatee, and are ruthless warriors who show no mercy even to surrendering foes.
- The Musketeer: The elite swordsmen also carry a gun, and even the basic ashigaru gunmen are no slouches in melee if allowed to pull out their dual katanas.
- Palette Swap: The dwarf assassins they employ are functionally identical to the Senpou ones, but wear crimson clothing. In fact, there's a good chance that they are Senpou assassins who've simply switched uniforms to signify their new allegiance to the Ministry.
- Pistol-Whipping: The flamethrower elites have no melee weapons, but will gladly use their cannons to smash in the face of anyone who gets too close to them.
- Samurai Shinobi: The black-caped swordsmen are just as heavily armored as the other Red Guard troops, but seem to specialize in stealthier operations, as evidenced by them being the only Red Guard to take part in the initial infiltration of Ashina Castle alongside the Interior Ministry's dedicated shinobi. Gameplay-wise, this is mostly reflected in them having a tendency to skulk behind walls and corners.
- The Worf Effect: The Demon of Hatred kills them in droves. Gyoubu Masataka Oniwa and Shume Masaji Oniwa are also both shown to have killed a rather large number of them, as Red Guard corpses can be found littering the areas they stand guard over.

A powerful warrior appearing late in the game who's part of the Red Guard force attacking Ashina Castle. Wolf can encounter him in the same courtyard that Tenzen Yamauchi previously appears in.
- Achilles' Heel: He's wearing a breastplate that makes it difficult to damage him from the front, unless one uses the Loaded Spear to rip it off, though it takes two stabs to do so.
- BFS: Wields an odachi, just like his bandit counterparts.
- Booze Flamethrower: Whenever he stops to take a drink, that means he's getting ready to start spewing sake-powered fire out of his mouth.
- Flaming Sword: He can light his sword on fire with his breath, potentially inflicting the Burn status effect as he attacks Wolf.
- Flunky Boss: He's surrounded by regular Ministry troops. Fighting him without stealthily clearing the soldiers out first is suicide for all but the most skilled players.
- Ironic Name: He wears blue, despite being a member of the Red Guard. At least he wears red armor underneath.
- Large and in Charge: Is implied to be at least one of the main commanders of the Interior Ministry army attacking Ashina Castle.
- Old Soldier: A grey haired, battle-scarred old warrior.
- Playing with Fire: Instead of using poison like Juzou and Tokujiro, he utilizes fire instead.
- Palette Swap: Of Juzou the Drunkard, and unlike Tokujiro the Glutton, he actually does look different from Juzou, wearing some actual armor and a blue cloak over his shoulders. That said, unless noted otherwise, all of the gameplay tropes in Juzou's section apply here too.
- Weapon Across the Shoulder: His default pose is to lay an odachi on his shoulders.
- Walking Shirtless Scene: He has a blue kimono draped over his shoulders and wears a breastplate, but lacks an actual shirt.

Shinobi for the Interior Ministry, these agents have been sent as spies to assess the situation in Ashina. Three serve as mini-bosses; the Longswordsman is found in the same well Wolf was in at the start of the game, while the Vilehand and Masanaga the Spear-Bearer appear as part of the assault force invading Ashina Castle.
- And This Is for...: When fought at the Great Serpent Shrine, Masanaga recognizes Wolf and declares he will avenge Masanari, revealed by an Eavesdrop to be the Lone Shadow whose body he stands vigil overnote .
- Actually, I Am Him: The Longswordsman can be talked with, and he tells Wolf that he was hoping to see the infamous broken failure of a shinobi that was imprisoned in the well, unaware that the same shinobi is the one standing in front of him. Talk to him again and he will realize who he is talking to and attack.
- Badass Family: Their most elite members are all siblings.
- The Beastmaster: Some Lone Shadows are accompanied by shinobi hounds, including Masanaga himself; at the Great Serpent Shrine, he's able to call upon any nearby hounds that you haven't already killed, and in the second Hirata Estate memory, he will be constantly summoning new hounds into his arena if you don't interrupt him whenever he's about to whistle for help.
- "Blind Idiot" Translation: Masanaga the Spear-Bearer does not use a spear in any capacity because "槍足の正長" (Yariashi no Masanaga) would more accurately be translated as something like "Spearfeet Masanaga" or "Masanaga the Spear-footed". In that same vein, "太刀足" (Tachiashi) means something closer to "Swordfeet" or "Sword-Footed" rather than "Longswordsman".
- Boss in Mook Clothing: The Lone Shadow in the first Hirata Estate memory. He's technically not a boss, just a regular mook, but he's nevertheless an endgame-level enemy inserted into one of the earliest playable areas of the game, and he's arguably the toughest foe you'll face for quite some time.
- Colour-Coded for Your Convenience: The mini-boss Lone Shadows can be distinguished by their black hoods.
- Dual Boss: The Vilehand is accompanied by a standard Lone Shadow, though approaching the dojo through the front door will allow Wolf to easily backstab the latter before the battle begins.
- Early-Bird Cameo: Long before the player will have any idea of what these guys are, a Lone Shadow can be found atop a three-story pagoda watching over the burning Hirata Estate. A later visit to the Estate will reveal that several other Lone Shadows, including Masanaga, were also present there, implying the attack was sponsored by the Interior Ministry and the Lone Shadows were there to act as advisers to the bandits.
- Easy Level Trick:
- Downplayed for the Longswordsman; he can be found standing gormlessly underneath a huge crack in the ground, letting you drop down on him for a free Deathblow.
- For the Vilehand, there are two you can choose from. If you backstab the other Lone Shadow first, then immediately exit to the menu and load the game again, you will be able to deal a free Deathblow on him. Or if that's not your style, you can use the Puppeteer Ninjutsu on the second Lone Shadow instead, and tag team the Vilehand with him, leaving him few if any chances to get an attack off. You can also reset your puppet's health by using the Puppeteer Ninjutsu a second (or third) time during the fight.
- For the Hirata Estates' version of Masanaga the Spear-Bearer, you can lure him below the stairs after you kill the enemies stationed there. As long as you keep him on the bottom, he will only defend himself and be a sitting duck for you to wail on without any problems.
- The game never tells you this but their unblockable spear kick counts as a Thrust attack for purposes of Mikiri counters. This makes for an extremely reliable and explotable way to chip down their otherwise large Posture gauges.
- Elite Mooks: Even "regular" Lone Shadows are among the toughest enemies in the game; thankfully, they are usually encountered only one at a time, a notable exception being during the assaults on Ashina Castle, where one wrong move on the rooftops or inside the Upper Tower will result in Wolf being beset by several of them at once.
- Even Evil Has Loved Ones: Masanaga can be first found at the Serpent Shrine standing vigil over a comrade killed by the Tengu of Ashina, and explicitly attacks Wolf to avenge said comrade.
- Family Theme Naming: The seventeen most elite Lone Shadows are the children of Masatsuna Oribe. Two of the named Lone Shadows are Masanaga and Masanari. Could also reference to historical Hattori clan, with their family members got named with Masa as prefix (Hattori Hanzou, a retainer of Tokugawa Ieyasu, was born Hattori Masanari).
- Fashionable Asymmetry: They sport small purple cloaks covering the left side of their bodies, only lifting them away to conduct certain attacks. Presumably, Lone Shadows include this aspect in their uniforms to conceal whatever shinobi gadgets they have up their sleeves.
- Handicapped Badass: Subverted. At first glance, all Lone Shadow agents seems to be missing their left arm, but they actually pull it out when throwing kunai or performing hand strikes that inflict the Poison status effect.
- Highly-Visible Ninja: They're tall, dressed in bright purple robes, and have incredibly destructive movesets.
- In the Hood: Most Lone Shadows wear a half-hood that covers their face below the eyes, but leaves the top of their head exposed. The mini-boss and poison-using ones wear an extra hood on top that leaves only their eyes exposed.
- Martial Arts Headband: Most of them can be seen wearing a metal headband that protects their forehead.
- Massive Numbered Siblings: The most elite Lone Shadows are a set of seventeen brothers, the sons of the master shinobi Masatsuna Oribe.
- Meaningful Name: Vilehand lives up to his name by having his left hand coated in poison. Longswordsman and Masanaga the Spear-Bearer would live up to their names if they were translated correctly, as "sword-footed" and "spear-footed" would be suitable names considering they attack with powerful kicks.
- Mini-Boss: The Longswordsman, the Vilehand, and Masanaga each have two lives instead of just one.
- Ninja Run: Carefully paying attention to their movement when they rush towards you reveals this, although one of their arms are covered inside their purple uniform, and we can only see their sword-holding one without reverse gripping their sword.
- Non-Indicative Name: Vilehand has a nameless Lone Shadow mook backing him up and Masanaga can summon dogs in both his fights, making them not quite Lone Shadows after all.
- Outside-Context Problem: The Lone Shadow perched atop the three-story pagoda during the first visit to Hirata Estate. The path leading up to him is hidden, he moves and looks unlike any of the bandits or shinobi hunters attacking the Estate, and wordlessly engages you upon approaching the pagoda. The Red Guard invasion of Ashina and second visit to Hirata finally explains why he was there.
- Poisonous Person: The Vilehand, Masanaga (when fought at the Great Serpent Shrine), and the ones who wear an extra white hood can perform hand strikes that inflict poison.
- Power-Up Food: When fought at the Great Serpent Shrine, Masanaga will occasionally bite down on a Yashariku's Sugar to give himself an attack boost in exchange for sacrificing a bit of health.
- Purple Is Powerful: They are elite shinobi who wear a good amount of purple, most visibly in the cloth that covers their left arm.
- Recurring Boss: Masanaga can be fought twice: once at the Great Serpent Shrine after the first Interior Ministry invasion and again in the second Hirata Estates memory.
- Sibling Team: While they aren't fought together, it is mentioned that the seventeen most elite Lone Shadows (presumably including the three named ones you fight) are the children of their leader, Masatsuna Oribe, making them all brothers.
- Sword and Fist: While Lone Shadows are all master swordsmen, they tend to favor using a series of kicks and sweeps, including an unblockable front kick and an axe kick after a jump, with those wearing an extra hood also ultilizing hand strikes. One of their moves is perhaps Senpou leap kick (but without anti-air part during their jump animation like Wolf's) that propels themselves into the air and divebomb his opponent with a slam dunk, followed by an unblockable leg sweep (which Wolf can take advantage of).
- Tempting Fate: The Longswordsman can be talked to first without aggro-ing him, during which he'll explain to Wolf that he was hoping to see the immortal shinobi who couldn't even kill himself to take responsibility for his failures, then muses that he'll stumble across such a pathetic man eventually. As said "pathethic man", Wolf is free to answer that with an ambush.
- Wake-Up Call Boss: The "regular" Lone Shadow at the first visit to Hirata Estate, who isn't even considered a boss by the game. If you "travel" to Hirata immediately after acquiring the Young Lord's Bell, he will most definitely be the hardest enemy you have encountered thus far, even more so than actual minibosses Juzou the Drunkard and Shinobi Hunter Enshin.
- The Worf Effect:
- They are subjected to this offscreen by the Tengu of Ashina, as every location he appears in is littered with their corpses when you get there.
- However, they subject the Nightjar Ninjas and Fencers to this later in the game, easily massacring them whenever they get into a direct confrontation. Heck, even the Samurai Generals will usually lose to them in a straight fight.
Fountainhead Palace

The inhabitants of the Fountainhead Palace, now turned into yokai by the water from the Fountain.
- Age Without Youth: Turns out becoming a carp-man is this sort of immortality. But the Nobles have... workarounds.
- Aristocrats Are Evil: On top of being stereotypically decadent, out-of-touch Heian nobles, their abuse of the Rejuvenating Waters has turned them into cannibalistic fishmen.
- Expy: Of the Jailers from Dark Souls 3, as depraved, aristocratic Squishy Wizards whose primary means of attack is an HP to One debuff that leaves you vulnerable to other enemies.
- Fish People: The Nobles are seemingly carp-people, considering their fish-like faces, their tailfins, and the fact that they have four Creepily Long Arms just like how some kois have four fins.
- HP to One: The Nobles can drain Wolf's max health to 1 if he gets hit by their magic.
- I'm a Humanitarian: If they age Wolf enough to overpower him, they fall upon him like wild animals.
- Immortality Seeker: Their hunger for the youth of others seems to be motivated by a desire for an immortality unafflicted by aging.
- Life Drinker: According to one of the aged daughters of the Great Carp's caretaker, the Nobles have a craving for youth. They feed primarily on the Okami Warriors, but the Warriors know a ritual dance that can restore their youth; however, judging by the piles of masks in the Palace, it only works so well.
- Long Neck: They have elongated necks not unlike the Dancer of the Boreal Valley.
- Magical Flutist: If players are seen on sight, the Nobles will play a tune that starts accumulating the "Enfeebled" status effect. Getting inflicted will result in Wolf losing all his Resurrections, reducing his HP to 1 and severely crippling his ability to move and take action.
- Monstrous Cannibalism: It is shown in a closed room of the Palace that the Nobles feed on the Okami Warriors. Going by the number of discarded masks, it has been going on for a long time.
- Squishy Wizard: Although their magic is redoubtable, they are extremely weak at close range, allowing Wolf to dispatch them with ease.
- Vain Sorceress: A male version. They magically drain the youth of others to restore their own.
- Was Once a Man: It's implied that they used to be human, but after so many years of drinking the Rejuvenating Waters straight from the source they've become monsters within and without.

Onna-bugeisha![]() yokai that guard the Fountainhead Palace.
yokai that guard the Fountainhead Palace.
- Achilles' Heel: Ball-users are susceptible to the Anti-Air Deathblow when they are jumping up for a charged kick.
- Amazon Brigade: The Okami are incidentally all females, and are the proper guards of the Palace.
- Bow and Sword in Accord: The bow-wielding Okami are also adept with their tachi.
- Cool Crown: All of them wear golden tenkan headdresses.
- Cool Mask: They wear blue, vaguely human-looking masks.
- Dance Battler: They're very light on their feet, deftly hopping from one foot to the other while assuming grand kabuki-esque poses during combat. Their surreal movements highlight both their athleticism and their inhumanity.
- Elite Mooks: Their best fighters, distinguished by their purple outfits, are more aggressive, have significantly higher Vitality and Posture (plus a slightly higher resistance to the Sabimaru), and can incorporate electricity into their attacks.
- Every Japanese Sword is a Katana: From the sword mountings and how it is worn, along with the fact that they're supposed to be call-backs to the Heian period, their swords are actually Tachi.
- Evil Laugh: Are almost always laughing as they try to kill you, with a certain regal/stuck-up air that invokes the stereotypical Noblewoman's Laugh as well.
- Extremity Extremist: The ball-users use kicks to launch their mari, and their sole melee attack is an airborne double kick.
- Eye Scream: Their transformations removed their eyes.
- Fashionable Asymmetry: Ever so slightly; the elite Okami wear clothing that is mostly purple, but has a single tan-colored sleeve.
- Fish People: Like the Fountainhead Nobles. They're not as deep into carp territory though, lacking their counterparts' tails and extra arms.
- Great Bow: Okami archers wield great yumi whose length surpasses their own height.
- Improbable Weapon User: Some particular Warriors use exploding kemari balls as weapons.
- Just Hit Him: A strange example in that it applies to you more than it does to them; their fighting style is almost ceremonial with lots of flourish and flashy moves. If you choose to engage them in this "dance" with fancy deflections, they will give you a hard time thanks to their odd timings and repeated onslaughts. On the other hand, adopting a blunt Attack! Attack! Attack! approach will force them to go on the defensive and make it easier to break their posture.
- Kryptonite Factor: The Okami are, as described in the lore, very weak to the Sabimaru, to the point that one hit and a few sword blows will put all but the elites into Deathblow status.
- Long Neck: Like the Nobles they serve.
- Magical Barefooter: Inhuman women with supernatural qualities who do not wear shoes.
- Magic Dance: The completed Dancing Dragon Mask reveals that they can restore their youth by doing a special dance in tribute to the Divine Dragon. Which is good for them, because they're the primary source of youth for the Palace Nobles.
- Martial Arts and Crafts: The ball-users practice by playing kemari (a traditional Japanese ball game similar to hackey-sack) with themselves.
- Naginatas Are Feminine: Female warriors who are the only enemies that can be found wielding (traditional) naginatas.
- Purple Is Powerful: The elite ones, who can use lightning attacks as well, can be identified by their purple clothing.
- Shock and Awe: The purple-clad elite warriors can channel lightning through their weapons.
- Spectacular Spinning: As part of their Dance Battler routine, they'll sometimes do an exaggerated spin before their next strike.
- Spin Attack: The naginata-wielders have a Perilous Sweep that involves them spinning around in circles multiple times.
- Villains Out Shopping: A handful can be seen either playing kemari by themselves or practicing what seems to be a bugaku dance.
- Wicked Cultured: The Flower Viewing Stage has bugaku courts on every platform, where Okami warriors can be seen practicing ceremonial dances. The one closest to the Great Sakura (near the idol leading to Okami Leader Shizu) hosts a full-on stage performance, with Dragonspring Sake served among them as a refreshment. Killing everyone there will net a bottle for yourself.
- Youkai: Their inhumanly long necks are reminiscent of the Rokurokubi, supernatural human-like creatures characterized by their elastic necks who are usually (but not always) female.

A Palace Noble residing in the Hidden Forest part of the Ashina Depths. Using its flute, it conjures a thick mist and apparitions in order to prevent outsiders from reaching Mibu Village. Wolf is asked by a Buddhist priest to get rid of it.
- Early-Bird Cameo: The Mist Noble is the first Palace Noble seen in the game, and will likely be encountered long before the player reaches Fountainhead Palace.
- Good Hair, Evil Hair: Its whiskers resemble a Fu Manchu style moustache.
- Hard Levels, Easy Bosses: The Hidden Forest can be a challenge to navigate in no small part due to the thick haze enveloping everything. This is combined with the uneven terrain, constantly spawning mobs who are either camouflaged against the background or just straight up invisible, and two (thankfully optional) mini-boss encounters. The actual fight against the Mist Noble is more of a formality than anything else.
- King Mook: Compared to the Nobles found in the Fountainhead Palace, it has significantly more Vitality and Posture (including two Deathblow markers), likely as a result of its encounter being technically a boss battle that has to be fought to dispel the mist around Mibu Village. It still has the slug-like pace and low attack power of the other Palace Nobles, though.
- Magical Flutist: The thick fog/mist covering the dense forest outside of Mibu Village is a result of this Noble playing its flute.
- Master of Illusion: The mist and the enemies within? Just a very powerful illusion. Even the temple it takes shelter in is an illusion, appearing to be in pristine condition while it is actually only a ruin.
- Multi-Armed and Dangerous: It has four arms, although its status as a Squishy Wizard don't make said arms so dangerous by themselves.
- Squishy Wizard: The Mist Noble is a real pushover in close quarters. Not only can Wolf easily get the drop on it, but it also is just slow and weak in general, being easily defeated by any player good enough to reach it to begin with. Its only two attacks are incredibly slow and do negligible damage, and the only possible way anyone could die to it is by standing there and letting it hit you out of pity. Nonetheless, its illusions represent a significant danger.
- Zero-Effort Boss: You can just wail on him until he dies without having to worry about a counterattack.

A yokai roaming in the Fountainhead Palace. It will attack Wolf if they cross paths.
- Achilles' Heel: Like all beast-type eneimes, the Sakura Bull is easily startled by the Shinobi Firecrackers, causing it to rear and opening a window for some quick hits.
- Armor-Piercing Attack: All of the Sakura Bull's attacks will deal chip damage whether your parry timing is perfect or not.
- Bullfight Boss: Like the Blazing Bull, the Sakura Bull does not stop charging.
- Easy Level Trick: Unlike its fiery counterpart, the Sakura Bull does not begin the encounter immediately aggro'd. Furthermore, it lurks around in tighter spaces than the Blazing Bull's boss arena, which Wolf can use to his advantage - sneak up behind the bull without it noticing, spook it with the Shinobi Firecrackers, then give it a smack with the sword, and it will potentially ram itself into a wall while panicking and immediately suffer a broken posture bar. Do it right, and the fight can end in just seconds.
- New Skill as Reward: Defeating it will net you A Beast's Karma (a latent skill that increases your Spirit Emblem capacity by 1) in addition to the expected Prayer Bead.
- Palette Swap: Of the Blazing Bull.
- Skull for a Head: The only difference between it and the Blazing Bull. Whether or not this creature originally had such a face, or was the result of being so wizened the skin on its head decayed away to a husk, is unknown.
- So Last Season: It's possible to use a stealth Deathblow on the Bull, but it won't be a One-Hit Kill; rather, a small percentage of its Hit Points is damaged. To truly put it down, players must defeat this mini-boss the standard way.

A leader of the Okami Warriors. She is posted on a great tree branch overlooking the lake of the Fountainhead Palace, and can be distinguished by her white hair.
- Achilles' Heel: Not that you'll really need it if you're already close enough to cut her, but she's just as susceptible to blue rust poison as her warriors, and her charging kemari kick can be exploited for an Anti-Air Deathblow.
- Degraded Boss: Another lightning-powered kickballer shows up as part of the elite Okami trio guarding the path to the Divine Dragon.
- Hard Levels, Easy Bosses: She's just an especially eagle-eyed kickballer; the hard part is getting to a position where Wolf can fight her, which involves navigating a circuitous route through the heavily-guarded Palace.
- Improbable Aiming Skills: If you jump in the lake, she will strike you down with her kemari balls no matter how far away you are.
- King Mook: Besides her white hair, magatama necklace, and exceptional long-range accuracy, there's nothing about her that stands out from the other elite Okami Warriors encountered at Fountainhead Palace. She doesn't even get the extra Deathblow marker that most other mini-bosses have.
- Long-Range Fighter: Very long-range; unaware players will likely be first introduced to her as they attempt to go for a swim at the Fountainhead Palace, only to be struck by a scintilating thunder ball shot from across the map. However, she has very little means to defend herself at close range.
- Mook Lieutenant: As indicated by her title of "Okami Leader".
- Purple Is Powerful: Like the other elite Okami, she wears purple.
- Shock and Awe: She attacks Wolf with lightning-powered balls, kicking them at him even from afar.
- Squishy Wizard: For all her lightning, Shizu is a pushover in close-quarters. She only has one health bar and no notable close-quarters moves, making her very easy to kill once reached.

A nun guarding the entrance to Fountainhead Palace. An illusion of her is first fought in Mibu Village, protecting the Wedding Cave door which contains the Shelter Stone. When Wolf enters the bridge leading to the Palace proper, the real one appears to stop him.
- Armor-Piercing Attack: A select few of her moves can break through Sekiro's blocks despite not classifying as Perilous Attacks. This is achieved through weaponizing Hitbox Dissonance; during those unique swings, two strikes are registered along the length of her naginata rather than just one, catching players off-guard after a seemingly successful parry or block.
- Body Horror: Bring her down to her last health bar at the bridge fight and a centipede will burst out from underneath her mask as she resume the fight with several new and devastating attacks.
- Cool Mask: The Corrupted Monk wears a Hannya Mask with a jeering but agonized expression to cover her face.
- Dance Battler: Some of her attacks almost resemble ceremonial dances, especially her spinning combo.
- Damage-Sponge Boss: Both fights against her try different variations of this. The Illusory version has a long Posture bar that regenerates very quickly, meaning you're more likely to kill her by whittling down her health. Meanwhile, the true Monk's posture bar fills up very fast and hardly diminishes at all, but has three health bars for you to go through.
- Dark Action Girl: A demonic nun who is exceptionally skilled with a naginata.
- Easy Level Trick: Possible in both encounters:
- Against the illusory version, one can utilize some combination of snap seeds, fistfuls of ash, and firecrackers to stun-lock her and deplete her health bar without giving her a chance to retaliate. With a Gachiin's Sugar/Spiritfall, it's also possible to sneak around behind her and throw fistfuls of ash repeatedly, causing her to flinch backward slightly each time. Once she's close enough to the pillar behind her, jump off it for an Air Deathblow and the fight is over.
- Against the True Corrupted Monk, it's possible to instantly end the second phase of her fight by landing a Deathblow from the highest tree branch whenever she teleports to the middle of the bridge in a crouched position (basically, whenever she's about to either summon or dispel her shadow forms). As for her other phases, firecrackers and fistfuls of ash will stun-lock her just as easily as her illusory counterpart.
- Evil Laugh: Occasionally lets out an evil cackle as she fight.
- Facial Horror: Though almost impossible to see in game, careful examination of her illusion◊ shows that her face underneath the mask is one of a young woman, but with the left side disfigured due to her infestation.
- Fighting a Shadow: In phase two, she can create a thick mist in which shadowy reflections of herself come out and attack Wolf. Furthermore, a ghostly illusion of the Monk is first fought outside of Mibu Village, where it guards the Shelter Stone.
- Gate Guardian: Twice. Not only does her illusion protect the Wedding Cave Door through which one must pass to even hope to access the Fountainhead Palace, but her real self also guards the entrance of the Palace itself.
- Given Name Reveal: Per the remnant memory of the True Monk, her name is Priestess Yao. Translates to Japanese as "Yao Bikuni" a name given to a certain immortal nun in Japanese folklore.
- Immortality: She's infested like the elders of the Senpou Monks, and was given the role of guarding the Fountainhead Palace because of it.
- In a Single Bound: The Monk appears by jumping above the entrance walls of the castle, only to land on the bridge.
- Kryptonite Factor: Being an illusion, the Corrupted Monk fought in Mibu Village is vulnerable to Snap Seeds, taking considerable damage and being stunned with each use. It can only work for three times before she become immune to them. The Lazulite Axe which has the same properties is even more effective with the added damage from the axe itself; by the time you've hit her with three axe combos and she becomes immune to the illusion dispel effect, she's probably lost about half her vitality and all posture regeneration.
- You can also use Snap Seeds during the second phase of the Fountainhead Palace rematch. Doing so will dispel all the illusions attacking you and forces her to resume her normal attack patterns.
- Mighty Glacier: One of the few bosses in the game with three health bars, she moves and attacks slowly, but her attacks pack a punch and wide-reaching and will always stagger Wolf if they connect. She is also very defensive, blocking every frontal attacks you throw at her and will counter back with attacks that can easily break through guarding.
- Naginatas Are Feminine: Wields an absolutely giant one, though it also doubles as a nod to the association of the weapon with monks.
- Nuns Are Spooky: Especially nuns who infest themselves with supernatural centipedes to become immortal witches.
- Nun Too Holy: It's right there in the name. Like the Senpou Monks, she was presumably once a normal holy woman whose lust for immortality led her to infest her own body with the centipedes, corrupting her into the monster she is today. Alternatively if she is the very same Yao Bikuni from Japanese folklore it means she was infected unwillingly like Hanbei, but regardless she isn't the kind figure from the tales anymore.
- One-Hit Kill: Can unleash a stream of centipedes from her left arm as an attack in her third phase which rapidly build up the Terror status effect. If the Terror bar is full, Wolf will die instantly.
- Only Known by Their Nickname: Her real name is priestess Yao, see the below trope for why.
- Public Domain Character: She is clearly based on the Japanese folk tale of Yao Bikuni (八百比丘尼 "eight-hundred (years) Buddhist priestess") A story of a girl who unknowingly eats ningyo meat. The girl goes on to marry, but she stays young while her husband and family grow old and die, after marrying and widowing, again and again, her life is filled with emptiness and suffering. She becomes a Buddhist nun and wanders through various countries. At the age of 800 years, she returned to her hometown and finally died as she simply lost her will to live. If the same name and the elements the tale shares with the game aren't hinting enough, she also protects a palace full of fish people.
- Recurring Boss: First you face her as a ghostly illusion outside of Mibu Village, then you fight the actual Monk herself at Fountainhead Palace.
- Villainous Breakdown: Spend the first two phases of her fight blocking every frontal attack you can throw at her and letting out Evil Laugh as she fights back with her slow and calculated attacks. Bring her down to her last health bar will result in her centipede bursting out of her and her losing her composure, fighting back much more aggressively, forgoing her slow and calculated attacks for a barrage of quick and powerful attacks instead and wailing like a banshee as she fights.

A giant carp swimming in the waters of the Fountainhead Palace. It attacks Wolf if it spots the shinobi underwater.
- Attack of the 50-Foot Whatever: The carp got so big in the first place because it continuously grew as it aged.
- Beast with a Human Face: The carp has a quite horrifying human-like face with eyes at the front and a set of human teeth.
- Killed Offscreen: If fed the Truly Precious Bait, its corpse will be later found in the same place where you fought the Guardian Ape.
- More Teeth than the Osmond Family: Examining its corpse reveals that it has rows and rows of teeth. Unexpectedly for this trope, they are all molars.
- Tastes Like Friendship: If you feed it Precious Bait, it won't attack you again.
- Trademark Favorite Food: It loves its Precious Bait - slimy, aquatic slugs that can be found in freshwater areas where the Fountainhead waters pool. They are primarily harvested in Mibu Village, where thousands proliferate and cover the lake bottom.
- The Unfought: Aside from a Stealth-Based Mission, you only "fight" it by feeding it a Truly Precious Bait.
- Was Once a Man: It sports humanlike features and the fact that the Pot Nobles are attempting to become one themselves imply that the Great Colored Carp was formerly yet another Immortality Seeker.
- Yōkai: The carp is based off the jinmen gyo — a yokai that appears as a massive fish with a human face.
- You Kill It, You Bought It: Whichever Truly Precious Bait you use, if you go back to the Pot Noble who sold it to you it turns out he's become a new carp.
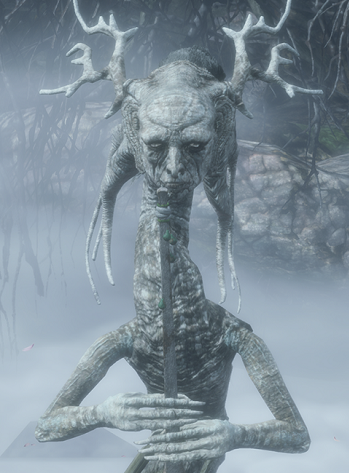
Sickly, tree-like dragons who serve the Divine Dragon.
- Beast with a Human Face: For some reason, they have uncannily human faces.
- Color-Coded for Your Convenience: The Dragons appear as either white or black; the only way to take off their collective Hit Points is to damage the former.
- Easy Level Trick: If Wolf grapples onto one of the protruding branches in the area and deals a deathblow from above, he will then use the corpse of the dragon he kills as a long club, clearing the area of the rest of the dragons as well. Repeated use of this can clear their fight phase very quickly.
- Expy: Of the Deacons of the Deep from Dark Souls III. Both boss battles consist of multiple enemies you must fight, whose Hit Points only go down by attacking certain members. For the Dragons, you must clear all of the sickly, pale ones to proceed, while for the Deacons, you must target the priest possessed by a red orb.
- Green Thumb: Occasionally, the Old Dragons will summon tall tree roots that can harm Wolf. However, he can grapple onto the top of these trunks and score a Shinobi Deathblow on one of the unsuspecting Dragons.
- Grievous Harm with a Body: Doing an aerial Deathblow will let Wolf swing the body of the dead dragon like a club, sweeping the area and wiping out any dragons nearby.
- Multi-Mook Melee: Players will be fighting at least a dozen of the Old Dragons as they continue to spawn.
- Our Dragons Are Different: They’re Eastern dragons with human faces, barklike skin, and roots where their lower limbs should be.
- Plant Mooks: They look like trees that have been carved into the shape of a human-like dragon, and must be cut down in great numbers in order to face the Divine Dragon.
- Poisonous Person: The white Old Dragons incessantly cough, littering the environment with a toxic gas that inflicts poison.
- Rule of Symbolism: Let's see, they're dragons with human faces that spawn from the divine dragon's influence, and they cough stagnant phlegm that kills you. Doesn't this remind you of a certain disease that you happen to spread all over Ashina? Also, they are the same color as the pale mark on Wolf's face.
- It can also be interpreted that the initial battle with the Old Dragons may symbolise Wolf purging the Divine Dragon's/Sakura Tree's disease. First, killing the sickly pale dragons is the only way to drain their collective health bar, much like amputating an infected limb to prevent the disease from spreading to the body. Second, for every pale dragon killed, a weaker, but visibly healthier and more aggressive black-and-red dragon will take their place, and the Divine Dragon only appears once all the ill white dragons have died and been replaced by healthy black dragons.
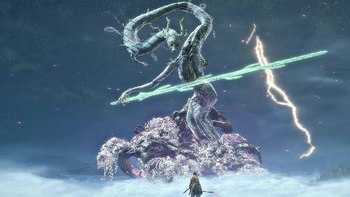
An ancient deity that is the source of the Dragon's Heritage. Wolf must confront it in the Divine Realm if he is to have any hope of ending Kuro's immortality.
- An Arm and a Leg: It is missing one of its large arms, implied to be because a branch was taken from a Sakura tree in the Divine Realm.
- BFS: Its sword is big even in comparison to its own body. Compared to Wolf, it's gargantuan.
- Blade Run: Wolf ends the battle by knocking it out and then running up its massive sword to its face.
- Blow You Away: The Divine Dragon uses wind to its advantage to blow Wolf far away from it just so it can spam Razor Wind.
- Crossover Cosmology: A subtle one, but the Divine Dragon is actually the odd one out among the land's own collection of demons, ghosts, and Youkai. During the Divine Child's questline required to earn the Return Ending, it is revealed the Divine Dragon is not actually native to Japan, and likely wasn't meant to be there in the first place; instead, it is said to have been brought to Japan from an unspecified foreign land to the West. Considering how in Real Life, Japanese dragon myths are influenced by imported stories from regions west of Japan, especially China and its version of Eastern dragons, this may be a hint that this trope holds true in the world of Sekiro, further implied by the Return Ending. The sword it is wielding is another hint of its foreign origins. It is modeled off the Shichishitō or Seven-Branched Sword, a ceremonial weapon gifted to an old Japanese king by a Korean king.
- Dragons Are Divine: It's an Eastern dragon with "Divine" in its name. What did you expect?
- Dramatic Thunder: Climbing the Fountainhead Spiral up to the shrine, where Wolf can pray and enter the Divine Realm, will have lightning touch down uncomfortably close to him as if warning him to stay away. Thunderbolts are also constantly firing in its boss arena, letting the Wolf perform Lightning Reversal to significantly weaken the dragon.
- Eye Scream: Wolf will eventually plunge the Mortal Blade in the Dragon's eye to collect the Dragon Tear, though the wound isn't so deep it can't heal it eventually. Its other eye is also missing entirely, suggesting that when Tomoe gained her own dragon tear for Takeru's rite of severance, she completely ripped out its eye.
- Lost in Translation: The Divine Dragon is referred to in Japanese/Chinese as "櫻龍", literally meaning "Sakura Dragon". Its rootlike appearance and presence of cherry blossoms where its influence is felt become more obvious upon knowing that.
- Oddly Shaped Sword: It wields a giant jade-colored Seven-Branched Sword.
- Our Dragons Are Different: Literally a "divine dragon" of the Eastern variety, yet cannot fly, but compensates it for sheer size and the fact that it has a sword. It's also part-plant in nature.
- Planimal: The Divine Dragon is half-plant, its lower body being made of giant roots.
- Puzzle Boss: Like the Great Serpent, it's impossible to fight the Divine Dragon directly; rather, players must grapple onto the giant tree roots and use a Lightning Reversal from a lightning bolt and re-direct it back at the Dragon to deplete its Hit Points.
- Razor Wind: Can perform those by slashing at Wolf.
- Recurring Element: The jade-colored Seven-Branched Sword looks oddly familiar to the Moonlight Greatsword, a FromSoftware staple since King's Field.
- Villainous Breakdown: Probably not a "villain" per se, as its behavior and motivations are more comparable to a territorial animal than a malicious being, but dropping its health down to the last needed hit will have the Divine Dragon blow Wolf away, then frantically swing its sword at him in a constant hurricane of razor-sharp winds, as if you were a stubborn wasp who just ruined its nice, carefully-planned picnic. After a short while, it will run out of stamina and tire itself out, and Wolf is free to run up to it and stab the Mortal Blade into its tear duct.
SPOILER BOSSES
WARNING: The following characters are Spoilers Off.
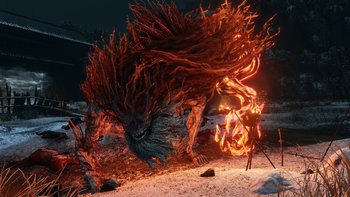
- Abnormal Ammo: From the second phase onward, the Demon of Hatred begins to send homing fireballs at Wolf's direction. That doesn't sound so strange until one notices that they are just Sculptor Idols set on fire.
- Achilles' Heel: The Malcontent can stun it briefly, but only up to 3 times. Suzaku's Lotus Umbrella can also block most of its fire-based attacks, especially during the Ground Pound attack. It's difficult to figure out, but it's also weak to Divine Confetti.
- An Arm and a Leg: It doesn't have a left arm. In its place is a writhing mess of flames that will incinerate you if you get too close. It's also the biggest hint that the Demon is the Sculptor.
- And I Must Scream: Whatever humanity is left in the Demon of Hatred is fully aware of what it has become. When Wolf battles it, it begs him to kill it and thanks him when it is struck down.
- Animal Motif: Bears very clear traits of an ape (in this case a demonic ape), which is quite evident in the way it moves and attacks. More specifically, its red fur makes it clear the Demon possesses the same orangutan motif as the Sculptor, a huge hint that they are one and the same.
- Artificial Stupidity: It's easily one of the most dangerous fights in the game, but if you go up to a gate on a cliff, it can be tricked into falling off the cliff and dying instantly for an easy victory.
- Ass Kicking Pose: When initiating combat, the demon performs a pose from Kabuki theatre known as a Mie, which is used to indicate that the character's emotions have reached their peak, fitting for a being consumed by anger and hate.
- Ax-Crazy: All that's left of this monster is a desire to rend, and cause suffering. It's exceedingly violent, cruel, and sadistic.
- The Berserker: Attacks in wild, erratic, and exceedingly powerful patterns with barely any thought to self-preservation, all the while roaring like a wild animal.
- Big Red Devil: Downplayed - it has red tints all across its body. For added measure, it likes to spew flames all over the place. That being said, it still comes closest to evoking the imagery of a classical Japanese Oni, being an ogre-esque nightmare, covered in Hellfire and complete with a pair of horns.
- Bishōnen Line: Despite being one of the deadliest bosses in the game, the Demon of Hatred comes closer than any other Yōkai - short of the Headless - to human body shape. While he is overwhelmingly large compared to Wolf, he's not much bigger than Gyoubu Onigawa - although the latter is admittedly a heavily-armored samurai riding an equally-armored stallion.
- Burning with Anger: The Demon isn't burning per se, but has grown a left arm made of fire.
- Damage-Sponge Boss: If you decide to forego a certain
 Cheese Strategy, it requires three deathblows to put down, and the only way to pull off a deathblow is to drain its staggeringly large Vitality bar. You're going to be fighting it for a while.
 - The Dreaded: The Ministry soldiers are terrified of it.
- Dying as Yourself: When Wolf kills the monster, it regains its senses as a human and thanks the shinobi for delivering him."Finish me... please... *Deathblow is struck* Wolf... Thank... you...
- Expy: Of Manus, Father of the Abyss and Laurence, The First Vicar, being absolutely brutal Optional Bosses that were once human but transformed into insane beasts with oversized left arms, especially the latter regarding his fire powers.
- Face–Heel Turn: The Demon of Hatred is what's left of the Sculptor, who succumbed to his own rage and failed to become the demonic Shura. That being said, what's left of him is aware of what he's become and thanks Wolf for ending him.
- Genre Refugee: Its appearance and attack patterns follow more along the line of Bloodborne's design philosophy, being a gargantuan, hairy husk that Was Once a Man. Many players will end up adopting a similar strategy to fighting that game's collection of beasts too - stay out of range, wait for the attack animation to end, then charge in for a couple jabs, rinse and repeat.
- It Can Think: The Demon of Hatred is not just some beast - many of its attacks conclude with recognizable stances, likely learned from the days when it was still a human shinobi.
- Kick The Son Of A Bitch: The path to the Demon of Hatred is lined with the bodies of dead and dying Interior Ministry soldiers, and when you find it, it's killing a few more. After seeing the Ministry commit so much wanton slaughter over the course of the game, it can feel rather cathartic to see them get a taste of their own medicine for once.
- Lightning Bruiser: Not only is the Demon of Hatred hard to take down due to requiring at least 3 deathblows to kill it, it also is incredibly relentless in their attacks and most of its attacks cannot be deflected and thus its Posture bar will barely be filled throughout the fight, forcing the player to slowly chip its health down to perform a Deathblow while most of the Demon's attacks in return can easily kill Wolf in one or two hits. There's a reason why it's considered one of the hardest bosses in the game.
- Maniac Monkeys: It looks like a giant demonic ape, and it's as violent as one as well. It's only fitting that it used to be a man named Orangutan.
- Marathon Boss: It's got three deathblow markers, and it takes virtually no posture damage from being parried. You're going to have to completely drain its Vitality bar to get a deathblow in. Considering how much Vitality it has, this can take a while.
- Mercy Kill: Killing this monster is a somber affair when it becomes clear when Wolf executes the Deathblow that the Demon is aware of what it has become. The Old Nun will console Wolf later if talked to, hoping he's comforted with the knowledge that he has freed the Sculptor and allowed him to find peace in the underworld.
- Morphic Resonance: It really does look a lot like the Sculptor, right down to its fur being the same colour as the Sculptor's clothes.
- One-Man Army: When you find it, the Demon has slaughtered untold numbers of the Interior Ministry's elite army, and there's an implication it's been killing anything unlucky enough to be caught in its rampage for hours.
- Our Demons Are Different: A nightmarish horror born from the Sculptor's repressed hatred, blood lust, and resentment. The Flavor Text implies it isn't a true Shura, instead a primal manifestation of pure hatred.
- Playing with Fire: Most of its attacks are fire-based, and it will often send fireballs, create fire trails and try to swipe at you with its fire-arm. As a result, getting the "Burn" status effect is a real possibility and the player should plan their items accordingly. Conveniently, all the Interior Ministry Mooks you had to kill in order to get to him should have provided you with plenty of Ministry Dousing Powder, which is even better than the regular kind.
- The Power of Hate: The Sculptor's own rage eventually consumed him, resulting in him becoming a Demon of Hatred.
- Red Is Violent: The Demon is supposedly a failed Shura who's become a vessel for hatred, complemented by his bright red hair and his left arm, which is literally made of raging fire.
- Resist the Beast: Like Father Gascoigne before him, the Demon can be stunned up to three times by playing a sound that triggers old memories of a loved one, causing whatever humanity is still left to briefly fight against the monster consuming him. In his case, the Malcontent which belonged to the Sculptor's old shinobi partner Kingfisher.
- The Right Hand of Doom: Inverted - the Demon's left arm is more or less a fire construct rather than a real arm, and the source of its fire projectiles, making it the Demon's most dangerous body part.
- Ring of Fire: One of its attacks in its third phase is to create and trap Wolf in a massive ring of fire, limiting his space to dodge and recover as the Demon continues its assault.
- Shockwave Stomp: One of the Demon of Hatred's moves is to jump in the air and violently land to create an explosion that harms Wolf which is followed by a shockwave that can send Wolf flying far away, leaving him vulnerable to projectiles.
- Something Only They Would Say: More so in the original Japanese - if Wolf/the player hasn't already learned who the Demon really is before defeating it, part of the reveal comes when the Demon refers to Wolf specifically as omae-san, the exact same term the Sculptor and only the Sculptor used. This is downplayed in the localized version where the Demon simply says "Wolf", though since not many characters refer to Wolf by name the effect still exists.
- Superboss: Defeating it is entirely optional, and it requires the player to go completely out of their way to find, but it does drop 2 Lapis Lazuli, one of the ingredients for the final tier of prosthetic upgrades, and there's only 6 that can be obtained in a single playthrough. That being said... there is a very good reason why it's optional in the first place.
- Sympathy for the Devil: There are several pieces of hidden dialogue if Wolf is made aware of the Demon's identity; he'll solemnly say farewell to what's left of his fallen friend.Wolf: [upon initiating fight] Sculptor...
[First Deathblow is struck] So these are the flames of hatred...
[Finisher Deathblow is struck] Farewell, Sculptor... - Tragic Monster: The Demon was formerly a man who spent decades trying to atone for his sins, hiding away from society and offering shelter and assistance to a wayward shinobi. By the end of the day all of it becomes for naught, and his only remaining hope is for the Wolf to put an end to his suffering.
- Use Your Head: Standing between its legs may seem the safest spot; however, he can also hunch forward and violently headbutt Wolf.
- Was Once a Man: It's what's left of the Sculptor, having succumbed to his own rage, but failed to become a Shura.
Great Shinobi - Owl / Owl (Father)
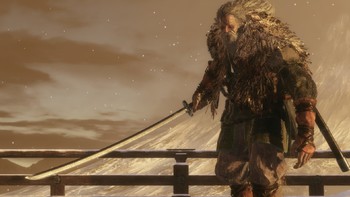
One of the greatest shinobi, and Wolf's adoptive father and mentor, Owl did not perish at Hirata Estate. Instead, he returns seeking Kuro at Ashina Castle to take the Dragon Heritage for himself. A secret Boss Fight with Owl in his prime from a memory of that fateful night at the Hirata Estate can be unlocked with the right actions and is required for one of the endings of the game.
- Abusive Parents: He seems to view Wolf as a tool for his own ends, putting him through Training from Hell, ordering him to betray his own master, and killing him when he becomes disobedient. That said, he does show a certain measure of pride in his son should he be defeated.
- Ambition Is Evil: Was working to betray his masters and the Ashina Clan to get the Dragon's Heritage and conquer Japan. His battle remnant states that everything he did was for the sake of his ambition.
- Animal Motif: The owl - it's part of the character's name and his cape is made of grey feathers: coupled with the pointed, beak-like beard and the man looks like an overgrown, humanoid owl. In the secret fight at the Hirata Estate, he can also summon an ethereal owl familiar, and in the cutscene before his boss fight in the story, he lunges at Sekiro without making a sound, like an owl in flight.
- Anti-Regeneration: During his fight in Ashina Castle, he can use Lloyd's Talisman expies that prevent the use of healing items, notable for being the only boss in the entire game to do so.
- Artificial Brilliance: In both fights against him, he is packing skills that complement each other to make him a more difficult opponent. The battle at the Castle Tower Lookout have him use smoke bombs that not only interrupt Wolf's attacks, but linger in the air to obscure Owl's movements. The battle at the Hirata Estate will have him change certain attacks mid-animation to catch Wolf if he dodges too early, use the Shadowfall technique right after his owl familiar's fiery divebomb forces a jump, and teleport around to disengage the target lock-on.
- Beard of Barbarism: His unkempt beard combined with his massive braid make Owl look less like a shinobi and more like a bloodthirsty barbarian. Considering his savage and treacherous nature, it's very apt.
- Big Bad Ensemble: With Genichiro and the Interior Ministry. While Genichiro wants to use Kuro's blood to save Ashina from destruction by the Ministry's armies, Owl wants to make himself a god with it and conquer Japan for himself.
- Big Bad Wannabe: Has ambitions of using the Dragon's Heritage to Take Over the World, but no matter what happens he gets cut down by his own son before he can accomplish this.
- BFS: Even relative to his size, the Owl carries a very large blade that is longer than he is tall.
- Blade Run: He can do the Mikiri Counter technique. If Wolf does a stab attack, be it either the charged stab or the loaded spear, Owl will counter with an almost guaranteed One-Hit Kill.
- Blinded by the Light: One of his most regular tricks is to release a handful of blinding firecrackers. Wolf can get stunned if caught in the firework so it is recommended to quickly dodge out of the cloud of black powder.
- Bodyguard Betrayal: He has not only tried to make Wolf do this to Kuro, but he was also the one that sent Wolf on a mission away from Kuro while giving info to the bandits on the Hirata Estate's weaknesses three years ago.
- Boring, but Practical: What his swordplay is compared to other end game bosses. Whilst those of the Ashina Clan having extremely flashy techniques that have insane combo potential, Owl's moves with the sword are far more simple, almost all strong, but mundane strikes. That being said, he hits hard and fast regardless, and when you take this with Owl's insane Shinobi skills, he's no less formidable because of it.
- Boss Banter: Perhaps by virtue of being so familiar with Wolf, he's by far the most talkative of the bosses. He is especially talkative when Wolf "dies".First Death: One! The parent is absolute. Their will must be obeyed. ...Yet I'm sensing some insubordination.
Second Death: Two! The master is absolute. You give your life to keep him safe. You bring him back at any cost. ...At this rate, you'll lose him again.
Third Death: Three! Fear is absolute. There is no shame in losing one battle. But you must take revenge by any means necessary! ...I wonder if you've got it in you - to bring me down. - Combat Pragmatist: Like any good shinobi, he uses whatever dirty tricks he has to gain the advantage in battle ranging from firecrackers to blind and stun Wolf, poisonous liquid that remains on the ground for a while to limit room to move around, smoke bomb for attacks from blind spot and trick bombs that prevent the use of healing items. In addition, whatever route the player takes, he either attacks Emma with a sneaky shuriken throw or tries to cut down Wolf from behind.
- Crocodile Tears: Should Wolf refuse to join him, he will fall to his knees in despair and cry and sob loudly as Wolf turns around to leave. It is however a trick, as he is merely using the sound of him crying to mask out the sound of him drawing his sword for a sneak attack on Wolf.
- Dash Attack: In the Second Hirata Estate Memory, he is capable of using the Shadowfall Combat Art. It's a Stinger that does massive damage and has a multi-hit followup to finish Wolf off if he doesn't deflect on time. Fortunately, it is considered a thrust attack and thus can be Mikiri Countered.
- Didn't Think This Through: He raised Wolf to be his personal unthinking and remorseless killing machine. Owl never considered the possibility and danger that this could turn his adopted son into a Shura, which is exactly what happens should Wolf side with him. It's only when Sekiro runs Owl through with his sword that the Great Shinobi realizes his folly.
- Dirty Coward: Subverted. While he can potentially beg for mercy, attempting to attack him instead will have him praise you for not being fooled easily. He also doesn't take death all that bad when you kill him in either fight.
- Even Evil Has Loved Ones: Owl seems genuinely distraught if Wolf refuses to side with him by betraying Kuro, indicating he has at least some affection for his foster son. An example of this is in the Sweet Rice Ball description, which states that the Owl would wordlessly feed him the titular rice balls (ohagi) when Wolf was starving.note Those same rice balls are now considered by Wolf to be his Trademark Favorite Food. However, even their father-son bond isn't enough to stop him from attacking Wolf, or Wolf from ultimately slaughtering him in either of his endings.
- Evil All Along: Owl has coveted the Dragon Heritage for himself for a long time and set up a plan to obtain it.
- Evil Cannot Comprehend Good: Expresses his shock and disappointment to Wolf should he refused to join him.Wolf: ...I cannot do as you ask.
Owl: You... what? A shinobi... showing the likes of... compassion? Unthinkable... Such a miserable display. - Evil Is Bigger: He's freaking massive, on par with the Taro Troops. Wolf is no beansprout, but his face is about level with Owl's stomach, and one of Owl's arms is about as thick as Wolf's whole body. If Wolf is as tall as the average 16th century Japanese man,◊ then Owl clocks in at just under 8 feet.
- Evil Is Hammy: Downplayed. He starts giving a hammy New Era Speech in the Shura ending, but Wolf stabs him in the back before he can finish.
- Evil Mentor: He tutored Wolf in the ways of the shinobi, while simultaneously conspiring to take the Dragon Heritage from his master. Even when he fights Wolf at Ashina Castle, Owl compliments his protege on his growth.
- Evil Old Folks: He was already an old man during Isshin's coup 20 years ago, and he's one of the primary antagonists of the game.
- Evil Sounds Deep: His voice is about as deep as Wolf's in both Japanese and English, and he's revealed to be one of the main antagonists of the game.
- Face–Heel Turn: He was once a loyal retainer for the Hirata family. Three years before the events of the game, however, he sells out both Kuro and Wolf in order to seize the means of immortality for his grand ambitions.
- Feeling Their Age: Despite the master shinobi that he is, time has not been kind to Owl. When fought at Ashina Castle, he will walk slowly towards Wolf most of the time and his sprinting at full speed is still slower than Wolf who can run circles around him. He can quickly close the distance with Chasing Slice and a jumping overhead slash but he requires a second or two to catch his breath before attacking which leaves him wide open if those attacks are dodged. He also lacks any Perilous Attacks, notable among the countless bosses that have them. Owl (Father) fought at Hirate Estate three years ago, who is Owl at his prime, is an entirely different story. Much faster and harder hitting, he can quickly close the distance by dashing around and his sprint speed is much faster and can catch up to Wolf rapidly. He also possesses several Perilous Attacks, a lunging sweep attack and the Shadowrush thrust attack. He can also summon an owl familiar to assist him in battle by teleporting him around the boss area to attack Wolf from blind spots or turning it into a fiery owl and launching it right at Wolf, a feat which the present Owl is unable to do due to his old age.
- Goomba Stomp: Just like Wolf, he can step off his opponent (namely you) to gain extra height. It causes flinching and a fair amount of posture damage if it isn't blocked in time, but he'll be vulnerable if his foot hits the floor instead.
- Guide Dang It!: To acquire the memory of the alternate Hirata Estate where Owl is the secret boss relies on players knowing which Non Player Characters to eavesdrop on and where then triggering conversations with them that leads to Wolf acquiring the item necessary to head into the memory.
- Graceful Loser: He expresses pride in Wolf overcoming him just before he dies. The description of the Remnant: Foster Father even says that raising Wolf as a shinobi was so enjoyable he always hoped that the two would battle to the death someday.
- At Ashina Castle:Wolf: Death of a shadow... You taught me well.
Owl: That's... my boy... - At Hirata Estates:Wolf: Farewell...
Owl: Defeated by my own son? [laughs] The feeling is not entirely unpleasant...
- At Ashina Castle:
- Hidden Eyes: His bushy eyebrows and perpetual, heavy squint mean that his eyes are never actually visible. The only time you see them is when he opens them wide in abject horror during the Shura ending.
- Hypocrite: The Owl taught Wolf to unfailingly follow the Iron Code of the Shinobi, particularly the part about obeying your father above all else. However, the Iron Code also states that if there's no father to obey, you're supposed to have total obedience to your master, and yet Owl intends to betray his own master and take his power for personal gain.
- I Am Not Left-Handed: During his secret boss fight at Hirata Estate, Owl reveals that up to this point, he had been going easy on Wolf. He thus unleashes a variety of spells to attack Wolf in conjunction with conventional ninja fighting style.Owl: (after losing a health bar) What a fine specimen you've become, Wolf. Allow me to honor your efforts, and show you this old Owl's true power!
- Impaled with Extreme Prejudice: How he dies in every ending.
- Immortality Seeker: He had hoped to steal Lord Kuro away from Ashina Castle and form an Immortal Oath after coming out of hiding, but the boy was smart enough to rebuke him.
- In the Back: Not only did he stab Wolf in the back after he defeated Lady Butterfly, but also is on the receiving end of it from Wolf in the Shura ending. Additionally, both boss fights with him will end with Wolf leaping over a stunned Owl to impale him from behind.
- I Surrender, Suckers: After depleting his first Deathblow Marker at Ashina Castle, Owl will fall to his knees and beg for Wolf to stay his blade. Approach him and he will throw a smoke bomb while calling Wolf a fool and resuming the fight with an attack from within the smoke. Attack him, however, and he will dodge the attack while dropping a smoke bomb and praising Wolf for seeing through the ruse.
- Jerk with a Heart of Jerk: The redeeming aspects he displays in the game's introduction are ultimately subverted when Owl is revealed to be a deceitful, power-hungry traitor whose only goal is to rule over Japan with the power of the Dragon's Blood. Even before that point is reached, story breadcrumbs imply he was an abusive parent towards Wolf, and he only ever treated the shinobi as a tool to be used and disposed of as necessary.
- Karmic Death: No matter which route you take, he eventually gets stabbed in the back just like he did to Wolf in the past. It's especially poetic in the Shura ending since Owl doesn't even get the chance to defend himself, just as he denied it to Wolf.
- Katanas Are Just Better: His main weapon is a large sword.
- Lightning Bruiser: In the Second Hirata Estate Memory. Not only can he zip around the arena while turning on a dime, but he swings hard. The usual approach to avoiding damage applies here more than ever, as getting clipped by just one slash will reduce Wolf's health down for size. Reaches its zenith during his Gauntlet of Strength encounter, where Inner Owl (Father) makes use of the Mist Raven to extend and augment his combos to the point where he's launching attacks at you from literally every direction at once. And while his vanilla version is much slower than in his other encounters, he is still capable of running and flipping in a way that borderline defies physics for a man as massive as he is.
- Magic Knight: Not only is he a master swordsman and shinobi, he also has a few spells he will use in his second fight.
- The Man Behind the Man: He and the Interior Ministry are jointly responsible for the attack on Hirata Estate three years ago; presumably the Ministry ordered the attack to begin with, and Owl told them of the perfect time to strike so he could claim Kuro's blood for himself.
- Mirror Boss: As the one who trained Wolf, it only stands to reason that they would fight similarly. Owl has apparently specced heavily into the Shinobi skill tree, using techniques like Mikiri, while also dabbling in the Prosthetic skill tree, having the ability to use shinobi tools in midair and use Chasing Slice. Two of his tools are shuriken and firecrackers which Wolf also has access to, and he can also throw out poison sludge, equivalent to Wolf's usage of the Sabimaru. He also uses the Mushin art Shadowfall during the rematch in the Hirata Estate. His use of Shadowfall and the Mikiri Counter both make extra sense, as he invented both techniques.
- His Gauntlet of Strength encounter adds the the Whirlwind Slash Combat Art and Mist Raven to his repertoire, the latter of which he uses not as a counterattack, but as a form of Teleport Spam.
- The Mole: He was the one who fed information to the Interior Ministry for the sacking of the Hirata Estate three years ago, giving them the perfect opportunity to strike while all of the Hirata's fitter warriors (including Wolf) were fighting elsewhere.
- New Era Speech: He starts giving one to Wolf in the Shura ending, but Wolf puts a blade through his chest before he can finish.
- Noodle Incident: In the Shura ending, he gets hold of the second Mortal Blade by killing Genichiro completely off-screen while Wolf is fighting Emma and Isshin.
- No-Sell: Attempting to poke at him with thrust attack (be it your charged strike, Loaded Spear, or certain Combat Arts) will only get you Mikiri Countered for your trouble.
- Offscreen Moment of Awesome: Evidently kills Genichiro offscreen in the Shura ending, claiming both his head and his sword.
- Oh, Crap!: The only time he downright panics is in the Shura ending, where he realizes what Wolf has become right after he stabs Owl In the Back:Owl: (!) Shura...!
- Old Master: He is very old, having raised the mature Wolf since he was a child. Nonetheless, he's also a tough boss who qualifies as one of the most difficult in the game.
- Omnicidal Neutral: Intends to wipe out both the Ashina Clan and the Interior Ministry so he can rule over Japan himself.
- Only Known by Their Nickname: Subverted; the game only calls him Owl, but triggering the Shura ending and he starts revealing his real name, but is cut off when Wolf stabs him In the Back. Due to the fact that the English and Japanese audios cut him off at different parts of the name (because Japanese surnames go first), it is revealed that his full name is "Usui Ukonzaemon".
- Optional Boss: Inner Father is a memory of Owl with his strength taken to new heights. Alongside his moveset in the Hirata Estate, he also has the Whirlwind Slash and Mist Raven tool at his disposal. He also sometimes throws his flaming owl familiar at you sideways, forcing you to dodge to the side instead of jumping over it like you'd normally have to do.
- Pose of Supplication: As noted in the entry for I Surrender, Suckers, Owl will attempt to throw Wolf off by slamming his hands and head down into a magnificent kowtow.
- Playing with Fire: During his secret boss fight, Owl can turn his spirit owl into a fiery bird and launch it at Wolf.
- Smoke Out: One of his moves is to burst a smoke bomb on the ground and create a great black cloud from which he can attack Wolf.
- So Proud of You: When Wolf kills him, his last words are akin to this.Owl: That's... my boy...
- Stock Ninja Weaponry: In addition to his large sword which he extensively and repeatedly swings at Wolf, he's got smoke and poison bombs which he can throw at Wolf to blind or poison him. Owl also has a supply of shurikens he can throw at Wolf, either in a double shuriken throw from afar, or as a volley during a somersault away from Wolf to secure his landing.
- The Stoic: He never loses his cool, and when he does show emotion, it's probably a trick. The only time he properly panics is when Wolf stabs him in the Shura ending and he realizes what the other shinobi has become.
- Strong and Skilled: He's blessed with prodigious size and strength and taught Wolf everything he knows. He also uses various magic attacks in his Owl (Father) version.
- Super-Strength: Most notably, he can kick a man hard enough to launch him dozens of meters.note This is apparent in his boss fight as his sword strokes, while they don't come as quickly as Isshin's or Genichiro's, are universally devastating and will chew through your posture bar like little else. His running slash, even if deflected, will also impart enough force to send Wolf across half the arena.
- Take Over the World: His motivations for attempting to become immortal, though downplayed to just the country... for now.
- Villain Respect: Expresses respect for Isshin's combat skills after Wolf kills him.
- Villain Teleportation:
- His secret boss battle in the Hirata Estate features him teleporting around to strike Wolf from blind spots.
- Inner Father takes it up a notch and uses the Mist Raven Shinobi Tool as a part of his enhanced style as well.
- We Used to Be Friends: He fought for the Ashina during the war two decades ago, and was familiar enough with Isshin for the latter to sadly reminisce about the old shinobi along with other close associates. Now, in his pursuit for immortality and renown, he is willing to murder the heads of the Ashina Clan for standing in his way.
- Worthy Opponent: In both instances where you fight him, he will begin by treating Wolf dismissively for being such a poor excuse of a shinobi. Once he is struck with the first Deathblow though, his opinion starts to turn around; by the time Wolf finishes him off, Owl uses his dying breath to wholeheartedly praise his son for giving him the time of his life.
Isshin, The Sword Saint

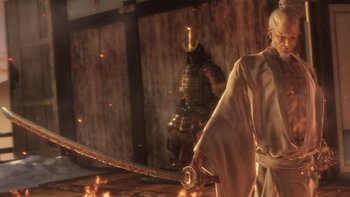
If Wolf remains loyal to Kuro and finds the way to sever his master's ties to immortality, Isshin dies from illness but then Genichiro summons him back from the dead at the peak of his strength. Bound to honor his grandchild's will to save Ashina, Isshin fights Wolf.
If Wolf chooses to stay loyal to Owl and betray Kuro, then Isshin steps in, sensing that Wolf is turning into a Shura and wanting to cut him down before it happens. Despite his great age, Isshin remains a supreme swordsman.
- Anti-Villain: In all routes other than "Shura", where he's a Hero Antagonist, Isshin fights Wolf because he feels bound to honor his grandchild's sacrifice to save Ashina after being brought back to life at his prime.
- Authority Equals Asskicking: It's no wonder the Interior Ministry waited until this guy was on his death bed to strike. Not only is he the leader of the Ashina clan, but he's also probably the strongest character in the game.
- Back from the Dead: Genichiro slits his own throat with the Black Mortal Blade to bring back Isshin from the dead and at the peak of his strength.
- Battle Trophy: The spear he uses appears to be the same one that he got from General Tamura in the intro cinematic and later gifted to Gyoubu.
- Blade Spam: During the Shura route, he can attempt to overwhelm Wolf through a special sword technique of the "creates a death zone by cutting several times in a sphere around him" variety, followed up with a finishing slash. Isshin will drop this combat art upon death, revealing that it is called "One Mind".
- Blood Knight: Sword Saint Isshin isn't quite happy with having to fight Wolf, but he does take pleasure in fighting a Worthy Opponent who is giving him a run for his money once he loses his first Deathblow Marker. His remnant also indicates that Isshin craved war until his last breath.Isshin: How my blood boils! Face me, Sekiro!
- Bottomless Magazines: The way he rapid-fires his pistol, you'd think he somehow obtained a revolver. Close examination shows it is indeed a(n enormous) single-loader, making Isshin's use all the more inexplicable.
- Charles Atlas Superpower: Even by the standards of this game (where, fitting the genre, every skilled warrior has varying degrees of superhuman strength and speed via Supernatural Martial Arts). It's easy to attribute Sword Saint Isshin's combat prowess to the supernatural means used to bring him back to life, but even as a withered, sickly old man, he can transform the small patches of burning tatami mats at the Castle Tower Lookout into a blazing firestorm using nothing but sheer physical strength. All of this has been achieved through decades of experience on and off the battlefield.
- Chest Burster: Or in this case, Neck Burster. Genichiro summons Isshin by carving the side of his own neck wide open. Isshin crawls out of the gushing wound.
- Cool Helmet: Upon resurrection, he wears his old samurai helmet as his only piece of armor. The helmet itself is recognisable by the golden crest it has.
- Complete Immortality: It's implied his Sword Saint form gained immortality after being 'reborn' through Genichiro and the Divine Heir's blood. Not only is he inhumanly tough, but he also doesn't die till Wolf slashes at his neck with the Mortal Blade in the final Deathblow.
- Don't Think, Feel: If (when) you lose to him, he advises you that "Hesitation is defeat."
- Dual Wielding: After losing his first Deathblow Marker, Isshin will wield his katana with his right hand for short-ranged quick attacks and a halberd in his left for slower but more powerful attacks at long range.
- Easy Level Trick: Well, not easy per se, but his pistol move can be countered by just throwing a shuriken at him, which forces him to put away his gun instead of continuing to fire.
- Empowered Badass Normal: In a land swarming with powerful shinobi, monstrous animals the size of Kaiju, malevolent spirits, and demons of untold power, the perfectly human Isshin was revered as the single strongest warrior in all of Ashina, owed entirely to his inhuman skill with a katana. And after being resurrected by Genichiro he not only gains Complete Immortality, but reveal a skill in the Way of Tomoe.
- Exotic Weapon Supremacy: Sword Saint Isshin packs an ornate miquelet-lock pistol in his match against you, the only weapon of its type in the game.
- Expy: Like Gwyn, he is a patriarch associated with fire and lightning, whose descendants ended up losing a lot of what he gained. His old version is similar to Gwyn's Lord of Cinder variant with a worn-down body combined with the use of fire, whereas his Sword Saint version is like Gwyn in his prime utilizing lightning. Also like Gwyn, his death signals the End of an Era and the final downfall of the kingdom he spent his life building.
- Face Death with Dignity: Isshin will recognize defeat, stop himself from falling over to kneel instead, and stoically wait to receive Wolf's final sword stroke at the end of the fight.
- Final Boss: Isshin is always the final boss regardless of what route is taken. What differs is the state that he's fought in. In most routes, Genichiro will sacrifice his life to resurrect the recently deceased Isshin at the peak of his strength. In the Shura route, the elderly but highly-skilled Isshin will be fought much earlier after defeating Emma.
- Final-Exam Boss: In both routes, he's designed to thoroughly test all of the skills you've acquired up to that point. Case in point, he uses all four types of perilous attacks (sweeps, thrusts, grabs, and lightning) and three different weapons, each with their own counter.
- Get It Over With: At the end of the Sword Saint fight, he will shout "Do it!" as he waits for Wolf to finish him off.
- The Gift: The description for the Dragon Flash Combat Art earned after defeating the Sword Saint suggests that Isshin's skill with the blade wasn't just honed by years of battle, but was also borderline instinctive.
- Graceful Loser: His final words? "Well done, Sekiro" before he falls.
- Grapple Move: Old Isshin has a throw where he swings Wolf high into the air before slamming him back into the ground. It's identical to Emma's throw (not surprising, as he's implied to have taught it to her in the first place), except Isshin' attack windup is much shorter.
- The Gunslinger: His Sword Saint form not only brings a gun to a sword fight, but is also capable of firing it multiple times in rapid succession like he's the Man With No Name, despite the gun appearing to only be a large, single-shot matchlock pistol.
- Gutted Like a Fish: How he is ultimately put down in both versions where you fight him, though as the Sword Saint it carries more honorable connotations by segueing into a Seppuku rite.
- Hammerspace: Where does he get that gigantic halberd and that gun? Who the hell knows?
- Hero Antagonist: In the Shura route, Isshin is this as he fights Wolf in order to stop him from becoming a bloodthirsty Shura.
- Honor Before Reason: When resurrected as the Sword Saint. No matter how friendly Wolf and Isshin have been to each other before this, there's no talking him out of this fight.
- Iaijutsu Practitioner: Several of his most powerful sword attacks will have Isshin sheathing his sword before unleashing them.
- Implausible Fencing Powers: He wouldn't have been given the title of "Sword Saint" in his youth otherwise. In both battles where you face him, be prepared to witness some fantastic, superhuman feats no other character in the base game can hope to pull off.
- In a Single Bound: Starting from his second phase onwards, Sword Saint Isshin will incorporate long-distance jumps into his swings. Paired with his massive spear, his attack range becomes something to behold.
- Katanas Are Just Better: Isshin's weapons in both versions is a long katana. He just uses a sword in the Shura route, but the other routes show that he's not only specialized in the sword.
- Kiai: Isshin is not the only boss character in the game to engage in it, but his shouts are the most noticeable due to them practically doubling as audio cues for his laundry list of powerful sword techniques. Once he's bested as the Sword Saint, the old man will give a last mighty bellow that shakes the screen.
- Kinetic Clicking: The faint but audible sound of a gun cocking during the fight against Sword Saint Isshin is a sign the old man is about to pull the trigger.
- Large Ham: Downplayed, but he gets some pretty bombastic lines during the final battle."How my blood boils! FACE ME, SEKIRO!"
- Lightning Bruiser: Isshin as the "Sword Saint" is this - he can run fast, performs quick and highly damaging attacks with his katana while his halberd inflicts long-ranged devastating attacks. Moreover, with three Deathblow Markers, he's one of the most durable bosses in the game.
- Lightning/Fire Juxtaposition: Both versions of him favor one element over the other. The elderly Isshin Ashin in the present day is fought atop a burning tower and utilizes fire techniques where he engulfs the arena in a blazing inferno and unleashes flame with his sword swings. Meanwhile, the revitalized Sword Saint Isshin is fought amidst a thunderstorm, where he'll hurl lighting at Sekiro. The contrast gives the latter a more unearthly, almost divine feeling, which is fitting considering he is Isshin returned to the world of the living in his physical prime.
- Made of Iron: His Sword Saint form has three health bars and Posture for days, meaning he's gonna take a long time going down. Even after he's defeated, he still has enough energy left to pick himself back up, kneel down, and demand Wolf to honorably behead him.
- Major Injury Underreaction: In both versions of his boss fight. Even while being stabbed via Deathblow, he will maintain enough composure to shove Wolf away with one arm and give a mildly-annoyed look.
- Master Swordsman: Good Lord. There are several characters who are highly potent with the blade in Sekiro, but Isshin? He makes them look mediocre in comparison. His title of "Sword Saint" is Not Hyperbole, and he's easily among the most skilled of sword-fighters in FromSoftware's entire catalog, surpassed only by Malenia, while keeping up with the likes of Artorias, Sir Alonne, Lady Maria, Gerhman, Soul of Cinder and Gael with his deadly precision and finesse. Case in point, he wrote the book for both the Ashina Swordstyle and Mushin Arts, and a special move he created in his old age is to slash a sphere around him so fast even Wolf, who can easily block multiple bullets, can barely discern a fraction of the sword strokes.
- Meaningful Name: Isshin (一心): Single-minded, focused without hesitation.
- Multi-Melee Master: Isshin as the "Sword Saint" is this as he wields both katana and spear with deadly speed and accuracy, seemlesly switching between each weapon like it's nothing.
- Muscles Are Meaningless: Even when fought at his prime, it's clear that Isshin was always that skinny. This does not, however, indicate the level of hysterical strength he possesses, as he is able to left-handedly swing his spear (that is easily twice as long as he is tall) with such force it visibly digs through the ground without so much as slowing down, as well as leaping superhuman heights and lengths to reach Sekiro.
- Nonchalant Dodge: The elderly Isshin will occasionally opt to just casually sidestep your attack instead of blocking. He follows this up with a quick and dirty counterattack, so get ready to deflect or dodge immediately.
- No Shirt, Long Jacket: Sword Saint Isshin only wears a tattered untied kimono on him, revealing his chest.
- Old Master: Even at peak strength, when he was capable of dancing around his opponents in a whirlwind of blades, Isshin had already been getting on in the years. As he passed that point of decline, the old man simply compensated by training hard enough to julienne victims instead.
- One-Handed Zweihänder: Once he enters his second phase as the Sword Saint, Isshin will never bother to grasp any one of his weapons with both arms. He'll even perform two-handed techniques like the Ichimonji with just one, and they will still hit just as devastatingly.
- Optional Boss: Inner Isshin is a version of Isshin, the Sword Saint with higher health and damage output and a few new tricks up his sleeve. In his first phase, he can use a Mortal Draw technique that is akin to a "Mortal Flash". His version hits 360° around him in a huge radius, which is then followed up by a second shockwave with an even bigger radius, not unlike a fully-charged Dragon Flash. This second attack will easily one-shot you even if you dodged the first. In his second and third phases he can use a combination of the Shadowfall technique and the Dragon Flash, one following the other in quick succession.
- Playing with Fire: In the Shura route, Isshin takes advantage of the burning battleground to create impromptu Sword Beams of fire, all of which are caused merely because he slashes with his katana so hard the wind fuels the fire to lethal degrees over an area.
- Razor Wind: Sword Saint Isshin can prep himself up for several moments to perform a tremendously powerful slash, sending a cutting shockwave over a long distance. Sword Saint Isshin will drop this combat art, revealing that it is called "Dragon Flash".
- Red Baron: The "Sword Saint". His reputation is wholly deserved, seeing that even as a decrepit old man in the Shura route, his sword fighting skills are inhumanly great.
- Rugged Scar: Has two; one he earned across his left eye during the Ashina coup twenty years prior, and another across his lower abdomen which can just barely be seen beneath his robes.
- Seppuku: How the final Deathblows of both Isshin fights are carried out - after a brief Blade Lock between him and Wolf, the shinobi breaks through and guts Isshin across the stomach with a single slash. Then, in the non-Shura routes, instead of collapsing to the ground, Isshin composes himself into a proper kneeling position as Wolf stands beside him, the Mortal Blade ready. However, since Wolf performs the stomach slash in the Shura ending fight as well, it probably isn't meant to be honorable, since that version of Wolf is anything but.
- Shock and Awe: Sword Saint Isshin, in his final form, will use the Lightning of Tomoe to strike at Wolf. Ironically, this actually makes the final phase of the fight slightly easier than the previous phase, since you can use Lightning Reversal to devastate Isshin.
- Shockwave Stomp:
- Sword Saint Isshin will do this precisely once at the beginning of his second phase, knocking back greedy players attempting to sneak some hits in. The force of the impact is strong enough to dig a giant spear out of the earth, which he will then proceed to use against Wolf.
- Old Isshin, in a fashion - the man will occasionally stomp the ground hard enough to kick up additional flames, which he will then sweep to your direction with a swing of his sword.
- Shotguns Are Just Better: His pistol apparently has alternate firing modes, because occasionally he will blast Wolf with a single, powerful burst of gunfire at close range.
- Strong and Skilled: While fighting as the Sword Saint as opposed to his iteration in the Shura route. While he doesn't use the One Mind Combat Art in this state, his silky-smooth swordsmanship and honed technique are perfected (or rather restored to his what it was in his prime) to an exponential degree.
- Super-Strength: Despite being a noticeably skinny man in his prime, he is fully capable of left-handedly swinging a spear that is twice as long as he is tall with such hysterical strength that it punctures and cuts deep through the earth without so much as slowing down, and he is able to lazily jump to heights and lengths that no ordinary human could ever even begin to reach.
- Supernatural Martial Arts: A given in this world, but Isshin's mastery of them are especially notable. While he's superhumanly strong and fast by default, his power is relatively modest for this game (and very modest compared to other Soulsborne bosses). His martial arts techniques, however, let him do stuff like summon wind projectiles and shockwaves, shoot walls of flames, blast his enemies with lightning, and move his sword arm faster than the eye can see in brief bursts.
- Sword and Gun: In the final two phases of Sword Saint Isshin's fight, he will pull out a pistol with his sword hand should Wolf stay out of melee range for too long, while still keeping his spear rested on his shoulder.
- Tranquil Fury: The elderly Isshin is quite clearly furious at Wolf for betraying Kuro and slaying Emma, but he keeps his voice calm and level as he draws his blade and prepares to kill him, only raising his voice as he charges at you."Sekiro, you were a most unkind and inauspicious man... but for some reason I could not bring myself to hate you. It seems I must cut you down before you fall to Shura. Shura... I never did think I'd have to KILL YOUR KIND AGAIN!"
- Weapon Across the Shoulder: After Sword Saint Isshin pulls out his spear, he will rest it on his shoulder when not using it.
- Worf Had the Flu: If fought in the "Shura" route, he's still an exceptionally skilled opponent, but not nearly as powerful as his reputation paints him, and requires "just" two Deathblows to defeat. However, remember that at this point Wolf is fighting a 90-year-old geezer who is mere hours from keeling over and dying from illness. The fact that he is still able to put up the fight he does speaks volumes, and when you face him in his prime in any of the other endings you'll realize his reputation was more than deserved.
- Worthy Opponent: He had hoped to one day clash swords with Wolf. Come to the climactic showdown among fields of silver grass, Isshin is positively relishing in the opportunity to utilize his full power on an unwavering opponent. In the end, he congratulates Wolf for giving him the battle he always wanted.
- You Will Not Evade Me: Getting hit by Sword Saint Isshin's thrusting yari attack may have him follow through by yanking it back, pulling Wolf closer to him for another world of hurting (not unlike how Wolf yanks his enemies inwards with the Loaded Spear).