Dragon Quest IX: Sentinels of the Starry Skies is the ninth installment of the Dragon Quest series, released on the Nintendo DS. In this world, a race of Winged Humanoids known as Celestrians watch over humankind from The Observatory. They also protect the Great World Tree, Yggdrasil, nurturing and nourishing, for it holds the key to their destiny. Select Celestrians have taken up a vital duty: to act as guardians of the mortal realm.
By watching over humankind, granting their wishes and shielding them from harm, these guardians can collect "benevolessence" (Don't worry, this being Dragon Quest, this isn't the only pun!) — a positive energy that replenishes the great Yggdrasil and allows it to flourish. With enough energy, Yggdrasil will be able to bear fruit, producing the sacred fyggs that will enable the Celestrians to follow the path of their elders and ascend to the upper realms.
However, disaster strikes, and a young Celestrian ends up falling to earth. Upon awakening, they discover that they've mysteriously transformed into a human...! Now, they must Walk the Earth with a small band of other travelers, helping those in need and trying to find out what exactly happened... and if there's any way for them to get back home.
One notable aspect of the game is the sheer amount of Character Customization open to the player. Not only can you name your heroes and determine their classes, you can fiddle with their height, hair, eyes, equipment, attire... In fact, their appearance changes to reflect whatever you currently have equipped. This extends to your teammates as well, enabling the player to create a very personalized party to take on challenges with.
It was released in Japan in 2009 by Square Enix and in North America and Europe in 2010 by Nintendo.
Has a blossoming Character Sheet.
Dragon Quest IX: Sentinels of the Starry Skies contains examples of:
- Actually Four Mooks: In a change from the series' usual Random Encounters.
- Absurdly High Level Cap: The level cap is 99; you'll be needing over 65535 XP per level when you get much past 50! Oh, and XP is not shared between vocations (classes), so you could be a level 99 warrior but only a level 1 mage. And you can reset back to level 1 if you want, in order to get more skill points and a "special" item related to the vocation.
- Added Alliterative Appeal:
- The Flavor Text and item / monster descriptions in general.
- Some of the NPC dialogue.
- Even the freaking game booklet applies.
- Alliterative Name: Most of the item, monster, and quest names.
- Alliterative Title: Sentinels of the Starry Skies
- All in a Row: After its absence in Dragon Quest VIII, this trope returns.
- Always Check Behind the Chair: Not only can you randomly find things in cabinets, pots and barrels, but their contents get reset each time you start playing, just like blue chests. Contents also seem to be determined by what they are and their location — dressers tend to have clothes, while the pots and barrels inside dungeons are more likely to have reagents and mini medals than those in towns.
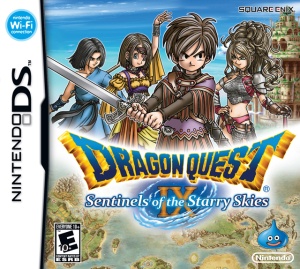
- American Kirby Is Hardcore: The western box art (shown in the page image) shows four warriors, each sporting Angry Eyebrows, the front-most warrior brandishing a sword. By comparison, the Japanese box art
 ◊ shows a group of adventurers having fun in a town.
 - And Now You Must Marry Me: Played for drama in the past with Serena- when the Gittish Empire comes to Wormwood Creek, an officer fully intends to carry her off as a spoil before Corvus intervenes.
- And the Adventure Continues: So much so that instead of "The End" or "Fin", the closing says "To Be Continued..." and immediately launches you into the Extended Gameplay of the Playable Epilogue.
- And Then John Was a Zombie: In a way. In order to defeat the Big Bad, you must become a "mortal" by eating a Fygg. The Celestrians for the most part seem to hate the mortals (See Pride below), so it may count.
- Angel Unaware: In the well of Wormwood Creek. The quest-giver for the Priest rank, he reveals himself after success.
- Angst Coma: Mayor Bryce at the end of the Lleviathan arc. He only gets better after the completion of a sidequest later on.
- Anime Hair: One of the possible hairstyles is basically Vegeta. (Did we mention the character designer is Dragon Ball creator Akira Toriyama?)
- Anti-Frustration Features: After a Total Party Kill, your party is fully healed at the church, without needing to spend a fortune on reviving them; in the earlier titles, the game revived only the hero (or the lead character) when continuing, making defeats very costly. And as per series tradition, there is a banker NPC that allows you to deposit gold. You'll still lose half of the cash in your wallet whenever the party is wiped out, but anything left in the bank will be untouched.
- Arbitrary Headcount Limit: As per Dragon Quest tradition, you can have up to four members in your active party. There's also a limit to how many characters you can create and have waiting at the Quester's Rest. On a related note, the game does pretty much everything it can to avoid showing more than five-ish modeled characters at once for the sake of rendering speed. All but the most important NPC's are billboarded sprites, your party members are often not shown in key cutscenes that involve several important (and thus modeled) characters, and monsters and party members in battle are often hidden even when standing onscreen unless they're in the middle of interacting.
- Autosave: The game only has autosave when calculating the odds of an alchemiracle, to prevent Save Scumming until you get the ultimate weapon/armor.
- Back Stab: Of a sort, starting a battle by running into a monster from behind gives a higher chance of stunning them or catching them unawares.
- Backstory: Most of it is given after the game through the downloadable quests.
- Being Tortured Makes You Evil: Corvus. For 300 years, and it was because the village he defended betrayed him. (Serena was duped into betraying him.)
- Berserk Button: Some monsters have these, where doing things like getting a Critical Hit or healing a party member (specific to the enemy) will enrage it, making it only target the character that made the action. Using the 'Whistle' skill in battle also causes them to focus on the user, which makes it very useful for dedicated tank characters to learn for all but the party-wide enemy attacks.
- Beware the Silly Ones: Cruelcumbers are usually The Goomba in thier debut game and Dragon Quest XI, note but one along with 2 Slimes nearly kill Erinn and her Grandad, had the Hero and Aquila not intervened.
- Bittersweet Ending: Your fellow Celestrians ascend to the heavens without so much as a goodbye, while you're left behind to wander around as a mortal and continue protecting the land. No rest for the weary. For better or for worse, most of the living have no recollection of the existence of guardians. A random NPC in Gleeba goes so far as to complain about a pointless 'odd relic' cluttering up the place — the Gleeban guardian statue she could once be found praying to earlier in the game. On the bright side, the world is saved; Serena, Corvus, and the rest of the Celestrians have hopefully found peace; and you are eventually reunited with Aquila. Not to mention that you get to spend more time with Sterling, Stella, and your mortal friends...
- Bilingual Bonus: The place where you change jobs is on Newid Isle, "newid" being Welsh for "change". It goes beyond Bilingual Bonus, too, since it can also be read as "New I.D. Isle", where you get a new identity (and 90% of the visits to the map area will be for class changing).
- Blood Knight: Goresby-Purrvis. He fights you in the final dungeon not because Corvus told him to (his loyalty is to the Gittish Empire alone), but because he considers you a Worthy Opponent.
- Sir Sanguinus is as literal a Blood Knight as you can get: a red knight who invites you to "spill your blood on the gore-splattered altar of battle", and is the incarnation of Zenus' blood.
- Bonus Dungeon: Rather than save them for after the main game, as is conventional, the Grotto system becomes available to you about a third of the way through the game. You can enter in and scour them for loot and experience, but be wary of the Superbosses.
- Book Ends: The beginning and ending narrations are both the same, on a backdrop of stars.
- Boss in Mook Clothing: Many bosses have Underground Monkey variants that appear as mooks after the main game. If you encounter a Palette Swap of a boss, it's generally this.
- Broken Angel: Celestrians are meant to enter and exit the Observatory through a special gateway in the foundation of the Floating Continent. It's possible for them to fall over the edge, but it's a long way down. Though even Celestrian children are sturdy enough to survive the fall, if they walk away, it'll be without their halo and likely even their wings. The main character only manages to retain their ability to see ghosts and other "special" folks. At the end of the game, your character voluntarily gives up these powers to become fully human, in order to fight Corvus. In-game, though, Celestrians and humans are not terribly different in terms of ability.
- But Thou Must!:
- Celestrians cannot — cannot — defy their superiors. The Hero must agree when Aquila decides to drop formalities in private; Aquila had to yield to Apus Major's decision to assign the hero to Angel Falls; the hero must hand over the Fyggs when Aquila claims them and then stand there helplessly while Aquila attacks him; and then Corvus adds a whole new wrinkle after being "freed".
- Subverting this trope, Stella will accept either Yes or No. She asked if you could hear her, so by responding to her question, you heard her. She does yell at you for saying No, though, because that's a Jerkass thing to do.
- Can't Catch Up: The higher a character's level, the bigger a slice they get of the experience "pie", and they get less if they die in battle. So a character who spends most of their time dying before you have resurrection spells is going to be a few levels behind the others, and look out for irony if one of your partners has a class that levels up faster than you do.
- Car Fu: Or rather Train Fu.
- Carry a Big Stick: Several clubs are among the weapon options, though they're considered part of the hammer skill line. Smash Mooks like trolls and cyclopes use spiked and non-spiked versions.
- Cassandra Truth: One sidequest involves finding the ripped-up test of a boy who claims his test (on which he got a hundred points) from monsters (his mother believed he'd hidden it to hide that he'd gotten a zero). Subverted in that while he did get a hundred points on the test, it was out of five hundred (he neglects to inform his mother of this, and asks that you do the same).
- Chainmail Bikini: Just take a look at the default class armor for the female Warrior. In addition, a Paladin-only piece of armor even allows for Chainmail Zettai Ryouiki. Some of the best equipment in the game also happens to be bikinis and bustiers.
- Character Customization: Played completely straight for the first time in the series's history, and enabling players to invoke various Costume Tropes, Eye Tropes, Hair Tropes, and so forth.
- Chekhov's Gun: Tons through the DLC quests, including the crack in the wall in Stornway's well, the ruins of Brigadoom, that one guard's comment about King Schott's bad dreams, and the amnesiac ghost in the Quarentomb.
- Cherry Tapping: There are several quests that require you to kill one or more strong enemies with weak attacks. "Kill Atlasnote with the Zam spellnote " is a good example.
- Chokepoint Geography: Grotto hallways have rocks or other obstacles every few feet, making it impossible to pass by larger monsters when they're sitting in the narrower areas.
- Chronic Hero Syndrome: Justified by the plot.
- Class Change Level Reset:
- The game has a job retrainer. Every time a character changes professions, they start back at level 1, including hit points. Skill points are kept if the skills overlap. The character could also retrain to their old job and not have lost any progress. Plus, stat bonuses earned from job-exclusive skills remain, so a character with points in those skills will have some stats above the baseline.
- If you hit Level 99 in any particular trade, you can "revocate", and reset the class back to Level 1 (but keep all the Skill Point bonuses and such). This will get you an Accolade and a special accessory.
- Clingy Costume: Cursed equipment cannot be removed until a priest performs the skill Benediction on the character.
- Cold Open: The very first thing the player sees after turning on the game is a little video, consisting of a party of four adventurers fighting a Rashaverak, some scenes of daily life in Stornway, The Hero speaking with Patty at the Quester's Rest, and the four adventurers offering Benevolessence to Yggdrasilnote .
- Combat Exclusive Healing:
- While spells learned from the various professions can be used outside of combat, skills learned from leveling class abilities cannot. The likely first example that players will run across is Caduceus, a staff skill that heals with the power of Moreheal for the cost of Heal.
- The "Heal All" command, which determines the most cost-effective way to cast healing spells, completely ignores techniques like Meditation (even though it can be used out of combat).
- Combat Medic: Healslimes, Medislimes, Sootheslimes, and Cureslimes are often summoned by enemies to serve as such. Enemies with Kazing can serve as this.
- The Priest class can equip spears, making them eligible for this trope.
- Combination Attack: While all the members of your party have coups de grâce, if certain basic and advanced classes are in your party together, they can use special Co-op de Grâces that are usually a combination of their own separate ones.
- Covers Always Lie: Due to the Character Customization feature, none of the characters on the front cover are important to the plot (though they are defaults)...
- Creator Backlash: In-Universe. Zenus, towards the humans, which he viewed as an "aberration" and full of sin. Prior to the events of the game, he even tried to destroy his creation, but his daughter Celestria transformed herself into the form of the World Tree, Yggdrasil, under the condition that she would only revert back to her normal form once the human race had produced enough benevolence to prove themselves worth not killing, in order to convince him to stay his hand. Much later, history would repeat itself, only with Corvus and the player character in the place of Zenus and Celestria. The player character does manage to save the human race a second time, again at some personal cost — due to needing to become "mortal" to defeat Corvus, he or she does not get to retire to the stars along with the rest of the Celestrian race, and instead is left to stay in the "mortal" realm to remain serving as its "Guardian".
- Creature of Habit: The whole of Wormwood Creek. They're so determined not to have their lives disrupted that it's made them extremely hostile and xenophobic.
- Cross Dresser: The special revocation accessory for the Minstrel is the "Wear-With-All Award", which lets males equip attires that's normally exclusive for females and vice versa. There are some restrictions however. While males can indeed put on a dress... they still can't put on a bikini.
- Crystal Dragon Jesus: One of the most transparent parallels with Christianity in gaming history. The Creator Grandpa God wanted to destroy humankind, but his daughter took on the weight of humanity's sins until her return.
- Curtains Match the Window: Patty. Obviously, also possible with your party.
- Damage Reduction: The defense stat reduces incoming physical damage by 1 point per 4 points of defense. Some equipment also reduces specific types of elemental damage by a percentage. Late in the game, particularly against grotto bosses and legacy bosses (as well as some of the more powerful monsters encountered deep in higher level grottoes) that can hit for several hundred damage, elemental damage reduction tends to be worth a lot more than defence.
- Dead All Along: The Gittish Empire was defeated 300 years ago; when you face Gittish soldiers for the first time, this is very clear. Goreham Hogg realizes this when you defeat him, as it reminds him of when Graygnarl killed him.
- Deadly Dodging: One of the shield moves allows the user to try and deflect damage on an ally or an enemy. Hideously effective when a fighter ends up accidentally hitting their caster.
- Department of Redundancy Department:
- A sign inside the Bad Cave: "WARNING! You ave bin warned."
- Later on, after you give over the Fyggs to Aquila:
Stella: We had to sweat blood, sweat and tears to get those! - Difficult, but Awesome: It's possible to go hunting Metal Slimes with only your main character; very difficult, but if you succeed the experience comes flooding in, since the total experience is divided by the number of characters in your party.
- Disc-One Final Dungeon: Gittingham Palace.
- Distracted by the Sexy: Happens at random based on your charm stat. More likely to happen to Minstrels and Luminaries, due to a high natural charm stat and passive charm bonuses in their unique skilltrees. Can even affect the Big Bad and Superbosses. When it comes to distracting your enemies, gender is never a barrier.
- Divided Deity: The endgame's grotto bosses turn out to be aspects of the creator god Zenus who split apart out of grief and incomprehension at his daughter turning into a tree to stop him destroying mortals, and representing different aspects of his personality or body (rage, intellect, blood, arm, etc.)
- DLC: Of the "already on-disc" variety. But now that Nintendo's online services has been discontinued, all of this is lost unless players follow a complicated series of instructions regarding connectivity issues or, alternatively, playing in multiplayer with someone who has already downloaded the DLC previously.
- The Dragon: Goresby-Purrvis to King Godwyn. Barbarus to Corvus as a literal example. Graygnarl also counts, to the heavens above.
- Draw Aggro: The Forbearance skill in Dragon Quest IX makes one character take all attacks for the next turn. It's possible to spam this move with one character, letting the other three concentrate on damage, but it can be interrupted by a Disruptive Wave. The Paladin's Limit Break as the same effect, but lasts several turns and can't be dispelled.
- Dub Name Change: Sandy -> Stella, Ruida -> Patty, and many others.
- Dungeon Town: The Gortress, which is quite literally a prison complex full of downtrodden townsfolk who were kidnapped.
- The Dragonslayer: Minstrels, Warriors, Thieves, Gladiators, and Armamentalists can all learn a skill specifically dedicated to killing dragons. It's also the name of a sword (upgraded from the dragonsbane) that does extra damage to dragons (no, it doesn't look like a sharpened slab of iron.
- Easter Egg: The original Celestrian form counts as a vocation in the progamming and, if you look, it even has its own vocational symbol. (Players have found that if you hack the game to force the hero back into this "vocation", you can use all weapon skills regardless of what you actually have equipped, so you can do things like shooting arrows from swords).
- Education Mama: Coffinwell turns into a town full of these, with every mother in the village obsessed with getting their kid into Swinedimples.
- Elaborate Underground Base: Grottoes come in natural cave, ice cave, flooded tunnels, volcano and man-made crypt variants. How these sprawling caves all manage to fit (several share the same access point) is best left unquestioned.
- The Empire: The Gittish Empire. They're not quite an empire by the time they show up, though.
- Empty Room Psych: It's possible to find grotto floors entirely devoid of monsters. It's unnerving, to say the least.
- Enemy Scan: The Eye for Trouble skill.
- Excalibur in the Rust: The Rusty Sword you find in the last dungeon is
LotoErdrick's Sword, the third best sword in the game — only the deep grotto gear is better. All the Rusty gear turns out to be Erdrick's gear, which is all the third best stuff in the game. - Experience Penalty: Experience is split by the number of characters in the party. Metal Slime runs can be very rewarding with only the main character, but very easy to lose in the higher level grottoes.
- Expy:
- Using the character creation system, you can make expies of other characters designed by Toriyama. Among them, Shu, Crono, Marle, and Lucca, Androids #17 and 18, and Gohan, and Uub... just to name a few. It's also possible to recreate◊ virtually every previous Dragon Quest hero. In fact, the game even offers their trademark garbs as some of the more useful equips.
- Also, some of the official art depicts a character who looks a good deal like Vash the Stampede.
- Corvus is essentially a Celestrian version of Psaro the Manslayer.
- Using the character creation system, you can make expies of other characters designed by Toriyama. Among them, Shu, Crono, Marle, and Lucca, Androids #17 and 18, and Gohan, and Uub... just to name a few. It's also possible to recreate
- Extended Gameplay: Dear Almighty, where to begin? The grotto system. The cameo bosses. The weekly Wifi DLC. Given the relative ease of the main quest and the
 bone crushing difficulty of the extra content (something the developers said was intentional), it's not a stretch to suggest that the entire 50 hour main game is merely a tutorial for the Extended Gameplay.
 - Failed a Spot Check: Sometimes enemies don't notice your presence, giving you a free turn at the battle's start, even when they'd noticed and chased you down to start with.
- Fake Defector: Aquila. His "defection" was just a failed Batman Gambit to kill King Godwyn.
- Fallen Angel:
- The protagonist, literally at the beginning of the game (upon landing in Angel Falls), and technically later on, after eating a fygg in order to become mortal and defeat the Big Bad.
- Corvus is a straight example.
- Fallen Hero: Corvus
- Family-Unfriendly Death: Each monster has its own unique death animation, so there are probably a few of these. However, special note must be paid to the Cruelcumber and its family, which are impaled on their own spears, through their own heads, whenever you defeat them.
- Fan Disservice / Double Standard: Revealing male clothing barely boosts and in most cases penalizes a character's allure ranking, while female revealing clothing (as well as "fetish" outfits like a maid costume or a schoolgirl skirt) increases it a great deal.
- Fantasy Counterpart Culture: Mild version, done mainly through writing the dialogue phonetically so that many characters have accents.
- Stornway appears to be Scotland (their king is King Schott, the long-razed kingdom of Brigadoom to the north echoes another legendary Scottish locale that vanished).
- Port Llaffan is apparently Wales (they worship a whale).
- The empty Hermany region is based on Germany.
- The Gittish Empire uses Stock British Phrases and its people probably have an upper-crust London accent.
- Wormwood and, more importantly, Upover are the Land Down Under.
- Fantasy Pantheon: So we're first introduced to Celestrians, who serve the Grand Architect, but as you travel, you encounter cultures who worship other beings. The townsfolk of Zere worship the massive tree in the center of the town that is said to have protected them from a vicious storm (there's a Celestrian statue that has fallen into disrepair at the entrance), and the people of Upover worship Greygnarl, a legendary dragon that once did battle with the Gittish Empire, but has now grown old and crotchety.
- Fetch Quest: Many of the side quests.
- Fiery Redhead: Possible, and a common archetype in Dragon Quest; interestingly, however, instead of the usual reddish-orange sported by most DQ redheads, IX instead features a much richer red. Certain cosplay outfits include wigs to get that nice orange shade.
- Fix Fic: Let's see, you go to a school named Swinedimples where you rescue a troublemaking student named Fred from an evil monster of a teacher named Sternivus. Looks like somebody wasn't a fan of ''Deathly Hallows''' ending.
- Floating Continent: The Observatory, dwelling place of the Celestrians. The fact that the Observatory is comprised of a large quantity of stonework and has a large tree growing at the top is also a likely Shout-Out to Hayao Miyazaki's Castle in the Sky.
- Foreshadowing: The Prologue is naturally brimming with it, if you know where to look.
- The Four Gods: The elemental Cobra, Fowl, Feline, and Tortoiseshell fan weapons upgrade to Azure Dragon, Vermilion Bird, White Tiger, and Black Tortoise fans, with appropriate art.
- Funetik Aksent: Two villains in the Bad Cave transcribe their 'orrible accent to the warning signs in the cave.
- Free Rotating Camera: Most of the time the camera will let you swing about thirty degrees right or left, but in several places, only one view is permissible.
- From Nobody to Nightmare: The Fyggs of Yggdrasil have a bad habit of inflicting Face Monster Turns on anyone who unwittingly eats them, like fishermen, monsters, and even pet lizards.
- Game-Favored Gender:
- Females get the 2 best leg armors in the game (Magical Skirt and Sizzling Bikini Bottoms, both great gear for resists), can earn a total of one more title than males, and get some odd possibly useful exclusive equipment throughout the game. All male only equipment either has a roughly equal female counterpart obtainable at the same time and/or isn't something to wear in an actual fight. Even with the Wear-with-all, males can't wear a good chunk of female items due to their exposure of cleavage (see down), while only a few rare items show bare male chests and get barred.
- That said, many of the male single-class items have upgraded forms when the female ones don't, and while it only takes one Monarchic Mark to upgrade a Twinkling Tuxedo all the way to an Emperor's Attire, it takes a grand total of FOUR to get a Shimmering Dress into an Empress's Robe.
- Genre Throwback: To the early Dragon Quest titles, especially Dragon Quest III.
- God Is Evil: Subverted. A lot of the story implies that Zenus is up to something, but the worst thing he ever did was to go Well-Intentioned Extremist regarding wiping out the mortals.
- Gods Need Prayer Badly: Subverted, insofar as there's no existential crisis, per se. Benevolessence is a concentrate of human gratitude, collected by the Celestrians and offered to Yggdrasil. After a sufficient amount has been collected, Yggdrasil the World Tree will undergo Fyggbloom and the Celestrians will be called to the Realm of the Almighty, having completed their earthly work. It's proof of humanity's goodness, per Celestra's argument with Zenus.
- Gratuitous French:
- Coup de grâce for Limit Breaks and je ne sais quoi for the Luminary class skill. Co-Op de grâce for double-team Limit Breaks.
- The knife teacher at Swindimples is also the school cook, and of course uses Poirot Speak liberally, as does the chef in the Gortress.
- Fleurette (of DQ Swords) peppers her dialogue with French whenever you speak to her.
- Grimy Water: There are a few areas where the player can walk through what appears to be purple water. Doing so slowly damages the entire party, but the game never lets your party's health fall below 1HP. This feature is useful, as there is a side quest which requires you to heal allies from exactly 1 HP several times... good luck getting monsters to drop you to exactly 1 HP, unless you have a lot of Defense and a lot of patience.
- Guardian Angel: Deconstructed. The Celestrians have been fulfilling their mission to collect Benevolessence for Yggdrasil by protecting and serving the mortals for thousands of years (if not tens of thousands). After hundreds of years of an invisible army essentially guaranteeing world peace, the mortals have grown complacent, and in several places have become Ungrateful Bastards, no longer generating Benevolessence. Many of the Celestrians, meanwhile, have been growing resentful and haughty as their lifelong mission to clean up the mortals' messes stretches forever on.
- Guide Dang It!:
- The game's quests can be downright obscure to unlock, let alone complete. This may be why Bradygames released a guide for the game bigger than some phone books.
- Special mention goes to the Grottos, which are displayed as cryptic Xes on a special, zoomed in version of the world map, with no reference points nor ability to scroll. However, the more you become familiar with the world map, the more you recognize landmarks in the scrolled-in versions of the map — there are only so many places with giant spiderwebs or destroyed trees, for example.
- And on top of that, you can achieve Accolades for certain accomplishments, but it's never explained which ones are available or how to get them. Ones for achieving weapon or class skills are simple enough, but there's also, for example, a series of titles for dressing well, and "well" isn't defined; even worse, one such title is required for a quest.
- Also unexplained are the requirements to get cosplay gear from the legacy heroes that visit the Quester's Rest via DLC. But we can help you out on that one: One is unlocked by default, one is for upgrading the inn completely, and a third is given on your birthday. Some stop there, others give a fourth item once the inn's won an award in a DLC quest chain and maybe a fifth when your hero is the same class as the legacy character.
- On a less amusing note, the combination of Punny Names for every skill, alongside a lack of game descriptions of skills (at least before you buy them) leads to a bit of frustration.
- Detailed information on the elemental strengths and weaknesses of enemies is crucial to effectively using the Fource skills of the Armamentalist class. Unfortunately, such information is not provided in-game; some of the bestiary entries have hints about them, and that's it. Thankfully, letting an AI-controlled character know the Fource skills is very helpful, as they know which spells hurt which monster.
- Occasionally, Stella will ask you if you want to know how to get Coup-de-graces easier. She actually tells you to look it up!
- Crafting the ultimate gear in the game is this, every single step of the way. Getting the rare weapons that need upgrading, the extremely rare components needed in the recipes, the recipes themselves... and on top of that the final alchemical procedure only has a 10% yield to create the very best item instead of a second best variant. There is a way to ensure 100% drop rate on the rare orbs required and on the crafting itself if you look up the Hoimi Tables online.
- If you unlock the topmost floor of the Quester's Rest, you gain access to a library with loads of top-quality Alchemy Recipes. One of the books, however, is "Memoirs of an Alchemist", and the passage the hero reads indicates that there are so many recipes that the author gave up trying to record them all, so have fun with trial and error!
- Half-Identical Twins: Aquila and Pavo, although unlike Aquila, Pavo actually has hair.
- Have You Seen My God?:
- The cataclysm that cast The Hero down from the Observatory also caused a major earthquake that's caused all sorts of trouble. The mortals, having grown complacent after years of peace, are almost constantly on the verge of panic, and their Celestrian guardians, for some reason, are failing to defend them. After the hero fell, Apus Major sent almost all of the Celestrians down to recover him, but then they started disappearing themselves.
- After everything goes to pot during Fyggbloom, Apus Major repeatedly tries to raise the Almighty on the prayer hotline... except the Grand Architect is suddenly not answering his calls. Celestria reveals that Zenus still exists, but she does not know where he is. On top of that, he seems to appear when "Spelly Breath" is used and "speaks" if you use Divination, creating a sort of Gameplay And Story Segregation. Ten of the grotto bosses and their extended character description imply or outright state that they are Zenus, divided into 10 parts. The other two are a resurrected Greygnarl, and a demon named Tyrannosaurus Wrecks who freed the others to screw over the Supreme Sage.
- Helmets Are Hardly Heroic: The ending cutscene removes a character's "head" gear, even if it is of a type (glasses, hair accessories) that doesn't impede the view of the PC's face. Otherwise averted. And, of course, you are perfectly free to invoke this one yourself, if you don't mind the defense impediment.
- Particularly averted in the Greygnarl animated cutscene, where your character has to wear the fully-concealing helmet. (Justified, since the cutscene is fully animated and it would be nuts to try and create unique animations for every arrangement of traits).
- Helpless with Laughter: The Minstrel class has a skill that can make enemies lose their turn by making them laugh too hard. Certain enemies can use it on the party as well.
- Heroes Prefer Swords: Your main character's first weapon is a sword, and the box art gives one to the most prominent figure. Of course, if you like, he/she can ditch the sword early on. They're the most common type of weapon, as they can be equipped by five out of twelve classes by default.
- History Repeats:
- At the beginning of the game, the hero falls from the sky and lands in the pond in the center of Angel Falls. At the beginning of the final arc of the main game, they fall from the sky again and land in the waters at Wormwood Creek, except this time, they're on the receiving end of hostility instead of hospitality. As we learn later, Corvus was also pulled from the waters at Wyrmward after getting injured.
- The hero's fight with Corvus in the last part of the game is the same argument between Celestria and Zenus, except this time it's to the death.
- Hitbox Dissonance: Some monsters' area of contact is wider than it appears, especially in the cramped grotto corridors. It even lets them move through walls.
- Hopeless Boss Fight: Twice the hero must enter battles which they not only can't win, but can't do anything in. Remember how Celestrians aren't physically able to stand against a superior in any fashion? Well, you have to fight two different Celestrians. The final segment of the game centers around finding a way around this law so that you can actually fight and defeat the Big Bad.
- The battle against the Final Boss is a downplayed example in that, while it's technically a normal battle (complete with white flash at it's end, victory screen and fanfare), all your efforts amounted to giving him a hard slap, after which he decide to blow up the world anyway.
- Hub City: Stornway, which has the Quester's Rest, the center of any and all activities relating to Socialization Bonus. There's canvassing for guests, Patty the Party Planner, Sellma and the DQVC, Ginny and the bank... Pretty much a quarter of the post-game DLC quests are found in Stornway.
- Humans Are Bastards:
- The Gittish Empire serve as an enormous example of the depravity humanity is capable of, in a shocking reversal to one of the main themes of Dragon Quest itself: Humans Are Good. However, everybody in the empire died a long time ago after it collapsed, so they're Not Even Human by the time you see them in the game.
- Wormwood's another good example, being the quintessential example of What The Hell, Townspeople.
- Humans Are White: From not-Scotland to not-Arabia, the Non-Player Character pigmentation range is pretty limited. You can make your characters the darkest shade possible and they'll still look like they just have a really deep tan.
- Hurricane of Puns: Towns. Dungeons. Enemies. Bosses. Characters. Flavor Text. Inns. Too many to count. It's tradition for the Dragon Quest series.
- Particular note should be given to each member of the Triumgorate, whose very speech patterns invoke this trope every single chance they get, right down to their names.
- Shogum has quite possibly the highest pun-to-totql text ration:
"Goo day, and welcome to this place, forgotten since slime immemorial... this goomb of so many unknown soldiers. But, though we have been here for a goo many years now, it has become no easier to foregoo the thrill of battle. Come, it is slime! If you ooze your life at my hands, perhaps the seal will be broken, and we will goo free at last!" - Iconic Outfit: Along with the Mythology Gag gear unique to legacy characters, characters can wear recurring outfits from the Dragon Quest series (such as the Robe of Concealment or Bustiers). The game will also give you accolades for wearing the same ensemble as the official art for a character's specific class.
- Ignoring by Singing: One old man in Wormwood Creek (a village that hates outsiders like The Hero) does this if you try to talk to him.
- Incredibly Lame Pun: All over the place. Be on the lookout for Inn-credibly Lame Puns, too.
- Ineffectual Sympathetic Villain:
- The Bloomingdale "kidnappers" are pretty much the most pathetic crooks ever. Even their hideout name is evidence of this. It likely came about like so: "We need a good lair name." "Ooh! 'ow about "The Bad Cave"?" "Brilliant!"
- Despite how vicious they may technically be, Sanguini enemies will NEARLY ALWAYS waste at least one turn "just fluffing about", best exemplified when they get a surprise attack and EACH ONE. DOES. IT.
- Infinity -1 Sword: The Metal gear (Metal King Sword, Metal King Armor, etc). Obtainable in grottoes, it's not the best, but it's pretty darned close (and looks awesome). Most of the cameo gear is very similar — not the best, but cool-looking Mythology Gags that you might indeed wear for a while.
- Infinity +1 Sword:
- Each weapon type has a specific series of 3-4 of them, dubbed the Uber-gear. They consist of a basic weapon that you get in ultra-deep grottoes, then an evolved version that you get by using alchemy. Using this, you can then make 2 more evolved versions past that — a booby prize version, and another that has a chance of appearingnote when you create the booby prize. Should you end up getting the booby prize version, you can alchemize it with a Reset Stone to reset it back to its base form so you can try again. There are similar pieces of armor that use the same system.
- Not all the time, however. There are many situations where other gear is more useful than the Uber-gear. For example, the only reason you'd want to use the actual Infinity +1 Sword instead of the Uber Falcon Blade is that the former can reduce the target's defence.... even on bosses in a game where Contractual Boss Immunity is in full effect. See Infinity -1 Sword above for more details.
- If your attack is already at 999, it doesn't matter how powerful your god-weapon is, your attack never goes beyond 999. Therefore, the Falcon Blade series becomes the most useful weapons in the game at that point, with Dire Critical Fan and Attribeauty in the tow. Also, the Metal King Armor begins to overtake the Legendary Armor's position as best heavy armor as your defense gets high enough, as it offers 20% protection from all elements (Legendary Armor has 25% protection from fire and ice). Same with sandal-type footwear over boots.
- Informed Equipment: Notably Averted — every piece of gear has its own 3d model graphics for male and female characters. You can strip down by unequipping everything. They'll be wearing a sleeveless T-shirt and short shorts underneath everything. Amusingly, some characters will react if you speak to them while wearing armor they don't expect / not wearing armor. For example, some of the Celestrians get quite upset if you're not wearing your official Celestrian outfit when you speak to them. Later on, you're required to wear a suit of "Dragon Warrior" armor for a specific event. This does result in party characters sometimes looking like Rummage Sale Rejects due to mix and matching available equipment.
- Inn Between the Worlds: The Stornway Inn. Characters from different Dragon Quest games (even ones from Canon different times and worlds) can stay there, and you can travel to Alternate Universe (other people's games) through it via Pavo and The Rapportal.
- Interface Spoiler: The existence of secret playable classes may start to become obvious in Dragon Quest IX when weapon types no member of your party can equip start appearing.
- Ironic Echo: The ending cinematic, which repeats the opening lines of the game.
- Item Crafting: Alchemy makes a return from Dragon Quest VIII.
- Job System: Six basic classes, six advanced ones.
- Kicking Ass in All Her Finery: As long as characters are female, they can wear pretty dresses, even if they are fighter and monk classes.
- Kick the Dog: The tutorial sequence has the player attacking two Slimes and a Cruelcumber in order to prevent this from happening, interestingly enough.
- Killer Rabbit: The usual Dragon Quest entries (except for the Bunicorns, who are literal killer rabbits; they don't appear in the bestiary for DQ9), but special mention to the Sanguini family. Early on, they're cute little fluff balls that you kinda feel bad about killing. Then they start getting aggressive and lots of teeth. Then you get the expanded bestiary entries and read that when they drink enough blood, they turn into demons. You get to fight those too — they're called Manguinis, and they look a lot more demonic and a lot less cute (think Slender Man with a Golbat mouth).
- Genius Bonus: "Sanguine" is an old, old word for blood. Can be a Bilingual Bonus instead if you are familiar with Latin and/or any other languages that use a similar word for blood.
- Mook Promotion / Ascended Extra: Monster Allies aside, in Dragon Quest Monsters: Joker 2, the local Alpha Bitch's sidekick is a Teeny Sanguini. He's not evil, though, despite going all red-eyed and ohgodtheTEETH every time someone gets close to him. He is, however, the local Big Bad's soul given flesh after a Grand Theft Me situation.
-
- The Law of Conservation of Detail: Averted. The world is sprawling, often containing side areas for no point other than to have them. Entire islands and plateaus are completely empty except for random monsters and the occasional odd harvesting spot. There are also tons of items that are fairly worthless, but look neat when equipped. All of which comes into play in the Grotto and Quest system, as all of this stuff is fair game for Grotto placement and quest objectives.
- Legacy Boss Battle: Trope Namer. You can fight every single Big Bad (and some Dragons) from all the previous games as some of the Superbosses. However they use the same grotto system as the other superbosses, but with a few differences. Such as only one floor, and the fact that you can level up the bosses by giving up the EXP rewards. Beating them usually gives you some cosplay gear related to their original games or some Orbs.
- Light and Mirrors Puzzle: Subverted in the Quarantomb. There are mirrors all over the place, and you have to reflect two lasers onto a door to open it and progress to the boss' room... except that the mirrors are already in the right positions and can't be moved, so all you need to do is find the two machines that emit the light beams and turn them on.
- Limit Break: Called "Coup de Grâce". Each class has one (and can be combined if two classes have theirs at the same time), and they have various effects ranging from the Mage making their spells cost no MP for a time to the Thief guaranteeing item drops after the battle. They become available by chance, so you can't pull them off directly... but you can manipulate the chances.
- Linear Warriors, Quadratic Wizards: Averted. Gladiators are strong enough to go toe-to-toe with Mages and Sages. Which one is technically the stronger depends on what buffs you set up (and if the boss will let you keep them).
- Luck-Based Mission:
- To obtain most of the post-game story relevant quests, one needs to find a random dungeon with "silver" in the name to complete an otherwise simply "kill monsters until they drop the item" quest.
- The first Warrior class quest requires you to first enrage (not always successful), then kill two monsters via regular criticals (so no deals-a-critical-if-it-hits moves). One shield skill requires you to rack up 10 successful shield blocks, when the best you can hope for is around 10% chance to block. Another requires you to kill golems with criticals, and the guy even tells you it helps to build patience.
- There are far too many quests that boil down to "kill this monster and hope it's the one the quest giver wanted dead".
- Finishing a grotto might get you an even better one... or a piece of junk (though there are some factors that can be used to improve the drops).
- Luckily, My Shield Will Protect Me: There is literally no disadvantage to equipping a shield in this game. When fully maxed out and equipping the best shield, you have a 1 in 4 chance of nullifying enemy damage, a myriad of useful abilities that are among the best in the game, and complete immunity to critical hits.
- Malaproper: Stella is very, very prone to this; these can prove amusingly apt, such as when she claims to be a Shrinking Violent...Stella: Time and tide wait for Norman. And I'm not Norman, so I'd best be off!
- Mana Drain: Wands do pitiful attack damage but drain MP with every hit. The Master of Nu'un, Tyrannosaurus Wrecks, Shivery Shrubberies, Bloody Manguinis, and Slugly Betsies, as well as Pandora's Boxes once again, can use Drain Magic, which does just that.
- Meaningful Name:
- Messianic Archetype:
- Celestria, aka Yggdrasil, stopping her father, the high-god Zenus, from killing all of the humans for their sin, and turning into a tree in order to counter that sin.
- And then there's Greygnarl who dies for his worshippers, and then comes back to life.
- Metal Slime: But of course. There are some variations that give large amounts of money instead of experience once killed.
- Mini Dress Of Power: There are skirts available that do a good job of boosting one's magical powers.
- Missed Him by That Much: The Paragon Celestrian Corvus went missing 300 years ago (but the Celestrians aren't allowed to talk about it). He's in the bottom-most floor of The Oubliette, which is the basement of Gittingham Palace, which is dead in the center of the territory of the Gittish Empire, which is the wasteland the Observatory is floating over — Corvus is as under the Celestrians' noses as he could possibly get.
- Money for Nothing: Averted. Most of the alchemy recipes for weapons and armor require store-bought weapons, which can get expensive very fast. The very high-end ones require Chronocrystals, which can only be bought for 50,000 each.
- Monster Clown: Moai Minstrels are moais in clown makeup added by the Boa Bishops.
- Monster Compendium: The defeated monster list. The Thief ability "Eye For Trouble" can add a second page of flavor text to each entry, as well as revealing what an enemy is capable of dropping (or has available for stealing).
- Monster Whale: There are several whale enemies, notably Leviathan (a story boss that's actually a transformed human, the real one is fought after the game is beaten) and the high-end undead Flying Seafood Special Pale whale and Stale whale.
- More Dakka: Have a Ball does this via juggling, doing small amounts of damage to random enemies. Combined with tension, it brings even metal slimes down fast.
- Multiple-Choice Past: Although she denies it, Stella is heavily implied to be:
- the soul of a child who died...
- the reincarnated soul of the Stellestria, Queen of Gitt...
- ...or even the second World Tree, which Stellestria burned to the ground.
- Myopic Architecture: The entrance to the wasted kingdom of Brigadoom is an iron gate that has been locked shut. Thing is, almost every wall has been razed to the ground, so you're free to walk around the still-intact gate.
- Mythology Gag:
- The tavern where you create your party is run by a familiar face who fulfilled the same role long ago. Other characters show up throughout the series. Alltrades Abbey returns. Several of these references were changed in the English localization. However, localization choices like Count Uptaten and Patty are actually references to their translations of Dragon Quest IV and Dragon Quest V. So they're still Mythology Gags, just making reference to the modern localizations. While not consistent with the original Japanese names or the NES era translations, they are consistent with themselves.
- The names of places and characters from Dragon Quest, II, and III are all from the NES translations instead of the GBC/original. This is either a Regional Bonus to old-school players, a hint at potential Virtual Console ports, and/or an Early-Bird Cameo of a future remake(s) (which is odd, considering the characters from 1-3 came first). One can only hope for the last, though, especially if based on the cell phone ports, which are arguably the best-looking versions yet. Let the Wild Mass Guessing begin.
- Additionally, the "Dragon Warrior" armor set looks A LOT like the NES boxart and artwork the heroes had on. Not exactly, mind, but way too similar to just be a coincidence.
- The first Optional Boss map you'll find is Baramos, who then drops Murdraw's map, who then drops Dholmagus's map, who drops only high level gear, no maps. All three of these antagonists were infamous Disc-One Final Boss characters from previous Dragon Quest games.
- The second Optional Boss map you'll likely find is Dragonlord, gotten from a specific Grotto boss that only appears at random in level 80+ Grottos. L16+ Dragonlord drops the map for Psaro, who drops the map for Nimzo, who drops only items. The gag here? They all have One-Winged Angel forms.
- The husband/wife armor selling warrior duo in Stornway are modeled after the classes appearance in the 3rd game.
- There's an old man wanting to class change into a maid — (He also invokes the third law — citing that he isn't budging until he gets a frilly dress and feather duster.) In DQ 6, he had a counterpart who wanted to become a pattycake princess. And in Dragon Quest 3, he has another counterpart. Who succeeds.
- Naughty Nuns: One of the aspiring belly dancers in Gleeba is a nun, hoping to cure her shyness. She also prays the Almighty will help her, quote, "strut her stuff".
- New Skill as Reward: The Celestial can receive skill manuals for completing certain quests, giving them access to powerful abilities like Twocus Pocus, which allows a Sage to cast the same spell twice in one turn, and Gigagash, a more powerful version of the already strong Gigaslash skill.
- Nice Job Breaking It, Hero: Multiple times.
- Nintendo Hard: Word of God has stated this to be the goal, with the following rationale: "People can always find out information on the Internet — like that's part of the game experience."
- No Fair Cheating: If you finish the game without wiping, Stella will think you're cheating, especially since the game has two Hopeless Boss Fights; though both fights will end after a few rounds, so players could Level Grind so they can survive, even if they can't win.
- Obfuscating Stupidity: Batzorig. Wow.
- Ooh, Me Accent's Slipping: An odd, in-game example. Greygnarl generally speaks in an ancient 'high and mighty' tone to project a fearsome and powerful image, but if he's sufficiently annoyed (or sufficiently drunk), he reverts to using the same Aussie slang as the Upover citizens.
- He reverts to the first when you fight him in a grotto.
- One Game for the Price of Two: An inverted variant: Dragon Quest Monsters: Joker 2, if it sees Dragon Quest IX or Dragon Quest VI in Tag mode (set up through Erinn in Stornway), will unlock new content. Conversely, the other two games do similar things if they see Dragon Quest IX. Somehow, Square Enix has standardized a protocol for Dragon Quest games to see each other in Tag Mode, which is mind boggling when you think about it — especially when you realize Dragon Quest X is slated to be a Wii title (and, presumably, easy to link up to DSes). This concept was so mind-blowingly successful that it inspired the entire Streetpass system on the Nintendo 3DS.
- Optional Boss: Every Dragon Quest last boss ever, and quite a few dragons, too. Amusingly, they use the same Grotto system (you can even get a few of these maps randomly from higher ranked Grotto bosses, 1 in 20 chance), but they have only one floor, the boss floor. Bosses start at level 1, and upon beating them, you have the opportunity to give up the XP, allowing the boss to gain levels (which increases item and XP drop from the boss, but also increases the boss's stats and occasionally gives them new attacks). Most bosses after level 16 or so drop the next boss in the chain's map (rarely — 10% chance at first, but rises as you level them up) and start dropping very high level gear. If you can beat them, that is. The first one of these most players will find is Baramos's. Available in the post game via quest 62... if you know where to look. Starts a chain of 3 maps, see Mythology Gag above.
- Orichalcum: One of the items used in Item Crafting. Weapons and armor made from it tend to be very powerful.
- Our Angels Are Different: The Celestrians are basically Winged Humanoids like the Zenithians, only with halos and more active about the whole "guardians of the mortal realm" thing.
- Palette Swap: A staple of the series, and strangely charming when done in 3d. It helps that they give the Palette Swaped monsters differing names (Slime -> She-Slime -> Metal Slime) and they actually have different skills, AI, etc.
- Averted with the weapons. While each weapon line has its own unique sprite and icon, there is no visual difference between, say, iron, steel, and gigasteel broadswords.
- Peninsula of Power Leveling: The cliff just northeast of Angel Falls contains nothing but slimes, and the liiquid metal variety show up slightly more often than the usual locations. However, it's only reachable post-game. Some grotto floors where metal slimes spawn also count.
- Once you get the ship, the Khalaag coast contains the same monsters as the not-quite final dungeon... if you survive getting there.
- Permanently Missable Content:
- If you try to sell something DQVC-exclusive or a piece of equipment from one of the Inn guests, the shopkeeper will warn you that you might never be able to get it back.
- Also, if you somehow do not receive a certain piece of gear from a legacy boss via drop before leveling them up past the point where they start dropping something else instead (unlikely, as it is usually 20-25 percent drop and you may have to fight them over 20-30 times before they drop something else).
- Pimped-Out Dress: Various high class ladies, and various types of armor.
- Playable Epilogue: So much so it might as well be Dragon Quest IX: Part 2.
- Player Mooks: Their appearance is much more customizable, so no two look alike, but they are interchangable. They are also given little to no acknowledgement in the game's storyline.
- Plot Coupon: Benevolessence. And later the
Dragon BallsFyggs. First you need to find 7 to proceed with the plot, one is given as a MacGuffin in order to let the player defeat the Big Bad, and a 9th in Post-Game to allow you access to the Global Airship. - Pluralses: If more than one Claws enemy shows up, they're referred to as Clawses.
- Polluted Wasteland: The Gittish Empire is a grey and ominous wasteland full of pollution, and the ruins of seemingly huge cities and broken brick highways are all that are left of the true empire.
- The area around Brigadoom as well.
- Potion-Brewing Mechanic: Alchemy plays a large role, it is used to produce anything from potions to weapons and armor. Some healing items are only available through this process (i.e. putting two of the basic healing item gets a stronger one, another two gets the strongest of that item line), with the player coming across recipes or finding them by combining the right number of ingredients. Most healing items take the form of Healing Herbs, but there are some potions as well.
- The Pratfall: The Minstrel class can unlock the Pratfall Ability, staging a slapstick fall for the amusement of the local Slimes, hopefully depriving the enemy team of a turn as a result of side-splitting hilarity. One quest involves killing monsters this way. And another involves making them laugh, then robbing them of a skeleton's pair of pants. Yes, really.
- Pre-Rendered Graphics: One plotline quest requirement is for the player character to show up alone and wearing a certain set of armor. It's a rather transparent justification for the fact that the following animated cutscene shows only one person wearing the all-encompassing armor, when in-game models allow for huge amounts of customization (and there are no preset party members, only random ones) and every weapon has its own model. Fortunately, it's a pretty awesome cutscene.
- Prestige Class: Classes are divided into Basic and Advanced, with the latter gradually being unlocked over the course of the game. However, unlike the expected system, Advanced classes are no better than the basic classes — in fact, the basic classes are often better at specific things, being specialists.
- Pride: It takes about 3 seconds of walking around the Tutorial town to realize just how utterly arrogant most Celestrians are. Some are openly questioning why they have to protect the world, others are openly derisive of humans, others are one step away from being outright Obstructive Bureaucrats. This foreshadows what happens to them at the end of the tutorial quite nicely. The prophecy even spells out exactly what happens... just not what they expected: "Fyggbloom hails the opening of the Heavenly Gates (big honking thunderbolt) and sets the Celestrians on the path to salvation (the plot of the game)..."
- Pride Before a Fall
- Punctuated! For! Emphasis!: "You... are... not... Mason..."
- Punny Name: It is seriously easier to list all names that don't contain a pun, an alliteration, or some kind of double meaning.
- Zere appears to be one at first. Then you find its exact copy, carved from stone, named Zere Rocks (Xerox).
- Batsureg and the people within are based on Mongol culture rather than a single pun, doesn't stop most of the gear from alliterating like there's no tomorrow.
- Quirky Miniboss Squad: The Gittish Empire's Triumgorate: A Ganon-esque Pig Man, a Blood Knight Cat Boy, and an evil Owl Man.
- Rainbow Pimp Gear: A potential side-effect of mix-and-match armor. Conversely, there's a large number of Mythology Gag gear — basically, in the Bonus Dungeons, you can find "cosplay gear" that makes your hero look like the heroes from the other Dragon Quest games◊. The Magical Skirt, for instance, is easily among the best legwear for legacy bosses due to adding 7% to your resists for everything, but looks odd.
- Randomly Drops:
- Nearly every enemy has one item it has a 10% chance to drop, and a far better one with a 2% chance.
- The bane of every grotto explorer: chests don't give the same items every time, and often contain stuff that's low in value.
- Random Drop Booster:
- The Thief class has a Limit Break called Itemized Kill, which guarantees an item drop from the enemy (even Superbosses). It can be combined with the Armamentalist's Voice of Experience (more XP) to give Haulellujah (increased gold, XP and drops).
- Revocating from Thief gives a medal that doubles the chance to successfully steal an item.
- Randomly Generated Levels: The Grotto system makes a return from Dragon Quest Monsters 1 and 2, this time in a main series Dragon Quest game. Randomly generated but using the same seed system, there are
about 250,000over 8 million separate dungeons that are the same with every copy of the game. You get access to one by doing a quest during the main game, one at the start of the post game, and get the others through Tag Mode and/or beating the bosses of other Grottos. If you can. Some of these have become very legendary in Japan due to the popularity of mass transit — Masayuki's Map, for example, has nothing but Metal King Slimes on the 15th floor (although the monsters from floors 10-14 are all stronger than the last boss, and come in groups of 3), the Kawasaki Locker has the same monsters on floor one (and they get worse from there) but it has some of the best treasure chests possible, etc etc. Masayuki was even interviewed in the Japanese media due to the popularity of his map. - Rare Candy: While you need a lot of them for it to have any noticeable effect, seeds are still the only way (aside from skills) to permanently increase your stats. If you're stupidly, insanely, HELLISHLY devoted enough, you can get every single stat in every single vocation up to 999 (the maximum), and in doing so, make the entire vocation system absolutely unbalanced due to the fact that some vocations have spells while others get none. A vocation's usefulness at that point would be determined by what equipment they can wear (Priests get the best helm and more elementally resistant gear), what spells they can use (Sages get the best revival spell as well as offensive spells), and what effect their Coup de Grace has (Paladin's Coup de Grace nullifies all hostile effects).
- Reality Is Unrealistic: If you thought Mason building Zere Rocks by himself was pretty much impossible, you've clearly never heard of the Coral Castle before.
- Reasonable Authority Figure: Apus Major.
- Red Eyes, Take Warning / Marked Change: Corvus, right before taking on his true form.
- Reptiles Are Abhorrent: Two of the main antagonists have reptilian traits: King Godwyn, the evil and cruel ruler of the Gittish Empire, can transform into a skeletal winged serpent. His ally Barbarus is a massive Eastern black dragon. Of course, the Mooks in the game are no slouches themselves. note
- Ret-Gone: Almost every major residential area features a statue of a generic Winged Humanoid emblazoned with the name of its Celestrian guardian. Whenever there's a change in the roster of heavenly appointees, the name on the statue will change and the locals will start recognizing the new name as their original and only Guardian's. The only known case of Ripple-Effect-Proof Memory belongs, oddly enough, to Ivor. When the Celestrians ascend after the finale, the residents of the Protectorate all wake up to discover these mysterious, unmarked angelic statues in the center of their towns.
- Rewarded as a Traitor Deserves: Serena's Father turns Corvus over to The Empire for Wormwood to be spared from them. He and his daughter get massacred anyways. Quoth the Gittish sergeant, "I Lied."
- Rule of Symbolism: You are an angel, your boss is God. The final boss is a Lucifer Expy. Furthermore, Celestria is a sort of female Jesus, giving up her life for the sake of the world by turning herself into a tree, a notable symbol of (among other things) life, death, rebirth, and sustenance. All of these concepts are important to DQ9's plot (the last of which mixes with salvation). Her father created the Celestrians for the purpose of saving her from this fate, but if a mortal eats a Fygg, bad stuff tends to happen to the eater. Sound familiar?
- Sacred Bow and Arrows:
- A sacred bow is required to fix a Broken Bridge.
- The ultimate bow ability shoots holy attacks at the target.
- Santa Claus: Chris Cringle. He lives on an island off the Cringle Coast, north of Swinedimples.
- Schizo Tech: Despite being a standard medieval world, it features a steam train, which, to be fair, can fly and was created by God himself.
- School Setting Simulation: Swinedimples Academy (Shion Institute in the original) is an extremely prestigious college the player investigates while looking for a Fygg (and can pick up the high-end weapons techniques). It's also haunted by the ghost of Sternivus Swinedimple, the founding headmaster, who thinks the current students are lazy and undisciplined, and has been kidnapping them to bring them up to his standards until you beat some sanity back into him. The dub turns it into a big Harry Potter reference, not only through the name of the place but the presence of a prankster student named Fred.
- Sdrawkcab Name: Sarantsatsral/Larstastnaras
- Self-Imposed Challenge: The game is meant for combat with a four-man party, but there are many players who run The Hero solo. This transforms some of the boss fights, like The Dreadmaster into chokepoints that can only be overcome if the Hero has certain skills. (Shield skills, man, that's the way to go).
- Serious Business: Innkeeping. Not only is there an "Inny" awarded to the Inncredible Inntertainer Eddwinn (after innspection), the previous innkeepers literally get on the floor and bow when faced with his daughter, Erinn. Talk about an Inncredibly Lame Pun. And we haven't even got to the DLC that introduces Al Capinne and the Inntouchables. And yes, they are an inn-keeping mafia.
- Sealed Evil in a Can: Multiple:
- The Supreme Sage, either a living Great Big Book of Everything or else turned himself into one in order to contain the demon Tyrannosaurus Wrecks. It then did the same thing for the 10 Pieces of Zenus that became beings unto themselves. Tyrannosaurus Wrecks freed them all, and the pages of the book became Treasure Maps.
- The Ragin' Contagion — the boss that the protagonist fights inside the Quarantomb — was sealed away in a pot by the inhabitants of Coffinwell for about a hundred years before breaking out and infecting the entire village all over again. Ironically, the Contagion itself is also a seal to a certain former ruler of the Gittish Kingdom...
- Shout-Out: Multiple:
- To Treasure Island: The last skill you learn in the Thief's class skillset is called Treasure Eye Land.
- One of the later locations in the game is Swinedimples Academy. While the similarities end there for the most part, it can't be a coincidence that the main troublemaker is named Fred, or that one teacher was named Sternivus (you know, severe-us). (There also happens to be an accessory called a Sorcerer's Stone.
- The inn at Stornway contains a party recruiter and a saleswoman, respectively named Patty and Sellma. And the highest Luminary ability is "Disco Stew".
- And speaking of Luminary abilities, they can up their Charm with an "Extreme Makeover".
- One of the DLC quests ends with you being congratulated for solving the puzzle like a Professor, and teaches you the "Professor's Pose" (even though the art style doesn't show fingers).
- Grotto boss "The Trauminator" ends its pre-fight spiel by shouting "TRAU-MIN-ATE!" just like a certain other kind of one-eyed mechanical monstrosity...
- Dr. Phlegming wears a very familiar-looking tunic beneath his lab coat.
- Slood is a craftable helmet here. Yes, it's a slime hood, but still.
- And we have a story with characters illustrated by Creator/AkiraToriyama chasing down seven glowing, golden, wish-granting objects that scattered themselves around the world.
- The animation for maximum tension is the same as when going Super Saiyan, albeit with a purple Battle Aura rather than yellow.
- The animation for the Wave of Relief skill is, of all things, the Kamehameha.
- In the French version of the game, Purrviss is named Mac Leo, the leo part is a Pun on the fact that he's an anthropomorphic panthera (léopard) in French. As for the Shout-Out itself... he's a master swordman from 300 years ago and his name is actually one letter away from Macleod.
- Smug Super: Some of the Celestrians in the prologue really don't see why they should bother keeping the humans or the right path, as they're obviously so inferior.
- The So-Called Coward: The chief's son in Batsureg is seemingly terrified of a beast attacking his father and their advisor. He's really pretending because he knows the advisor is really a monster and is plotting against her. The beast, btw, is working for him and isn't targeting his father.
- Socialization Bonus: Connecting with other players in Tag Mode can upgrade the Quester's Rest, and you can also get treasure maps from those you connect with.
- Sorcerous Overlord: King Godwyn of the Gittish Empire.
- Spiritual Successor: While it has Mythology Gags to all the games in the series, 9 can be best summed up as "Dragon Quest III with the Dragon Quest VIII skill system."
- Sprite/Polygon Mix: Monsters, party members, and most particularly plot-important or unique characters get polygons. Shopkeepers, townspeople, and less important characters get sprites.
- The Starscream:
- Mrs. Mallet is very bad at hiding that she wants the headmaster's post at Swinedimples.
- Hootingham Gore has no intention of being loyal to the one hoo resurrected him, to wit, the Man Behind the Man.
- Stealth Pun:
- In Porth Llaffan, everyone has a Welsh accent. In other words, the place where the people worship a whale is based on Wales.
- The town of Upover, at first glance, is a strange but not punny name. Then you realize that it's always hot, the local wildlife is particularly murderous, the inhabitants pepper their speech with "Strewth!" and "Crikey!", and alcohol is a major part of their life.
- Zere Rocks is an exact copy of Zere, carved from stone. One could almost call it a Xerox.
- Sticks to the Back: Your characters carry their weapons like this when out of battle.
- Stupidity Is the Only Option: Late in the game, you find a long-lost and heavily disfigured ally Chained to a Rock in the deepest, dankest part of a certain prison, repeating a very ugly Madness Mantra to himself. Some players realize bad things will happen because of this, but it's perfectly justified in universe, since this is simply the last and most extreme case in a chain of rescues. Indeed, the Hero is most likely wondering what happened to him in the first place.A crime... Their very existence is an insult... an abomination... a crime...
- Summon Magic: One of the Ranger skills summons wolves to attack. Some enemies can also do this.
- So Long, and Thanks for All the Gear: YOU can do this by constantly recruiting members and then ditching them away for good. Even though you don't strip their equipment off first, parting with members does that automatically. Selling their basic equipments is a good way to earn a bit of extra money... if you don't feel bad, that is.
- Spell My Name With An S: "Tortoise shells" and "Tortoiseshells" are two different things.
- Stars Are Souls: What the Celestrians (except the Player Character, who became mortal) become at the endgame. This is referenced in the post-game as well, with the quest "When a Star Wishes upon You".
- Summon Backup Dancers: The ultimate Luminary skill, Disco Stew.
- Suicidal Overconfidence: Both averted and played straight. Enemies will cease to chase after you once your level is high enough, but it's quite possible that you will not have reached this limit even by the time you can one-shot an entire group of attackers. In addition, some monsters are apparently more aggressive than others, such as the Badboons in the Alltrades area that will continue to charge at you a good fifteen levels after everything else in the vicinity has decided that discretion is the better part of valor.
- Super-Persistent Predator: Monsters that run at you come in two varieties: either they charge in straight line that can be sidestepped, or they hunt you down. Guess which is more annoying.
- Supernatural Team: It's possible to set up a party this way thanks to the Job System. It can be quite effective in boss battles, as hitting the same enemy with the same spell or ability causes additional combo damage, but it's best suited for endgame dungeons after the HP bonuses from other classes have been taken.
- Suspiciously Specific Denial: "No, I am not planning to kidnap the daughter of the richest guy in town and hold her for ransom!"
- Tailor-Made Prison: Appropriately named "The Oubliette," it is used by the Gittish Empire to trap and drain the power of fallen Celestrians.
- Tactical Rock–Paper–Scissors: Certain weapons do increased damage against certain enemies. Swords are good against dragons, spears against beasts, axes against plants, wands against demons...
- Take That, Audience!: If the game thinks you're doing something wrong, it will generally convey it to you with snark.
- You can earn accolades for dying in battle too many times.
- Take Your Time: Lampshaded by Stella in the Battle Records screen, who will change her dialogue if she thinks you've been taking too long to get back to the plot.So it's the slowly-slowly-catchy-Fyygy route, hmm? You clever monkey, you!
- Temporary Online Content: Nintendo ended support for WFC for all DS and Wii software on May 20th, 2014. A large number of bonus quest flags, the Inn guests, and DQVC exclusive items will now be unobtainable if they have not already been activated/downloaded or retrieved, making true 100% Completion impossible.
- Theme Naming: In the English version, all named Celestrians, with the exception of the main character, maybe, are named for constellations that are named for birds.
- Time Dissonance: References to all of the Dragon Quest games abound, simultaneously.
- Totally Radical: Courtesy of Batsureg's priest: "Wow, we are completely the Almighty's little children, yo. How would you like to use our way humble church?"
- Tragic Monster: Pretty much anyone foolish enough to eat a Fygg. Some are able to get better, while others have to be put down.
- Trailers Always Lie: Despite what was implied by the trailer, Aquila is only in your party for the first battle of the game. (Until a DLC quest we got in 2011, anyway.)
- Treasure Map: Invoked by name. The maps that enable grottos to appear and display where they appear are called treasure maps, and are red Xes on a zoomed in version of the world map. Trying to figure out just where they are is part of the fun of grinding them.
- 20 Bear Asses: Many of the quests that don't involve Cherry Tapping.
- Twinking: Averts this a little too well by doling out proportionately less experience to lower level characters, regardless of battles fought. Classes with steeper experience curves will take that much longer to level up at later levels, as teammates who end up leveling up faster due to lower XP requirements siphon off even more XP from their lagging colleagues. The difference can be somewhat offset later on with Elevating Shoes, which give a 5% XP boost to anyone who wears them.
- Unfinished Business: Part of the Guardians' job description includes helping lost spirits complete this so they can pass on.
- The Unfought: Unscrupulus Maximus, who we're told fights only those weaker than him yet still boasts of his exploits. You never face him, you merely break his record to prove he's not the best.
- Untrusting Community: Wormwood Creek has a long and honored tradition of hating outsiders guts. In the past, the Gittish Empire tried to target the town and was defended by a special guest of theirs. When the Gittish Empire returned, the town's mayor sold out their defender and then discovered that the Gittish Empire still wouldn't leave them alone, which mess they laid entirely at their defender's feet.
- Valley Girl: Kogal, actually, which translates very well into Valley Girl. Thankfully, the original developers didn't go Ganguro with her.
- The Very Definitely Final Dungeon: The Realm of the Mighty, which is enormous and filled with many strong enemies as well as rematches with the Triumgorate along with Corvus and Barbarus.
- Victory-Guided Amnesia: Averted. It was stated that this was going to happen, after the Celestrians Ret-Gone and the main character's Humanity Ensues meant they would forget everything. (Which, given that they were one, would be nearly everything.) However, there's a Playable Epilogue quest that lets them bolster their awareness.
- Video Game Stealing:
- You can steal the skin from snakes, the wings from butterflies, or the bandages from mummies, among others. This does not harm them or impede their ability to attack or defend in any apparent way.
- Taking it even further is the Thief's Theory scroll, which gives an extra chance to steal an item after a battle. So it's entirely possible (if the Random Number God smiles upon you) to steal a snakeskin, grab the one that it carried in a chest, and steal another one, from the same single snake.
- Viral Unlockable: The post-game DLC quests can no longer be obtained normally since the Nintendo DS Wi-Fi has been taken down, but they can still be unlocked by playing with someone who had downloaded them beforehand.
- Virtual Paper Doll: Being able to see your equipment in character models.
- Wake-Up Call Boss:
- Two serve the purpose in different ways: the Wight Knight, while not overly difficult, exists to show players why having a full party is a good idea, while the Master of Nu'un is the first boss with respectable multi-target damage and signals the point that the game takes off the kid gloves.
- Also the Ragin' Contagion, who is the first boss to have multiple attack turns, employ any sort of strategy, and make good use of status altering moves, which can wreak havoc on an unprepared party.
- Goresby-Purrvis and his fellow Gittish warriors serve as late examples to illustrate that you should really utilize skill points, alchemy, and side-quests (though his exclusively-physical arsenal can be rendered trivial with a single properly prepared paladin).
- The bosses in the random dungeons — the game's difficulty curve is fairly gentle until you hit the first boss from grottos, or the first cameo boss from a previous DQ game. Then it's a bit like slamming into a brick wall. To wit, the monsters in your first grotto will be so low-level that some of them will actually flee from you... and then the boss can demolish your entire party in a single turn with two area-effect spells.
- Wandering Minstrel: Invoked with your hero, who starts as a Minstrel, possibly because everybody else thinks they look like one.
- Warmup Boss: The Hexagoon. It has a basic attack and a rock throw which isn't much different. A main character at level 7 (perfectly reasonable) will probably have to heal with a spell or an item exactly once to survive until the end of the battle.
- Weak to Magic: Imbuing weapons with elemental magic causes huge damage boosts and is almost mandatory for the later boss fights. Unfortunately, the only information on what monsters are weak to what element involves a lot of guesswork, as they're not always as logical as "water beats fire".
- Weapon Specialization: Each class has certain weapons they specialize in; several of these specialties are shared, and mastering a weapon allows any class to equip it. Certain weapon types can only be trained in by Prestige Classes, making unlocking them worthwhile simply to expand your characters' potential arsenal.
- With This Herring: Many of the individual quests involve fighting a monster in just such a manner. Like... "Defeat the God Horse Nemean with a Laundry Pole."
- World of Pun: It's almost impossible to count how many puns have been shoehorned into the localization without listing... every line of dialogue, every item name, every item description, every chaaracter name...
- World Tree: Two of them. One in the Observatory which is really the goddess Celestra, and there's a second on Pluvi Island that produces Yggdrasil leaves — according to postgame DLC, it's a phantom. It was burned down 300 years ago.
- Ye Olde Butcherede Englishe: Baramos (in a cameo from Dragon Quest III) speaks this way, and so does Zoma (also a cameo from Dragon Quest III).
- You All Meet in an Inn: Literally so, a Mythology Gag dating back to Dragon Quest III. It currently provides the page image.
- You Can See Me?: One of the hero's Celestrian powers prompts a lot of this reaction.
- You Have Researched Breathing: Thirty-five skill points into the Claw skill tree is the ability "Flailing Nails", which... is just your claw-user punching the shit out of the enemy like a Berserk Button's been pressed. What's more, it takes twenty-three more skill points to reach "Hardclaw". Now, your character finally learns how to... hit the opponent with both claws with a one-two punch.
- Unarmed characters need to spend skill points to learn how to throw rocks and punch around randomly.
- Your Princess Is in Another Castle!: For thousands or maybe even tens of thousands of years, Celestrians have been collecting Benevolessence to feed the World Tree Yggdrasil in anticipation of her blooming and producing the heavenly Fyggs. Within instants of finally achieving that goal, something assaults the Observatory, scattering the Fyggs and flinging the Hero to the mortal realm. Also, you didn't really think King Godwyn was the Big Bad, did you?